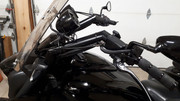
I decided to experiment with handlebars again. I decided that I was going to bump it up to 2" bars. But, by doing so, the curving of the metal tube would not do well. The tube starts to flatten out a little as it is curved. I then decided that I was not going to have the bar curved. Good thing to, because the guy I usually get to curve the bars had a major heart attack and has sold off all of his equipment. That solidified my decision to just cut them and shape them to my specs. Because I didn't curve the bars, I needed to include a riser in the bars so that they wouldn't hit the gas tank bezel at full turn. I put in a 2" riser.
I started by making a jig to lay out the metal. I then cut the angles to what was required, which is no easy thing to do. As the bars get bigger, the difficulty in the angles gets harder. The angles have to be more precise. I use a metal bandsaw and getting the angle cut at the proper spot is time consuming.
The first two cuts on each side at the bottom of the bars were not bad, but the top cut for the grips was the worst. Mainly because the cut had to be @110 degrees around the bar from the lower cut. This is so that the handles come down at a comfortable angle for my hands. The first one was hard enough, but the other side was a killer. It had to be the opposite of the other side. I had a difficult time setting up the saw to cut it. I eventually did and finally got the pieces tacked up with the mig welder.
For the 1" bar to fit into the 2" bar. I got heavy guage washers that would fit in the 2" pipe. I then took a step bit and drilled 1" holes in the centre. I welded the washers in the pipe and then welded the 1" bar to the washers. I did this for 1" bar needed for the grips and the handlebar clamps.
After everything was tacked up, I then welded the joints. After that I used the grinder and made the welds more presentable. When the welds were done, I used Bondo for the finishing touch. Sanded everything down and primed the bars. When the primer was dry, I sanded again and painted with VHT roll bar paint.
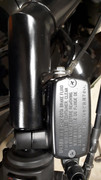
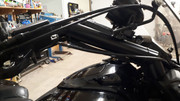
The bars were so fat that I had to cut in indents for the master cylinders on each side. I had to do the same with the bottom of the bars for the plastic on the upper part for the forks.