|
carolinarider09
|
 |
« on: April 28, 2026, 04:03:12 PM » |
|
2003 Valkyrie Standard (89,000 miles) only owner purchased new June 2003. I have a question but first I wanted to share a little story as to why this is important to me. I purchased my Valkyrie, new, in June 2003. I had been riding a 2001 Honda “Touring” bike prior to that time. The Tourer just did not seem to cut it so….. I decided to buy the Valkyrie. (Oh the “touring” bike had an issue that would have been costly to repair also) I have had no major issues with my Valkyrie and I have done most of the maintenance. Now I have a issue with the Fuel Petcock and I need to change the air filter. But first, I want to tell a story. My Valkyrie has not been to all 48 states but it has been to a few fun places. Like Toad Suck AR  And “The Crossroads”  And the Tail of the Dragon  And when I stopped in Memphis to see Graceland, Elvis and his girlfriend asked to sit on my Valkyrie. And I let them.  Its a special bike. But, for several reasons (none good), I have been letting a few things “go” and now I have the time and, I think, the inclination to fix them. There are two things I want to do. One is to replace the fuel petcock. It failed to shift to reserve a few years ago and I had let it stay that way (on regular). But now I want change it out. I have the parts. At the same time I want to replace the air filter since I have to remove the tank to change out the fuel petcock (it appears from what I have seen on-line). To do this, I will have to jack up the bike. I have a “platform” jack I have used to jack up my Valkyrie before and I have a “stand” that I made (I was into welding some years back and had the tools to weld it). My “Jack Stand” platform (all images are missing a “piece”)  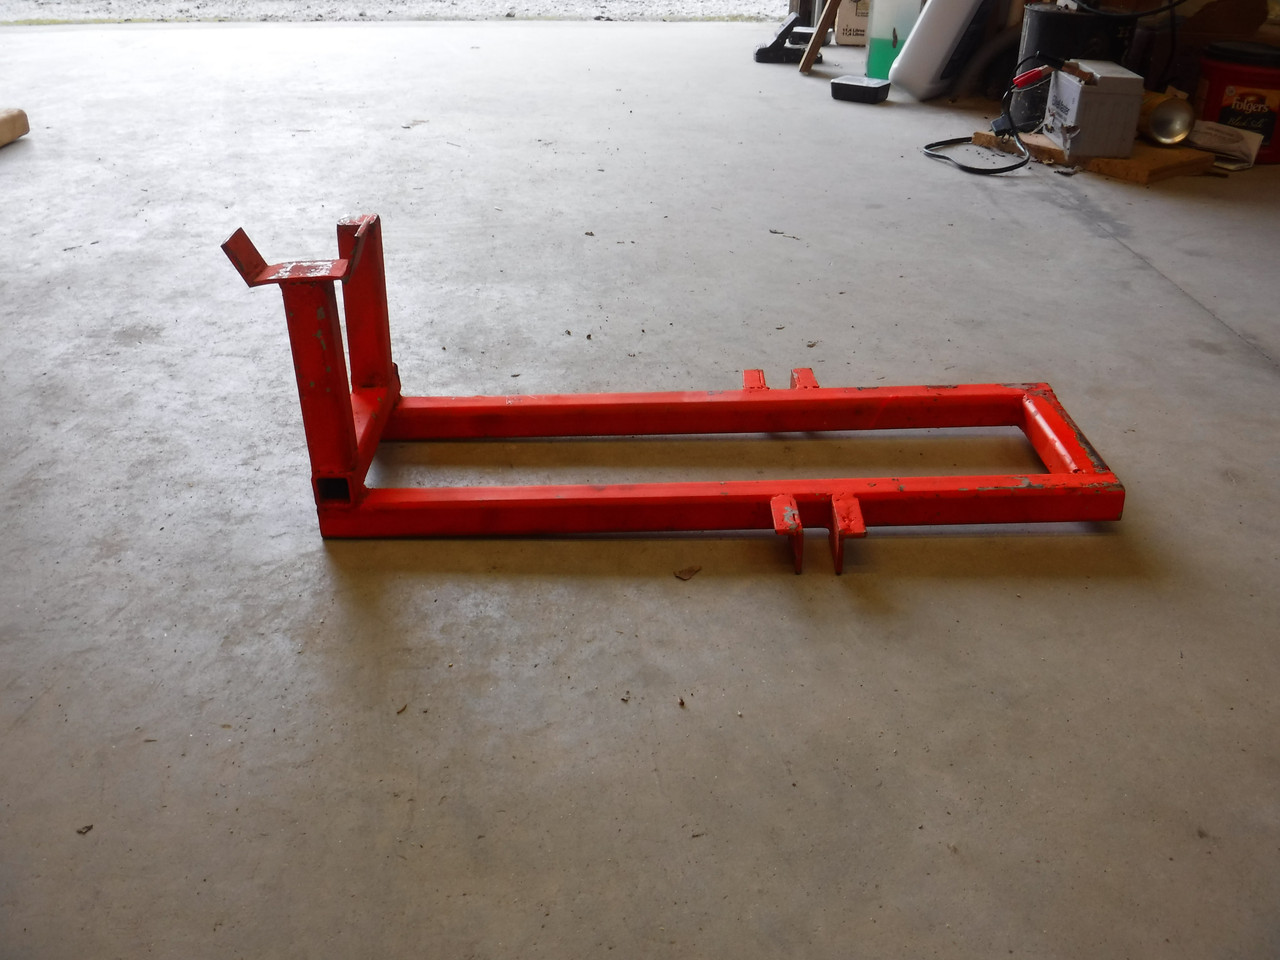 The “Jack Stand” on the “platform jack” (current picture) 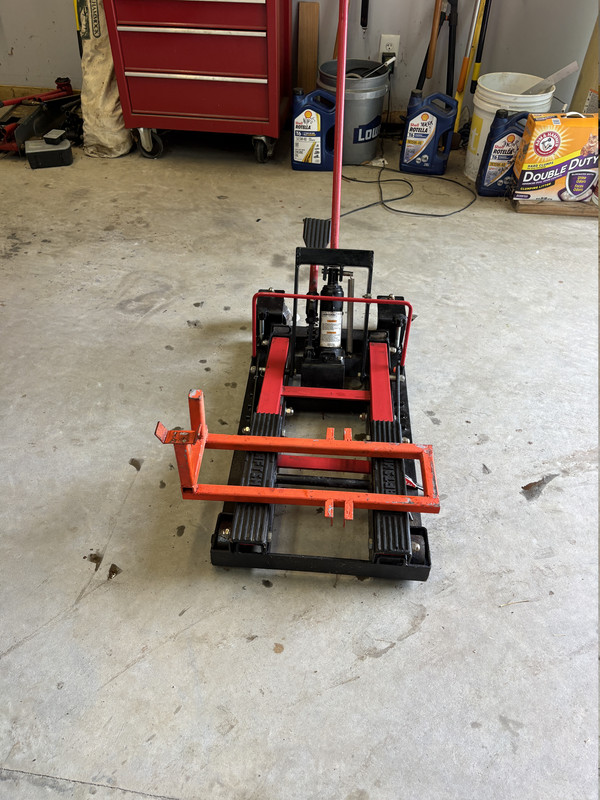 The “stand” has worked every time I used it. And the last time I used it, maybe five or six years ago (I forget when), I left it on the bike. That is, when I was finished with whatever I was doing, I lowered the “scissor jack” and did not detach the “Jack Stand” from the bike. The stand was held in place by two “pins” (another question below). I simply lowered the “scissor jack” and pulled it out. Then I and got on the bike and took it for a test ride. Somewhere along the way the pins holding the “Jack Stand” in place separated and the “Jack Stand” fell off the bike and the bike’s rear wheel rolled over it.
The only damage was to the “cupped” area on top of one of the “stands”. It was lost, ripped off somehow. (Image below) 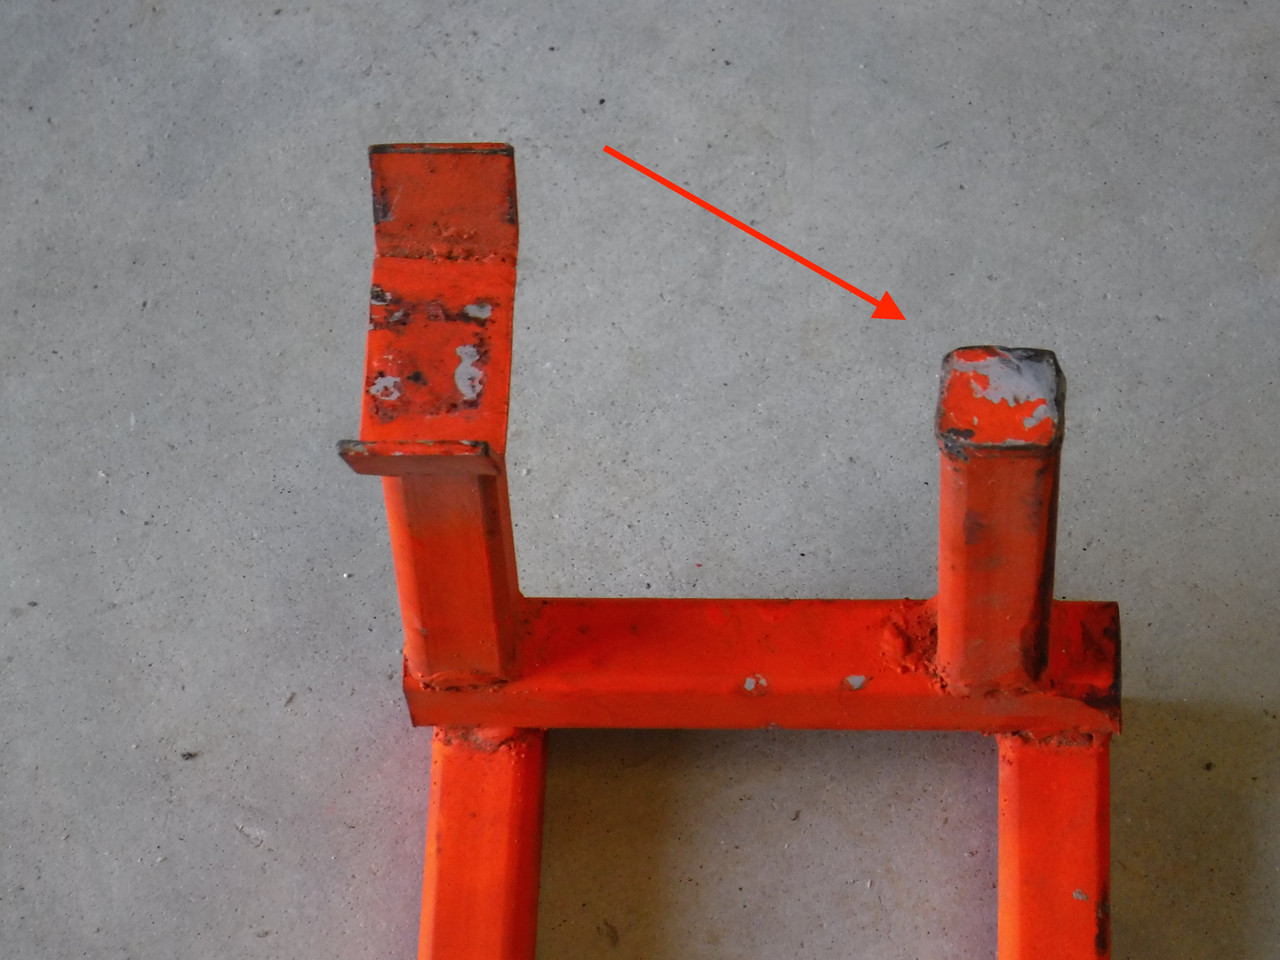 My questions are sort of “weird”. I have not used this jack since I left it on and it fell off, some years ago. I now what to use it again. So, I have to “weld” another “piece” on top of the one pole (again shown below). And I have to try and figure out which is the front and which is the back of the “jack stand”. And then figure out where I ‘pinned” the jack in place (see highlighted area in the picture below). 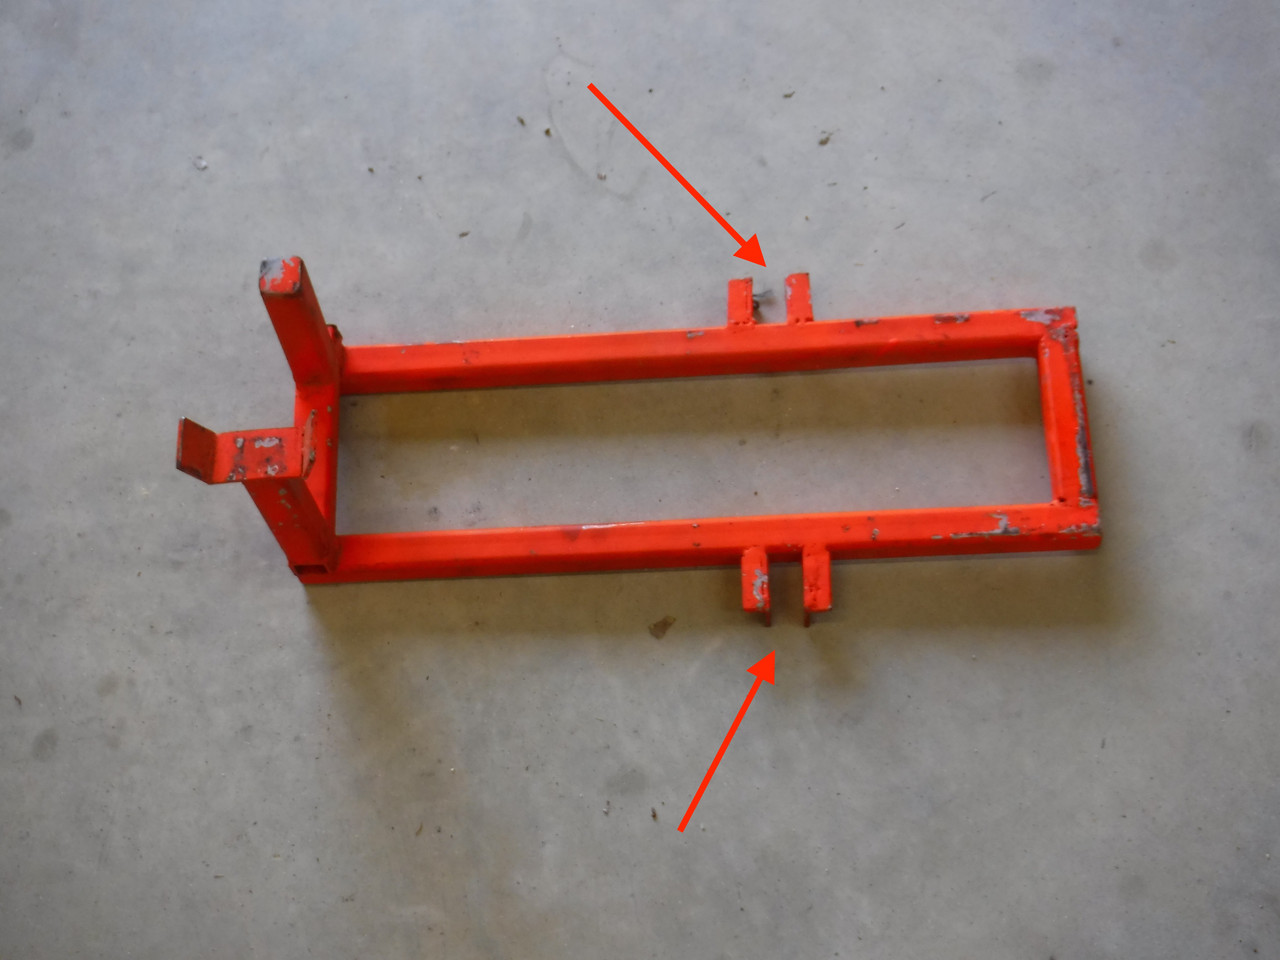 So, if you can help be “figure” this out, I would really appreciate your help. Thanks. |
|
|
|
« Last Edit: April 30, 2026, 02:26:09 PM by carolinarider09 »
|
 Logged
|
|
|
|
Willow
Administrator
Member

Posts: 16893
Excessive comfort breeds weakness. PttP
Olathe, KS

|
|
« Reply #1 on: April 28, 2026, 04:18:40 PM » |
|
Not related to the jack adapter but the petcock. The petcock movement is purely positional. My guess is that your problem was not the petcock but that your screen on the fuel line was clogged at the lower (reserve) level.
I would take out the petcock and screen and check for available flow.
I don't know why you would need to jack up the bike to remove either the petcock or the tank.
|
|
|
|
|
Logged
|
|
|
|
|
carolinarider09
|
|
« Reply #2 on: April 28, 2026, 04:37:17 PM » |
|
I would take out the petcock and screen and check for available flow.
I don't know why you would need to jack up the bike to remove either the petcock or the tank.
Thanks for the feedback. I watched a video on YouTube about removing the petcock and he had the bike up on a jack to allow easier access it appeared. The only other reason I considered "jacking up the bike" was to make it truly "upright" and stable. I worry, when I put some "wood" under the kickstand to allow me access to to something on the left side. But having it upright was the driving force for jacking it up. |
|
|
|
|
Logged
|
|
|
|
|
carolinarider09
|
|
« Reply #3 on: April 28, 2026, 05:27:08 PM » |
|
No need to lift the bike. I don't put a block under the side stand, either.
Removing the tank is easier if it is nearly empty. Remove the tiny Phillips screw in the hole on the fuel selector, and remove the selector. Remove the bolt at the back of the tank. Boost up the rear of the tank with a block of wood, then disconnect the fuel line and vacuum lines on the petcock. Remove the vent hose at the back of the tank.
The tank may then be removed by lifting it rearwards and up.
I shall give that a good look and try if I have it figured out. And yes, I planned on getting almost all the gas out of the tank before doing the task. Just for the record, I have replaced the air filter before, but I have slept since then.  As I get older, I tend to not remember some things I did in the past. So, I know I did it but don't remember the process. |
|
|
|
|
Logged
|
|
|
|
|
WintrSol
|
|
« Reply #4 on: April 28, 2026, 08:15:42 PM » |
|
If I want to support mine near level, but don't want to use the lift, I'll put stands under the engine guards, with wood for shims to keep it from rocking.
|
|
|
|
|
Logged
|
98 Honda Valkyrie GL1500CT Tourer
Photo of my FIL Jack, in honor of his WWII service
|
|
|
|
Sixgunluvr
|
|
« Reply #5 on: April 28, 2026, 09:04:22 PM » |
|
I removed mine twice this year, all the way down to pulling the carburetor rack and then putting it all back together. There’s not much to it really….
like it was mentioned already stick a small screwdriver in the selector undo that screw and pull the selector down. Of course you will want to have very little gas in the tank and have the selector turned to off first. There’s a small bolt in the front of the tank and the back of the tank. Loosen the front bolt and take the rear one completely out and stick a block of wood underneath the back of the tank. That will give you enough room to pull the vent hose off the back of the tank then you can pull the block of wood back out and pull the main gas line off the petcock and the vacuum line off the petcock, then take the bolt out of the front of the tank and lift the tank up off the bike.
Better yet… there’s a video on YouTube that will let you see how it’s done with your own eyes. Just search for ‘replace Valkyrie air filter’
|
|
|
|
« Last Edit: April 28, 2026, 09:05:57 PM by Sixgunluvr »
|
Logged
|
|
|
|
|
Hook#3287
|
|
« Reply #6 on: April 29, 2026, 05:15:00 AM » |
|
Jim, I think your basically asking which part of that stand goes forward and although I've never used a metal stand that attaches to the bike, I believe the end with the raised towers is the rear, flat goes front.
I built several out of wood and use them with the same type lift you show.
Working from the right side, I position the jack, put the stand on it as close as possible, jack up some to make sure the stand is hitting correctly, then slowly jack up while pulling the bike to me.
It's orchestrated, but seems to work for me.
One of the main concerns is not catching the side stand components.
Many times when I don't want to go through the lift process, I'll just use two jack stands under the front enigine guards. Putting one under the right then lift the bike from the left just slightly to get the stand racked up a couple knotches. You can go back and forth getting the bike level and very stable upright.
|
|
|
|
« Last Edit: April 29, 2026, 05:19:49 AM by Hook#3287 »
|
Logged
|
|
|
|
|
carolinarider09
|
|
« Reply #7 on: April 29, 2026, 07:06:35 AM » |
|
If I want to support mine near level, but don't want to use the lift, I'll put stands under the engine guards, with wood for shims to keep it from rocking.
Thanks. A good alternative is always nice to have. |
|
|
|
|
Logged
|
|
|
|
|
carolinarider09
|
|
« Reply #8 on: April 29, 2026, 07:07:38 AM » |
|
I removed mine twice this year, all the way down to pulling the carburetor rack and then putting it all back together. There’s not much to it really….
like it was mentioned already stick a small screwdriver in the selector undo that screw and pull the selector down. Of course you will want to have very little gas in the tank and have the selector turned to off first. There’s a small bolt in the front of the tank and the back of the tank. Loosen the front bolt and take the rear one completely out and stick a block of wood underneath the back of the tank. That will give you enough room to pull the vent hose off the back of the tank then you can pull the block of wood back out and pull the main gas line off the petcock and the vacuum line off the petcock, then take the bolt out of the front of the tank and lift the tank up off the bike.
Better yet… there’s a video on YouTube that will let you see how it’s done with your own eyes. Just search for ‘replace Valkyrie air filter’
Thanks, I had not looked for a video on replacing the air filter, just replacing the petcock. So, it seems that the two are sort of connected. Good to know. |
|
|
|
|
Logged
|
|
|
|
|
carolinarider09
|
|
« Reply #9 on: April 29, 2026, 07:17:16 AM » |
|
Jim, I think your basically asking which part of that stand goes forward and although I've never used a metal stand that attaches to the bike, I believe the end with the raised towers is the rear, flat goes front.
I built several out of wood and use them with the same type lift you show.
Working from the right side, I position the jack, put the stand on it as close as possible, jack up some to make sure the stand is hitting correctly, then slowly jack up while pulling the bike to me.
It's orchestrated, but seems to work for me.
One of the main concerns is not catching the side stand components.
Many times when I don't want to go through the lift process, I'll just use two jack stands under the front enigine guards. Putting one under the right then lift the bike from the left just slightly to get the stand racked up a couple knotches. You can go back and forth getting the bike level and very stable upright.
Thanks, that confirms what I thought as well but was not sure. I have some jack stands so.... Also, as I noted above, I did search for a video on how to remove the fuel petcock and that is where I saw the person doing the task lifting the bike. It was after I did that "look up" the I thought about replacing the air filter. It as been a long time I fear and I forgot the process. But, if I remove the tank to replace the air filter, that will also allow me to replace the fuel petcock while then tank is off and it should be an easy process. The only thing I would like is to have the bike "level" (left and right) when I remove the tank. The may mean all I have to do is to : Replace the plate (could be a temporary fix) on the "lift adapter", Attach the lift adapt to the bike, Roll the jack under the bike, begin to lift, Get the bike level, Stop and remove the fuel and vacuum lines, Remove the fuel tank and Then do the reverse to install (after replacing the air filer and fuel petcock) Will give it a try as soon as I find a metal piece for the lift adapter. Must have some "steel" somewhere. |
|
|
|
|
Logged
|
|
|
|
|
Chrisj CMA
|
|
« Reply #10 on: April 29, 2026, 01:13:46 PM » |
|
I’ve taken the fuel tank off of a Valkyrie while on the side stand many many times. Heck sometimes I remove the tank just to clean under it. I have also removed my tank while it was on the lift and I think it’s easier on the side stand
|
|
|
|
|
Logged
|
|
|
|
|
carolinarider09
|
|
« Reply #11 on: April 29, 2026, 01:20:28 PM » |
|
I’ve taken the fuel tank off of a Valkyrie while on the side stand many many times. Heck sometimes I remove the tank just to clean under it. I have also removed my tank while it was on the lift and I think it’s easier on the side stand
Interesting. I have only removed the tank two or three times (been awhile) I guess I will see when I have the task at hand. Thanks. |
|
|
|
|
Logged
|
|
|
|
|
carolinarider09
|
|
« Reply #12 on: April 29, 2026, 01:28:59 PM » |
|
Ok.. today I did some more investigation into the "jack stand" and how it would be mounted and how it worked on the Valkyrie. After I finished that work and reached some decisions, I got a message from someone who had a jack stand almost exactly like mine. Mine, it appears, is intact and no additional work (except to get the things that will held the stand on the bike while you are setting up the lift. But I now have pictures (Thank You Sir!!!). Regarding the flat piece I thought was not right (image below): I looked under the bike and found the place it would be placed and, after manually moving the jack stand to that location and manually raising it, I found there is nothing missing. This is where it goes. 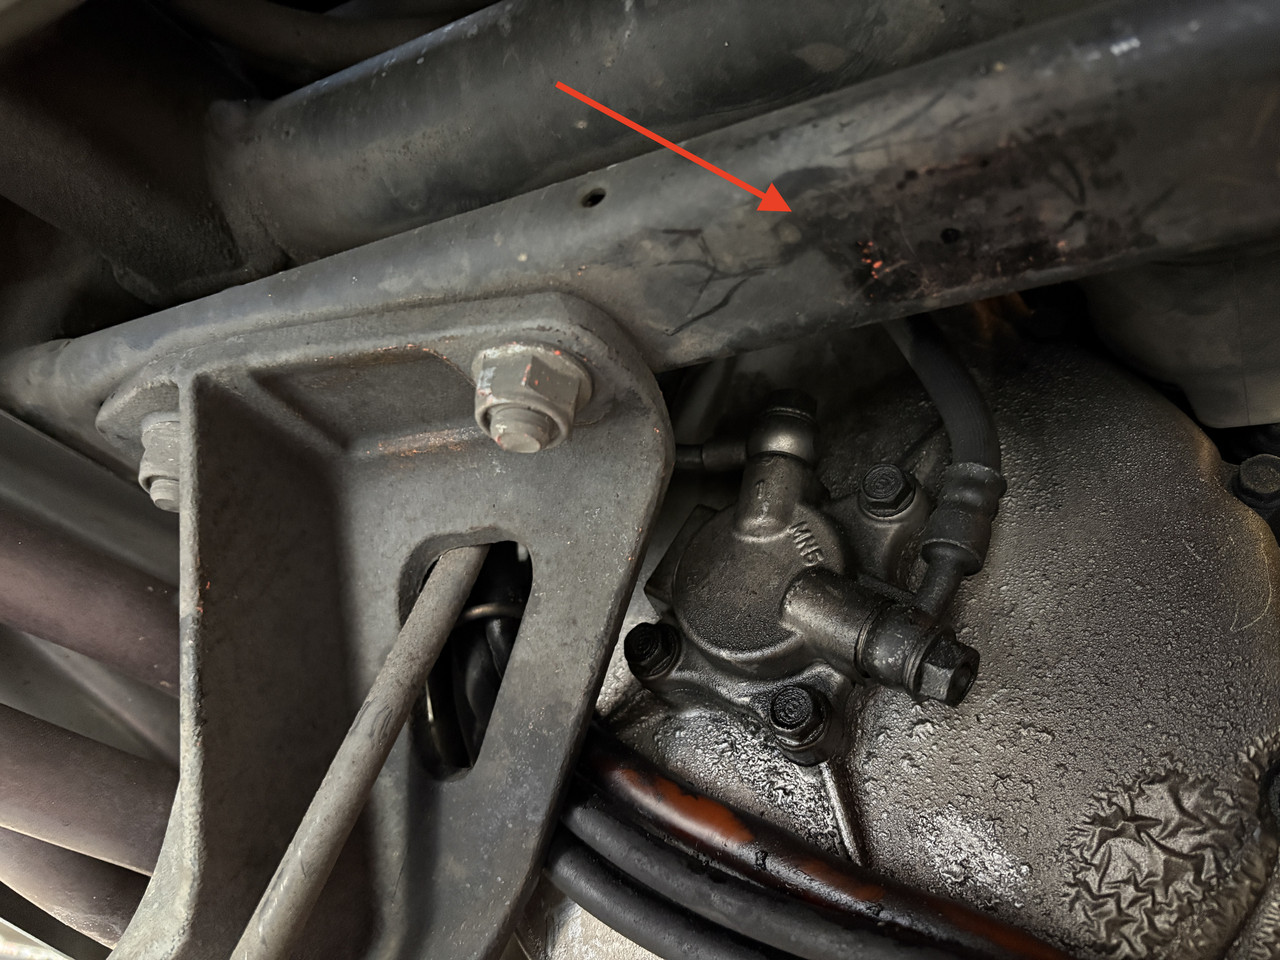 And I found the place where the "bolt" thingy would be placed to hold the jack in place. Will get some of those tomorrow. I will call then "L" bolts.  And, after using some wooden pieces to put the stand under the bike and hold it in place, I put the jack under the stand and verified it all worked. 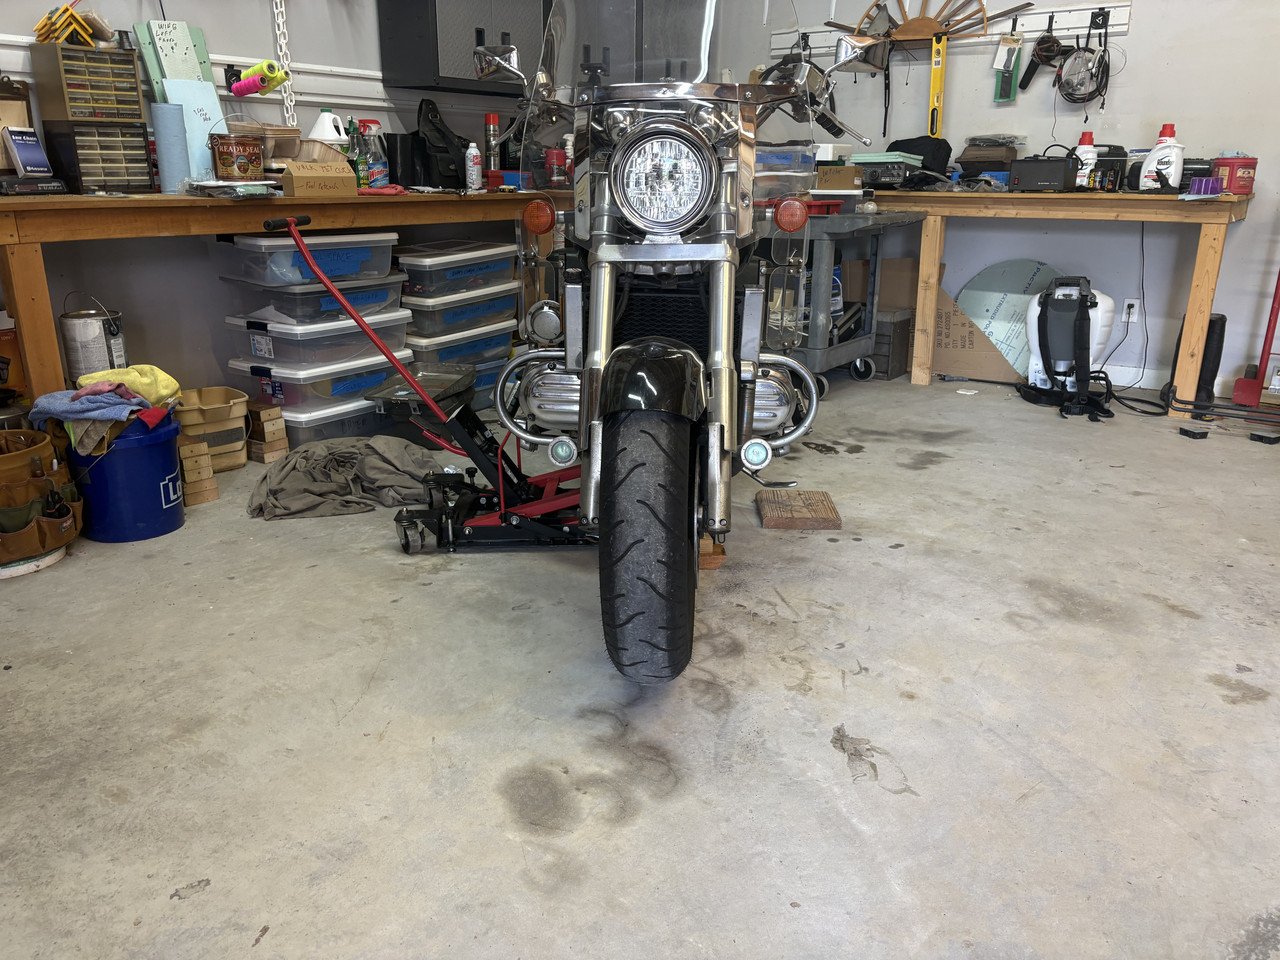 So, next step is to start work removing the fuel tank so I can replace the petcock and replace the air filter. I will check the bike before I go to bed to verify the jack hyrdalyics are not leaking and the bike is still safe. I'd jack it up high enough to engage the "safety things" on the stand but did not want to get it to high. Not before I had a chance to verify it is safely up. |
|
|
|
« Last Edit: April 29, 2026, 01:32:11 PM by carolinarider09 »
|
Logged
|
|
|
|
|
WintrSol
|
|
« Reply #13 on: April 29, 2026, 03:00:02 PM » |
|
You could raise it until the locks engage before leaving it, then lower it again for work.
|
|
|
|
|
Logged
|
98 Honda Valkyrie GL1500CT Tourer
Photo of my FIL Jack, in honor of his WWII service
|
|
|
|
Chrisj CMA
|
|
« Reply #14 on: April 29, 2026, 03:07:32 PM » |
|
I'd jack it up high enough to engage the "safety things" on the stand but did not want to get it to high. Not before I had a chance to verify it is safely up. This makes zero sense. As soon as the wheels are off the ground you can feel if it’s solid. You either put it back down immediately to readjust or go up to a safety stop. Leaving the room with trust in the hydraulic pump is asking to dump your bike |
|
|
|
|
Logged
|
|
|
|
|
carolinarider09
|
|
« Reply #15 on: April 29, 2026, 04:53:04 PM » |
|
Based on the comments above I just raised the "jack" to the first "stop".
The bike seems stable. And the jack seems to be stable.
The only thing I did notice was that the bike is "titled" slightly aft. That is the front wheel is higher than the rear wheel. Not a big deal but, just something I noted.
|
|
|
|
« Last Edit: April 30, 2026, 06:20:37 AM by carolinarider09 »
|
Logged
|
|
|
|
|
luftkoph
|
|
« Reply #16 on: April 29, 2026, 08:16:42 PM » |
|
I'd be wondering about that slave cylinder looks like paint is bubbling on the cover.
|
|
|
|
|
Logged
|
Some day never comes
|
|
|
|
Hook#3287
|
|
« Reply #17 on: April 30, 2026, 04:06:47 AM » |
|
If I want to support mine near level, but don't want to use the lift, I'll put stands under the engine guards, with wood for shims to keep it from rocking.
Thanks. A good alternative is always nice to have. Opps, I didn't see WintrSol's post. Based on the comments above I just raised the "jack" to the first "stop".
The bike seems stable. And the jack seems to be stable.
The only thing I did notice was that the bike is "titled" slight aft. That is the front wheel is higher than the rear wheel. Not a big deal but, just something I noted.
I have the same results in that the front wheel is slightly higher. If I'm going to have the bike raised for a while or for winter storage, I usually set it down on 4 jack stands, but you need the rear bags guards. |
|
|
|
|
Logged
|
|
|
|
|
carolinarider09
|
|
« Reply #18 on: April 30, 2026, 06:23:35 AM » |
|
If I'm going to have the bike raised for a while or for winter storage, I usually set it down on 4 jack stands, but you need the rear bags guards.
Hopfully it will only be for a few days. I have been looking at YouTube videos and trying to sort through the task so I can start (hopefully today or tomorrow). It just something I have not done in a long time. I have similar issues whenI have to replace the air filter on the Goldwing. |
|
|
|
|
Logged
|
|
|
|
|
HayHauler
|
|
« Reply #19 on: April 30, 2026, 06:32:48 AM » |
|
Air filter on the Goldwing is MUCH harder due to all of the shelter plastic that has to be carefully removed. But, you know that already.  Hay  Jimmyt |
|
|
|
|
Logged
|
|
|
|
|
carolinarider09
|
|
« Reply #20 on: April 30, 2026, 10:09:38 AM » |
|
I add "Fuel Tank Removal to the title of this thread.
The responses I have gotten here have been knowing and helpful and accurate. So........
I have verified the lift is stable enough and intended to start the fuel tank removal process.
It appears there are only a couple of things I have to do.
1. Turn the fuel petcock to "OFF".
2. Remove or undo, the fuel petcock "handle".
3. Remove the fuel line and the vacuum line.
4. Remove the two bolts holding the fuel tank in place.
5. Remove the fuel tank and put in a location that will allow me to remove "petcock".
I have seen some videos on line about the removal of the fuel and vacuum lines and they have looked like a real pain to do. Does anyone have any suggestions on the best way to do that? (I have a new fuel line just in case I mess up).
|
|
|
|
« Last Edit: April 30, 2026, 10:13:23 AM by carolinarider09 »
|
Logged
|
|
|
|
|
Chrisj CMA
|
|
« Reply #21 on: April 30, 2026, 10:23:26 AM » |
|
I add "Fuel Tank Removal to the title of this thread.
The responses I have gotten here have been knowing and helpful and accurate. So........
I have verified the lift is stable enough and intended to start the fuel tank removal process.
It appears there are only a couple of things I have to do.
1. Turn the fuel petcock to "OFF".
2. Remove or undo, the fuel petcock "handle".
3. Remove the fuel line and the vacuum line.
4. Remove the two bolts holding the fuel tank in place.
5. Remove the fuel tank and put in a location that will allow me to remove "petcock".
I have seen some videos on line about the removal of the fuel and vacuum lines and they have looked like a real pain to do. Does anyone have any suggestions on the best way to do that? (I have a new fuel line just in case I mess up).
A long screwdriver (small blade type) will aid in disconnecting the fuel and vacuum lines. The position of the petcock (on off res) doesn’t matter if the valve is operating properly Don’t forget the vent line at the tail end of the tank. |
|
|
|
« Last Edit: April 30, 2026, 10:25:42 AM by Chrisj CMA »
|
Logged
|
|
|
|
|
carolinarider09
|
|
« Reply #22 on: April 30, 2026, 11:15:43 AM » |
|
A long screwdriver (small blade type) will aid in disconnecting the fuel and vacuum lines. The position of the petcock (on off res) doesn’t matter if the valve is operating properly
Don’t forget the vent line at the tail end of the tank.
Ahhh yes. I did forget that (position petcock does not matter if valve is operating properly) I have not do a lot of work on my 2003 Valkyrie Standard (at least not recently). I did the normal maintenance cannot remember the last time I changed the air filter. And yes, I am older now and I forget stuff I had known before. So your comments above I have interpreted to be relevant to, what I believe is, the vacuum line. If it works as I think it does, if there is no vacuum the fuel will not flow out. A little thing I just read about recently. And I don't remember knowing that factoid. But any information is good information. Thanks again. |
|
|
|
|
Logged
|
|
|
|
|
Chrisj CMA
|
|
« Reply #23 on: April 30, 2026, 01:00:58 PM » |
|
So your comments above I have interpreted to be relevant to, what I believe is, the vacuum line. A big negatory. There is a fuel line and a vacuum line attached to the petcock. Then a third line is the tank vent at the aft end of the tank. You lift the rear of the tank 3 or 4 inches and disconnect that line before lifting the tank off the bike. |
|
|
|
|
Logged
|
|
|
|
|
carolinarider09
|
|
« Reply #24 on: April 30, 2026, 02:24:59 PM » |
|
A big negatory. There is a fuel line and a vacuum line attached to the petcock. Then a third line is the tank vent at the aft end of the tank. You lift the rear of the tank 3 or 4 inches and disconnect that line before lifting the tank off the bike.
Again, a big "THANK YOU". I had lifted the rear of the tank several times to determine the clearances and what I would do to remove the tank. I had not notice a line at the end of the tank. The vacuum line on the Fuel Petcock is my current problem. But your mention of the vacuum line at the rear of the tank went unnoticed by me. I just went out to make sure it (vacuum line at the rear of the fuel tank) was there and intact and it is. But there are no "things" holding the line to the tank that I noticed when I just looked. But, I will check my "Service Manuals" (which I have not done lately) to see what they say about the removal of the two vacuum lines. As I said, getting the fuel line off was not an issue. The vacuum line on the fuel petcock is only an issue in that the "spring clip" holding the line in place does not have a clear way of removing that clip. The clip appears to be different than the clip on petcock vacuum line. More work tomorrow. Again, thanks for your observations and your comments and assistance.  |
|
|
|
|
Logged
|
|
|
|
|
Chrisj CMA
|
|
« Reply #25 on: April 30, 2026, 03:57:45 PM » |
|
Don’t overthink it. Disregard that clip on the vacuum line, just push the hose off the nipple and then push it back on. The clip won’t stop you either way.
|
|
|
|
« Last Edit: April 30, 2026, 04:04:21 PM by Chrisj CMA »
|
Logged
|
|
|
|
|
HayHauler
|
|
« Reply #26 on: May 01, 2026, 04:49:52 AM » |
|
I stand the tank up on a towel with the aft end of the tank in the air. The petcock is accessible and can be removed if there isn't a full tank of fuel. That little hose on the aft end of the tank leads downward and exits below the bike. There is a T in the middle of the hose that has nothing attached to it. That is to break any vacuum in case the bottom of the hose gets plugged. This hose's purpose is to vent the tank, either from pressure or vacuum, to allow the fuel to flow freely to the carbs. I hope this helps. Hay Jimmyt |
|
|
|
|
Logged
|
|
|
|
|
carolinarider09
|
|
« Reply #27 on: May 01, 2026, 07:24:08 AM » |
|
ChrisJ CMA and HayHauler
Thanks for the information, and feedback. I am going to try and get the tank removed this am so I can replace the air filter and the Petcock and then start the process to return the tank to its "place" on the bike.
Still have some pending "issues" that I will have to address. But I believe they will be overcome.
|
|
|
|
|
Logged
|
|
|
|
|
carolinarider09
|
|
« Reply #28 on: May 01, 2026, 09:58:22 AM » |
|
Today, I undertook the task of removing the fuel tank, replacing the air filter, and installing a new fuel petcock. There were no issues during this process. As suggested above, I did not use a tool to remove the clip holding the vacuum line to the petcock. And I did not use a took to remove the “vent hose” from the back of the fuel tank. Those clips remained in place and I hope to be able to use them in the re-assembly. The clip "circles" overlap so, a tool cannot be easy used. There were no real challenges in this morning’s work with the exception of worring about the new fuel petcock’s extended “tube”. Then I confirmed that it was a “Protective Tube”. It even had a little “o” ring to hold it in place. 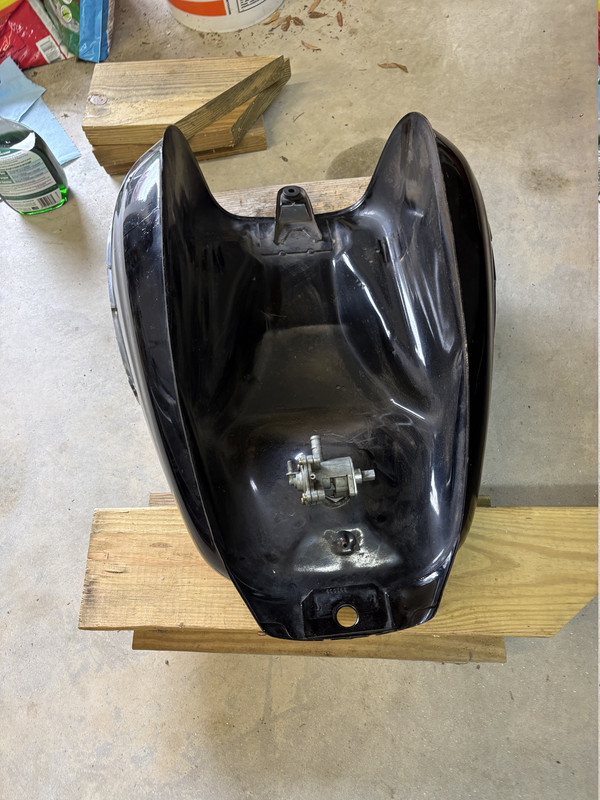 Fuel tank after removal and being “drained” 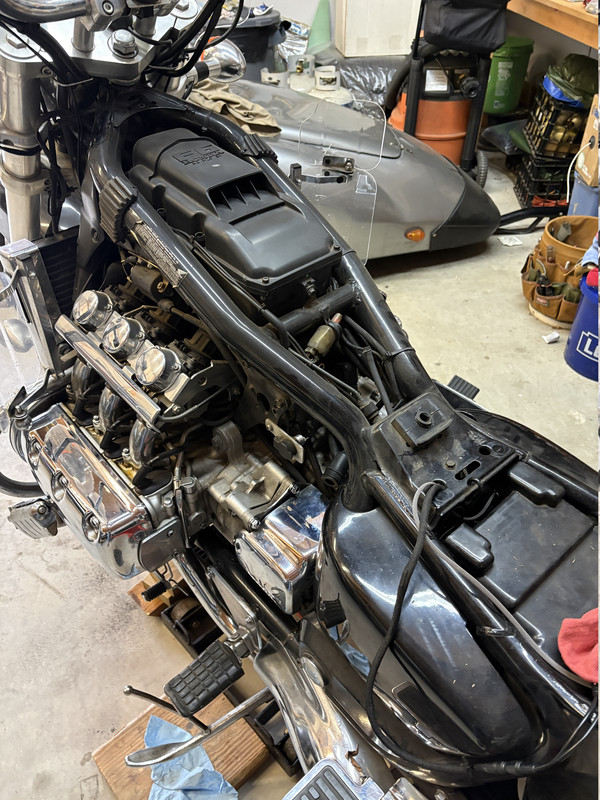 Area under tank and prior to replacing air filter. 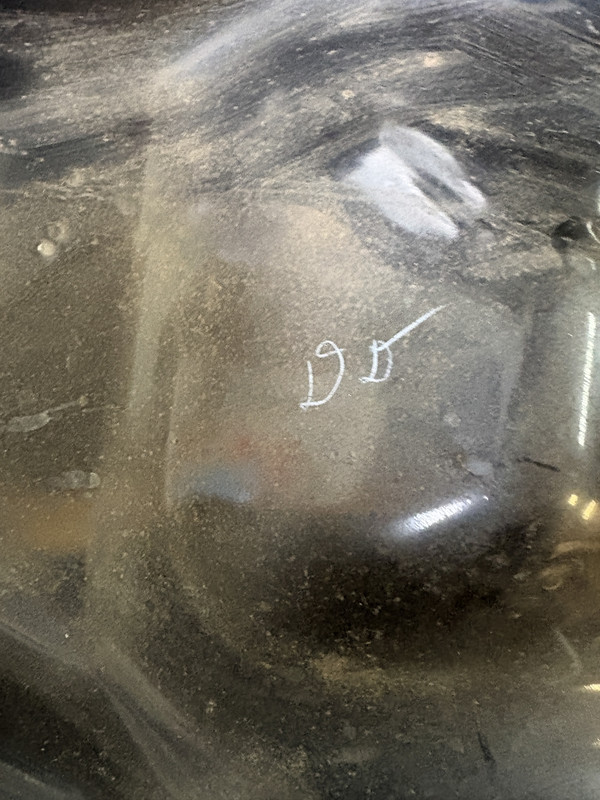 Something written on the bike’s “body” under the fuel tank. Since I thought I purchased the bike “new” I don’t know what this might mean. 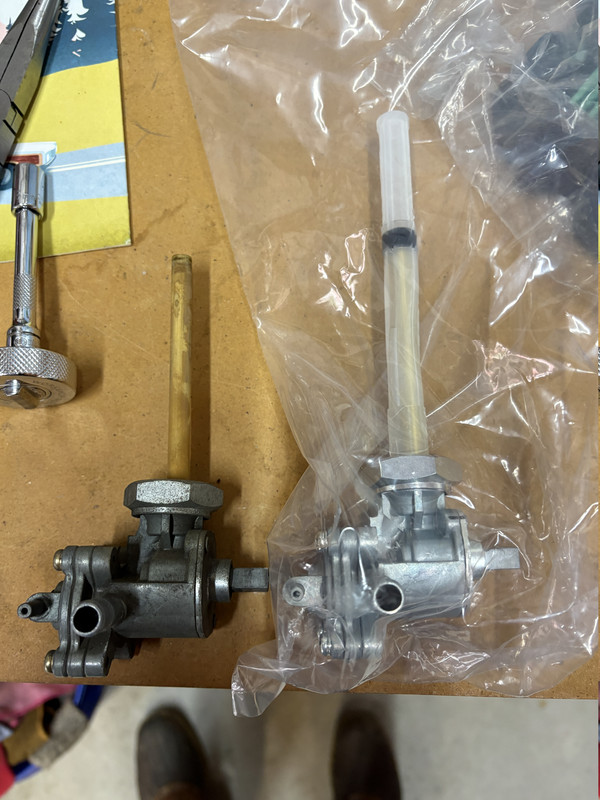 Comparison of old and new fuel petcocks. I was concerned that the new one was too long until I figured out the plastic was there for protection. 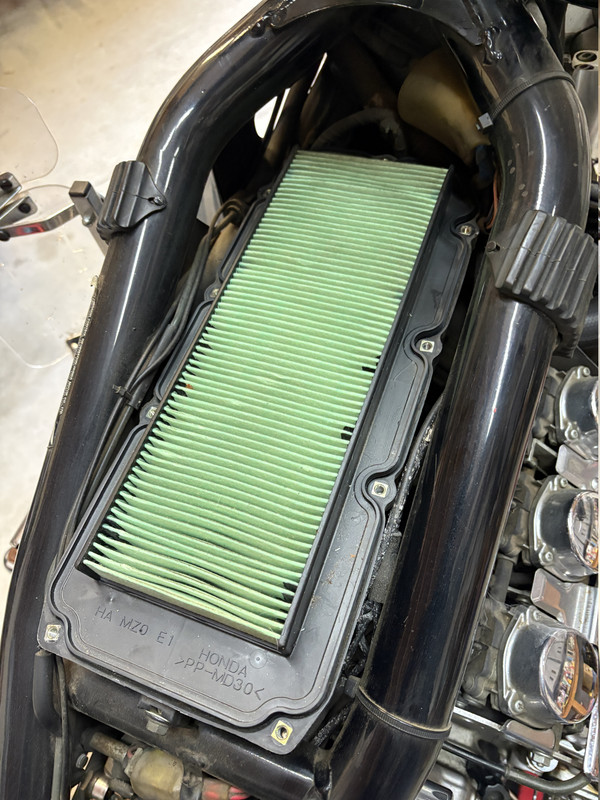 Old air filter prior to removal. And yes, it does not appear to be that dirty. I don't have a record of when it was last replaced. I thought it might have been five or more years ago.. But.... 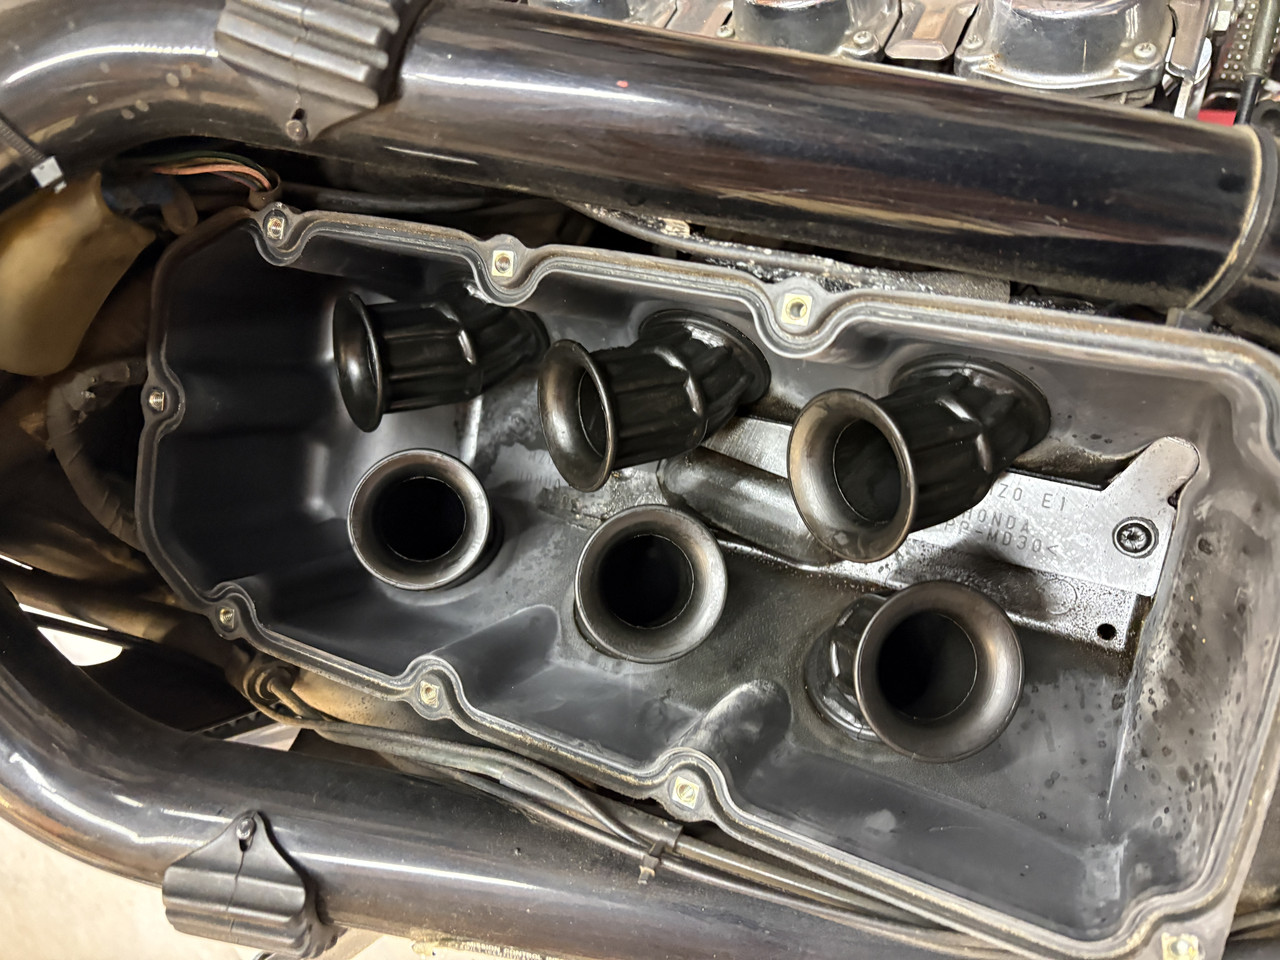 Area under the air filter. Looks ok, no issues noted. 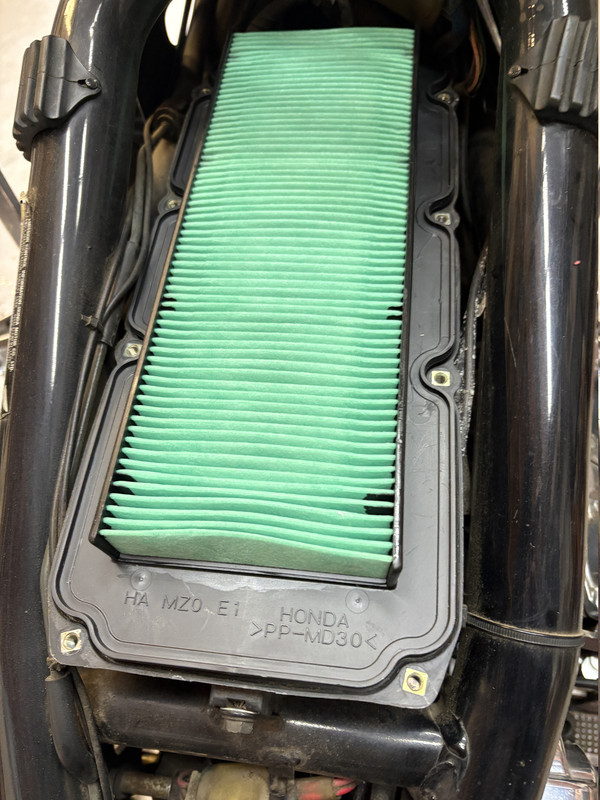 New air filter installed and ready to be “closed” up. 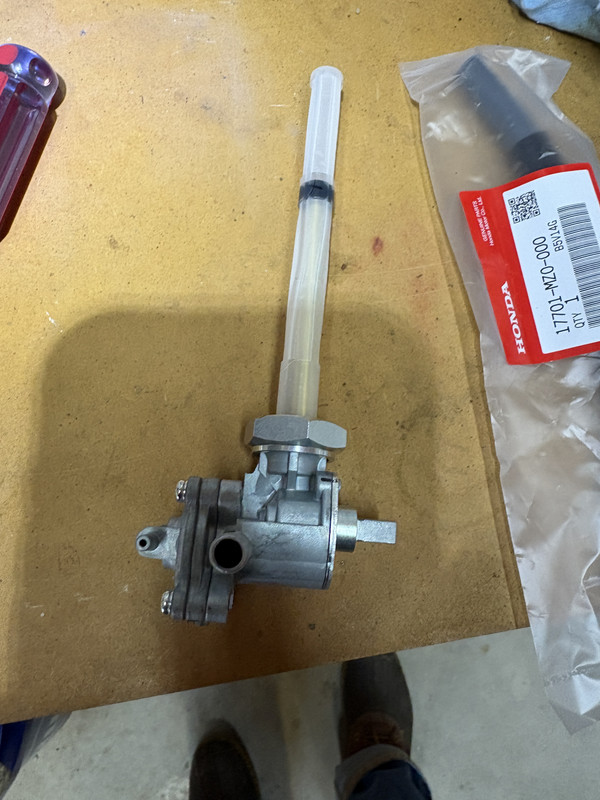 New fuel petcock prior to installation. You can see the “real” tubing under the clear plastic. And there was actually a little rubber ring (gasket) that attached the tube to the petcock. Not only helping to keep it attached but keeping dirt and stuff out while its was being moved about.  New fuel petcock installed. Old one is to the lower left. |
|
|
|
|
Logged
|
|
|
|
|
Chrisj CMA
|
|
« Reply #29 on: May 01, 2026, 11:09:19 AM » |
|
That clear plastic tube “for protection” as you say is the fuel filter. It is the only fuel filter a Valkyrie has so I hope you left it on there. Double check you don’t kink or pinch that rear tank vent tube upon assembly.
|
|
|
|
|
Logged
|
|
|
|
|
carolinarider09
|
|
« Reply #30 on: May 01, 2026, 12:24:11 PM » |
|
Ok, I went back out to the bike to have another look. The thing I thought was an insert into the fuel tank (don't know what I thought it was for but....) is actually the filter from the other petcock. It is shown in the picture below (arrow points). 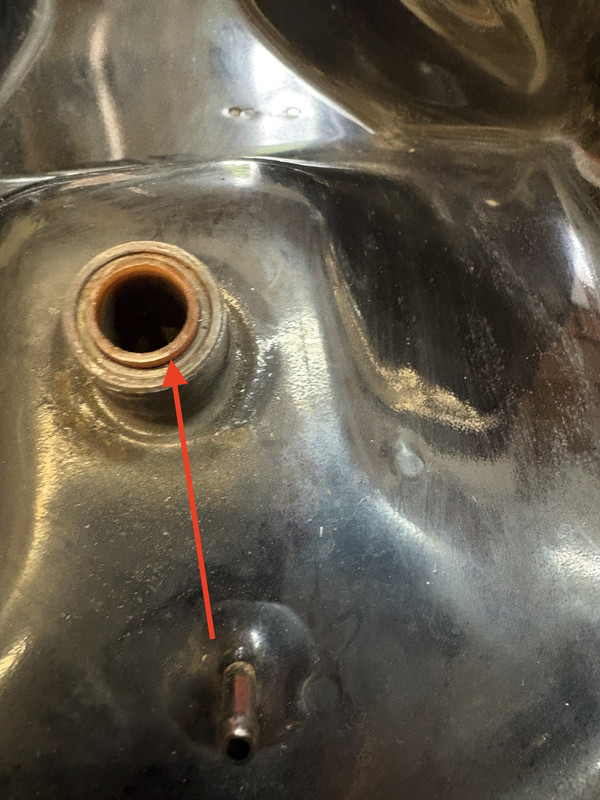 I removed that filter (and it was a filter similar to the one on the new petcock) and will not insert the petcock into the tank and get it installed. Thanks, again, for keeping my on track. I truly appreciate your responses and your expertise. Now, I can maybe actually get the fuel tank back into "service". I have re-inserted the thing I thought was something else, the filter back onto the petcock and it did re-insert back into the tank and seemed to fit just fine. As a note, I was lucky that the old filter assembly stayed in the opening. I have it out and will post a picture of it. It is a little "colored" . |
|
|
|
|
Logged
|
|
|
|
|
carolinarider09
|
|
« Reply #31 on: May 01, 2026, 03:40:59 PM » |
|
The picture below shows the two petcocks side by side. (new one on left, old one on right of image) 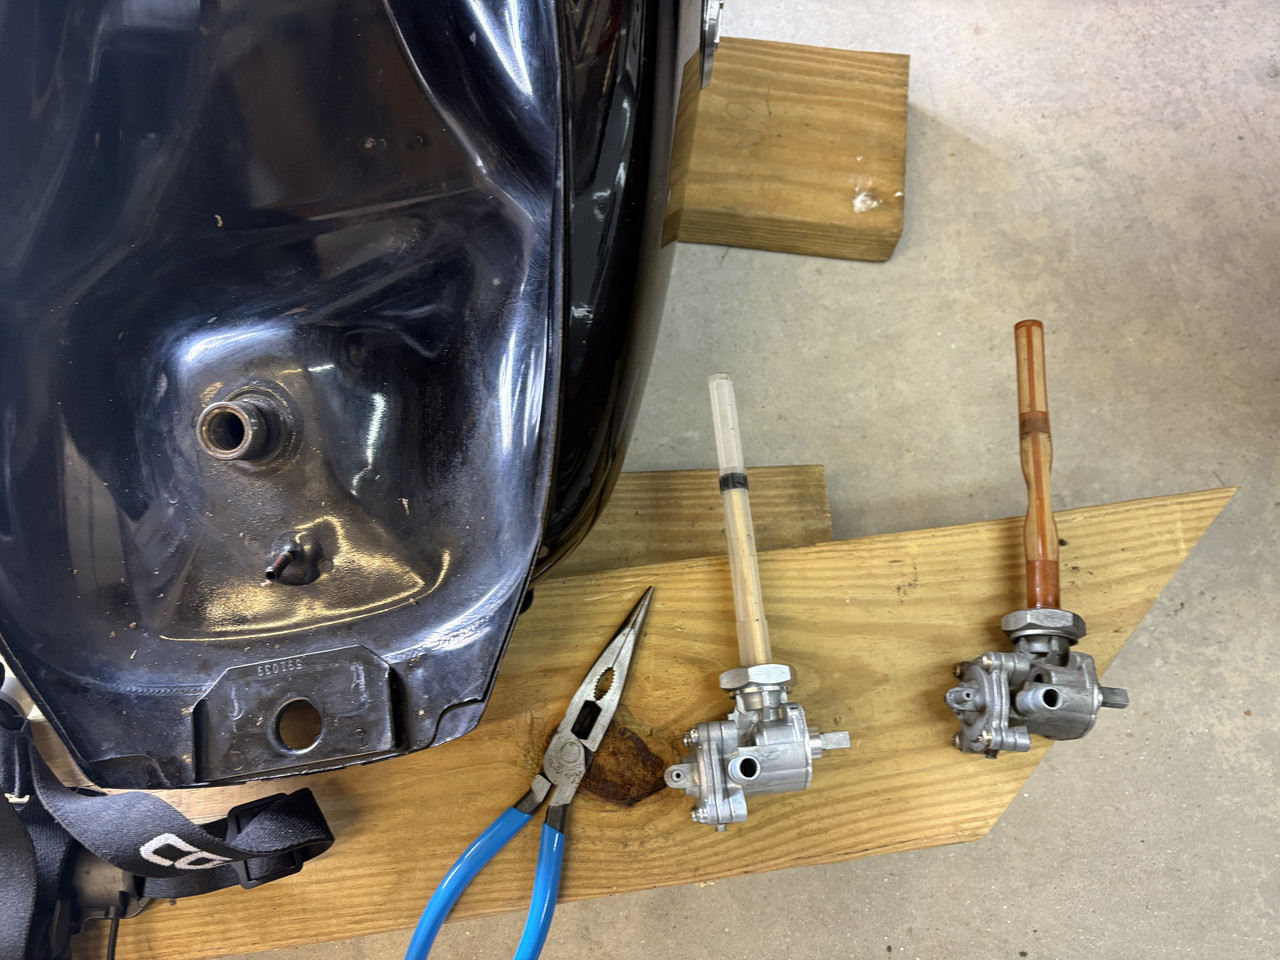 Now, I can maybe actually get the fuel tank back into "service". I guess the reason I was "reluctant" to try an remove the old filter was because I did not know that is what it was and I was concerned it was part of the tank. As a note, I was lucky that the old filter assembly stayed in the opening. |
|
|
|
« Last Edit: May 01, 2026, 03:42:49 PM by carolinarider09 »
|
Logged
|
|
|
|
|
WintrSol
|
|
« Reply #32 on: May 01, 2026, 04:29:32 PM » |
|
Did the new petcock come with the O-ring seal? I had to replace the O-ring on mine, as it started to weep, ever so little; just enough to smell of fuel.
|
|
|
|
|
Logged
|
98 Honda Valkyrie GL1500CT Tourer
Photo of my FIL Jack, in honor of his WWII service
|
|
|
|
carolinarider09
|
|
« Reply #33 on: May 01, 2026, 05:01:43 PM » |
|
Did the new petcock come with the O-ring seal? I had to replace the O-ring on mine, as it started to weep, ever so little; just enough to smell of fuel.
The only "O" ring I found was on the filter. It is highlighted in the image below. But tomorrow, when I go out to do some more work, I will look and see if I missed anything. As you will note, I have been having lots of help trying to get this right. So, I may have missed something. But the only thing that I would have called an "O" ring that was on the petcock was the black "O" ring pointed to in the image below. 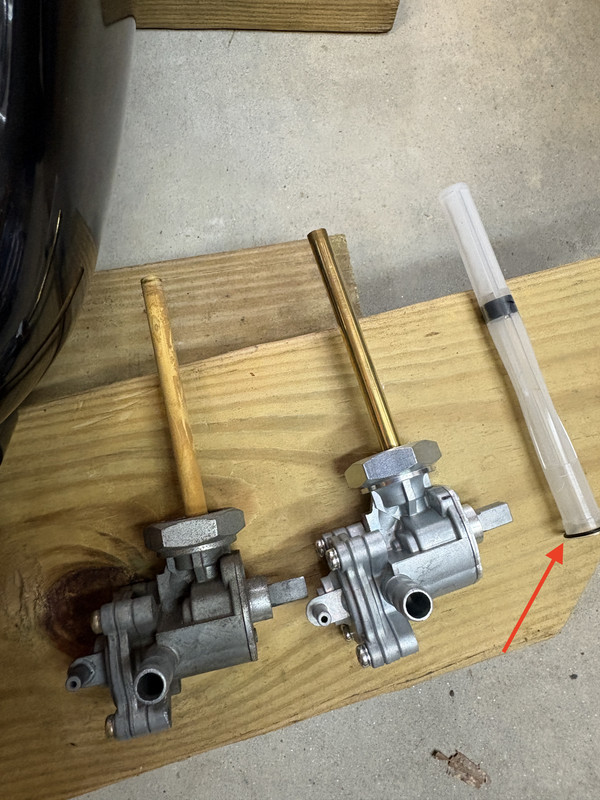 |
|
|
|
|
Logged
|
|
|
|
|
WintrSol
|
|
« Reply #34 on: May 01, 2026, 08:12:38 PM » |
|
That would be it, but the parts diagram shows it between the petcock and tank fitting, not around the plastic filter but under it.
|
|
|
|
|
Logged
|
98 Honda Valkyrie GL1500CT Tourer
Photo of my FIL Jack, in honor of his WWII service
|
|
|
|
carolinarider09
|
|
« Reply #35 on: May 02, 2026, 05:58:15 AM » |
|
I will check the old filter but this YouTube video (at time 6:20) shows the filter with the gasket at the very bottom of the filter but not under it. And I will check my new filter and petcock to verify that is the way it is installed. https://youtu.be/f1124-VrpAg?si=6cQ0Z8YBoVS0oNjF |
|
|
|
|
Logged
|
|
|
|
|
carolinarider09
|
|
« Reply #36 on: May 02, 2026, 08:28:46 AM » |
|
OK, I believe the task has been completed.
Next step, verify it works and check for leaks.
I have installed the tank and connected the hoses and the "Fuel control valve" (Petcock operator?).
I put about 1 gallon of gas in the tank and had not seen any leaks. The fuel control valve is still off.
Next step, start the bike and make sure it works and check for leaks again.
"Question"
Is it ok to start the bike while it is in the "Jack Stand" (for lack of a better term)? I'd rather wait to lower in until I verify it is operational.
Thanks,
|
|
|
|
|
Logged
|
|
|
|
Willow
Administrator
Member
Posts: 16893
Excessive comfort breeds weakness. PttP
Olathe, KS
|
|
« Reply #37 on: May 02, 2026, 09:07:46 AM » |
|
You can do it but I wouldn't. It should be very, very stable if you do start it on the lift.
|
|
|
|
|
Logged
|
|
|
|
|
carolinarider09
|
|
« Reply #38 on: May 02, 2026, 09:47:21 AM » |
|
Ok, thanks for the response.
|
|
|
|
|
Logged
|
|
|
|
|
WintrSol
|
|
« Reply #39 on: May 02, 2026, 09:48:43 AM » |
|
If the bike isn't strapped down so it won't move, I wouldn't start it; the engine is smooth, but there is still some vibration will make the bike move on the stand.
If you stop that video at 6:20, you will see the O-ring where it fits into the petcock, and the filter slides into it, so it seals both the base of the filter and the petcock-to-tank fitting. I guess there is no flange on the filter, just the molded end to fit tight to the inside of the O-ring when it is compressed. It wasn't clear from the photos you posted that it was just held to the end of the filter by friction.
That is the one I replaced, BTW. My original apparently hardened over time, and when something disturbed the petcock position, it started to leak. I have a belly tank, so getting the tank off is a LOT more difficult, so I probably hit the petcock with something enough to shift its position.
|
|
|
|
« Last Edit: May 02, 2026, 09:55:59 AM by WintrSol »
|
Logged
|
98 Honda Valkyrie GL1500CT Tourer
Photo of my FIL Jack, in honor of his WWII service
|
|
|
|


