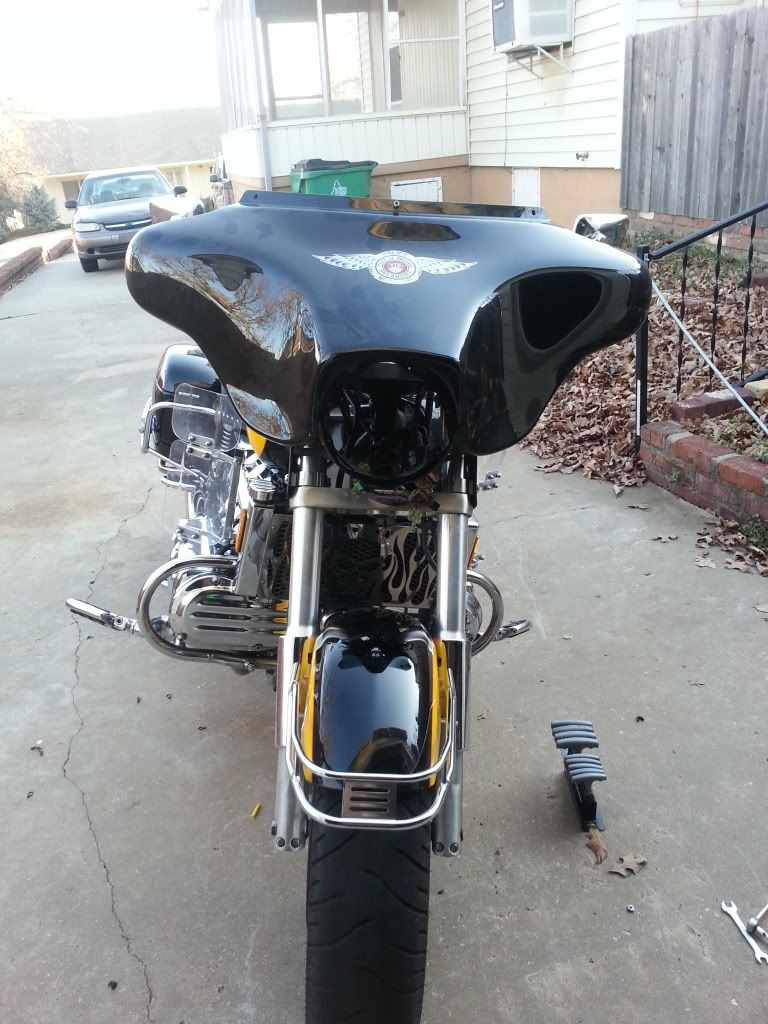
I finally got around to installing the 2001 HD street glide fairing on my 1997 standard. Although challenging, I was pretty pleased with the result overall. it is NEVER finished. But I've reached a good stopping point and decided to add my dimes to the bucket.
Thanks to tank_post for his write up here:
http://www.valkyrieforum.com/bbs/index.php/topic,35116.0.htmlThanks to Dubsvalk for help along the way.
The goal of the install was to keep the factory valk headlight. That was difficult. Mounting a HD headlight in the fairing would have been very simple, quick, clean, and easy. BUT I have always loved the valk headlight, an wanted to retain it at all cost.
to attach the fairing to the bike I used:
memphis shades fork clamps (4 of them)
OEM harley davidson inner fairing support brackets (like tank_post did)
I ordered a 10'' speedometer extension cable from ebay. (could have used a 6'') which mounted with no modification.
I also ordered an OEM harley odometer "roll back" cable. Had to modify this a little.
Alpine head unit stereo.
Polk audio 5 1/4'' 2-way speakers.
Windshield was purchased from HD. It's an 8'' with a "flip lip" at the top, which I love. Some pics show the shield, some do not.
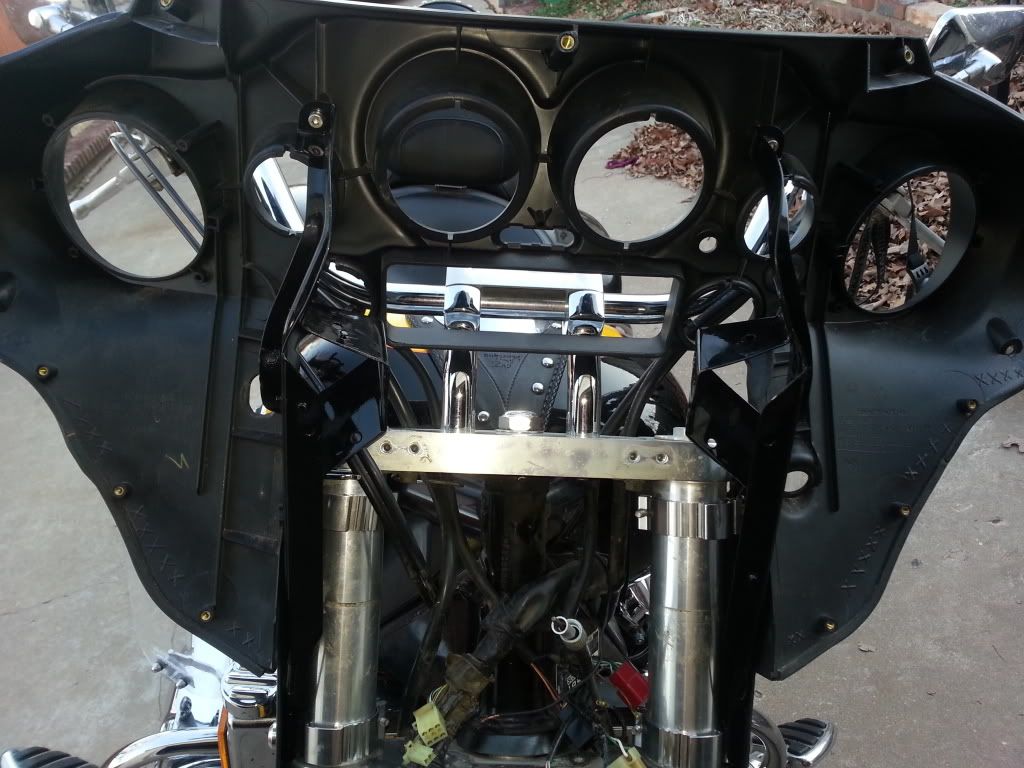
The most difficult part, by far, was fabricating a bracket for the valk headlight. I needed a bracket to drop the light, and move it slightly forward, so that the light would sit in the correct position in the fairing. (I trimmed the HD fairing with a dremel tool in order to get it to fit the valk headlight)
Some photos show the headlight in the Original OEM position, others show it with the fabricated bracket. I can PM measurements of the bracket if anyone is interested in building one. I am going to have mine chromed eventually. Safety first! More chrome = you can see me better! (Thats what I tell my wife after making big purchases)
The passing lamps are National Cycle. They are mounted in the OEM position, and work great there.
I moved all of the wiring out of the valkyrie headlight, and into the fairing. This was not particularly easy. honda definitely designed the wiring to fit inside the headlight.
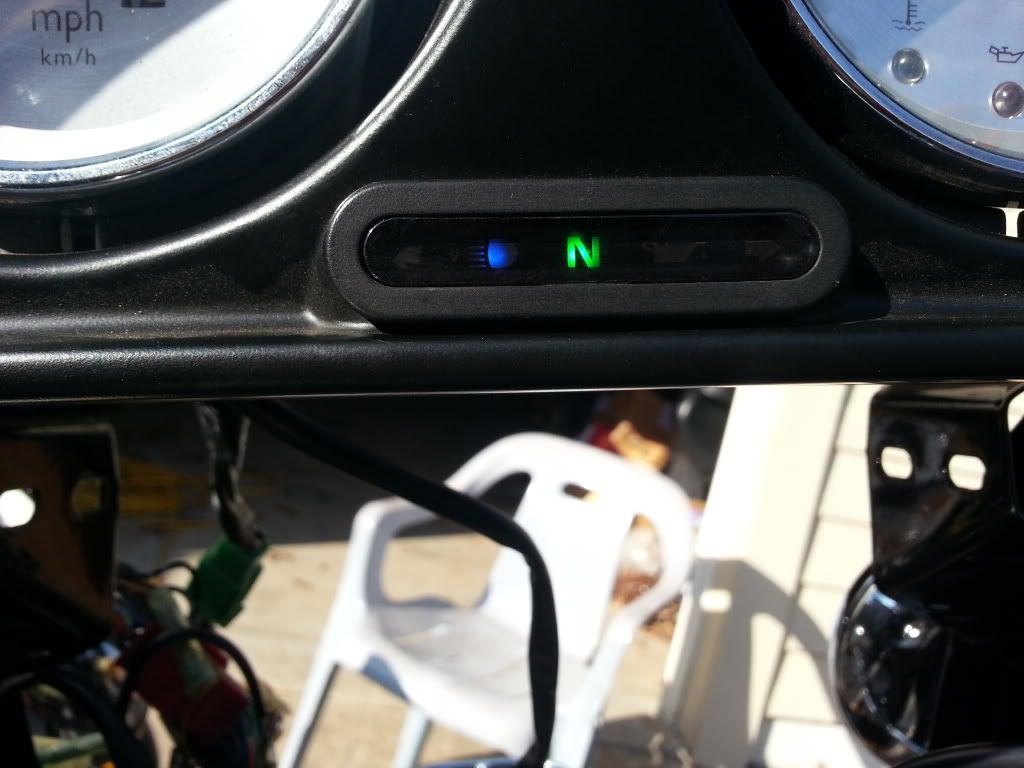
I used the Harley Davidson indicator (idiot) light assembly, rather than drilling holes in the fairing and mounting the valkyrie indicator lights. It took some trial and error (and one heated bidding war on ebay) in order to figure out which HD wires went to their corresponding indicator light. it looks great in the fairing though. The HD indicators are very bright (LED).
To power my sound system (and any other electronic components I'll add in the future) I wired a hot wire from the battery, under the fuel tank, to a master switch. From the master switch, to a relay, from the relay to a fuse panel, from the fuse panel to each individual accessory. Props to PhredValk for that idea. So everything on the fuse panel is relay'd through one relay. Eliminating clutter of multiple relays.
The relay is triggered by a wire which is hot when the key is "ON"
Before starting the bike, I flip the master switch OFF. This eliminates strain on the starter button. (because we all know what can happen there.)
Overall....love the fairing. Spent about $600 total, putting it together. Next tax season....she's getting painted! (along with the bags)
I'm going to keep a tube of blue locktite in my saddlebag from now on though...never know whats going to start falling off

Feel free to ask Qs if you have any. It's what makes the forum great.