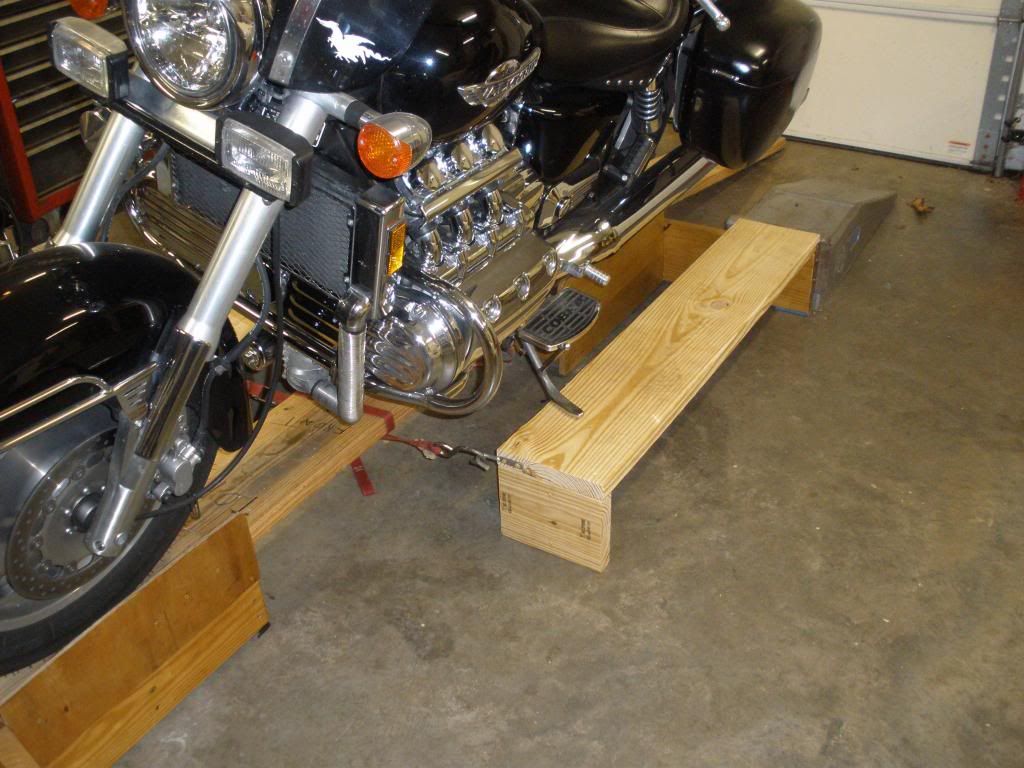
In some of my earlier posts, people have made comments about the wood under my Valk. Some of you have asked for more info on my wood ramp/workstation. I finally got around to taking some photos and here they are along with some basic write up. If you decided to try this setup, please be aware that the cost of all the material is going to run $150 or there about. I had a lot of the material left over from other projects and had to buy just a few things to build this.
I was thinking of buying a motorcycle jack but did not want it taking up space on the floor when I was not using it. This all hangs on the wall when not being used. Of course I could have hung an aluminum jack on the wal if I had known about them. I didn't. Besides, did I mention I had most of this stuff just lying around gatherin dust?
OK Disclaimer here: I make no recomendation or claims of fitness, suitability or safety of this design. Use at your own risk.
I ride my bike onto this ramp, put the kickstand down, get off and place the jack stands. Then I can put the kickstand up, remove the side walks and may also remove the center board.


I have an old office chair that I use to roll around the bike when working on electrical and anything else at that level. With the center board removed, I can roll under the bike on my creeper or have plenty of room for my oil catch pan.
I started with a 2x8 by 4 foot long. I cut along one edge about an inch and half deep.


Then I screwed another piece of 2x8 about 12 inches long to that centered from the ends of the 4 ft piece.
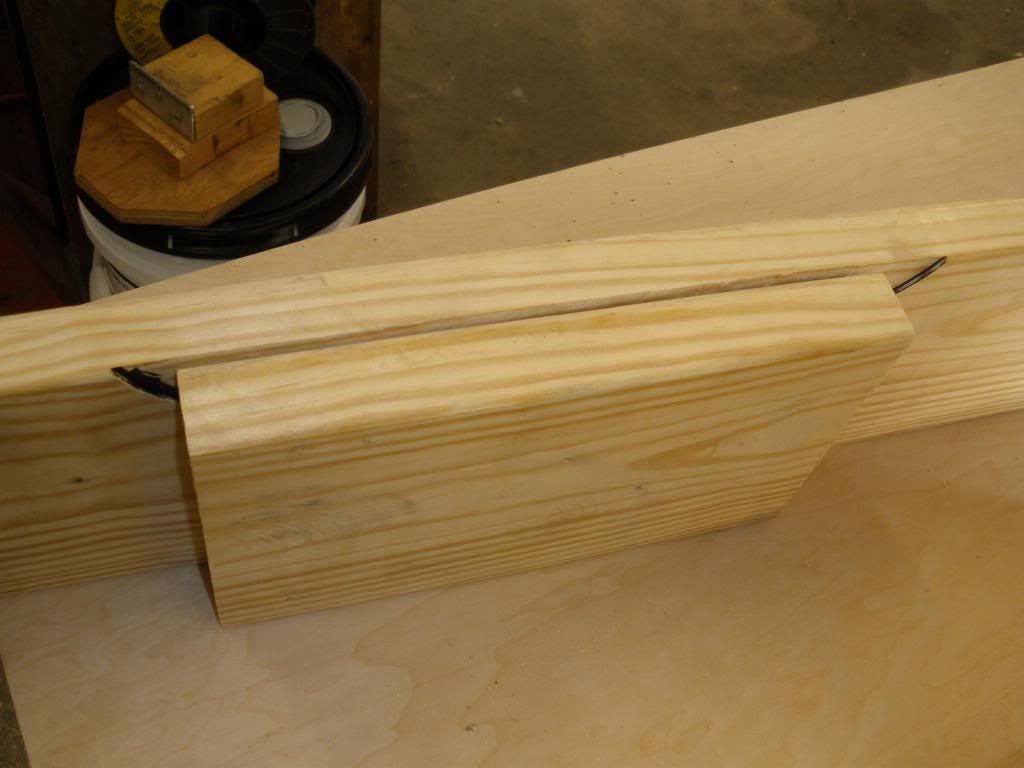
Note that the short piece is covering the saw cut on the edge of the long board.
I cut two pieces of plywood for sides of the ramp. These are 10 and 1/2 by 23 inches and happen to be 3/4 hardwood plywood but I expect 5/8 exterior plywood would work just as well.

I radiused 2 corners of the plywood and drilled some holes for the screws to go thru.
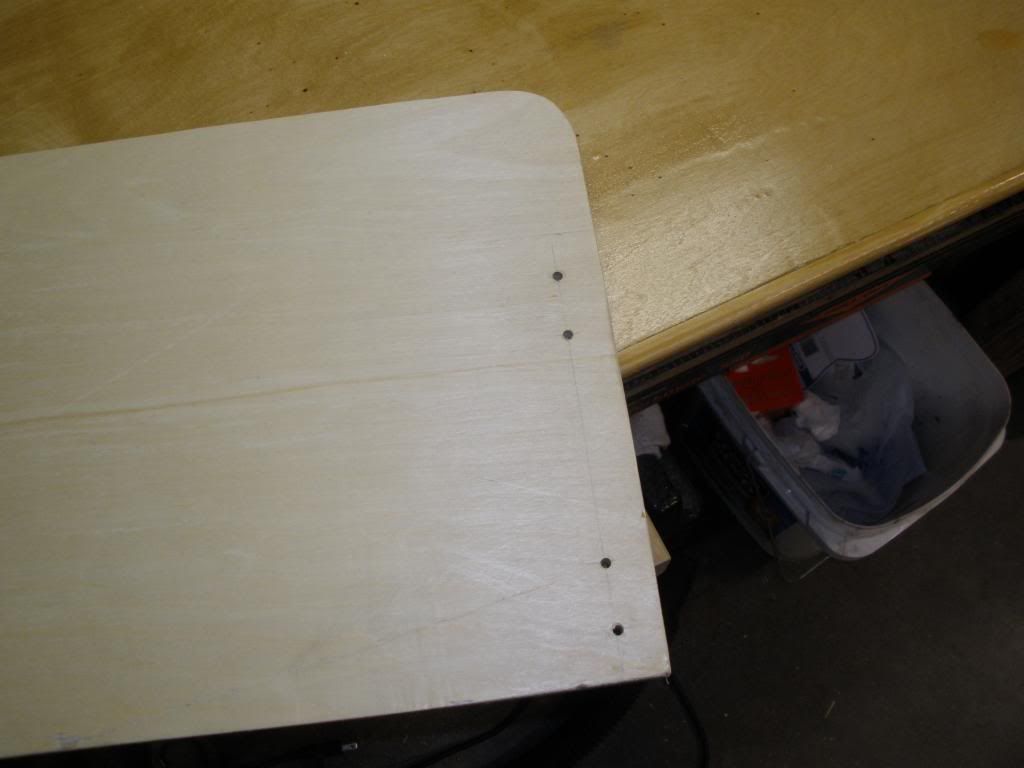
I used #9 x 3inch deck screws to hold it all together.
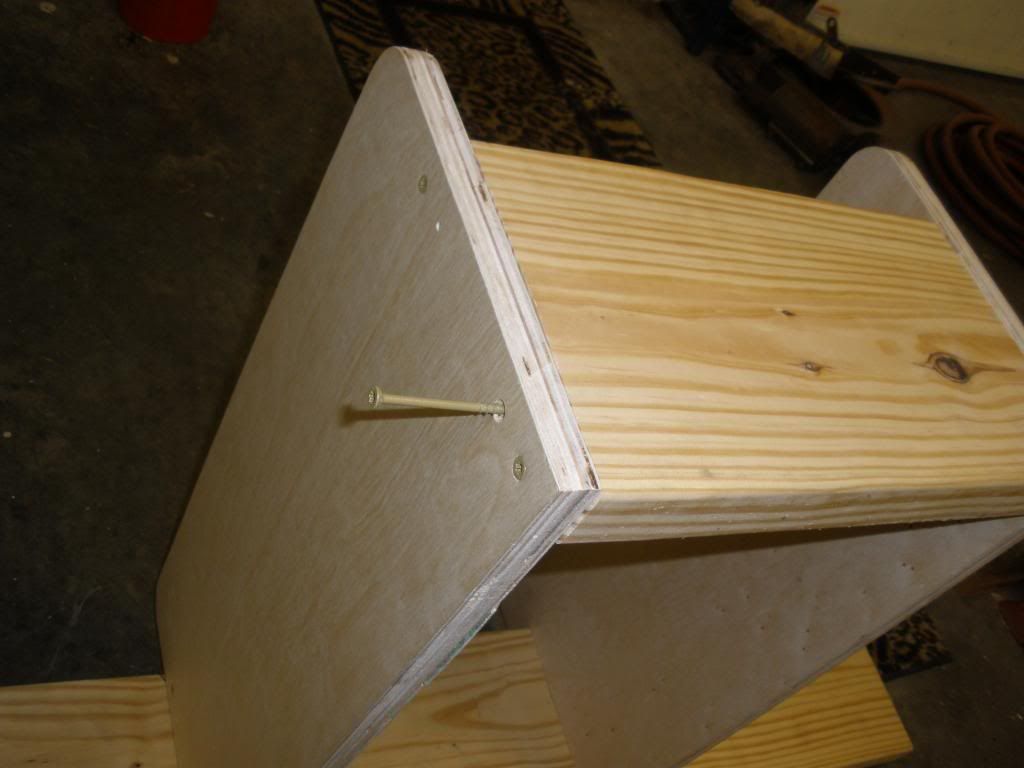
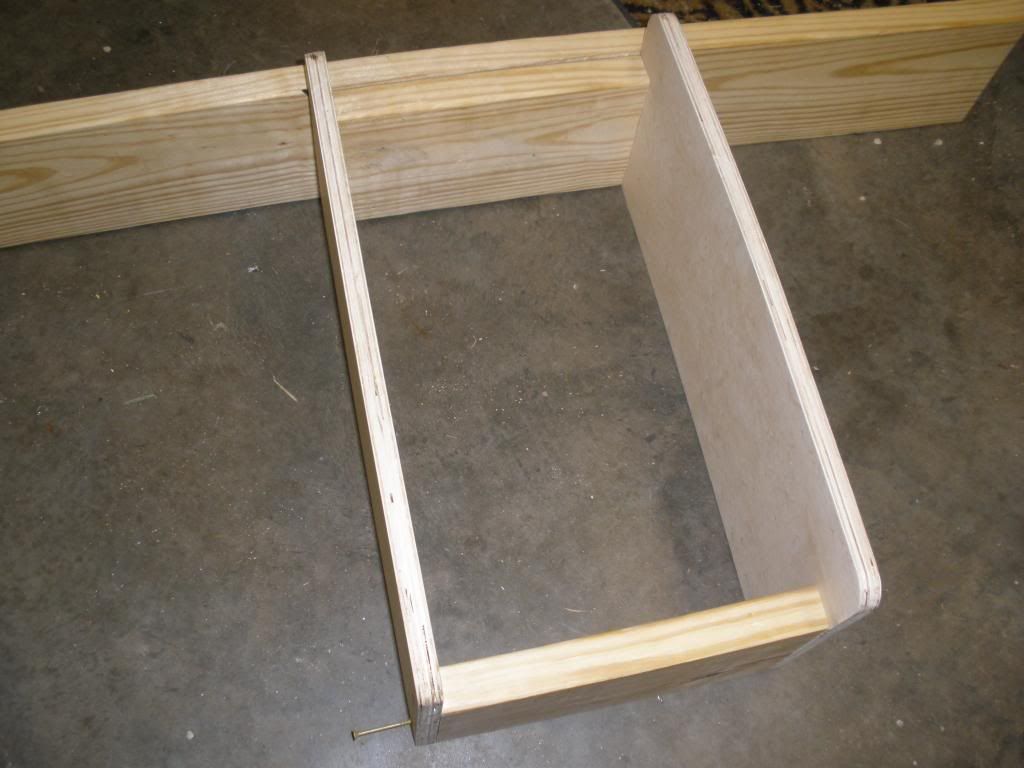

Note that the plywood sides are screwed to the ends of the short board that was attached to the 4 ft piece of 2x8 and there are 2 more pieces of 2x8 screwed together and screwed into the other end of the plywood.

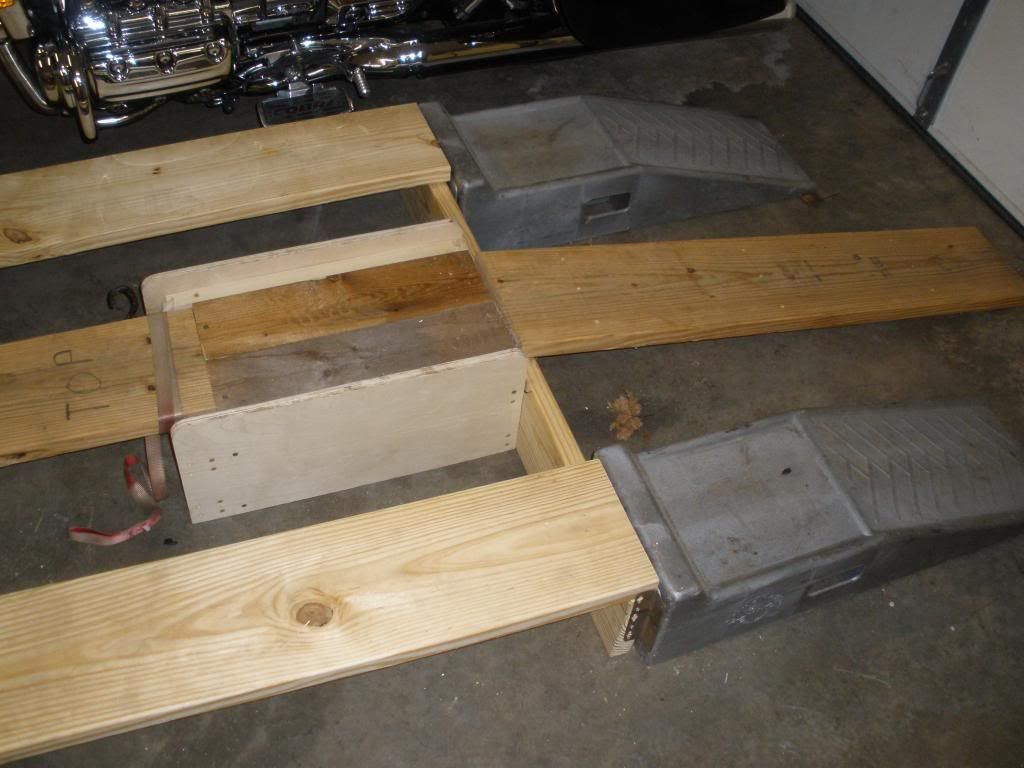
For the top of the ramp I used 2 pieces of 2x6 and a little extra strip. Note that the 2x6s sit on top of 2 of the cross pieces beteen the plywood sides but only little ears of the 2x6 actually sits on the front cross piece. That is where the center board will sit.

I cut the end of these 2x6s on a slight angle and also cut one end of the center board on the same angle. This will make the center board easy to remove even when the end pieces of the ramp are jammed together. This angle also means it is absolutely neccessary to tie this end of the center board down when loading or unloading the bike on the ramp.
The front part of the ramp is made in similar fashion except it does not require a 4 ft long stabilizer board. I used an 18 inch length of 2x10 and cut the upper corners on a 45*. Also, this front part of the ramp I made only 7 and 1/2 wide (between plywood side boards) to fit the width of the 2x8 center board. I put a 13 inch long piece of 2x8 on the front end to stop the front wheel from running off the end of the ramp. Also in this photo is the center board I use between the fron and back end of the ramp/workstation.

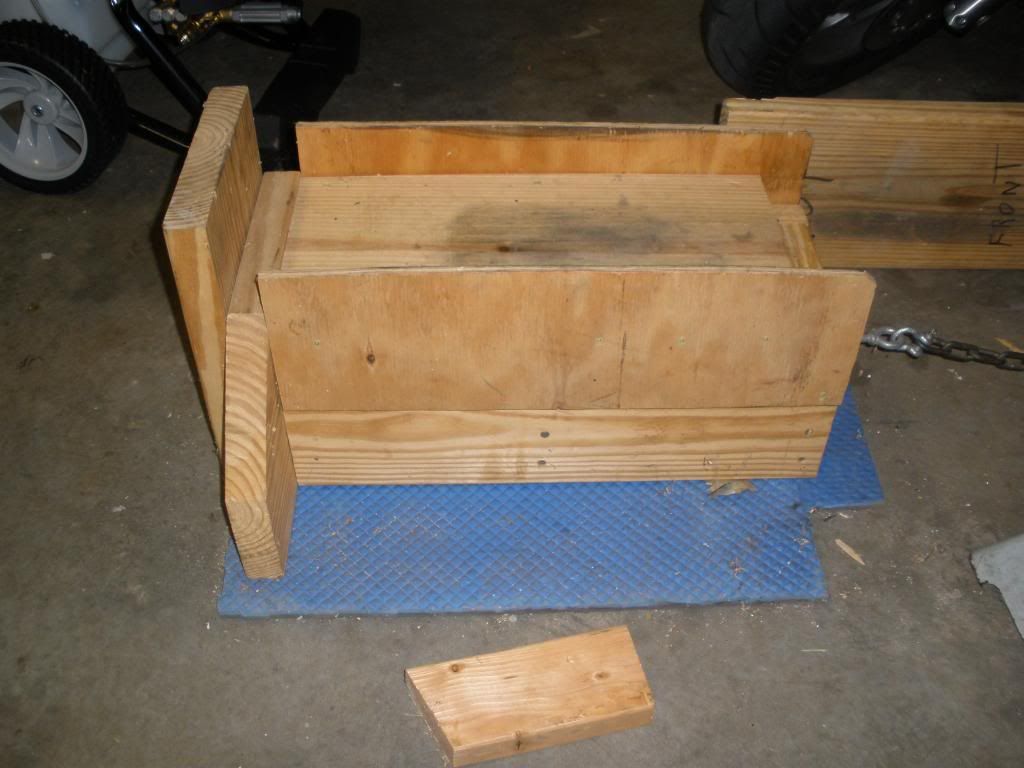
Put some rubber on it! OK This thing will slide all over the floor unless you put some ruber under it. I used some pieces of floor mat rubber and screwed them on the bottom as in the photo.

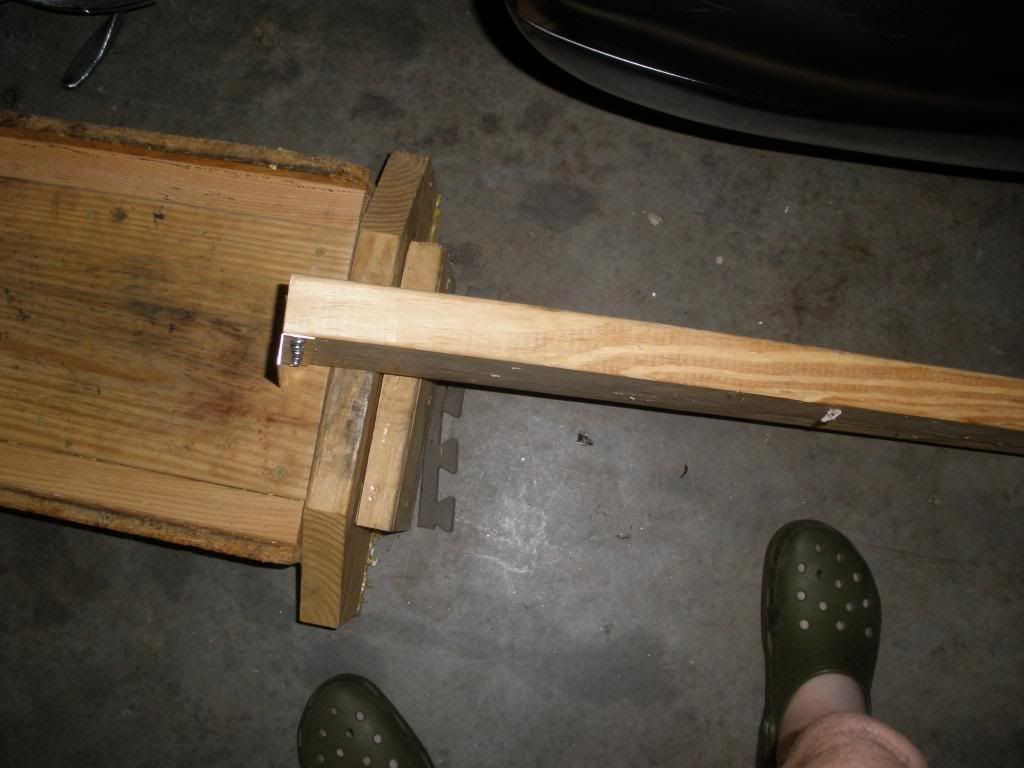
I use a 4ft long piece of 2x10 for the ramp to run up onto this ramp/workstation. I screwed a piece of aluminum angle to one end of thhis board. The angle sits down into the saw cut made in the edge of the 4ft cross piece on the rear of the ramp. This way, it will not slip or move when loading or unloading the bike.
It is neccessary to tie the front and rear parts of this together and I use some eye bolts and a piece of chain. Whithout this chain in place when loading or unloading, the ends will most likely slide apart and you will drop the bike.


For the side walks, I used 2x10 by 4ft long and put a 2x8 end piece with a brace piece on one end

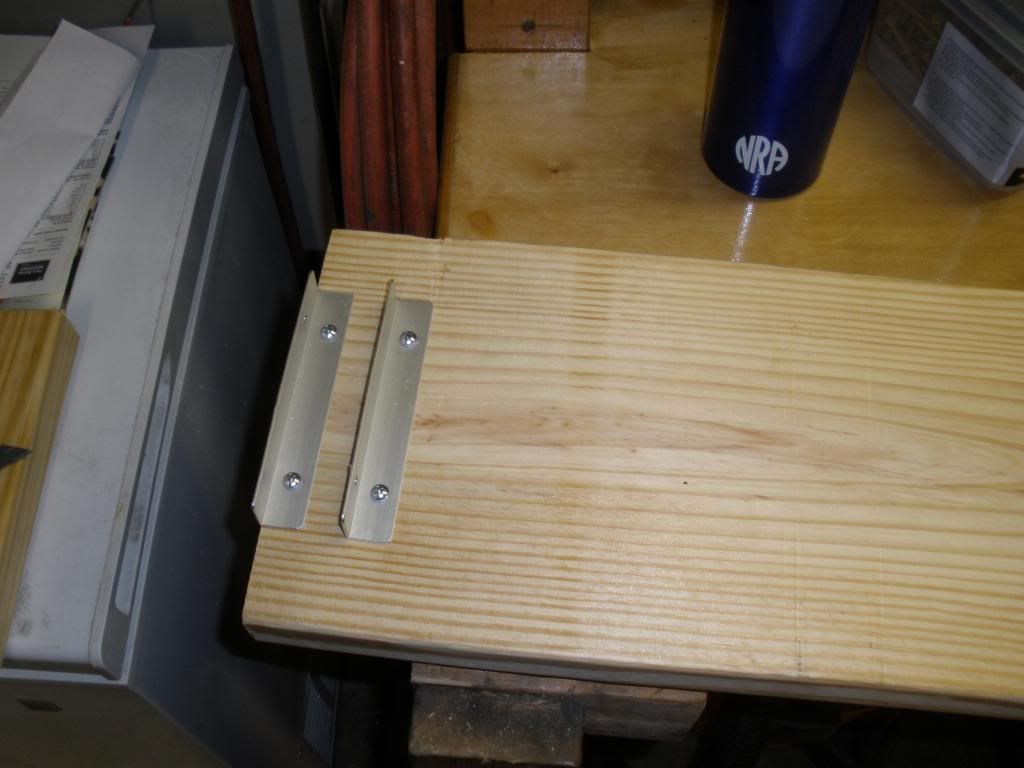
and 2 pieces of angle on the other end to fit over the 2x8 at the rear of the ramp.
It is important to be sure these side walks cannot slip away when loading or unloading so I attached hooks and use a tiedown strap to tie them to the center board at the front and metal strips on the ends of the 2x8x4ft part of the rear ramp.
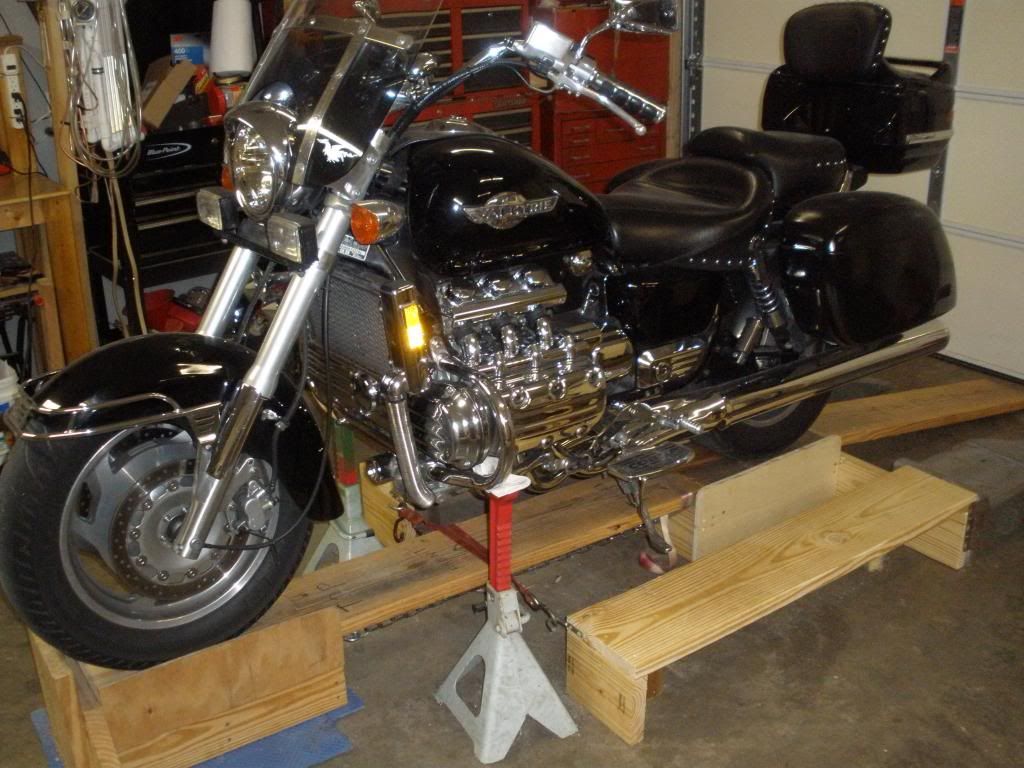

This is everything put together ready to ride the bike on.
I did/do set regular car ramps at the back end just in case I need to put my feet down when riding up onto the workstation. I have the car ramps here in the garage anyway so why not use them here just for insurance?
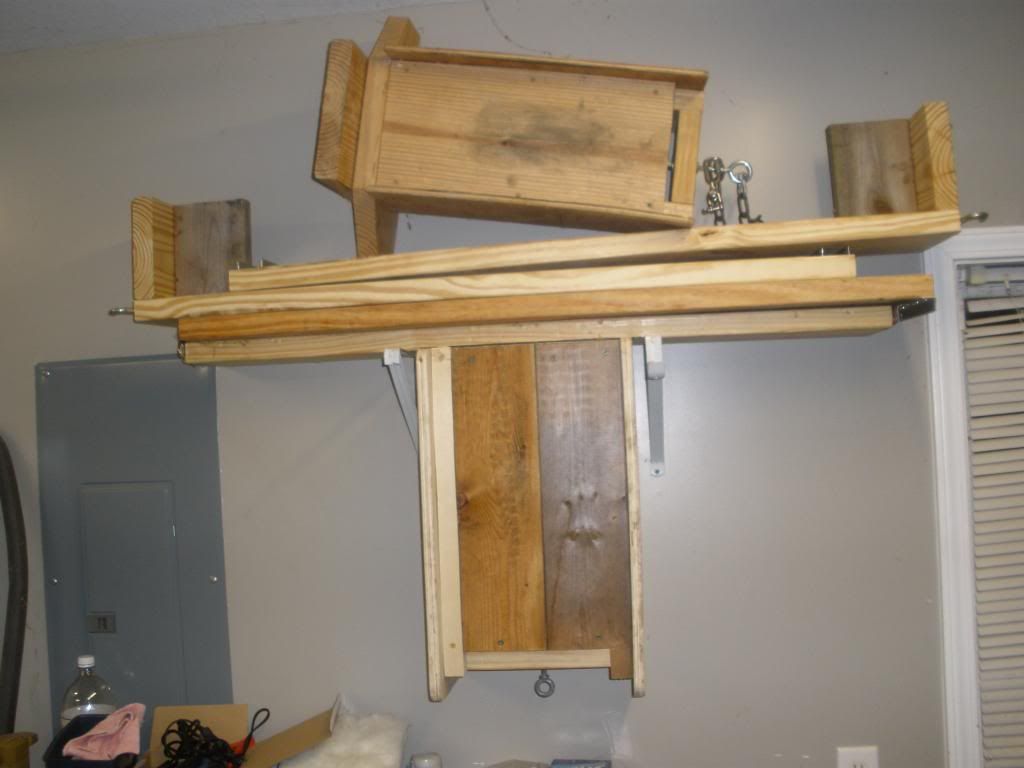
Side walks and rear loding ramp hanging on the wall.

The whole workstation hanging on the wall by means of a couple of shelf brakets screwed to wall studs.
Well that is pretty much it. Had I known they made lightweight aluminum bike jacks, I might have held out for the money to buy one. On the other hand, I did have nearly all of this stuff just collecting dust here anyway. And also, I am wondering if the bike jack might leak oil when it was hanging on the wall.
This system does seem to me to be very stable the way I use it and I am happy with it. Hey! There is no way it is going to leak down.
Bigwolf


