|
RustyValkry
|
 |
« on: March 20, 2021, 04:23:39 PM » |
|
I reassembled the final dive the other day and it went well. Based on some stuff I read after I had it back together I decided I should take it back out for a check which I did today. It took me five minutes to do what I wanted to do and an hour or two trying to get it back on without success. Am I missing something that I got lucky with the first time? Am I holding my mouth wrong?
Any hints about how to get the splines on the drive shaft to mesh with the U-joint would be appreciated. Are the splines designed to only mesh at one point? I can't see it if they are.
|
|
|
|
|
 Logged
|
|
|
|
Skinhead
Member

Posts: 8730
J. A. B. O. A.
Troy, MI
|
|
« Reply #1 on: March 20, 2021, 04:40:17 PM » |
|
No, they are just splined and will got together whenever the splines line up. The trick is to have the swingarm close to level and wiggle the drive shaft like you are using it to stir paint, Some time it helps to use the drive flange to rotate the ring gear/drive shaft.
|
|
|
|
|
Logged
|
 Troy, MI |
|
|
|
RustyValkry
|
|
« Reply #2 on: March 20, 2021, 05:41:52 PM » |
|
No, they are just splined and will got together whenever the splines line up. The trick is to have the swingarm close to level and wiggle the drive shaft like you are using it to stir paint, Some time it helps to use the drive flange to rotate the ring gear/drive shaft.
Thanks for the reply, I'll try as you say though I've tried it level, above level, low as I could get it and everywhere between. I've had the drive flange in since I started with it and I also had the bike in gear, out of gear. I think it hates me.  |
|
|
|
|
Logged
|
|
|
|
hubcapsc
Member
Posts: 16788
upstate
South Carolina
|
|
« Reply #3 on: March 20, 2021, 05:47:32 PM » |
|
No, they are just splined and will got together whenever the splines line up. The trick is to have the swingarm close to level and wiggle the drive shaft like you are using it to stir paint, Some time it helps to use the drive flange to rotate the ring gear/drive shaft.
Thanks for the reply, I'll try as you say though I've tried it level, above level, low as I could get it and everywhere between. I've had the drive flange in since I started with it and I also had the bike in gear, out of gear. I think it hates me. Look up in the swingarm with a flashlight and see how the u-joint is hanging while you move the swingarm through its arc. Frank Smoak used to slide a bit of coax up the swingarm and under the u-joint, he'd get it lined up and slide the driveshaft up there till it just entered the u-joint and still had enough room to pull the coax back out. Or maybe, just try again... it is alternately frustrating and easy as crap...  -Mike |
|
|
|
|
Logged
|
|
|
|
|
..
|
|
« Reply #4 on: March 20, 2021, 06:06:02 PM » |
|
|
|
|
|
|
Logged
|
|
|
|
|
luftkoph
|
|
« Reply #5 on: March 20, 2021, 07:02:37 PM » |
|
I’ve got an old wooden yardstick I slide under the U joint to hold it up while sliding the drive shaft in.
|
|
|
|
|
Logged
|
Some day never comes
|
|
|
|
JimC
|
|
« Reply #6 on: March 20, 2021, 07:25:31 PM » |
|
Level the swing arm, look into it with a flash light,
take a 3/4 inch broom handle and move the Ujoint to see what way it wants to flop.
You want it to flop side to side, if it flops up and down it will flop down with any movement and the shaft will hit the top of the ujoint.
When it swings side to side the opening will pretty much be on the same plane as the shaft coming in. Line the opening of ujoint as close to center as you can, then push on the driveshaft till you feel it touch the joint, then wiggle it.
It usually falls right into place this way for me.
Good luck, Jim
|
|
|
|
« Last Edit: March 20, 2021, 07:29:44 PM by JimC »
|
Logged
|
Jim Callaghan SE Wisconsin
|
|
|
Tfrank59
Member
Posts: 1364
'98 Tourer
Western Washington

|
|
« Reply #7 on: March 20, 2021, 08:24:23 PM » |
|
Well I happen to have a spare driven flange that I can use to rotate the driveshaft while I’m trying to install the pumpkin. Without that, getting the driveshaft to align with the U joint would be a total bummer. I guess it wouldn’t help you much unless you have a spare flange laying around. I do know that holding the swing arm at just the right angle helps too, I can’t remember if it’s high or low but it’s in shoptalk where it talks about it
|
|
|
|
|
Logged
|
-Tom
Keep the rubber side down. USMC '78-'84
'98 Valkyrie, ‘02 VTX 1800, '96 Royal Star, '06 Drifter, '09 Bonneville, '10 KTM 530, '04 XR 650, '76 Bultaco, '81 CR 450, '78 GS 750...
|
|
|
|
RustyValkry
|
|
« Reply #8 on: March 20, 2021, 08:49:50 PM » |
|
Thanks for the response but I'm not a Facebooker. |
|
|
|
|
Logged
|
|
|
|
|
RustyValkry
|
|
« Reply #9 on: March 20, 2021, 09:01:54 PM » |
|
No, they are just splined and will got together whenever the splines line up. The trick is to have the swingarm close to level and wiggle the drive shaft like you are using it to stir paint, Some time it helps to use the drive flange to rotate the ring gear/drive shaft.
Thanks for the reply, I'll try as you say though I've tried it level, above level, low as I could get it and everywhere between. I've had the drive flange in since I started with it and I also had the bike in gear, out of gear. I think it hates me. Look up in the swingarm with a flashlight and see how the u-joint is hanging while you move the swingarm through its arc. Frank Smoak used to slide a bit of coax up the swingarm and under the u-joint, he'd get it lined up and slide the driveshaft up there till it just entered the u-joint and still had enough room to pull the coax back out. Or maybe, just try again... it is alternately frustrating and easy as crap... -Mike I see, it's not the angle of the dangle, but the drop of the flop. I'll try that tomorrow. Yes, on the trying it again, eventually he law of averages has to kick in and, having tried enough, it'll work once. |
|
|
|
« Last Edit: March 20, 2021, 09:12:19 PM by RustyValkry »
|
Logged
|
|
|
|
|
RustyValkry
|
|
« Reply #10 on: March 20, 2021, 09:14:07 PM » |
|
I’ve got an old wooden yardstick I slide under the U joint to hold it up while sliding the drive shaft in.
I thought about sliding something up there but not being my own home I don't have as much 'stuff' laying around to work with. At home I have a nice steel yard stick that would probably work. |
|
|
|
|
Logged
|
|
|
|
|
RustyValkry
|
|
« Reply #11 on: March 20, 2021, 09:17:59 PM » |
|
Well I happen to have a spare driven flange that I can use to rotate the driveshaft while I’m trying to install the pumpkin. Without that, getting the driveshaft to align with the U joint would be a total bummer. I guess it wouldn’t help you much unless you have a spare flange laying around. I do know that holding the swing arm at just the right angle helps too, I can’t remember if it’s high or low but it’s in shoptalk where it talks about it
I've been using the drive flange. I've also been playing with the front half of the U-joint that's on the output shaft. I can get a vice grip or channel lock on it and spin it with the trans in neutral. It's maddening that I can get it to the point that the studs are into the holes and I can feel the spring moving but it must just be at the wrong angle by a smidge. I thought maybe the spring might be jammed on the drive shaft but I can move it with a screw driver. |
|
|
|
|
Logged
|
|
|
|
|
Chrisj CMA
|
|
« Reply #12 on: March 21, 2021, 05:43:18 AM » |
|
Just giggle the final drive harder, it’ll slip in
|
|
|
|
|
Logged
|
|
|
|
Daniel Meyer
Member
Posts: 5493
Author. Adventurer. Electrician.
The State of confusion.
|
|
« Reply #13 on: March 21, 2021, 06:17:09 AM » |
|
1)insert rear drive/shaft--get the 4 studs started in the holes
2) raise swing arm as high as possible
3) wiggle the crap out of it.
It will go home, every time, 5 seconds or less.
|
|
|
|
|
Logged
|
CUAgain, Daniel Meyer  |
|
|
|
RustyValkry
|
|
« Reply #14 on: March 21, 2021, 07:09:06 AM » |
|
1)insert rear drive/shaft--get the 4 studs started in the holes
2) raise swing arm as high as possible
3) wiggle the crap out of it.
It will go home, every time, 5 seconds or less.
Just giggle the final drive harder, it’ll slip in
I've tried everything . . . it hates me I tell you!  I've got ideas from this thread. Thanks to all. I'm lucky I haven't pushed the bike off the jack. Even with the wheels locked I end up pushing the bike, jack and all, across the floor. |
|
|
|
|
Logged
|
|
|
|
|
Jess from VA
|
|
« Reply #15 on: March 21, 2021, 07:52:35 AM » |
|
For all the world, this thread reminds me of virgin sex (vaguely, it's been quite a few decades).  The first time I poked the drive shaft up there, it slid right in on the first try. And I was like, what's the big deal? (I should have stopped there) And you haven't even got to the Ujoint boot yet (which never slipped right on, ever). |
|
|
|
|
Logged
|
|
|
|
|
0leman
|
|
« Reply #16 on: March 21, 2021, 08:31:55 AM » |
|
Rusty, I know you probably don't have them handy, but if one had two jack stands to put under the crash bars, it would help in the stability of the bike on the lift. Use them every time I have Valk in the air.
As far as getting the drive shaft into the U-Joint, it a crap shoot. About half the time she slides in with just a bit of jiggling, other times, takes a lot longer and maybe a few choice words.
|
|
|
|
|
Logged
|
2006 Shadow Spirit 1100 gone but not forgotten
1999 Valkryie I/S Green/Silver
|
|
|
hubcapsc
Member
Posts: 16788
upstate
South Carolina
|
|
« Reply #17 on: March 21, 2021, 08:55:50 AM » |
|
I re-read the posts in this thread, and scanned the pictures in your previous posts... you do have the shocks off? I jamb a board into the scissors of my jack to lock it... I barely lift my bike off the ground.  Besides the shocks, I remove the rear fender section. When I'm ready to reinstall the final+drive-shaft, my bike looks like this: 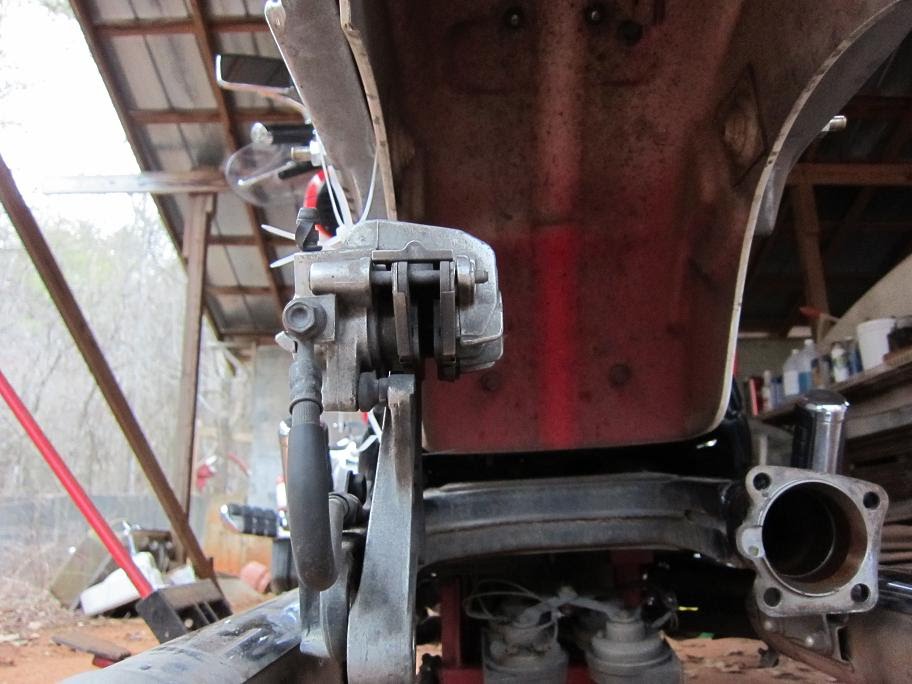 -Mike |
|
|
|
|
Logged
|
|
|
|
|
RustyValkry
|
|
« Reply #18 on: March 21, 2021, 01:11:45 PM » |
|
For all the world, this thread reminds me of virgin sex (vaguely, it's been quite a few decades). The first time I poked the drive shaft up there, it slid right in on the first try. And I was like, what's the big deal? (I should have stopped there) And you haven't even got to the Ujoint boot yet (which never slipped right on, ever). I find the boot to be a piece of cake - once I figured out to level the swingarm. I've had the front of the boot off a number of times. Yes, the first time I put the final drive in it was easy. I just KNEW when I was contemplating taking it back off I was asking for trouble and I was right. |
|
|
|
|
Logged
|
|
|
|
|
RustyValkry
|
|
« Reply #19 on: March 21, 2021, 01:15:26 PM » |
|
Rusty, I know you probably don't have them handy, but if one had two jack stands to put under the crash bars, it would help in the stability of the bike on the lift. Use them every time I have Valk in the air.
As far as getting the drive shaft into the U-Joint, it a crap shoot. About half the time she slides in with just a bit of jiggling, other times, takes a lot longer and maybe a few choice words.
You're right I don't have any jackstands with me. Add to that the crash bars are still off so I had to resort to using small pieces of 4x4 plus a piece of 1x3 to block up the front. I took my heaviest tool box and laid it on the luggage rack as well which helps - as long as it doesn't fall on me when I'm rocking the bike around fighting with the final drive. |
|
|
|
|
Logged
|
|
|
|
|
RustyValkry
|
|
« Reply #20 on: March 21, 2021, 01:23:04 PM » |
|
I re-read the posts in this thread, and scanned the pictures in your previous posts... you do have the shocks off? I jamb a board into the scissors of my jack to lock it... I barely lift my bike off the ground. Besides the shocks, I remove the rear fender section. When I'm ready to reinstall the final+drive-shaft, my bike looks like this: -Mike My shocks, pipes, rear foot rest/exhaust mount, rear fender section, as well as the caliper and bracket . . . all off. My jack is on the lowest lockable height. It's already low enough that it's difficult for me to work on the bike, I have to sit on the floor which is NOT comfortable for my old body, although the worst part is getting up. |
|
|
|
|
Logged
|
|
|
|
|
RustyValkry
|
|
« Reply #21 on: March 22, 2021, 06:56:50 PM » |
|
I tried all the things suggested in this thread and got nowhere. I went as far as removing the U-joint again just to test fit it onto the drive shaft to insure the locking ring wasn't stopping the drive shaft from mating to the splines, they weren't. I verified I had the U-joint in with the long spline side forward.
This has gotten to the point of being ridiculous. I've tried sliding the final drive and drive shaft in from every angle possible. I tried rotating the U-joint as suggested so the rear half moved horizontally not vertically, no go. My kingdom for a simple, straightforward belt drive.
At this point I don't know what I'm going to do. Don't know how many more times I can wrestle that damed diff. into that tube. I've begun to consider pulling the swing arm but I'd need to buy the bits needed and I'm not sure that would be much easier.
|
|
|
|
|
Logged
|
|
|
|
Valker
Member
Posts: 3018
Wahoo!!!!
Texas Panhandle
|
|
« Reply #22 on: March 22, 2021, 07:04:19 PM » |
|
You do realize that you can remove the front boot and actually touch the u-joint. You might be able to manipulate the joint from there.
|
|
|
|
|
Logged
|
I ride a motorcycle because nothing transports me as quickly from where I am to who I am.
|
|
|
|
turtle254
|
|
« Reply #23 on: March 22, 2021, 07:08:30 PM » |
|
With the bike in "gear", use the drive flange to slowly tune the drive line as you push in.
|
|
|
|
|
Logged
|
|
|
|
|
RustyValkry
|
|
« Reply #24 on: March 22, 2021, 09:53:37 PM » |
|
With the bike in "gear", use the drive flange to slowly tune the drive line as you push in.
I've tried that but I'll undoubtedly try it again. When pushing on the diff. I can feel the splines hitting as I spin the flange, I just can't get them to mesh. |
|
|
|
|
Logged
|
|
|
|
|
Bone
|
|
« Reply #25 on: March 23, 2021, 01:42:53 AM » |
|
My first time with the problem of alignment I tried several things. The one that worked for me
was supporting the driveshaft as it tried to enter the yoke. I took a long piece of black 3/4 inch
wide steel banding used in packaging. The narrow banding is to flimsy.
I folded under about 6 inches of the banding. Laying flat on the floor you could see the end was
elevated with the driveshaft laying on it the end of the shaft was elevated about 1 inch.
Now laying in the shaft tube would let the mesh enter the yoke. I bent the other end of the band
so the steel banding wouldn't slide to far into the tube and not lift the end.
Try it laying on the floor the banding makes a gradual ramp lifting the shafts end.
Alcohol before attempting this is a guaranteed failure.
|
|
|
|
|
Logged
|
|
|
|
Tfrank59
Member
Posts: 1364
'98 Tourer
Western Washington
|
|
« Reply #26 on: March 23, 2021, 04:59:24 AM » |
|
With the bike in "gear", use the drive flange to slowly tune the drive line as you push in.
I've tried that but I'll undoubtedly try it again. When pushing on the diff. I can feel the splines hitting as I spin the flange, I just can't get them to mesh. You still haven’t gotten this huh? Try this, like what everybody’s saying, have the bike in gear, suspend the swing arm with a bungee cord and instead of having the spring on the drive shaft, try getting it to mesh without the spring on there first. I wonder if the ends of your splines are getting buggered up at this point so that they don’t want to mesh? Maybe you can get the thing to go in there without the spring on it and then If you succeed without the spring, then assemble it with the spring. It’s just a thought, mght be worth a try |
|
|
|
« Last Edit: March 23, 2021, 05:03:32 AM by Tfrank59 »
|
Logged
|
-Tom
Keep the rubber side down. USMC '78-'84
'98 Valkyrie, ‘02 VTX 1800, '96 Royal Star, '06 Drifter, '09 Bonneville, '10 KTM 530, '04 XR 650, '76 Bultaco, '81 CR 450, '78 GS 750...
|
|
|
|
jnicks01
|
|
« Reply #27 on: March 23, 2021, 05:00:58 AM » |
|
Trick I tried was to get it bumped into the yoke and then just give the rear wheel a little spin back and forth and it just "finds" its way into the u joint. I fought it for 30 minutes too before reading that trick somewhere. It takes me 5 seconds now.
|
|
|
|
|
Logged
|
I want to scoop out your brains and eat your knowledge.  |
|
|
|
RustyValkry
|
|
« Reply #28 on: March 23, 2021, 07:08:30 AM » |
|
With the bike in "gear", use the drive flange to slowly tune the drive line as you push in.
I've tried that but I'll undoubtedly try it again. When pushing on the diff. I can feel the splines hitting as I spin the flange, I just can't get them to mesh. You still haven’t gotten this huh? Try this, like what everybody’s saying, have the bike in gear, suspend the swing arm with a bungee cord and instead of having the spring on the drive shaft, try getting it to mesh without the spring on there first. I wonder if the ends of your splines are getting buggered up at this point so that they don’t want to mesh? Maybe you can get the thing to go in there without the spring on it and then If you succeed without the spring, then assemble it with the spring. It’s just a thought, mght be worth a try I was concerned about whether I had done something to the splines of retainer with all my banging it in and out so I pulled the U-joint out again and test fit it onto the drive shaft splines, it fit fine. It's all a matter of alignment and I just haven't hit it again. As I mentioned, I had it together once and it took about 10 minutes of trying. This time - not so much. I haven't tried bungees yet but that's a thought. I've got a piece of 4x4 and a piece of 2x4 that I've used to block up the swingarm at various heights. |
|
|
|
« Last Edit: March 23, 2021, 07:12:57 AM by RustyValkry »
|
Logged
|
|
|
|
|
RustyValkry
|
|
« Reply #29 on: March 23, 2021, 07:16:31 AM » |
|
Trick I tried was to get it bumped into the yoke and then just give the rear wheel a little spin back and forth and it just "finds" its way into the u joint. I fought it for 30 minutes too before reading that trick somewhere. It takes me 5 seconds now.
I've tried spinning the drive shaft with the drive flange and I've tried putting a vice grip on the output side of the U-joint and spinning it that way. I've tried with the tranny in gear and out. I've tried with the driveshaft end of the U-joint moving up and down and I've tried it with it moving side to side. |
|
|
|
|
Logged
|
|
|
|
|
Chrisj CMA
|
|
« Reply #30 on: March 23, 2021, 07:49:06 AM » |
|
Trick I tried was to get it bumped into the yoke and then just give the rear wheel a little spin back and forth and it just "finds" its way into the u joint. I fought it for 30 minutes too before reading that trick somewhere. It takes me 5 seconds now.
I've tried spinning the drive shaft with the drive flange and I've tried putting a vice grip on the output side of the U-joint and spinning it that way. I've tried with the tranny in gear and out. I've tried with the driveshaft end of the U-joint moving up and down and I've tried it with it moving side to side. Starting to sound like a weird Dr Seuse book |
|
|
|
|
Logged
|
|
|
|
Jersey
Member
Posts: 545
VRCC #37540
Southern Maryland
|
|
« Reply #31 on: March 23, 2021, 07:56:34 AM » |
|
I've tried spinning the drive shaft with the drive flange and I've tried putting a vice grip on the output side of the U-joint and spinning it that way. I've tried with the tranny in gear and out. I've tried with the driveshaft end of the U-joint moving up and down and I've tried it with it moving side to side.
Not sure if you tried this, but step back from it... have a beer, forget about it, good night's sleep, try again the next day with a fresh look. Sometimes this happens and a break may help. You'll get it! |
|
|
|
|
Logged
|
Jersey
|
|
|
|
RustyValkry
|
|
« Reply #32 on: March 23, 2021, 09:05:25 AM » |
|
I've tried spinning the drive shaft with the drive flange and I've tried putting a vice grip on the output side of the U-joint and spinning it that way. I've tried with the tranny in gear and out. I've tried with the driveshaft end of the U-joint moving up and down and I've tried it with it moving side to side.
Not sure if you tried this, but step back from it... have a beer, forget about it, good night's sleep, try again the next day with a fresh look. Sometimes this happens and a break may help. You'll get it! Taking breaks from it is built in since I can't wrestle the diff. for more than :30 to :45 minutes at a time. After that time I'm so tired and pissed off that I just walk away and start working on some other part of the bike. Problem is soon there won't be any other part of the bike to work on. |
|
|
|
|
Logged
|
|
|
|
|
Chrisj CMA
|
|
« Reply #33 on: March 23, 2021, 09:19:40 AM » |
|
Since you’re sitting on the floor while doing this. Make sure you’re sitting right behind the opening of the swing arm. You can see the drive shaft start into the tunnel. And make adjustments up or down then when she stops, jiggle the final drive vigorously while applying a little pressure and it will pop right in. Sitting right behind makes a big difference
|
|
|
|
|
Logged
|
|
|
|
hubcapsc
Member
Posts: 16788
upstate
South Carolina
|
|
« Reply #34 on: March 23, 2021, 09:40:43 AM » |
|
I think there's some simple weirdo thing going on that blocking
you from doing this trivial thing when you're obviously competent
enough to refurbish stuff all over the rest of the bike... it is
supposed to take a couple of tries sometimes, but to be such
a roadblock is nothing I ever heard of...
-Mike
|
|
|
|
|
Logged
|
|
|
|
Jersey
Member
Posts: 545
VRCC #37540
Southern Maryland
|
|
« Reply #35 on: March 23, 2021, 10:16:53 AM » |
|
You may have said, but did you try fitting in JUST the drive without the hub connected to make sure it goes in properly? I've done that before to get it all prep'd, then I added the hub and slide it in easy-peasy.
You know... eventually someone is going to volunteer to ride over and help you out! What area of Jersey are you in? Maybe there's someone nearby.
|
|
|
|
« Last Edit: March 23, 2021, 10:23:39 AM by Jersey »
|
Logged
|
Jersey
|
|
|
|
Bagger John - #3785
|
|
« Reply #36 on: March 23, 2021, 10:41:43 AM » |
|
Have any moly lube on the shaft splines where they mate with the U-joint?
I find this helps. Occasionally I'll get one that's a slight PITA to re-install but most times they'll go right back in if lubed sufficiently.
|
|
|
|
|
Logged
|
|
|
|
|
Rio Wil
|
|
« Reply #37 on: March 23, 2021, 05:52:33 PM » |
|
Raise the end of the swing arm up just slightly more than level. Insert drive shaft/final drive.....a few wiggles and it will go right in....
|
|
|
|
|
Logged
|
|
|
|
RNFWP
Member
Posts: 425
"What color blue is that?"
Greenville, SC
|
|
« Reply #38 on: March 23, 2021, 06:10:17 PM » |
|
Trick I tried was to get it bumped into the yoke and then just give the rear wheel a little spin back and forth and it just "finds" its way into the u joint. I fought it for 30 minutes too before reading that trick somewhere. It takes me 5 seconds now.
I've tried spinning the drive shaft with the drive flange and I've tried putting a vice grip on the output side of the U-joint and spinning it that way. I've tried with the tranny in gear and out. I've tried with the driveshaft end of the U-joint moving up and down and I've tried it with it moving side to side. Starting to sound like a weird Dr Seuse book |
|
|
|
|
Logged
|
"My dog is one of my favorite people"
|
|
|
|
RustyValkry
|
|
« Reply #39 on: March 23, 2021, 07:29:27 PM » |
|
I thought I posted to this thread from my phone this afternoon but either I posted to the wrong thread or it never made it.
I started working on it at about 12:30 this afternoon and within 10 minutes the drive shaft slipped into the U-joint. Things started going quickly after that and by the end of the day I had the rear together, rear brakes assembled and bled, throttle cables connected and working. I bunged the filler neck on the tank with a rubber stopper and turned it upside down to get to the last part of the tank the Evapo-rust hadn't gotten to yet.
I've got to get the tank washed out, rinsed, dried and installed. Then the exhaust system installed, shifter installed, shocks installed and it should be ready for a test ride. Lots of odds and ends after that but if the test ride goes well I'll be relieved.
|
|
|
|
|
Logged
|
|
|
|
|


