John Schmidt
Member

Posts: 15392
a/k/a Stuffy. '99 I/S Valk Roadsmith Trike
De Pere, WI (Green Bay)
|
 |
« on: November 11, 2021, 09:51:29 PM » |
|
Anybody ever do it, more specifically on an '08 Highlander SUV. I can buy a new one for just over $200 from Rock Auto which is a lot less than buying it through a dealer, mine is the electronic type that doesn't use fluid. I'm tempted to do it myself since the mechanic that just replaced some bushings for me(I furnished them) told me the book calls for 13 hrs. labor. At his $50/hr. rate that's over $650 plus the cost of the rack and tax. We're now right at $900 total. Mechanically I'm more than able, having twisted wrenches since childhood. Physically, I'm not sure I can handle crawling around under the car for an extended period. That said, does anyone have some input as to what's involved. The mechanic I spoke of checked it out while on the lift doing the bushings, told me there is some play in there but if I can live with it I should be ok for another year. Not my choice...can already feel some movement going over rough terrain or coming off the driveway and hitting the gutter at the street. I can also hear a slight clunk at times, add to that a tendency to wander a bit at highway speed...especially if windy. The car only has 87k on it and is in good shape except for some damage across the hood which is scheduled for repair after T'giving. Any suggestions or observations are appreciated.
If I do it, I'd have to use my son-in-laws shop where he keeps the trucks for his business and I'm afraid I'd tie up the floor space for more than a day.
|
|
|
|
|
 Logged
|
|
|
|
|
Thunderbolt
|
|
« Reply #1 on: November 12, 2021, 03:24:42 AM » |
|
John just run that credit score up a little and get you a new model.  |
|
|
|
|
Logged
|
|
|
|
hubcapsc
Member
Posts: 16824
upstate
South Carolina
|
|
« Reply #2 on: November 12, 2021, 04:30:22 AM » |
|
I had the steering rack, bushings, control arms, shocks and basically everything that moved changed out on my old truck when I got it a few years ago. 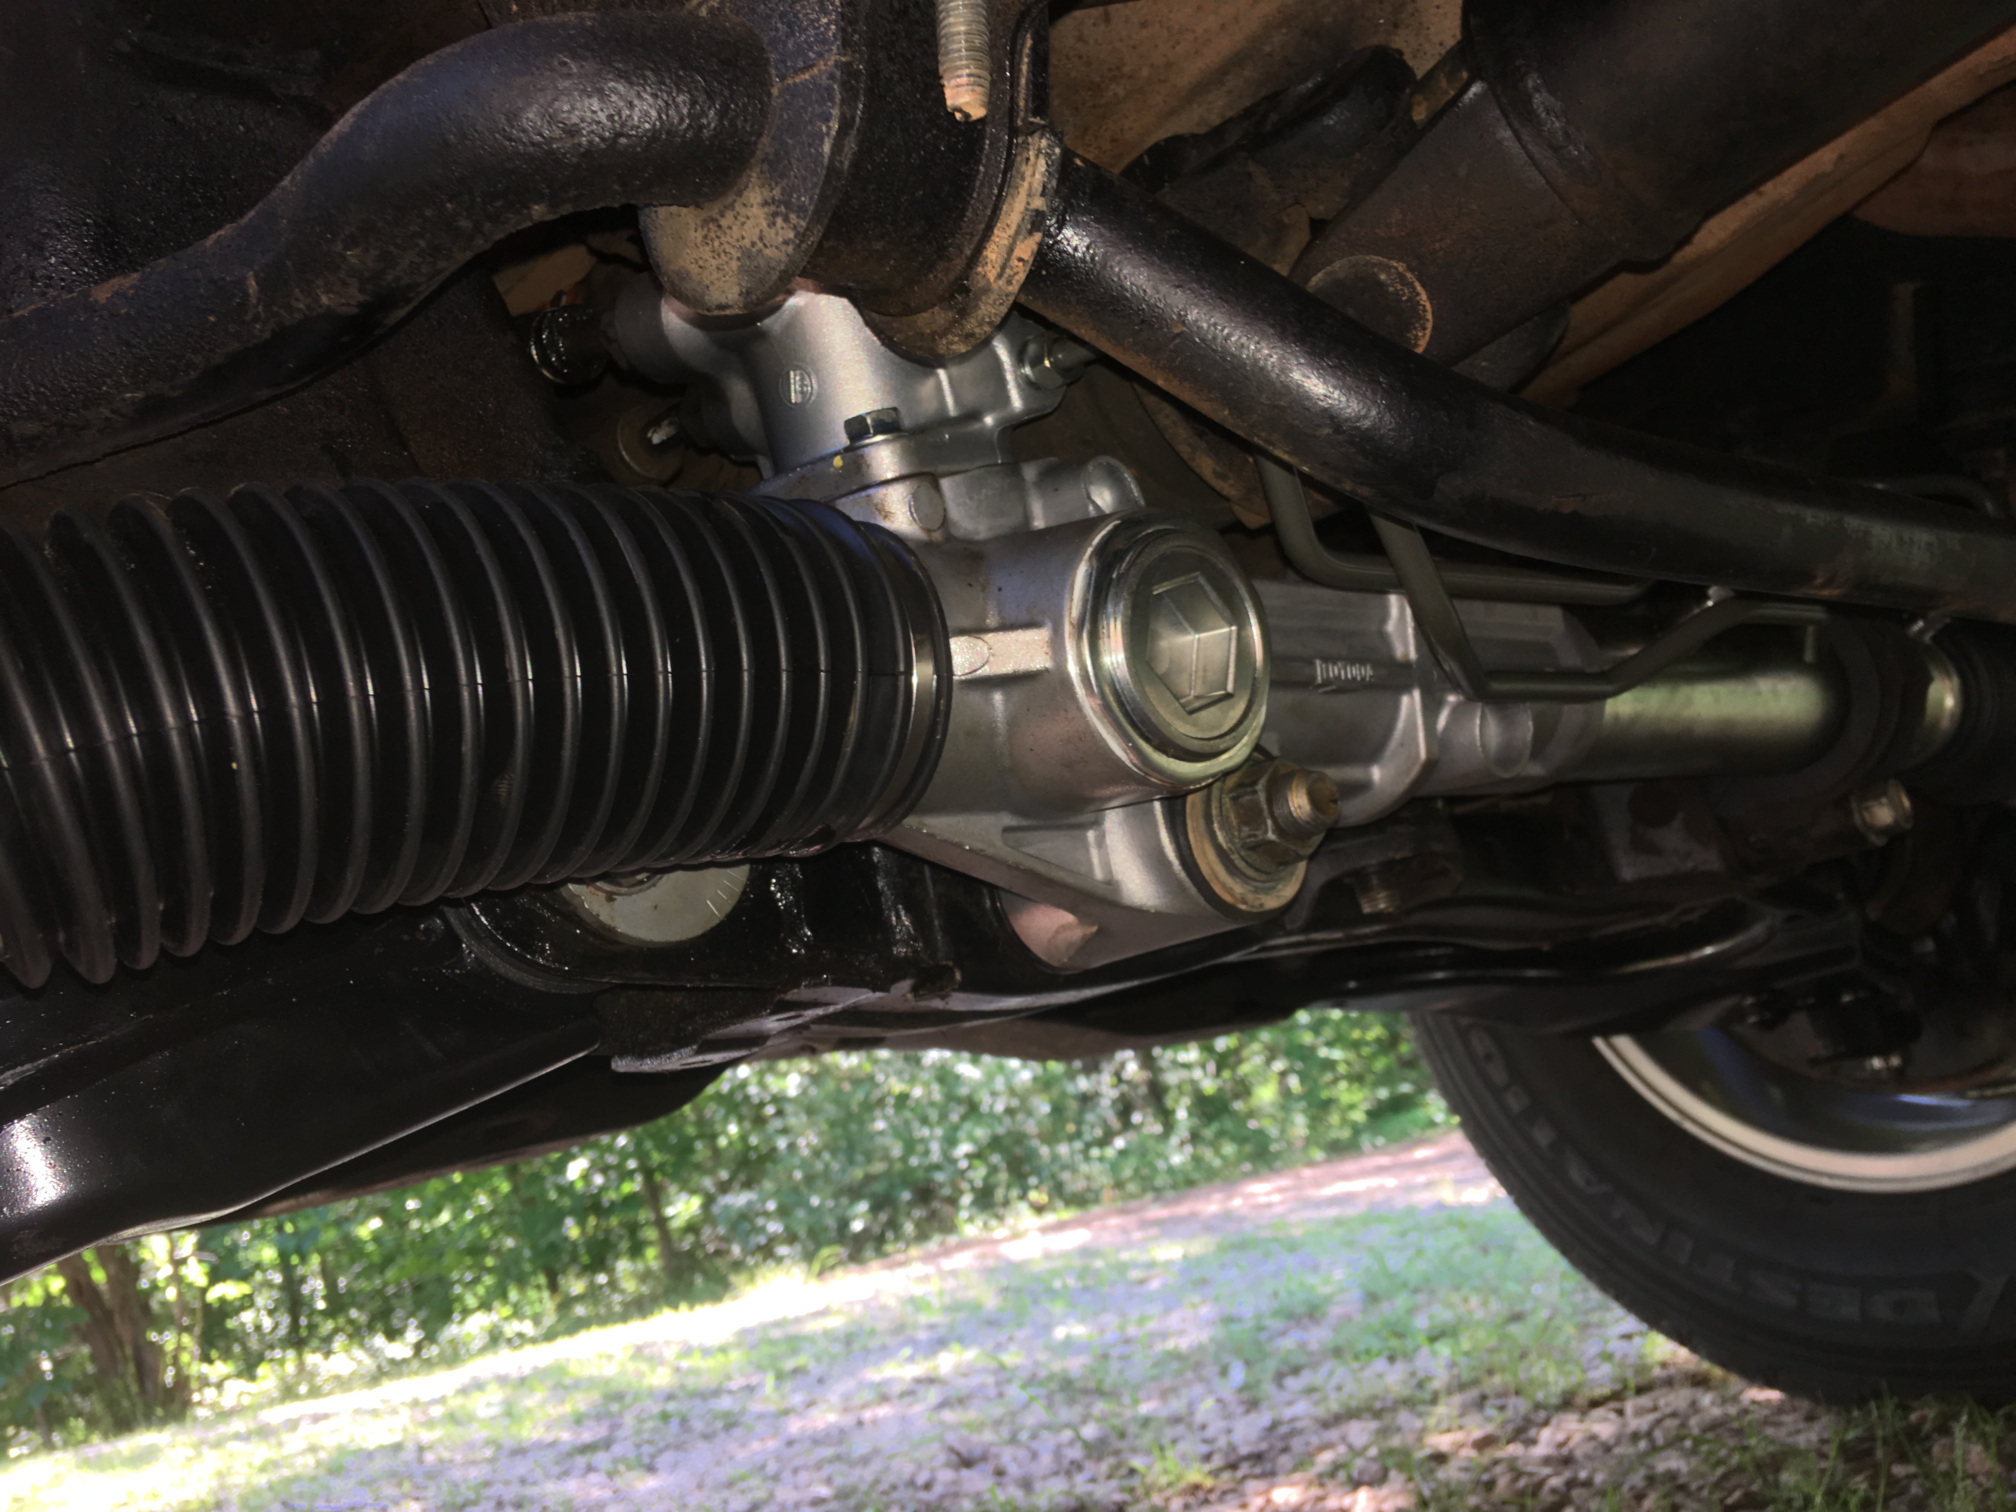 You couldn't pay me enough to try and change all that stuff out while lying in the driveway, and my truck is way off the ground... Having all that stuff solid and tight is real nice, though ... -Mike |
|
|
|
|
Logged
|
|
|
|
Rams
Member
Posts: 16939
So many colors to choose from yet so few stand out
Covington, TN
|
|
« Reply #3 on: November 12, 2021, 05:14:07 AM » |
|
Having the knowledge and skill/talent/tools to do this is one thing, being physically able is totally different. Having to borrow that one needed tool (the lift) helps me make an easy decision.
I've done a lot of things in the past in my own shop with my cars/trucks on my lift but, there's no way I'd attempt this with four wheels on the ground/concrete. I'd pay the mechanic if I couldn't live with it as it is.
Just my opinion, your choice.
Edited: Some cities have DIY shops that will rent the DIYer a workspace with a lift, have you looked into that?
Rams
|
|
|
|
« Last Edit: November 12, 2021, 06:06:48 AM by Rams »
|
Logged
|
VRCC# 29981
Learning the majority of life's lessons the hard way.
Every trip is an adventure, enjoy it while it lasts.
|
|
|
|
scooperhsd
|
|
« Reply #4 on: November 12, 2021, 05:41:38 AM » |
|
It cost me $1800 to have it done on my 2000 New Beetle recently, and then I had to spend another $200 for an alingment.
|
|
|
|
|
Logged
|
|
|
|
|
Robert
|
|
« Reply #5 on: November 12, 2021, 10:32:46 AM » |
|
Nope not a job for you 17.5 hrs 2 wheel drive and at that labor rate jump on it.
7. REMOVE FRONT WHEELS
8. REMOVE ENGINE UNDER COVER ASSEMBLY
9. REMOVE NO. 1 ENGINE UNDER COVER
10. REMOVE NO. 2 ENGINE UNDER COVER
11. REMOVE FLOOR UNDER COVER LH
12. REMOVE FRONT FENDER MOULDING SUB-ASSEMBLY LH See: Mud Flap > Removal and Replacement > Removal
13. REMOVE FRONT FENDER MOULDING SUB-ASSEMBLY RH See: Front Fender Liner > Removal and Replacement > Removal
14. REMOVE FRONT FENDER LINER LH See: Front Fender Liner > Removal and Replacement > Removal
15. REMOVE FRONT FENDER LINER RH See: Front Fender Liner > Removal and Replacement > Removal
16. REMOVE FRONT FENDER APRON SEAL LH
17. REMOVE FRONT FENDER APRON SEAL RH
18. DRAIN ENGINE OIL
19. DRAIN ENGINE COOLANT
20. DRAIN AUTOMATIC TRANSAXLE FLUID
21. REMOVE FRONT WIPER ARM AND BLADE ASSEMBLY LH See: Wiper Motor > Removal and Replacement > Removal
22. REMOVE FRONT WIPER ARM AND BLADE ASSEMBLY RH See: Wiper Motor > Removal and Replacement > Removal
23. REMOVE COWL TOP VENTILATOR LOUVER SUB-ASSEMBLY See: Wiper Motor > Removal and Replacement > Removal
24. REMOVE WINDSHIELD WIPER MOTOR AND LINK ASSEMBLY See: Wiper Motor > Removal and Replacement > Removal
25. REMOVE OUTER COWL TOP PANEL SUB-ASSEMBLY
26. REMOVE V-BANK COVER SUB-ASSEMBLY
27. REMOVE NO. 2 AIR CLEANER INLET
28. REMOVE NO. 1 AIR CLEANER INLET
29. REMOVE AIR CLEANER CAP SUB-ASSEMBLY
30. REMOVE AIR CLEANER FILTER ELEMENT SUB-ASSEMBLY
31. REMOVE AIR CLEANER CASE SUB-ASSEMBLY
32. REMOVE AIR CLEANER BRACKET
33. SEPARATE BRAKE MASTER CYLINDER RESERVOIR ASSEMBLY
34. REMOVE RESERVOIR BRACKET
35. REMOVE NO. 2 ENGINE MOUNTING STAY RH
36. REMOVE ENGINE MOVING CONTROL ROD
37. DISCONNECT NO. 1 FUEL VAPOR FEED HOSE
38. DISCONNECT NO. 1 RADIATOR HOSE
39. DISCONNECT NO. 2 RADIATOR HOSE
40. DISCONNECT HEATER WATER OUTLET HOSE B
41. DISCONNECT HEATER WATER INLET HOSE B
42. DISCONNECT FUEL TUBE SUB-ASSEMBLY
43. DISCONNECT OIL COOLER INLET HOSE
44. DISCONNECT OIL COOLER OUTLET HOSE
45. DISCONNECT TRANSMISSION CONTROL CABLE ASSEMBLY
46. DISCONNECT ENGINE WIRE
47. DISCONNECT UNION TO CHECK VALVE HOSE
48. REMOVE PROPELLER WITH CENTER BEARING SHAFT ASSEMBLY (for 4WD)
49. REMOVE TAIL EXHAUST PIPE ASSEMBLY
50. REMOVE CENTER EXHAUST PIPE ASSEMBLY
51. REMOVE FRONT NO. 3 EXHAUST PIPE SUB-ASSEMBLY
52. REMOVE FRONT EXHAUST PIPE ASSEMBLY
53. SEPARATE FRONT STABILIZER LINK ASSEMBLY LH See: Suspension Strut / Shock Absorber > Removal and Replacement > Removal
54. SEPARATE FRONT STABILIZER LINK ASSEMBLY RH
HINT: Perform the same procedure as for the LH side.
55. REMOVE FRONT AXLE HUB NUT LH
56. REMOVE FRONT AXLE HUB NUT RH
HINT: Perform the same procedure as for the LH side.
57. DISCONNECT FRONT SPEED SENSOR LH See: Wheel Hub > Removal and Replacement > Removal
58. DISCONNECT FRONT SPEED SENSOR RH
HINT: Perform the same procedure as for the LH side.
59. SEPARATE STEERING INTERMEDIATE SHAFT ASSEMBLY
SST: 09960-20010
09961-02010
NOTICE:
- When securing SST to the steering knuckle, be sure to tighten the string of SST to prevent it from falling.
- Install SST so that A and B are parallel.
- Be sure to place the wrench on the part indicated in the illustration.
- Do not damage the front disc brake dust cover.
- Do not damage the ball joint dust cover.
- Do not damage the steering knuckle.
61. SEPARATE TIE ROD ASSEMBLY RH
HINT: Perform the same procedure as for the LH side.
62. SEPARATE NO. 1 FRONT SUSPENSION LOWER ARM LH See: Wheel Hub > Removal and Replacement > Removal
63. SEPARATE NO. 1 FRONT SUSPENSION LOWER ARM RH
HINT: Perform the same procedure as for the LH side.
64. SEPARATE FRONT AXLE ASSEMBLY LH See: Ball Joint > Removal and Replacement > Removal
65. SEPARATE FRONT AXLE ASSEMBLY RH
66. DISCONNECT DISCHARGE HOSE SUB-ASSEMBLY See: Compressor HVAC > Removal and Replacement > Removal
67. DISCONNECT SUCTION HOSE SUB-ASSEMBLY See: Compressor HVAC > Removal and Replacement > Removal
68. REMOVE ENGINE ASSEMBLY WITH TRANSAXLE
69. REMOVE FRONT NO. 1 STABILIZER BRACKET LH See: Stabilizer Bar, Sway Control > Removal and Replacement > Removal
70. REMOVE FRONT NO. 1 STABILIZER BRACKET RH See: Stabilizer Bar, Sway Control > Removal and Replacement > Removal
71. REMOVE FRONT STABILIZER BAR
72. REMOVE POWER STEERING LINK ASSEMBLY
|
|
|
|
« Last Edit: November 12, 2021, 10:36:45 AM by Robert »
|
Logged
|
“Some people see things that are and ask, Why? Some people dream of things that never were and ask, Why not? Some people have to go to work and don’t have time for all that.”
|
|
|
Wizzard
Member
Posts: 4044
Bald River Falls
Valparaiso IN
|
|
« Reply #6 on: November 12, 2021, 10:50:09 AM » |
|
If you are not sure you can handle laying on the ground under the vehicle then I would say doing it yourself is out.
A lift is critical to this operation.
|
|
|
|
|
Logged
|
 VRCC # 24157 |
|
|
John Schmidt
Member
Posts: 15392
a/k/a Stuffy. '99 I/S Valk Roadsmith Trike
De Pere, WI (Green Bay)
|
|
« Reply #7 on: November 12, 2021, 11:36:34 AM » |
|
Robert, some of those steps seem totally unnecessary but maybe they are...don't know since I've not got down and under for a look see. I've looked at procedures for other vehicles and it wasn't that involved. Pull the wheels Unbolt sway bar and move out of the way Unbolt the tie rod ends Remove the fluid lines if so equipped Loosen pinch bolt for the steering column rod Unbolt the R&P unit Remove unit with appropriate verbal commands(discretionary procedure)  Now you have me scared!  |
|
|
|
|
Logged
|
|
|
|
|
old2soon
|
|
« Reply #8 on: November 12, 2021, 01:29:46 PM » |
|
John-If you don't already have it you Might need it-the Service Manual for your vehicle Might be a gooder place to start. What $25 $50 or whatever could reduce the hair pullin and I KNOW my Valkyrie Clymer manual has lotsa Helpful picatures! I also KNOW that my Honda Valkyrie manual IS a slight bit more detailed But they Both Help. Is the procedure for YOUR VEHICLE-Not a Similar vehicle-available on line? That physical part you mentioned-I Am AWARE!  RIDE SAFE. |
|
|
|
|
Logged
|
Today is the tommorow you worried about yesterday. If at first you don't succeed screw it-save it for nite check. 1964 1968 U S Navy. Two cruises off Nam.
VRCCDS0240 2012 GL1800 Gold Wing Motor Trike conversion
|
|
|
|
matt
|
|
« Reply #9 on: November 12, 2021, 03:51:43 PM » |
|
John electronic racks also have a steer a head sensor that can give a strange feeling if out of calibration.
Also we have not had to replace alot of electronic racks mostly inner tie rods. Right now do not remember doing a highlander but other Toyota models also have huge labor times and most have not been that drastic. But laying on the ground could make it impossible or way harder than it needs to be.
I would jack up one front tire at a time and confirm its the rack not a tie rod inner or outer or even a lower ball joint
Matt
|
|
|
|
|
Logged
|
|
|
|
John Schmidt
Member
Posts: 15392
a/k/a Stuffy. '99 I/S Valk Roadsmith Trike
De Pere, WI (Green Bay)
|
|
« Reply #10 on: November 12, 2021, 04:12:11 PM » |
|
John electronic racks also have a steer a head sensor that can give a strange feeling if out of calibration.
Also we have not had to replace alot of electronic racks mostly inner tie rods. Right now do not remember doing a highlander but other Toyota models also have huge labor times and most have not been that drastic. But laying on the ground could make it impossible or way harder than it needs to be.
I would jack up one front tire at a time and confirm its the rack not a tie rod inner or outer or even a lower ball joint
Matt
Matt, thanks for the suggestions, I'll try checking the tie rod ends and ball joints. Sure be a lot easier, especially the tie rod ends. How does one determine & possibly calibrate the head sensor? |
|
|
|
|
Logged
|
|
|
|
|
matt
|
|
« Reply #11 on: November 12, 2021, 04:14:27 PM » |
|
That you need either a scan tool or get a 4 wheel alignment and ask them to also set sensor. A shop that has good equipment and does correct alignment should be able to check and fix if needed
|
|
|
|
|
Logged
|
|
|
|
|
matt
|
|
« Reply #12 on: November 12, 2021, 04:17:00 PM » |
|
I will try and look it up tomorrow as I believe some Toyota are done by just disconnecting battery and doing a few steps. If you want send plate # and state i should be able to pull vin # and check that out. If you don't want info in this thread just personal message me
Matt
|
|
|
|
|
Logged
|
|
|
|
h13man
Member
Posts: 1904
To everything there is an exception.
Indiana NW Central Flatlands
|
|
« Reply #13 on: November 13, 2021, 07:03:12 AM » |
|
$50 an hour is cheap labor John. I'm sure you're not a "spring chicken" like myself. Its all I can do to change oil in the vehicles nowadays. If you trust your mechanic, let him do the cursing with pay. |
|
|
|
|
Logged
|
|
|
|
|
Robert
|
|
« Reply #14 on: November 13, 2021, 07:57:28 AM » |
|
Some steps may not be required but the rack is located in between the subframe and body.. I only gave the steps by the manual that they say are required and we all know that we can cut corners. But what I have noticed on doing a job first time the time to do it is usually pretty on time.
The racks can be mounted in many different positions which would lend to different times for different cars. Some are easy and mounted under the subframe and others are mounted between the subframe and the body, which make it harder depending on how close they have made things. Only when you look at it will you be able to judge how to do it that will best for you.
I have done a few with the rack mounted between subframe and body and some were easy and some were bad. You will have to see for yourself. But in any case its not a job I would want to do on the ground.
Matt made some good suggestions but steering angle sensor will require a scan tool in most cases and will not calibrate from disconnecting the battery, attaching it again.
Most modern cars do have a steering angle sensor its not only electric racks.
|
|
|
|
« Last Edit: November 13, 2021, 08:08:52 AM by Robert »
|
Logged
|
“Some people see things that are and ask, Why? Some people dream of things that never were and ask, Why not? Some people have to go to work and don’t have time for all that.”
|
|
|
John Schmidt
Member
Posts: 15392
a/k/a Stuffy. '99 I/S Valk Roadsmith Trike
De Pere, WI (Green Bay)
|
|
« Reply #15 on: November 13, 2021, 09:35:50 AM » |
|
Robert, I'll check the tie rods and ball joints first. If those are ok then I'll try to live with it another year so I can then do as Terry, a/k/a Thunderbolt, said....get a new(er) ride. By then I'll have the trike note mostly paid(low interest so not using savings) and my income also will increase about $200/mo. That will more than cover a car/truck payment without dipping into the cookie jar...at least that's my plan. |
|
|
|
|
Logged
|
|
|
|
|


