|
Boxcar01
|
 |
« on: February 23, 2022, 10:07:50 PM » |
|
Some idiot in the past must’ve torqued to double factory specs the 4 nuts holding the final drive on my Valkyrie. Now I’m in the middle of what was a final drive service and rear wheel replacement and I have 3 of 4 nuts that absolutely will not budge. To make matters worse, the flange stuck to the final drive when I pulled the wheel so removing the final drive is now a necessity.
They are not rusty at all, just way over-tightened. WD-40 did nothing. As you know u don’t have space around them to fit a socket, so forced to use a 14mm open end wrench. **Any tips on getting these off??**. I.E. nut splitter, torch, etc? Nuts are starting to strip when I apply leverage. Next try is open end nut splitter but I’m open to suggestions.
|
|
|
|
|
 Logged
|
|
|
|
|
RonW
|
|
« Reply #1 on: February 24, 2022, 02:54:39 AM » |
|
..... the flange stuck to the final drive when I pulled the wheel so removing the final drive is now a necessity.
Have you tried prying the 5-star flange with a flathead screwdriver? At red rectangle, below.  |
|
|
|
|
Logged
|
2000 Valkyrie Tourer
|
|
|
|
Jims99
|
|
« Reply #2 on: February 24, 2022, 04:37:42 AM » |
|
With the shocks removed, you can change hight of the rear to get a socket on. If they’re that tight, make sure to use a 6 point socket. Sometimes different extensions help out. Wd40 and others make a penatrating spray that will help better. Good luck.
|
|
|
|
|
Logged
|
The light at the end of the tunnel, is a train.
99 tourer
00 interstate
97 standard
91 wing
78 trail 70
|
|
|
hubcapsc
Member

Posts: 16818
upstate
South Carolina
|
|
« Reply #3 on: February 24, 2022, 04:56:58 AM » |
|
Every time I do that job I probably take apart more stuff than some people normally would. Jims99 mentioned removing the shocks. I take off the rear fender section too... anywho... taking stuff off might give you room work that will help... and if your flange is jambed in there cockeyed now, fiddling with your wheel until it is back on and then using that slot ronw posted a picture of with a big screwdriver as a lever could be helpful in getting the flange to stay in the wheel...  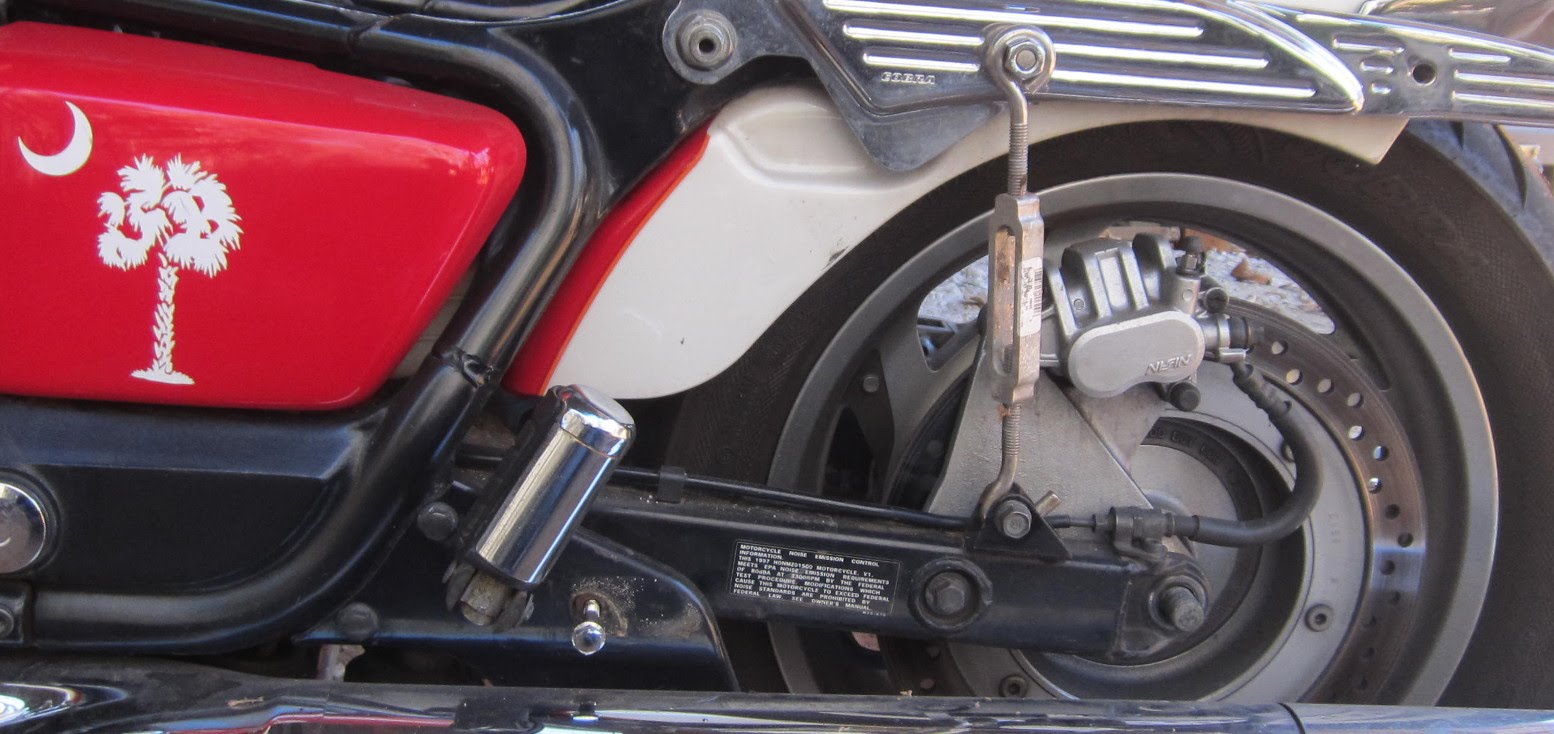 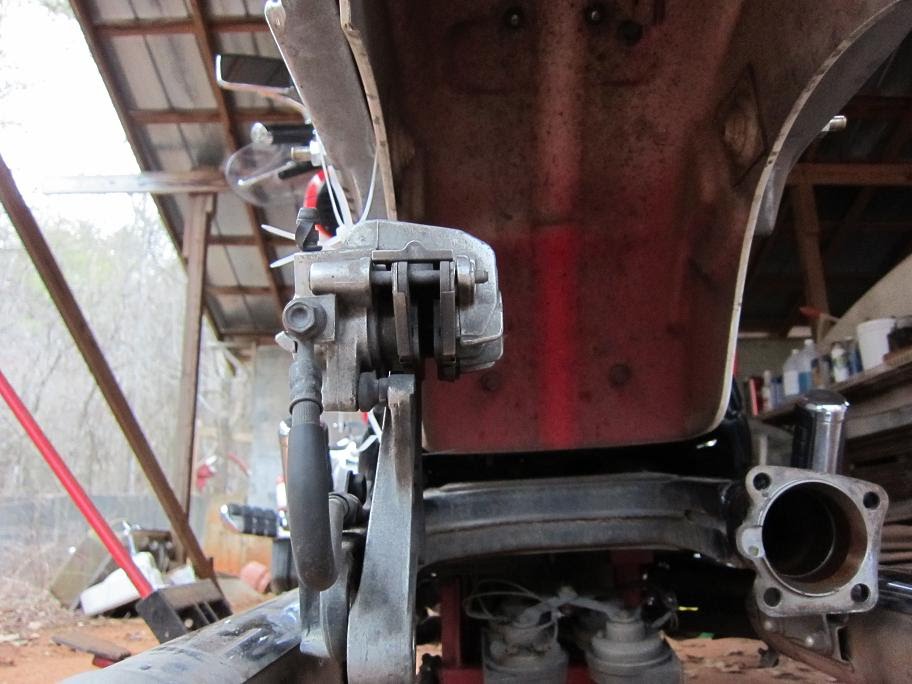 -Mike |
|
|
|
|
Logged
|
|
|
|
|
RonW
|
|
« Reply #4 on: February 24, 2022, 05:53:23 AM » |
|
..... If they’re that tight, make sure to use a 6 point socket. Sometimes different extensions help out. Wd40 and others make a penatrating spray that will help better. Good luck.
might be easier after the rear wheel is removed out of the way. *might*  |
|
|
|
|
Logged
|
2000 Valkyrie Tourer
|
|
|
Skinhead
Member
Posts: 8753
J. A. B. O. A.
Troy, MI
|
|
« Reply #5 on: February 24, 2022, 06:27:06 AM » |
|
Stop messing around with an open end wrench, you are only inviting more aggravation. If you don't already have them in your tool box, go to harbor freight and get some 3/8" drive wobble extensions and 3/8" drive metric sockets. I have never had a problem getting sockets on those nuts. Also, an impact gun may help or a long handle rachet or breaker bar. Leverage is your friend.
Edit: Also the previous owner may have loctited the nuts on the final drive. If that is the case, heat will be required to soften the loctite. Also, the studs may come out of the housing before the nuts loosen. If so, lock the studs in a vice, to remove the nuts and then use red loctite on the studs when you reinstall them.
|
|
|
|
« Last Edit: February 24, 2022, 06:33:09 AM by Skinhead »
|
Logged
|
 Troy, MI |
|
|
|
Avanti
|
|
« Reply #6 on: February 24, 2022, 08:29:17 AM » |
|
If you end up putting the studs in a vice make sure you use aluminum faceplates in your vice.
|
|
|
|
|
Logged
|
|
|
|
|
Chrisj CMA
|
|
« Reply #7 on: February 24, 2022, 12:32:11 PM » |
|
Some idiot in the past must’ve torqued to double factory specs the 4 nuts holding the final drive on my Valkyrie. Now I’m in the middle of what was a final drive service and rear wheel replacement and I have 3 of 4 nuts that absolutely will not budge. To make matters worse, the flange stuck to the final drive when I pulled the wheel so removing the final drive is now a necessity.
They are not rusty at all, just way over-tightened. WD-40 did nothing. As you know u don’t have space around them to fit a socket, so forced to use a 14mm open end wrench. **Any tips on getting these off??**. I.E. nut splitter, torch, etc? Nuts are starting to strip when I apply leverage. Next try is open end nut splitter but I’m open to suggestions.
2 things. First, there is absolutely room for a 14mm socket and a long breaker bar. Take the shock off and there’s room. Second get the wheel back onto the flange and put the axle back in without the caliper plate and spacer. Then do as Ronw said, pry the flange and wheel off the drive |
|
|
|
|
Logged
|
|
|
|
|
Boxcar01
|
|
« Reply #8 on: February 25, 2022, 09:01:54 AM » |
|
Well I found part of the problem. Bike has a COBRA chrome final drive cover which limits access to the 4 bolts. Honestly I though this was standard. Hate to have to remove 6 more parts/covers just to get to the chrome cover to remove it, just to be able to get a socket around a nut. But I guess that's what I'm gonna have to do. Then try a 6 point socket with a long breaker bar and see what happens.
|
|
|
|
|
Logged
|
|
|
|
|
Chrisj CMA
|
|
« Reply #9 on: February 25, 2022, 09:14:44 AM » |
|
Yes, those chrome covers are a pain but I always remove them. Truth be told if I know it’s in there I ask the owner to remove it before bringing the bike over. Sometimes they do, sometimes they don’t.
Get the wheel off first that will make life much easier
|
|
|
|
|
Logged
|
|
|
|
|
Boxcar01
|
|
« Reply #10 on: February 25, 2022, 04:44:00 PM » |
|
Do they just snap on and off? Or are they zip tied / bolted in somehow. Didn’t see any bolts
|
|
|
|
|
Logged
|
|
|
|
|
Chrisj CMA
|
|
« Reply #11 on: February 25, 2022, 04:45:34 PM » |
|
Do they just snap on and off? Or are they zip tied / bolted in somehow. Didn’t see any bolts
The ones I heave dealt with use zip ties |
|
|
|
|
Logged
|
|
|
|
|
Jess from VA
|
|
« Reply #12 on: February 25, 2022, 04:46:54 PM » |
|
The cover is held in back with either zip ties or hose clamps. Kinda similar to exhaust heat shields.
It might also have double sided tape underneath.
|
|
|
|
|
Logged
|
|
|
|
|
Boxcar01
|
|
« Reply #13 on: February 27, 2022, 05:48:20 PM » |
|
SUCCESS! Removing the chrome driveshaft cover, then heat and leverage and a 6 point socket did the trick.
|
|
|
|
|
Logged
|
|
|
|
|
Chrisj CMA
|
|
« Reply #14 on: February 27, 2022, 05:58:35 PM » |
|
Great. But that oil seal being off its seat is concerning. Did you pull the drive shaft out of the pinion cup yet?
|
|
|
|
|
Logged
|
|
|
|
|
RonW
|
|
« Reply #15 on: February 28, 2022, 12:52:26 AM » |
|
that oil seal shouldn't be in two pieces. Or is this why they said the oil seal should be installed flush with the adjacent surface?  |
|
|
|
« Last Edit: February 28, 2022, 12:54:21 AM by RonW »
|
Logged
|
2000 Valkyrie Tourer
|
|
|
|
Chrisj CMA
|
|
« Reply #16 on: February 28, 2022, 05:42:37 AM » |
|
that oil seal shouldn't be in two pieces. Or is this why they said the oil seal should be installed flush with the adjacent surface? That arrow is pointing to the thrust washer. “Two pieces?” |
|
|
|
|
Logged
|
|
|
|
|
RonW
|
|
« Reply #17 on: February 28, 2022, 07:14:27 AM » |
|
okay
|
|
|
|
|
Logged
|
2000 Valkyrie Tourer
|
|
|
|


