There are many ways to modify the exhaust system and most of them have been discussed and detailed in other posts. This is what I did to mine. This is not the fastest way, the cheapest way, nor the easiest way and I make no claims as to it giving more power than any other way. Soooo….. FWIW:
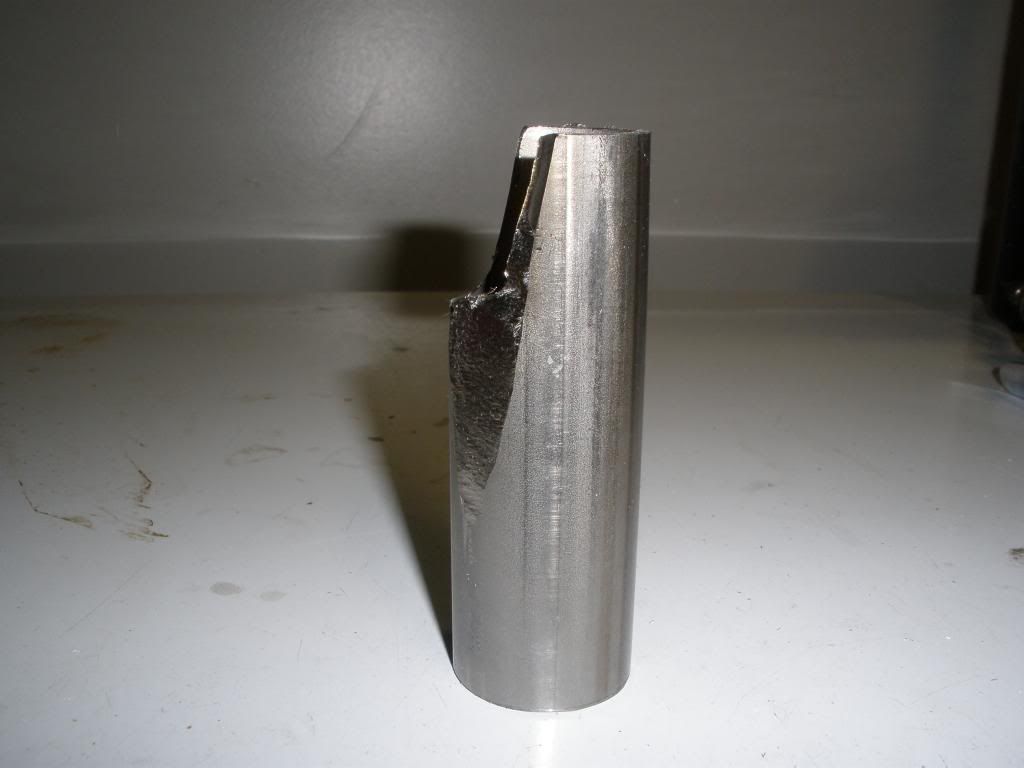
I picked up a set of exhaust that had been cut up and front baffles drilled. First I removed the remaining can by grinding thru only the weld with a cut off wheel on my die grinder. This left only the front plate of the muffler with the 3 header tubes protruding thru. Just inside the header tubes I found bumps of over penetration from where they were welded to the front plate. I ground those bumps off to smooth the exhaust flow.


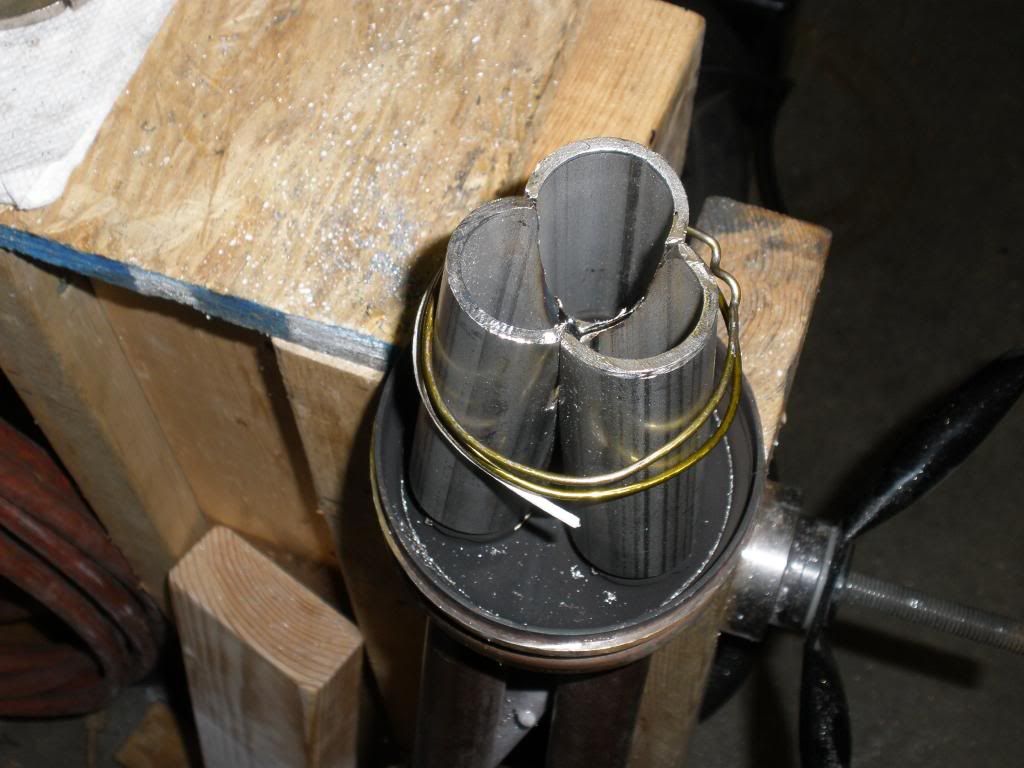
I then cut and fitted 1 inch ID stainless pipes to form a collector. The pipes set easily over the header tubes and come together to form a kind of clover leaf opening. I had to be really careful here! When welding these 3 pipes together and onto the head tubes, it is all but impossible to keep everything centered. Mine are not perfect.
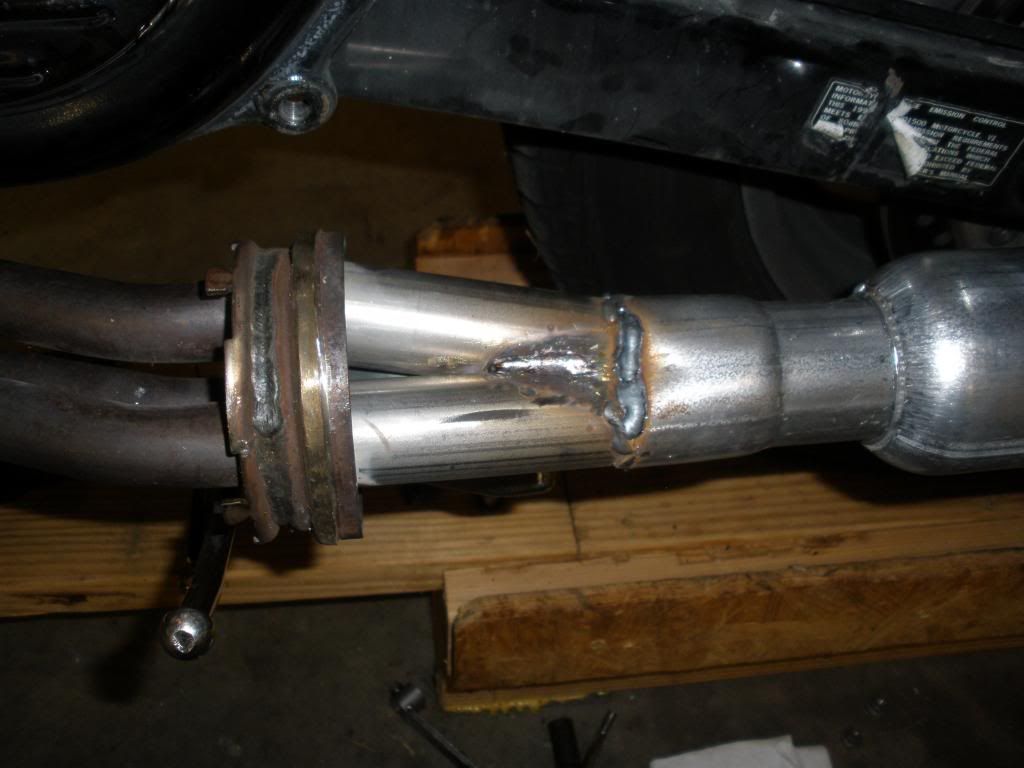
I welded a regular galvanized exhaust reducer with 2in ID and 1 and 7/8 OD onto the combined stainless pipes. By using a piece of pipe and a V block I hammered the 2 in end of the reducer into a rough triangular shape so it would fit about 1/8 in down over the 3 stainless pipes. This made it easy to line up and weld together. Before welding this reducer on, I mounted the header on the bike, pulled the guts out of the piece of can (about 10 in long) I had cut off and used this piece of can to check that the end of the reducer was centered. With the reducer hammered snuggly onto the 3 pipes, it stays put unless bumped. So a few taps with a hammer moved it around till I was satisfied and then tack welded it in place.
Then I pulled it back off the bike and fully welded the reducer to the 3 pipes. Also, at this time I welded the front piece of can (cut 2 inches long now) back onto the front plate and ground the welds down so the Airflow stacks would slide on.
I pulled out my new stacks and carefully marked where I was going to drill the mounting holes and also a small hole for a bolt into the can.
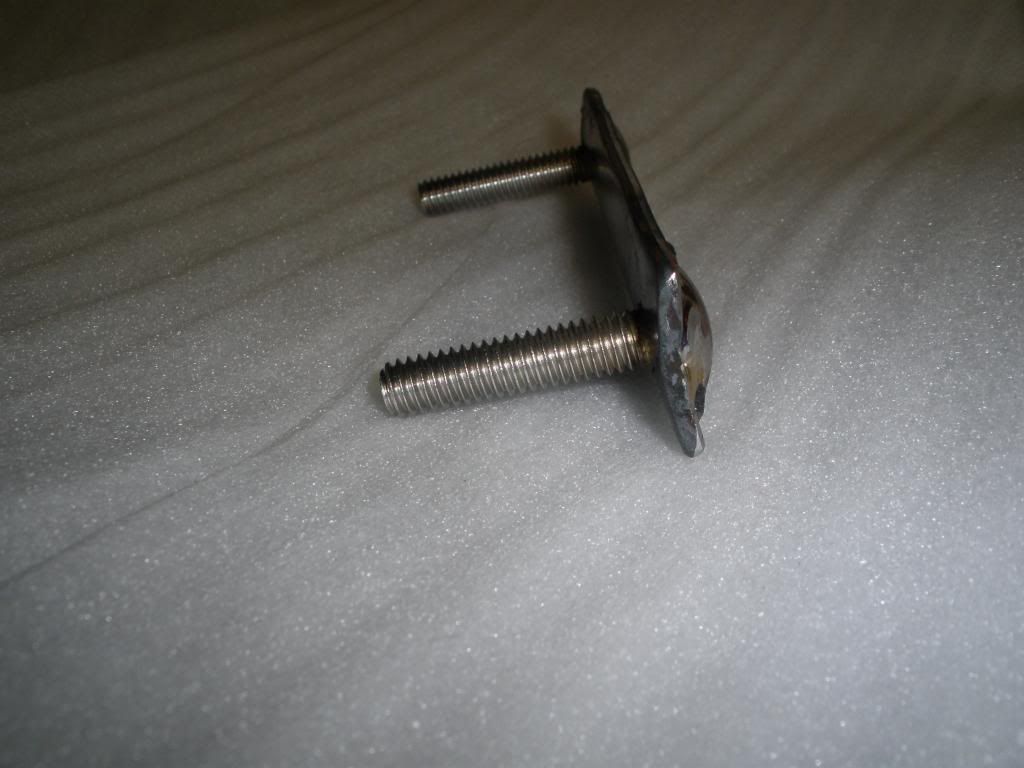
I had never liked the gap that was always there between the front covers and side covers on the original exhaust so I used an idea that was explained in shop talk. I drilled the mounting holes in the side of my stacks at a position that would have the front of the stacks end up under the front covers. I cut a piece of strap and drilled holes to match the mounting holes. Then I ground off the square below the head of carriage bolts and welded them to the sttrap so there is no way they can turn and also they will fit neatly inside the stacks.

My original intent was to weld a 1 ¾ id by 12 inch glass pack on the reducer, slide my new Airflow 36 in stacks over it all and call it done. However, I decided to just stick one of the glass packs on the one now reduced pipe and fire it up. Hmm! Way too loud and way to much cackle to suit me. Now I know the sound would have been different once inside the stacks but…I just did not think it would be what I wanted. So I put the glass packs back on the shelf and headed off to the hardware store.
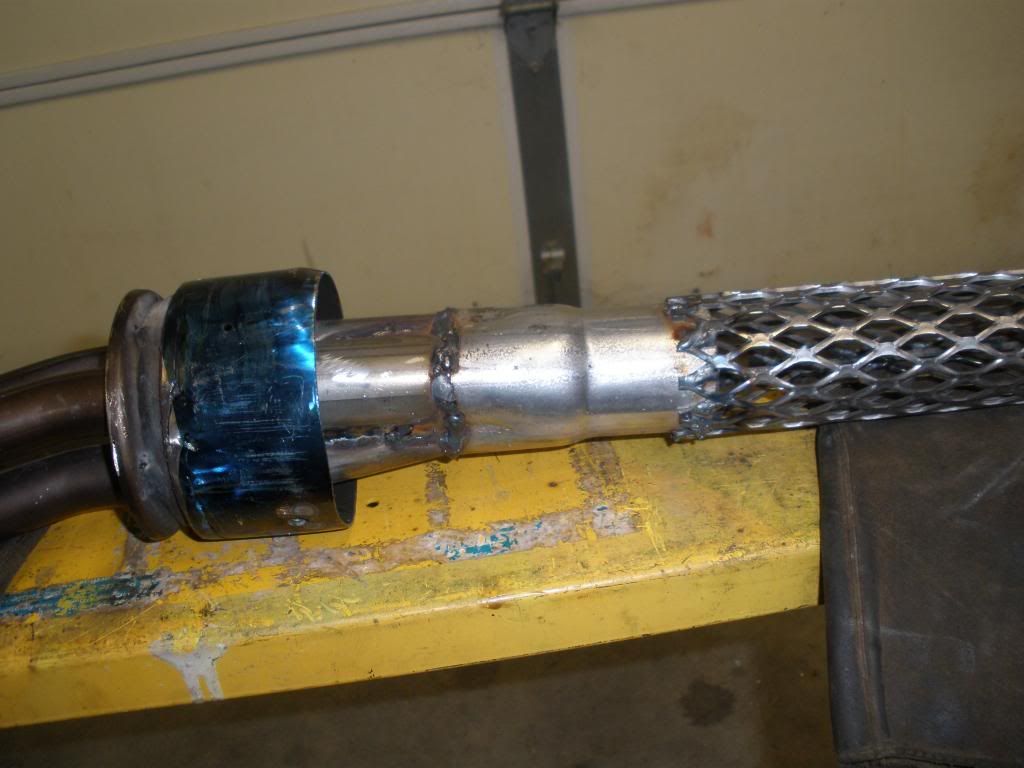
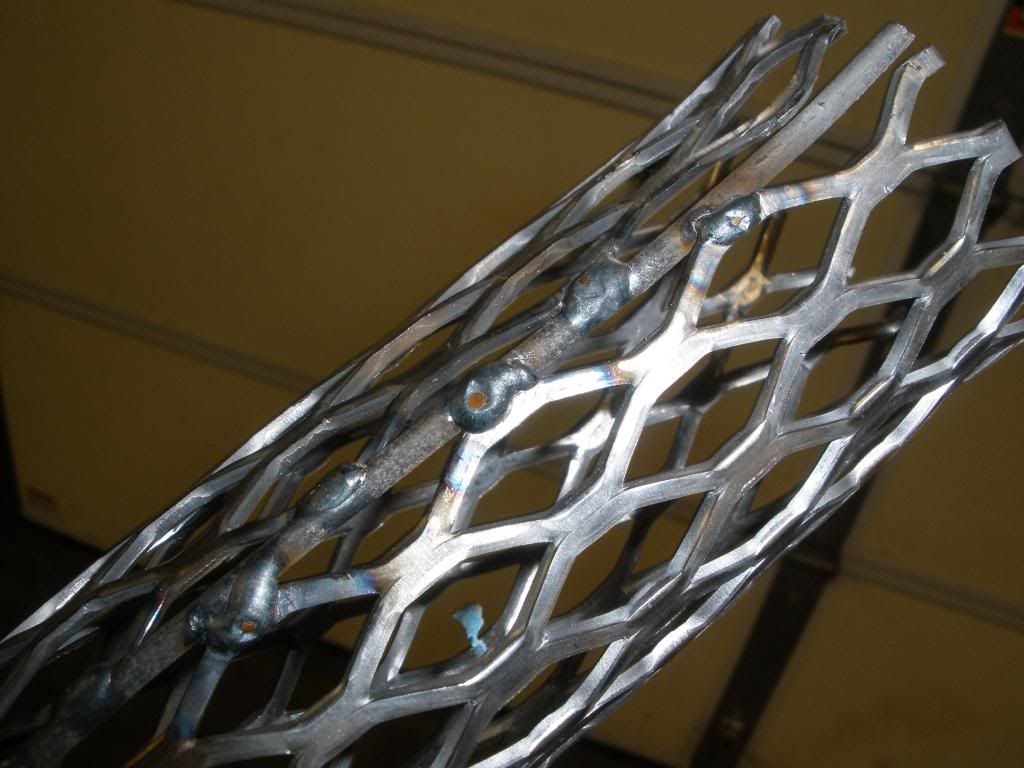
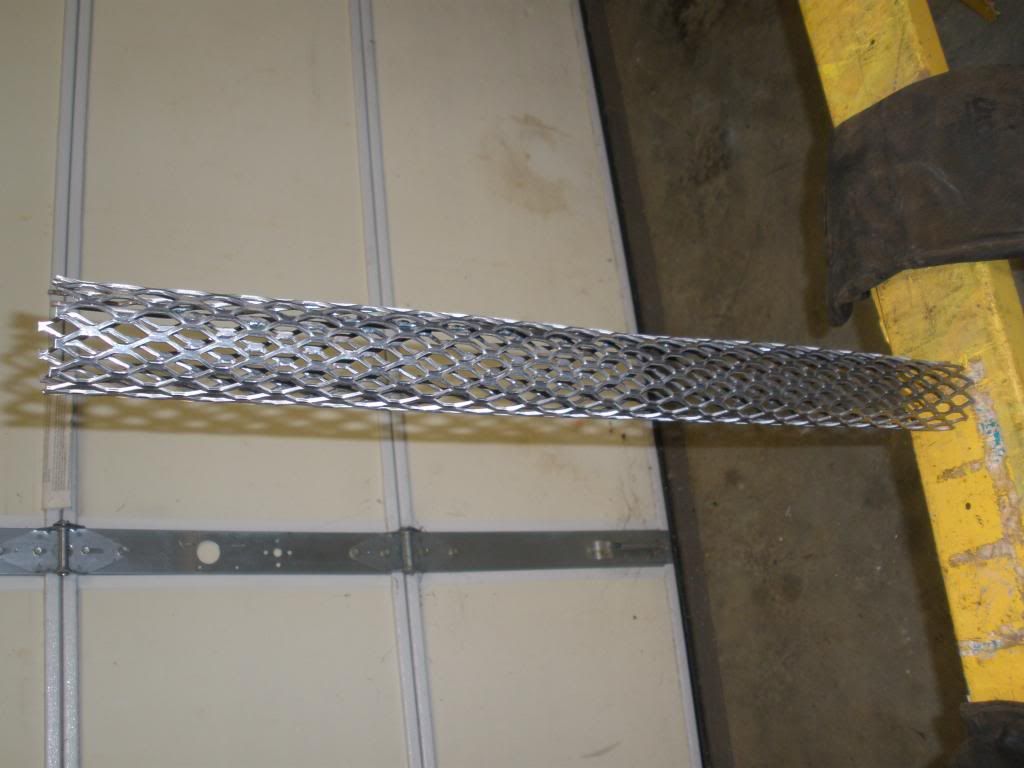
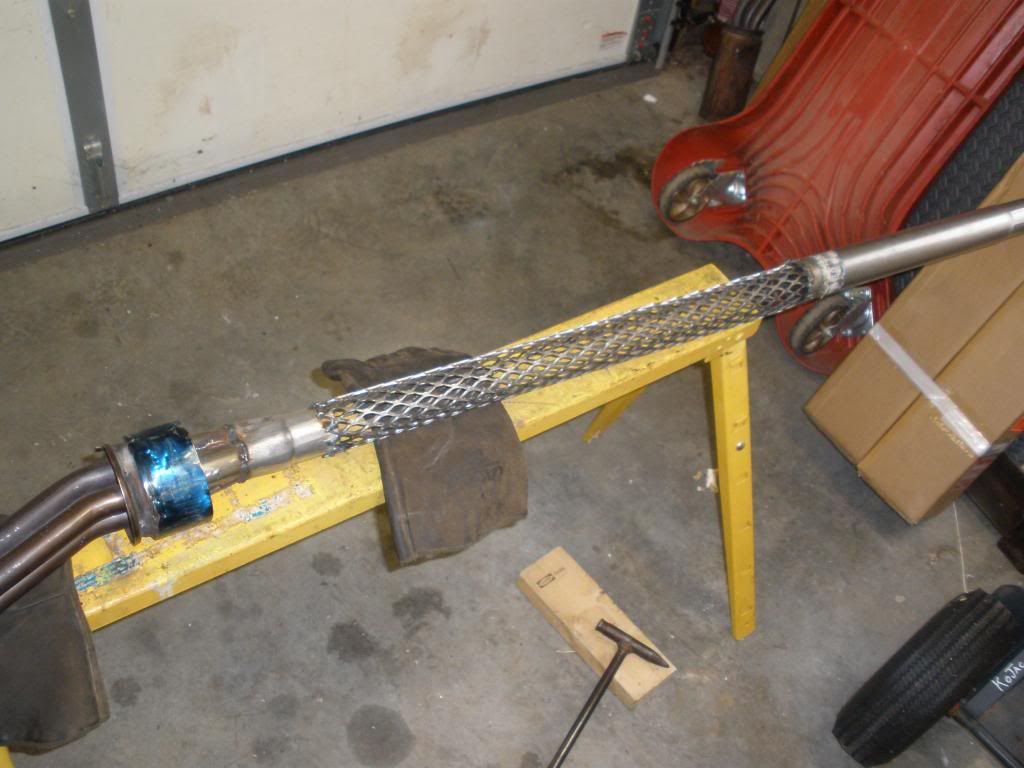
I cut a piece of expanded metal and rolled it around a piece of 1 ¾ OD pipe. Then I welded this expanded metal together forming a perforated pipe of sorts. By expanding the ends of this to fit over a piece of 1 7/8 OD pipe and welding the 2 together and this assembly onto the reducer, I would have a muffler core.
Before welding the core to the reducer, I put the header on the bike and slide the stack (with mounting holes now drilled) onto the header and mounted it all. I also put my new “Grumpy’s small bore tips on the stacks. With the bike in place on the stands, I took measurements to the floor and to centerline of the bike. Then I removed the stacks and placed the “core” on the reducer. I used a jack stand to position the rear of the pipe in the same position as the bore of the tips when I had the stacks on. After tack welding the core in place, I took the assembly off the bike and finished welding the core to the reducer.
The 1 and 7/8 OD of the rear pipe would be loose in the 2 inch bore of “Grumpy’s small bore tips, however, I used 2 wraps of aluminum tape. You could probably use 3 wraps but I wanted this to slip in easily. Mine slide in easily but do not rattle or seem too loose. By the way, I cut these pipes off so that they end about ½ inch inside of the tips.
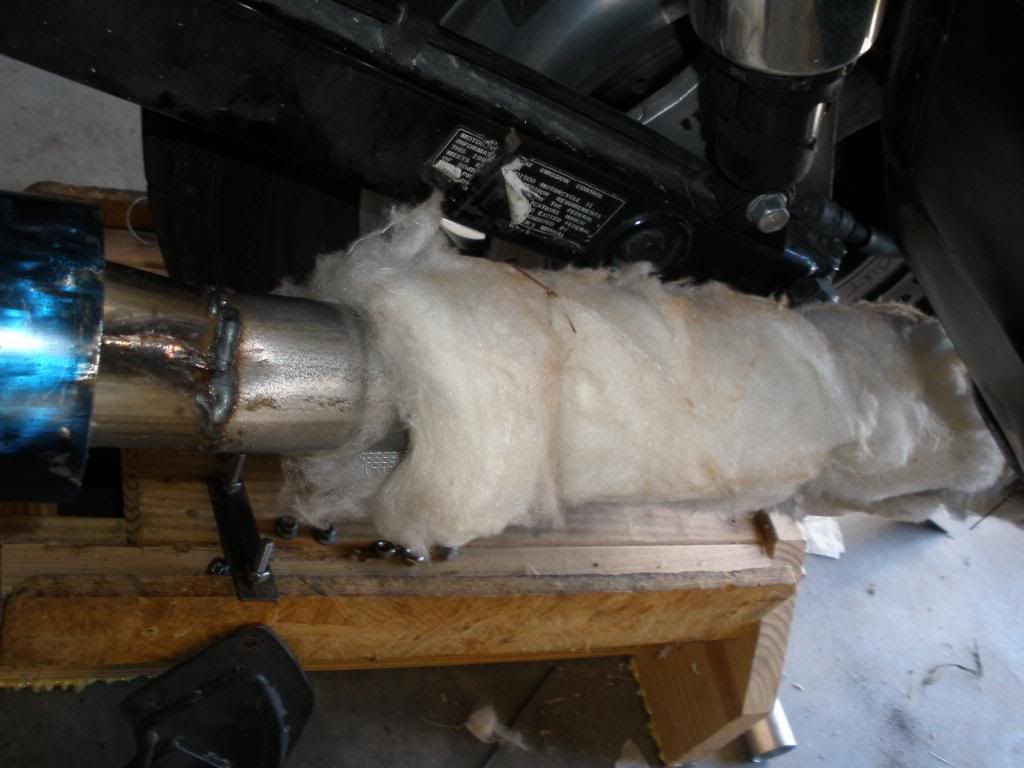
OK. Now the finish is the same as if you were repacking a rebuild able muffler. I had ordered a stainless steel muffler core kit 3 weeks before but it had not even been shipped when I was ready for it and the weather had been beautiful so I just could not bring myself to wait. I wrapped the core pipe with aluminum screen from the hardware store and tied it on with thin wire. Then I wrapped the screen with a piece of un faced fiberglass insulation which I also tied on with some wire. After that was done, I slide the stacks on and bolted them up. Had to kind of feed the fiberglass into the stack but that was easy.
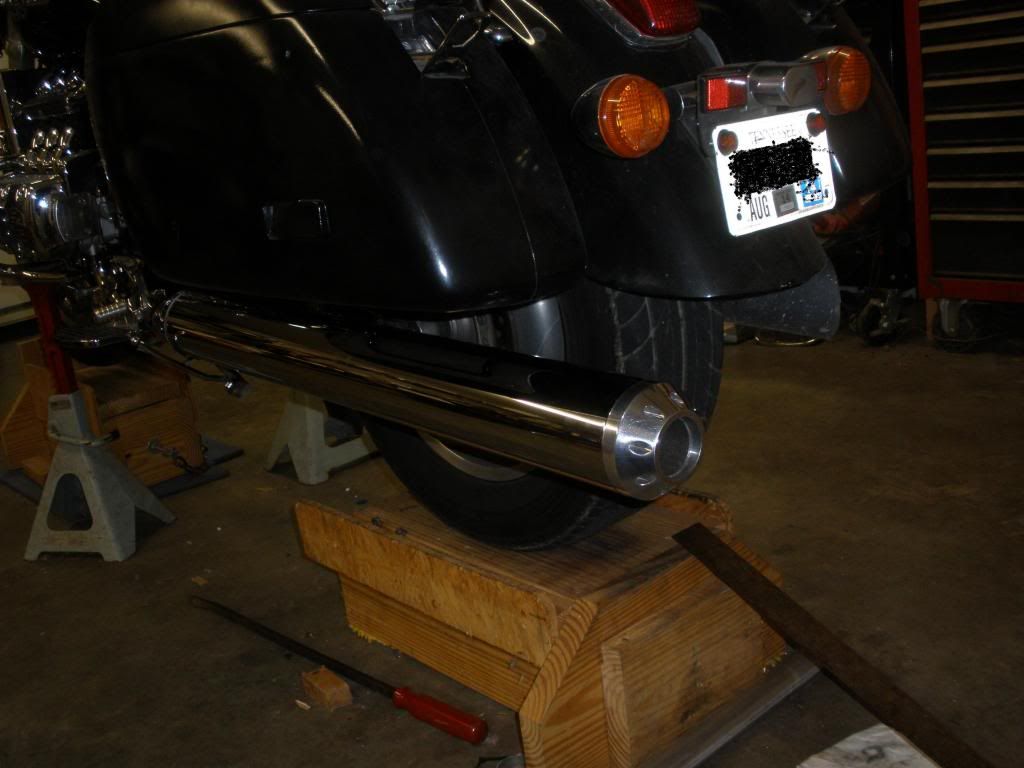
In this photo, you can see the end of the core pipe inside of the tip.
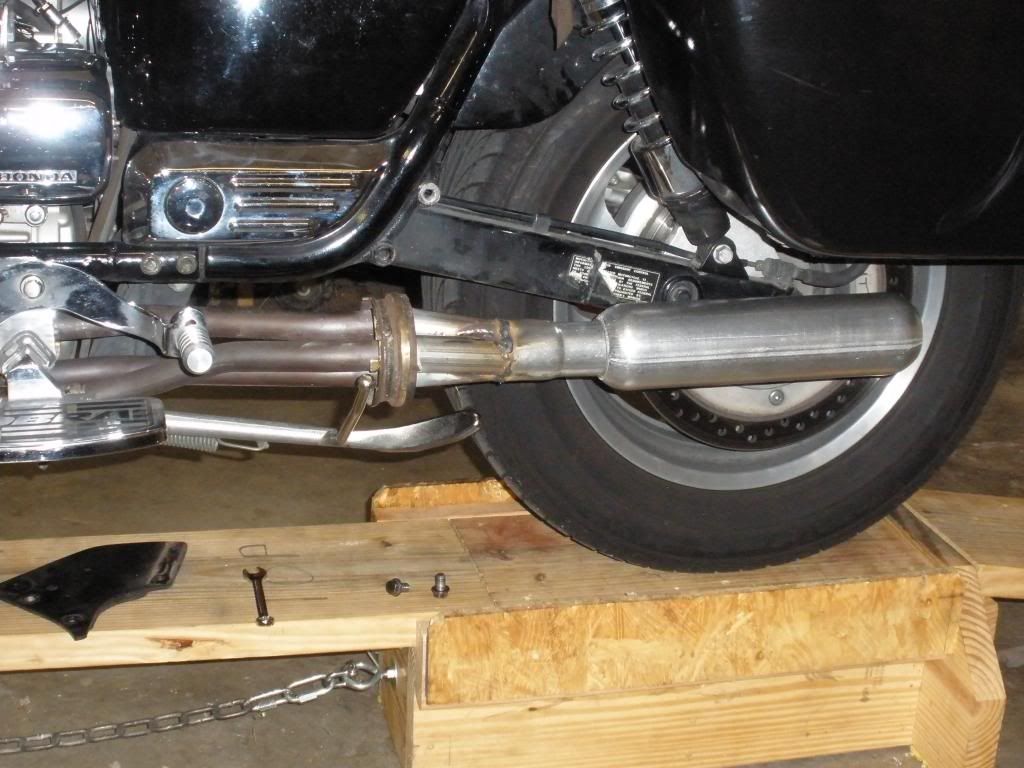
The finished exhaust.
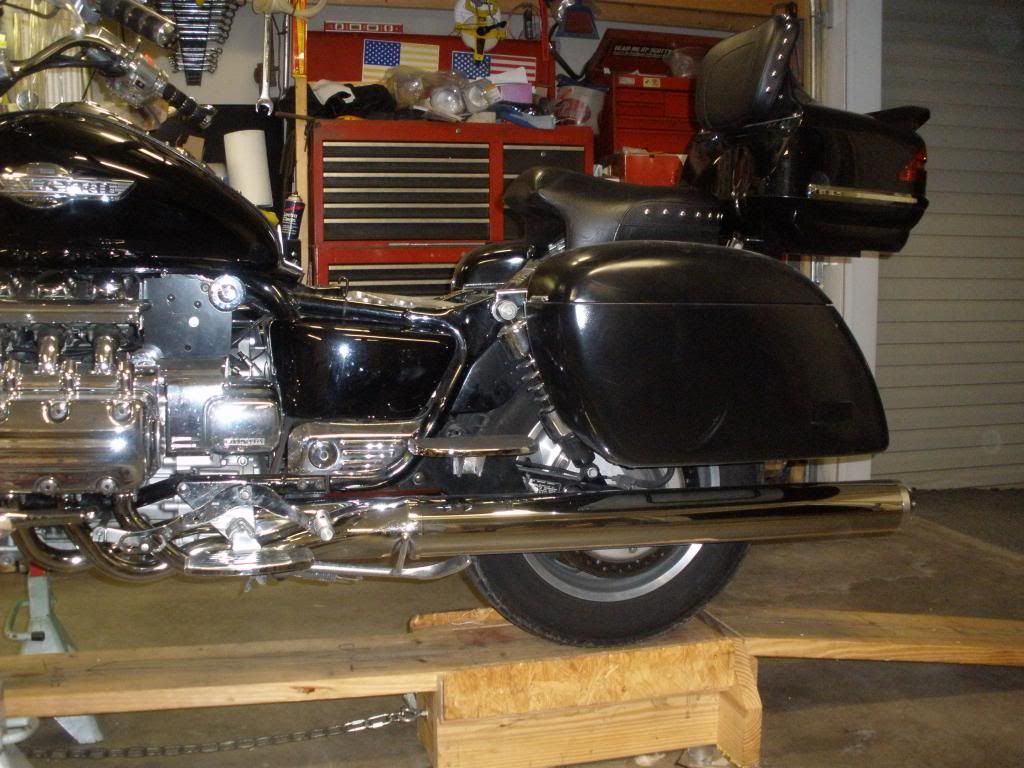
I like the result! The bike now has a bit of a growl between 1500 and 2000 rpm but seems to quiet back down a bit above 2000. Also, according to the butt dino and the angle of the front wheel under acceleration, There has been some increase in power. As for fuel mileage and highway drone, I don’t know yet. I have been out with both my half helmet and the full helmet but have not gone far enough to really be sure about drone. So far it has not bothered me.
Bigwolf


