|
grizz
|
 |
« on: December 29, 2014, 12:21:56 PM » |
|
Hi guys,
I am doing the Super Valk work this season and all seems to be going well until I came to the tail light wiring. I installed a new standard tail light on the interstate, along with the wiring harness for a standard. I noticed there is an extra green wire on the standard harness compared to the interstate harness? Where does this go? I have tried many things and have no signal lights or tail/brake lights? I am no electrician, so could use some help. I was just going to tap into the interstate wiring but thought it would be cleaner if I installed the standard wiring harness with the new tail light. I am now thinking that is the way to go. Any help would be appreciated.
Thanks, Grizz
|
|
|
|
|
 Logged
|
|
|
|
|
Pete
|
|
« Reply #1 on: December 29, 2014, 12:33:22 PM » |
|
You are fine so far.
But you will need to connect the extra wire.
That is the way I did mine, I will need to check to see where I connected it.
More as soon a I can look at mine.
|
|
|
|
|
Logged
|
|
|
|
|
signart
|
|
« Reply #2 on: December 29, 2014, 12:40:26 PM » |
|
Just guessing, try grounding it.
|
|
|
|
|
Logged
|
|
|
|
|
grizz
|
|
« Reply #3 on: December 29, 2014, 01:44:01 PM » |
|
I found that I didn't have the connector pushed in tight at the rear fender. Now all is working as it should except for the brake light? I still have a left over wire from the standard wiring harness and I am guessing that is the culprit. Now all I need to figure out is where to connect it so I have a brake light. "The light at the end of the tunnel is growing brighter"
Grizz javascript:void(0);
|
|
|
|
|
Logged
|
|
|
|
|
bentwrench
|
|
« Reply #4 on: December 29, 2014, 02:39:27 PM » |
|
All the greens w/o trace colors back there are grounds.
|
|
|
|
|
Logged
|
|
|
|
|
RonW
|
|
« Reply #5 on: December 29, 2014, 03:33:03 PM » |
|
G/Y wire supplies +12 to the tail light's high filament (brake light) and Green Wire is the ground return for the G/Y wire. If the ground wire is left unconnected, electricity won't be able to flow through the light bulb. Just repeating something you know, but just to make sure we're on the same page.
The green wire also serves double duty as a ground return for the low filament wire in the same tail light (running light), so you should have neither running light nor brake light with the ground wire as it is unconnected. The green wire is thin gauge so it may or may not be difficult to safely splice/tap it into the nearest green ground wire since those are also thin gauge, so practice the joint on some spare wires, or run a tributary wire from a nearby ground wire with a mating terminal that plugs into the 'leftover' green wire terminal.
|
|
|
|
|
Logged
|
2000 Valkyrie Tourer
|
|
|
|
pago cruiser
|
|
« Reply #6 on: December 29, 2014, 07:27:51 PM » |
|
Hey Grizz, I just went thru this as well. The IS brake light wire is only on the 3 pin connector (along with running and ground); not 4 pin connector that mates up to the Standard 5 pin rear wiring section. You can either: a) connect a single wire to the brake wire on the 3 pin, and then run it back to the tail light, or b) splice onto the IS brake wire and then splice onto the appropriate wire on the Standard rear wiring section (under the side cover/seat), or c) make a new 3 wire harness, connect to the IS 3 wire connector, and then run all three wires back to the tail light. a) has all the lights tied to a single ground - and you also need to put in a removable bullet connector for when you go to take apart. b) takes two splices, still have the common ground. c) is more work, and takes a crimp tool and connectors, but maintains the IS separate ground wires for tail light and turns. I don't think the common ground is a concern, unless you want to run halogen turns/brake bulbs  ... but c) should also make it easier for troubleshooting in the future, with completely separate wiring for turns and brake. They are still tied to the same fuse though. Hope I got that straight ???... Hope it helps. BTW, it was a pita getting the tail light bolts (inside the fender) to line up with the tail light threads thru the new rubber gasket, eh?  |
|
|
|
|
Logged
|
Just because you are not paranoid doesn't mean they're not out to get you
|
|
|
|
RonW
|
|
« Reply #7 on: December 29, 2014, 08:50:10 PM » |
|
might want to replace a nearby single-bullet socket (Ground) with a dual bullet socket (double Ground) ....  single socket shown below ..... 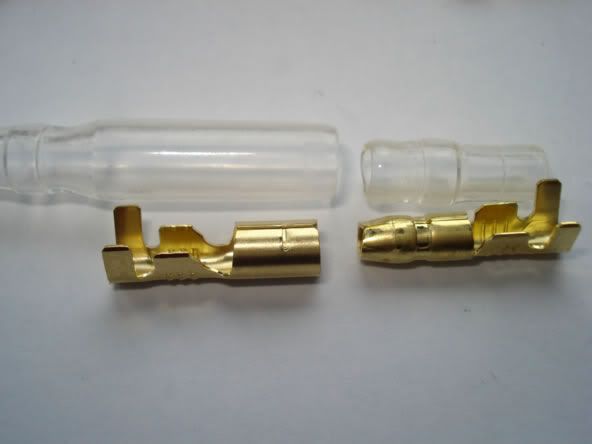 |
|
|
|
|
Logged
|
2000 Valkyrie Tourer
|
|
|
|
grizz
|
|
« Reply #8 on: December 30, 2014, 07:14:35 AM » |
|
Thanks for all the help guys. I will get back out to the shop this morning as soon as I clear a path through the snow. We got a good dump of snow overnight. I have the trunk brake/tail harness and the rear speaker harness completed with quick disconnects now and will try to splice into it. This is an awesome site and a wealth of knowledge available for the asking.
Grizz
|
|
|
|
|
Logged
|
|
|
|
|
grizz
|
|
« Reply #9 on: December 30, 2014, 02:25:29 PM » |
|
Still no luck. Here is what I got:
Standard rear harness Interstate harness
Brown/white Brown/white
light blue light blue
green green
orange orange
green/yellow
Interstate 3 wire
green
brown/white
green/red
I have tried lots of combinations, still no brake light. Does anyone know which of the 3 wire from the interstate connector goes with which wire from the standard wires?
I am almost at the point of running 3 wires back there..............then I could put the original wire harness for the signal lights back on.
Grizz
|
|
|
|
|
Logged
|
|
|
|
|
RonW
|
|
« Reply #10 on: December 30, 2014, 06:10:28 PM » |
|
I installed a new standard tail light on the interstate, along with the wiring harness for a standard.
Just to clarify, by "along with the wiring harness for a standard," you mean the wires that come already attached to the standard's tail light assembly? If so, then you want to connect the G/Y wire that sprouts from the standard's "tail light" .... to the I/S counterpart G/R brake-light wire, either at the Right or Left brake light wires on the I/S, as the I/S has two brake lights, as such, two duplicate p-connectors & two sets of wires at your disposal. For running light, connect Br wire that sprouts from the standard's "tail light" .... to any Br/W wire on the I/S. *Whether Br or Br/W it's the same wire serving the same purpose of providing Constant ON +12 voltage.* Interstate harness
Brown/white
light blue
green
orange
The above 4p-connector is for your turn signal & license plate light harness, so disregard. You still could utilize it for +12 running light electricity (Constant ON) as well as Ground if it's indeed more convenient. |
|
|
|
|
Logged
|
2000 Valkyrie Tourer
|
|
|
gordonv
Member

Posts: 5766
VRCC # 31419
Richmond BC
|
|
« Reply #11 on: December 30, 2014, 06:46:37 PM » |
|
Also to clarify.
There is 2 wire harness from the main wiring harness to the end, for all models. The IS has a different 2 than the std/tourers.
If all you have is the rear harness for the std/T, and trying to get that to mate up with the IS front section, then there is more work to be done.
I was going to get the 2 harnesses from the std/T and custom fit that into the IS instead, when adding in a rear fender brake light to my IS.
|
|
|
|
|
Logged
|
1999 Black with custom paint IS   |
|
|
|
grizz
|
|
« Reply #12 on: December 30, 2014, 07:41:22 PM » |
|
I have installed the 2 "standard" wiring harnesses along with the "standard tail light". One harness goes from the signal lights/ tail light to a grey connector at the split in the rear fender. From there the 2nd harness goes from the connector to the right side panel. All of the wires mate to the IS harness except the green/white wire. If I connect the green/white to the green/red, the tail light comes on bright (without) engaging the brake lever? This is the part that has me stumped? I don't want the brake light to come on without engaging the brake lever.
I certainly appreciate the help, perhaps I should just run the 3 wires back to the tail light as suggested, this is driving me around the bend.
Grizz
|
|
|
|
|
Logged
|
|
|
|
gordonv
Member
Posts: 5766
VRCC # 31419
Richmond BC
|
|
« Reply #13 on: December 30, 2014, 07:54:14 PM » |
|
I would think if you had the 2 wire harnesses, I remember now, A & B, from a std/T, then you should be able to plug that directly to any Valkyrie chassis and it should work.
I don't see where there would be a loose wire.
I was looking for the posted page of the wire schematics in Shop Talk (I thought), but couldn't find it. I know Dag's site is still down, so you can't DL the manual. Will take a look and see what I can find.
|
|
|
|
|
Logged
|
1999 Black with custom paint IS |
|
|
|
pago cruiser
|
|
« Reply #14 on: December 30, 2014, 08:58:04 PM » |
|
Grizz,
Per my Honda service manual, the green/yellow is the brake hot. That should go to the green/yellow on the Standard tail light - the one I just bought/installed had three wires: Green (ground), green/yellow (brake hot) and brown (running light hot).
If you have a 3 pin female connector with some wires on it, plug it into the IS 3 pin male. Then temporarily connect/twist the female connector wires to the tail light (un-installed) wires as I indicated. If you still have no brake light, time to get out the multimeter and see if you have 12V between green and green/yellow wires in the connector WITH THE BRAKE PEDAL or LEVER engaged. If you have 12V, then either your bulb is bad, the bulb socket is bad, or maybe someone forced a 1156 bulb into the 1157 socket - would not be the first time. Or maybe the brake light switches are bad - but I would doubt 2 switches bad at the same time.
If you don't have a 3 pin female connector handy, you should be able to get one from any independent bike shop. Or, you could jut cut the end off the Valk Trunk, leaving a couple inches of wire to play with; this makes it harder (but not impossible) down the road to just plug and play the trunk back on though...
|
|
|
|
|
Logged
|
Just because you are not paranoid doesn't mean they're not out to get you
|
|
|
|
grizz
|
|
« Reply #15 on: December 31, 2014, 09:58:48 AM » |
|
O.K. this is really getting weird now. This morning, I removed the tail light section of the rear fender, installed the 3 pin connector (original IS) then wired in the tail light. Now I have a tail light even with the key off and no brake light just tail light with the key on? Once again I tried every combination possible and always ended up with the same thing? I thought by running the IS 3 pin wires to the new tail light it would work? I can't believe there is power to the tail light even with the key off? Do you think the tail light is faulty? The bulb is O.K. I think it is time to get the multi
meter out.
Grizz
|
|
|
|
|
Logged
|
|
|
|
|
grizz
|
|
« Reply #16 on: December 31, 2014, 11:34:01 AM » |
|
Party Time................
I have been dicking around with this wiring for the Super Valk for way too long. I took the tail light off, took it apart, everything is O.K. No matter what I tried, I could get no brake light. Well stupid me found the problem..............I had the 3 wire male plugged into the wrong female connector. I didn't realize there was 2 empty female connectors and of course I picked the wrong one. I was busy pulling what little hair I have left when I saw the "other" female connector, I said no that couldn't be it, what the hell give it a whirl................bingo. The green/red wire connected to the extra green/ yellow wire and try the brake..........on comes the brake light. Problem solved. Now I am wondering what the other female 3 wire connector is for? Any clues?
Anyhow I am going to start my New Year celebration now and would like to thank all for the help I got from this great site. HAPPY NEW YEAR
Grizz............embarrassed but happy
|
|
|
|
|
Logged
|
|
|
|
|
pago cruiser
|
|
« Reply #17 on: December 31, 2014, 02:17:23 PM » |
|
That would be the CB radio connector: red/yellow, grn/blk, and grn. I traced it out in the manual, and it goes thru "Audio Backup" 15A fuse, then to the red wire on the starting relay - looks to be always hot. Might be handy to know if you needed 12V for something off the main 30A fuse... If it makes you feel any better, I fought mine for half a day as well. My rear brake pedal spring was so stretched that it only made contact if the pedal was stood on; and the lever wire was so corroded up it was not working at all... but the switches weren't bad... Glad you got it solved. Happy new year.  |
|
|
|
|
Logged
|
Just because you are not paranoid doesn't mean they're not out to get you
|
|
|
|


