|
..
|
 |
« on: February 03, 2019, 09:09:51 AM » |
|
I normally only Have to set my mouth just the right way to get the caliper bracket in. THIS TIME IT'S GETTING THE WHEEL OUT  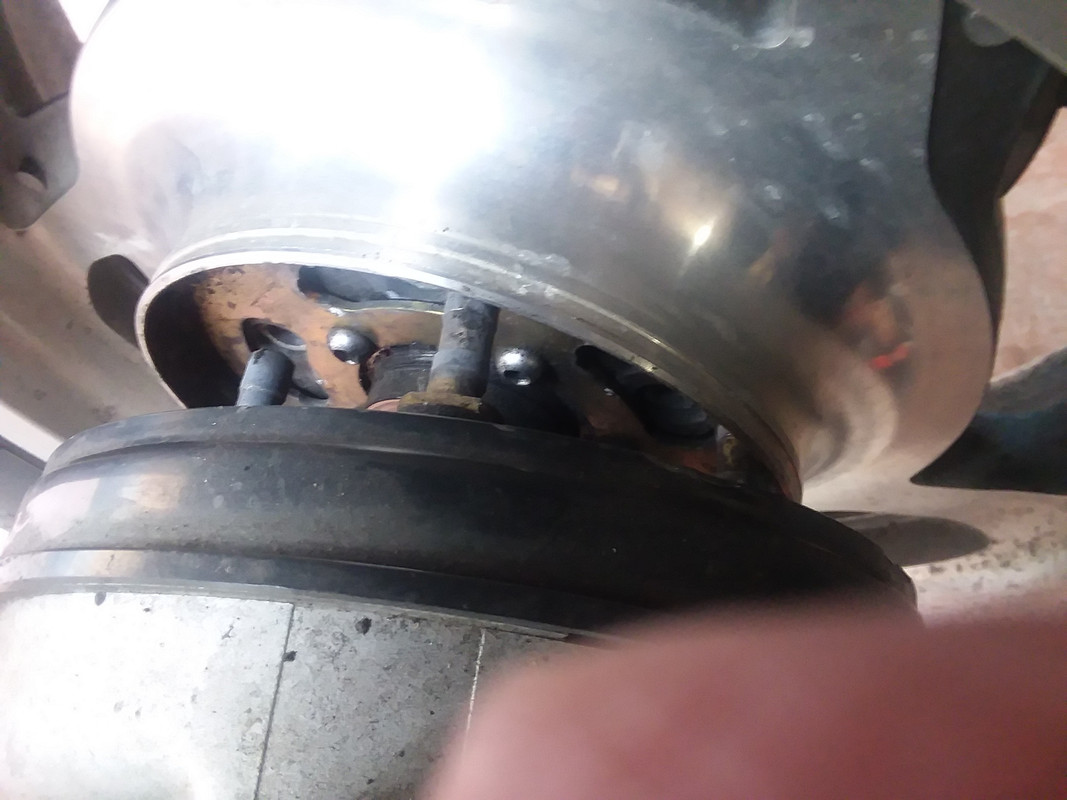 As you can see the flange set is staying behind instead of coming out with the rim and tire. I've tried to get it back into place but even if I can do that it will just stay instead of coming out with the rim and tire again. Suggestions before I call the local scrap merchant to take this thing away. |
|
|
|
« Last Edit: February 03, 2019, 10:49:39 AM by Britman »
|
 Logged
|
|
|
|
hubcapsc
Member

Posts: 16824
upstate
South Carolina
|
|
« Reply #1 on: February 03, 2019, 09:19:23 AM » |
|
look under your pumpkin for a slot in the plastic ring... a screwdriver or some
kind of wedge tool can help to get them separated...
-Mike "don't let the bike fall on your head :-) "
|
|
|
|
|
Logged
|
|
|
|
|
Hook#3287
|
|
« Reply #2 on: February 03, 2019, 09:20:57 AM » |
|
Put the wheel back on, and using a long screwdriver or pry bar in the slot on the bottom of the pumpkin, pry the flange assembly off with the tire.
|
|
|
|
|
Logged
|
|
|
|
|
..
|
|
« Reply #3 on: February 03, 2019, 09:28:09 AM » |
|
I'll try to fight the bastid back on.
Thanks guys.
|
|
|
|
|
Logged
|
|
|
|
|
sandy
|
|
« Reply #4 on: February 03, 2019, 10:01:50 AM » |
|
Another option is to remove the drive unit with the wheel. Heavy but then you can separate them on the garage floor (on carpet).
|
|
|
|
|
Logged
|
|
|
|
|
..
|
|
« Reply #5 on: February 03, 2019, 10:12:20 AM » |
|
Another option is to remove the drive unit with the wheel. Heavy but then you can separate them on the garage floor (on carpet).
If all else fails..............................................  |
|
|
|
|
Logged
|
|
|
|
|
..
|
|
« Reply #6 on: February 03, 2019, 10:36:28 AM » |
|
All I feel when I put a small bar up the slot is a void because the flange is secure to the gear. It hasn't moved to the left at all.
|
|
|
|
|
Logged
|
|
|
|
|
Chrisj CMA
|
|
« Reply #7 on: February 03, 2019, 10:56:24 AM » |
|
All I feel when I put a small bar up the slot is a void because the flange is secure to the gear. It hasn't moved to the left at all.
put the wheel back on, re-insert the axle but leave off the spacer and caliper plate. This way the wheel can slide easily to the left. Now try again with that large screwdriver or small pry bar to help the flange go with the wheel. |
|
|
|
|
Logged
|
|
|
|
|
..
|
|
« Reply #8 on: February 03, 2019, 11:00:00 AM » |
|
All I feel when I put a small bar up the slot is a void because the flange is secure to the gear. It hasn't moved to the left at all.
put the wheel back on, re-insert the axle but leave off the spacer and caliper plate. This way the wheel can slide easily to the left. Now try again with that large screwdriver or small pry bar to help the flange go with the wheel. I'll give it a go. Thanks. |
|
|
|
|
Logged
|
|
|
|
|
..
|
|
« Reply #9 on: February 03, 2019, 11:07:39 AM » |
|
I've tried with a flat piece of metal only 2 inches long and the flange is firmly in place and I can't get behind it to move it. |
|
|
|
|
Logged
|
|
|
|
|
..
|
|
« Reply #10 on: February 03, 2019, 11:16:27 AM » |
|
Git it off.  I ended up putting the handle of a socket set into the hole from the left side. This applied some pressure up against the flange and kept it in place as I pushed the wheel to the left. Phew! What do I do to make sure the flange stays in place next time? Grease the 5 posts ? |
|
|
|
|
Logged
|
|
|
|
|
The emperor has no clothes
|
|
« Reply #11 on: February 03, 2019, 11:30:08 AM » |
|
Git it off. I ended up putting the handle of a socket set into the hole from the left side. This applied some pressure up against the flange and kept it in place as I pushed the wheel to the left. Phew! What do I do to make sure the flange stays in place next time? Grease the 5 posts ? You should and I do lightly grease the flange posts. But even at that sometimes it sticks in there. About a 10” regular screwdriver works perfectly for me in that slot. |
|
|
|
|
Logged
|
|
|
|
|
..
|
|
« Reply #12 on: February 03, 2019, 11:30:53 AM » |
|
|
|
|
|
|
Logged
|
|
|
|
gordonv
Member
Posts: 5766
VRCC # 31419
Richmond BC
|
|
« Reply #13 on: February 03, 2019, 11:34:08 AM » |
|
What do I do to make sure the flange stays in place next time?
Grease the 5 posts ?
Never! They need to stay dry. I believe the manual shows no grease. I checked the manual, it shows it dry. |
|
|
|
« Last Edit: February 03, 2019, 11:53:52 AM by gordonv »
|
Logged
|
1999 Black with custom paint IS   |
|
|
|
..
|
|
« Reply #14 on: February 03, 2019, 11:34:55 AM » |
|
|
|
|
|
|
Logged
|
|
|
|
hubcapsc
Member
Posts: 16824
upstate
South Carolina
|
|
« Reply #15 on: February 03, 2019, 11:35:44 AM » |
|
Clean it good and take a better close up so you can see the splines really good. It still looks OK. Did you run it a long time with that car tar on there?  -Mike |
|
|
|
|
Logged
|
|
|
|
|
..
|
|
« Reply #16 on: February 03, 2019, 11:35:54 AM » |
|
Anyone got the part numbers I need?  |
|
|
|
|
Logged
|
|
|
|
|
..
|
|
« Reply #17 on: February 03, 2019, 11:36:37 AM » |
|
Clean it good and take a better close up so you can see the splines really good. It still looks OK. Did you run it a long time with that car tar on there? -Mike 10,000 miles and it was poifect when I out the tire on. |
|
|
|
|
Logged
|
|
|
|
hubcapsc
Member
Posts: 16824
upstate
South Carolina
|
|
« Reply #18 on: February 03, 2019, 11:42:18 AM » |
|
Don't give up on what you've got yet... a new flange is easy and pretty cheap, but a new pumpkin is hard to come by and expensive. You wouldn't want to put a new flange in a worn pumpkin. There's ways to redo your pumpkin for cheap, but not fast... I fixed this one...  -Mike |
|
|
|
|
Logged
|
|
|
|
|
..
|
|
« Reply #19 on: February 03, 2019, 11:56:34 AM » |
|
Phew. I over reacted.  Now clean it looks like the teeth on both sides are fine. Thoughts on what caused the ingress of moisture? The flange washer was in place. |
|
|
|
|
Logged
|
|
|
|
|
sandy
|
|
« Reply #20 on: February 03, 2019, 11:58:04 AM » |
|
Whatever grease you're using, stop now. Bel Ray is a waterproof grease and it protects the splines. |
|
|
|
|
Logged
|
|
|
|
|
..
|
|
« Reply #21 on: February 03, 2019, 12:01:59 PM » |
|
Whatever grease you're using, stop now. Bel Ray is a waterproof grease and it protects the splines. As I stated above I've used the same grease for 200,000 miles. ST1300 and 2 Valkyries. Never a problem until today. |
|
|
|
|
Logged
|
|
|
|
gordonv
Member
Posts: 5766
VRCC # 31419
Richmond BC
|
|
« Reply #22 on: February 03, 2019, 12:05:05 PM » |
|
How about the o-rings? The washer is for spacing, the o-rings for sealing, holding the grease in and water out. New or used o-rings.
Also, it should be moly paste isn't it, on the hub? Yes, I just checked the manual again, all places there are moly.
|
|
|
|
« Last Edit: February 03, 2019, 12:38:50 PM by gordonv »
|
Logged
|
1999 Black with custom paint IS |
|
|
|
..
|
|
« Reply #23 on: February 03, 2019, 12:19:34 PM » |
|
How about the o-rings? The washer is for spacing, the o-rings for sealing, holding the grease in and water out. New or used o-rings.
Also, it should be moly paste isn't it, on the hub? Yes, I just check the manual again, all places there are moly.
I replaced all O rings last time and will do so again. Thanks for the moly paste words. |
|
|
|
|
Logged
|
|
|
|
|
Moofner
|
|
« Reply #24 on: February 03, 2019, 12:42:15 PM » |
|
I really hope this isn't what I find when I pop the rear wheel tonight. This is good insight into what I might run into.
|
|
|
|
|
Logged
|
2003 Valkyrie "Ricky's Bike" 2014 Valkyrie "The Gypsy Bride"   |
|
|
|
Jess from VA
|
|
« Reply #25 on: February 03, 2019, 01:15:48 PM » |
|
When I see water damage in there (if that's it), my first thought is a torn Ujoint boot, with water coming down inside from the top. Either torn, or not all the way on.
I tore one (slightly) once (poking the bastard back on with a screwdriver), and fixed the hole with some liquid electrical tape. It held till the next change with a new boot.
|
|
|
|
|
Logged
|
|
|
|
|
indybobm
|
|
« Reply #26 on: February 03, 2019, 01:16:27 PM » |
|
How about the o-rings? The washer is for spacing, the o-rings for sealing, holding the grease in and water out. New or used o-rings.
Also, it should be moly paste isn't it, on the hub? Yes, I just checked the manual again, all places there are moly.
A lot of people do not use moly paste (me included). i use Bel-Ray waterproof grease on the drive splines and valvoline durolube on the drive shaft/pinion cup. never a problem. |
|
|
|
|
Logged
|
So many roads, so little time
VRCC # 5258
|
|
|
|
..
|
|
« Reply #27 on: February 03, 2019, 02:11:46 PM » |
|
When I see water damage in there (if that's it), my first thought is a torn Ujoint boot, with water coming down inside from the top. Either torn, or not all the way on.
I tore one (slightly) once (poking the bastard back on with a screwdriver), and fixed the hole with some liquid electrical tape. It held till the next change with a new boot.
I'll take a look tomorrow. Sun is down now and I've got to get to watch the second half of a rugby match  |
|
|
|
|
Logged
|
|
|
|
|
The emperor has no clothes
|
|
« Reply #28 on: February 03, 2019, 02:34:32 PM » |
|
When I see water damage in there (if that's it), my first thought is a torn Ujoint boot, with water coming down inside from the top. Either torn, or not all the way on.
I tore one (slightly) once (poking the bastard back on with a screwdriver), and fixed the hole with some liquid electrical tape. It held till the next change with a new boot.
Wouldn't that only contaminate the pinion cup area ? The drive splines are separated I believe. |
|
|
|
|
Logged
|
|
|
|
|
Jess from VA
|
|
« Reply #29 on: February 03, 2019, 02:50:37 PM » |
|
Maybe so. All I know is water goes downhill, and backwards with torque.
|
|
|
|
|
Logged
|
|
|
|
JimBob
Member
Posts: 61
Diamondhead, MS airport (66Y)
Mississippi Gulf Coast- Hancock county
|
|
« Reply #30 on: February 03, 2019, 09:18:06 PM » |
|
'Fretting' (slight oscillating movement under load) can also cause a similar appearance w/red 'rust' dust. No water needed.
|
|
|
|
|
Logged
|
Presently running:
'97 Valkyrie Tourer, '99 Valkyrie Interstate
'08 Buell 1125R, '06 Buell XB12X Ulysses, '06 Buell XB12S Lightning
'95 Suzuki GN125, '85 Suzuki GN250, '80 Suzuki TS125, '80 Suzuki TS250
Projects: '04 Buell Firebolt, '00 & '04 Buell Blasts, '74 Suz TM400, '78 Suz TS185
|
|
|
MarkT
Member
Posts: 5197
VRCC #437 "Form follows Function"
Colorado Front Range - elevation 2.005 km

|
|
« Reply #31 on: February 03, 2019, 10:45:50 PM » |
|
I saw a post that said the Locktite moly had a high % of moly - higher than the Honda assembly lube and some other brands. I recall it was 85%. Now I could be FOS on that, I'll check the name and edit if I need to. The moly is important as it's made for sliding-spline type applications and it's incredibly slippery at the molecular level - more so than anything else. There's a lot of pressure on these sliding splines, and heat as well. The O-rings are important. I have a can of that Loctite as well as the Honda stuff. I slathered the former on my splines before Roanoke Inzane - my next check is in 5k miles. Here's more info on molybdenum disulfide: https://en.wikipedia.org/wiki/Molybdenum_disulfideScroll down and read the paragraph on Lubrication and the next heading. From the Lubricant paragraph: MoS2 is often a component of blends and composites that require low friction. For example, it is added to graphite to improve sticking.[32] A variety of oils and greases are used, because they retain their lubricity even in cases of almost complete oil loss, thus finding a use in critical applications such as aircraft engines. When added to plastics, MoS2 forms a composite with improved strength as well as reduced friction. Polymers filled with MoS2 include nylon (trade name Nylatron), Teflon and Vespel. Self-lubricating composite coatings for high-temperature applications consist of molybdenum disulfide and titanium nitride, using chemical vapor deposition.
Examples of applications of MoS2-based lubricants include two-stroke engines (such as motorcycle engines), bicycle coaster brakes, automotive CV and universal joints, ski waxes[36] and bullets.[37] Here's the "next heading" paragraph: MoS2-fortification
Molybdenum disulfide is used as an additive in some NLGI#2 greases and dry-film lubricants to enhance pressure and temperature tolerances as well as to provide secondary lubrication after the base has worn off or migrated from the intended application site. Greases fortified with molybdenum disulfide grease have numerous benefits: [39]
Ideal for hard-to-reach areas
Reduced wear and galling
Reduced operating costs
Long-lasting, durable
Operator friendly
Environmentally-conscious
Flexible for joints and moving parts
Rust Prevention
Excellent surface penetration[40] Correction - the Loctite paste is 65% MoS 2. I couldn't find it locally, had to order it online. 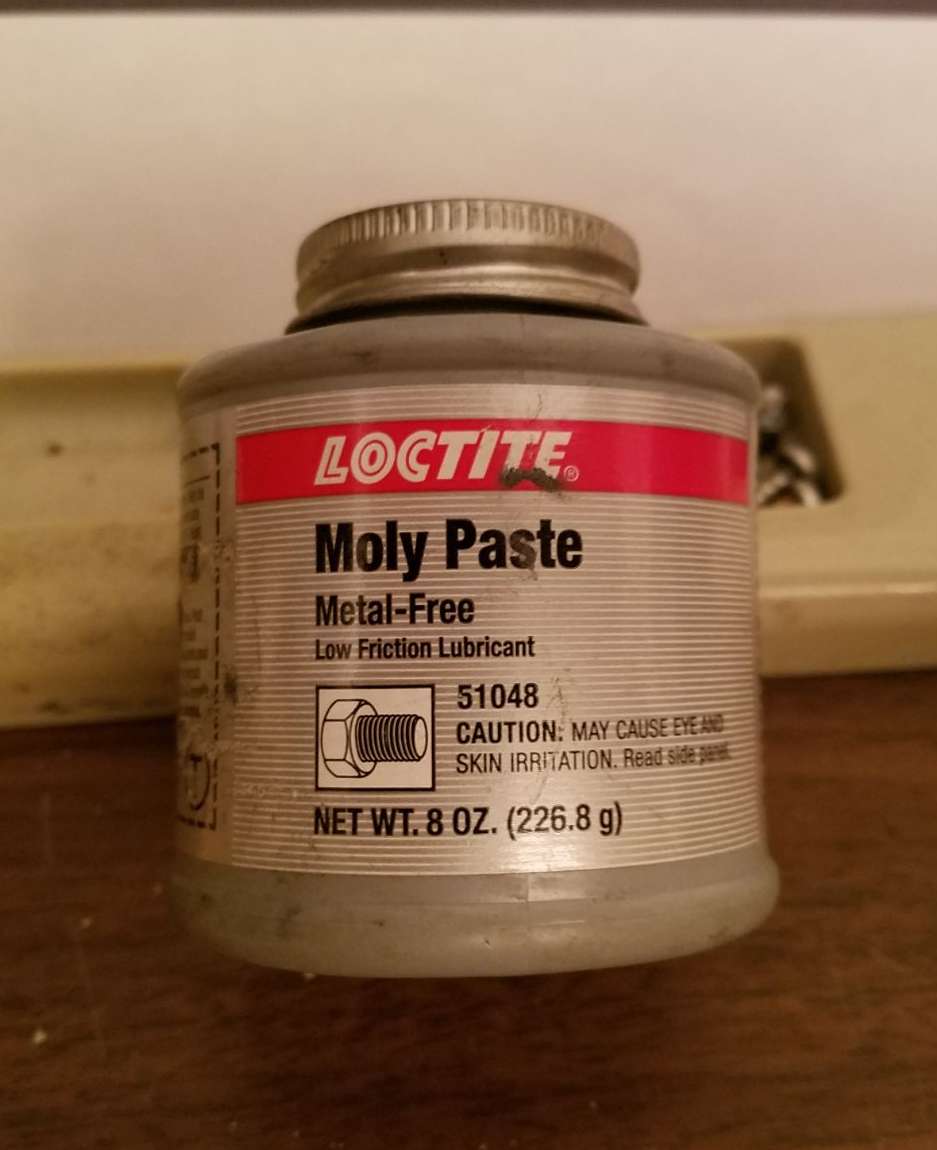 |
|
|
|
« Last Edit: February 03, 2019, 11:22:25 PM by MarkT »
|
Logged
|
|
|
|
|
..
|
|
« Reply #32 on: February 04, 2019, 02:08:22 AM » |
|
'Fretting' (slight oscillating movement under load) can also cause a similar appearance w/red 'rust' dust. No water needed.
WhAT could cause that on a Valkyrie? |
|
|
|
|
Logged
|
|
|
|
hubcapsc
Member
Posts: 16824
upstate
South Carolina
|
|
« Reply #33 on: February 04, 2019, 03:02:27 AM » |
|
Correction - the Loctite paste is 65% MoS2. I couldn't find it locally, had to order it online.
Stanley Steamer and I looked around Athens Georgia and found a can of Loctite moly at Grainger.
The can in that picture will last a loooong time...
-Mike
|
|
|
|
|
Logged
|
|
|
|
|
..
|
|
« Reply #34 on: February 04, 2019, 04:42:11 PM » |
|
Pick up rim with new tire in the morning.
I wire wooled the 5 posts on the flange to get any old crud off. Now they are nice and smooth. Hopefully that helps them stay in place next removal.
|
|
|
|
|
Logged
|
|
|
|
|
Chrisj CMA
|
|
« Reply #35 on: February 05, 2019, 04:46:29 AM » |
|
Pick up rim with new tire in the morning.
I wire wooled the 5 posts on the flange to get any old crud off. Now they are nice and smooth. Hopefully that helps them stay in place next removal.
Britman. The main reason your flange stayed with the drive was because it was bonded together in that red corrosion. Which was mostly dry rotted grease, not rust or your splines would have been toast. The other reason for the flange to stay with the drive is worn dampeners in the wheel. Check them. If loose or metal bushing wallowed. Replace, cheap insurance. |
|
|
|
|
Logged
|
|
|
|
|
Bambam650
|
|
« Reply #36 on: February 05, 2019, 05:54:38 AM » |
|
What do I do to make sure the flange stays in place next time?
Grease the 5 posts ?
Never! They need to stay dry. I believe the manual shows no grease. I checked the manual, it shows it dry. This from the Shop Talk page (see step #12): Rear Wheel Installation and Rear Spline Lube10. Coat the large plastic washer with mdp 11. Coat the inside of the flange with mdp 12. Lightly coat the 5 flange pins with mdp13. Push the flange onto the wheel hub being sure the inside o-ring and plastic washer are in place 14. Fill the outer flange o-ring groove with mdp, coat the o-ring with mdp and install |
|
|
|
|
Logged
|
1997 Standard (Black) original owner, bought new in August 1996
|
|
|
hubcapsc
Member
Posts: 16824
upstate
South Carolina
|
|
« Reply #37 on: February 05, 2019, 06:57:51 AM » |
|
I have always put moly paste on the flange fingers since I saw it in Shop Talk... but
the manual doesn't say to do it... do-it/don't-do-it is a controversy when you search
back through years of the tech board.
I almost never have to pry my flange out, I bet the most important reason that I
generally don't have to pry it out is because I have changed my dampers three or four times over
the years, like Jeff says...
If there's a bunch of rubber dust in there, or if they seem loose, it is good to change them.
-Mike
|
|
|
|
|
Logged
|
|
|
|
|
..
|
|
« Reply #38 on: February 05, 2019, 08:24:46 AM » |
|
Dampners changed 24,000 miles ago and are in good shape.
|
|
|
|
|
Logged
|
|
|
|
|
..
|
|
« Reply #39 on: February 05, 2019, 08:26:01 AM » |
|
The contrast between old and new is always striking.  |
|
|
|
|
Logged
|
|
|
|
|


