Valkyrie Riders Cruiser Club
June 19, 2025, 02:59:08 AM *
Welcome, Guest. Please login or register.

Login with username, password and session length
Ultimate Seats Link VRCC Store
Homepage : Photostash : JustPics : Shoptalk : Old Tech Archive : Classifieds : Contact Staff
News: If you're new to this message board, read THIS!
 
Inzane 17
Pages: [1]   Go Down
Send this topic Print
Author Topic: I have self-cancelling turn signals again.  (Read 1493 times)
John Schmidt
Member
*****
Posts: 15194


a/k/a Stuffy. '99 I/S Valk Roadsmith Trike

De Pere, WI (Green Bay)


« on: May 06, 2022, 07:05:04 PM »

I couldn't get the Signal Boss to work again so finally gave up and removed it, but left the power and ground connections available. Since that system worked on an initial voltage pulse to fire the module, I figured it would work with the Signal Dynamics module as well which operates in the same fashion. The stock system applies a constant voltage to the turn signal system and most aftermarket systems work only with a one time pulse. That's the reason the left side switch box had to have either the foam pads or the springs installed to return the turn lever to neutral, cutting the constant voltage off.

A few days ago I ordered the Signal Dynamics turn signal module #01501 and today went about testing my idea. It works fine. On the I/S trike, I had to pull the long green connector apart from inside the left side of the fairing, one half is directly from the handlebar switch box and is the part you need to work on. I then worked it out of the fairing to have it hanging out in the open to work on. I identified the light blue and orange wires, double checked using an ohm meter to be certain I had the correct wires. You use the gray wire and either of the blue or orange, press the turn lever and you'll get continuity if you've chosen correctly. I then split the protective tubing on the wire harness so as to access the two wires approx. 5" back up from the green connector and cut them there. I have a spare I/S main wire harness so cut some extra orange and blue wires from it and soldered approx. 6" extensions to the two halves of cut wires still in the harness. I did the same to the corresponding wires on the SD module, then went looking for a four pin connector. I added the pins necessary and was looking for some spare tubing to run the wires through for protection but apparently have used it all up so tomorrow I head to the store for a new supply. Once all wires are run through, I'll insert the pins in their respective halves of the connector, attach the power and ground and be done with it. I have some good double sided tape which will let me stick the SD module to the inside of the fairing. With that, I can then remount the speakers and close up the front of the trike. Time to go tire shopping for two new rears.

I'll be posting pictures of each step but want to wait until I have the protective tubing and module in place first. I will add, this only gives you self-cancelling turns at three different timing lengths. That's all I was interested in so I'm satisfied with the result.
« Last Edit: May 06, 2022, 07:08:01 PM by John Schmidt » Logged

JimF2424
Member
*****
Posts: 68


Valkyrie

Gulfport MS


« Reply #1 on: May 07, 2022, 01:11:07 PM »

I had problems with the Signal Boss, gave up on it.   Installed ST2 Turn System, works great, doesn't have the four-way like the boss, but can live without it.  But I think the signals work better.   You can get it on Amazon for about $100:  Smart Turn System - STS, Automatic Turn Signal Cancelling Module, self Cancelling System;  The problem I think I had with the boss is that my wiring is not original, which caused problems.
Logged
John Schmidt
Member
*****
Posts: 15194


a/k/a Stuffy. '99 I/S Valk Roadsmith Trike

De Pere, WI (Green Bay)


« Reply #2 on: May 07, 2022, 05:06:33 PM »

Jim, I paid about $65 for the Signal Dynamics module, finished wiring it in today. Works fine, I left the foam pieces in the left side switch box for it to work. Also won't give me 4-way hazards but I'm not interested in that. The module has it but won't work with the OEM switch...no bid deal for me.

Here's what was involved with installing the module on the I/S. You have to isolate the wires in the harness coming from the switch box and mount the module between them once you cut the wires.

The upper cut wires represent the "input" side for the module. The lower cut wires are the "output" side.
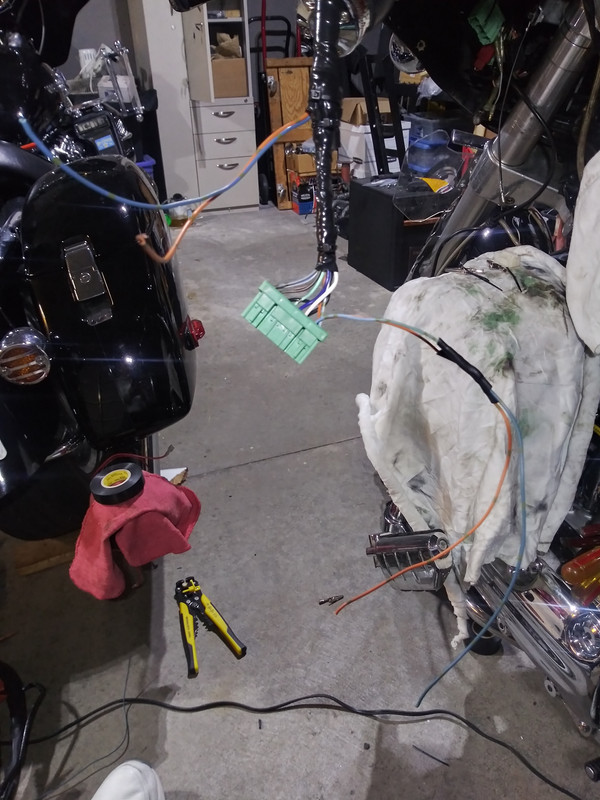

The solid colored wires(input) attach to the upper cut wires, just follow the color designation for left and right turns. The white striped wires(output) attach to the lower cut wires. Supply a ground and power and you're good to go.


I dug up a four pin connector to make the wiring connections. Then cut a piece of Alien Tape and stuck it on the back side of the module then placed it inside the left side of the fairing kinda toward the front. If I ever need to remove it, I just unplug the connectors, remove the foam in the switch box and I'm back to OEM operation. It wouldn't be right without one final aggravation however. Two of the imbedded  nuts that hold the speaker in started turning in their socket. So off it came and mixed up some JB Kwik,  inserted some inside then around the nut itself. Using the screw, I pressed it into place then removed the screw. Even though it's the Kwik version I'll let it dry overnight. Next...new rubber for the rear wheels plus brake pads and a flush.
Logged

Pages: [1]   Go Up
Send this topic Print
Jump to: