|
Hogdaddy
|
 |
« on: March 17, 2010, 06:51:39 AM » |
|
Anyone have trouble remounting the airbox after desmog? I desmogged and installing dan-marc valve yesterday, everything went fine. Except the installating of the tubles from the air box to carbs. the main problem is the # 4 and 6 just don't sit on the carb correctly especially #6. Any ideas? Thanks
|
|
|
|
|
 Logged
|
|
|
|
fudgie
Member

Posts: 10651
Better to be judged by 12, then carried by 6.
Huntington Indiana

|
|
« Reply #1 on: March 17, 2010, 07:20:33 AM » |
|
Just gotta work at it. Helps if it is warm, it will be more flexable. Get them lined up and press down in the airbox with your fist. Then tighten them. Be sure to check behind to make sure you got them in position. It gets easier each time.
|
|
|
|
|
Logged
|
 Now you're in the world of the wolves... And we welcome all you sheep... VRCC-#7196 VRCCDS-#0175 DTR PGR |
|
|
John Schmidt
Member
Posts: 15366
a/k/a Stuffy. '99 I/S Valk Roadsmith Trike
De Pere, WI (Green Bay)
|
|
« Reply #2 on: March 17, 2010, 08:56:01 AM » |
|
Fudgie is right on checking in back of the carbs. That rubber has a tendency to catch and roll under, which makes it difficult to get them all the way down. Use an inspection mirror to look in back, use a skinny screwdriver to roll the rubber out and in place. Just lift the rubber in front and push all the way around with the screwdriver. As for downward pressure, get out your tie down strap and put a small chunk of 2x4 on the airbox top cover. Hook the strap to the engine guard brace(the one going back under the engine) on each side and ratchet it down. It will pull the airbox down in place and hold it for you, leaving both hands free to work with it.
|
|
|
|
|
Logged
|
|
|
|
|
BradValk48237
|
|
« Reply #3 on: March 17, 2010, 09:44:48 AM » |
|
I know the pain....
Just had the box off yesterday to replace the air guide that the PO had removed from my I/S...
I slipped the clamps up on the tube and worked them down on... you can feel in back to see if they are sitting good, then slipped the clamps back down and tightend... Had to really push down.. but it is do able... just have to work at it.
I did notice that there was glue around the tubes on the outside of the air box.. is this something the PO might have done? Or is that something from the factory...it was cracking and flaking a bit.
B
|
|
|
|
|
Logged
|
|
|
|
|
DFragn
Guest
|
|
« Reply #4 on: March 17, 2010, 10:34:15 AM » |
|
I did notice that there was glue around the tubes on the outside of the air box.. is this something the PO might have done? Or is that something from the factory...it was cracking and flaking a bit.
The "glue" is factory applied. As far as reinstalling. Once the air-box is repositioned 'properly' it shouldn't take any pressure to hold it down, not even with the intake clamps let alone a ratchet strap. It does take a few R&R's to get your method down pat. Big importance - Make sure the boots aren't curled over at the carbs, especially towards the inside/back. |
|
|
|
|
Logged
|
|
|
|
|
Mikey
|
|
« Reply #5 on: March 17, 2010, 12:27:43 PM » |
|
What works real good is a radiator hose removal tool. I always take it and run it around the outside of the carbs, helps get the tubes over, and if you can get 5, and one folds over, this will take care of the one. 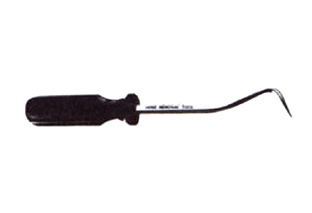 |
|
|
|
|
Logged
|
Remember folks, street lights timed for 35 mph are also timed for 70 mph
VRCC# 30782
|
|
|
Disco
Member
Posts: 4914
Armed Man=Citizen; Unarmed Man=Subject
Republic of Texas
|
|
« Reply #6 on: March 17, 2010, 12:55:41 PM » |
|
A light smear of silicone grease all around the inside of the boot will help them go on, too.  |
|
|
|
|
Logged
|
2000 Bumblebee "Tourer", 98 Yellow & Cream Tourer, 97 Rescue blower bike 22 CRF450RL, 19 BMW R1250RT 78 CB550K 71 Suzuki MT50 Trailhopper .jpg) VRCC 27,916 IBA 44,783 |
|
|
|
BrettB
|
|
« Reply #7 on: March 17, 2010, 03:55:26 PM » |
|
I couldn't find any silicone grease........looked at several parts stores and no one could help me. Where can I find it??
I used spray silicone to reinstall my airbox. Sprayed some on my finger, then applied to the inside of the boot. It worked well, but I think the light coat of grease would be better.
|
|
|
|
|
Logged
|
|
|
|
|
Farther
|
|
« Reply #8 on: March 17, 2010, 05:10:00 PM » |
|
I couldn't find any silicone grease........looked at several parts stores and no one could help me. Where can I find it?? Ace Hardware in the plumbing section. It is waterproof and used for O rings on Delta faucets and other plumbing applications. The silicone grease has been in my tool box for the past 20 years and I just picked up another tub about two weeks ago. The container is very small, probablly about one oz. worth. |
|
|
|
|
Logged
|
Thanks,
~Farther
|
|
|
Disco
Member
Posts: 4914
Armed Man=Citizen; Unarmed Man=Subject
Republic of Texas
|
|
« Reply #9 on: March 17, 2010, 05:49:31 PM » |
|
You could use dielectric grease, too.
|
|
|
|
|
Logged
|
2000 Bumblebee "Tourer", 98 Yellow & Cream Tourer, 97 Rescue blower bike 22 CRF450RL, 19 BMW R1250RT 78 CB550K 71 Suzuki MT50 Trailhopper VRCC 27,916 IBA 44,783 |
|
|
|
Steve K (IA)
|
|
« Reply #10 on: March 17, 2010, 11:18:25 PM » |
|
I know the pain....
Just had the box off yesterday to replace the air guide that the PO had removed from my I/S...
I slipped the clamps up on the tube and worked them down on... you can feel in back to see if they are sitting good, then slipped the clamps back down and tightend... Had to really push down.. but it is do able... just have to work at it.
I did notice that there was glue around the tubes on the outside of the air box.. is this something the PO might have done? Or is that something from the factory...it was cracking and flaking a bit.
B
Do you know why the PO removed the air guide? When putting I/S pods on the wife's Std, I put an I/S air guide in to make the pods functional. It was quite a challenge until I figured it out. If there is ever a next time, it won't be so hard. 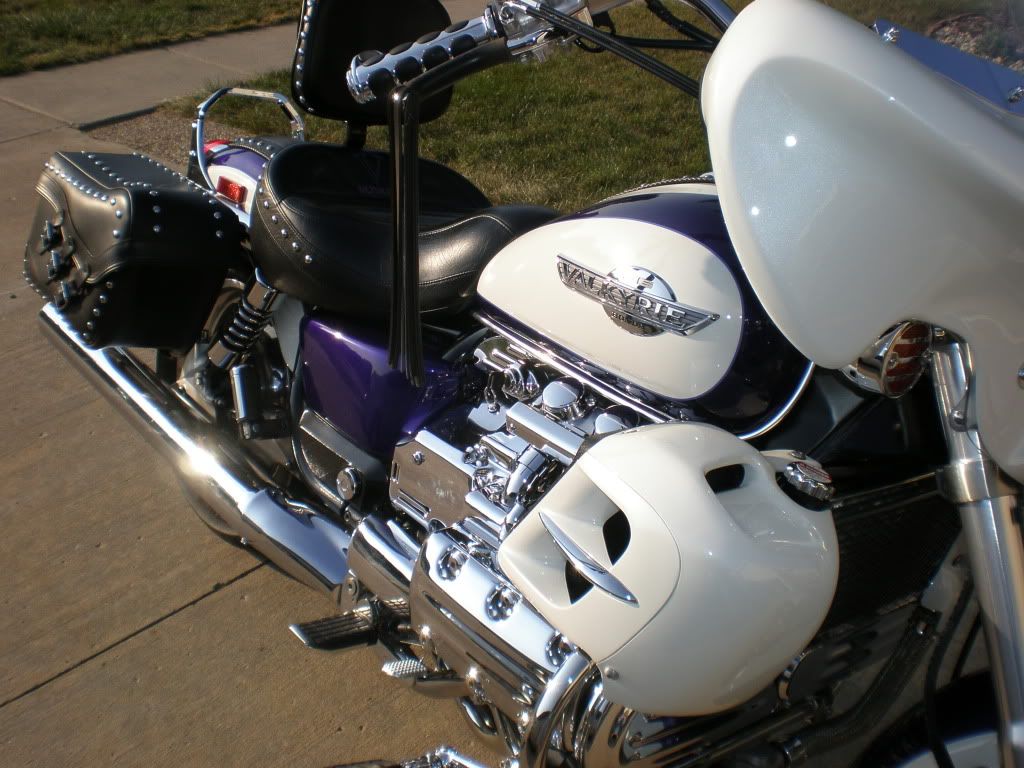 |
|
|
|
|
Logged
|
 States I Have Ridden In |
|
|
|
BradValk48237
|
|
« Reply #11 on: March 18, 2010, 07:06:45 PM » |
|
He took the pods off, put standard engine guards and radiator end covers. He sold the pods with the bike and I originally stuck em on as the bike was... once the bike was crunched last Sept, I began to put it back right. But , I have to say, I cheated....
I did not put the lower rubber skirt in, I also, cut the hard plastic upper part into 3 pieces and the epoxyed it back together once it was in place. May not work as well, but it saved me several hours of further tear down and possible re assembly boo boos...lol.
Brad
|
|
|
|
|
Logged
|
|
|
|
|
Steve K (IA)
|
|
« Reply #12 on: March 18, 2010, 08:40:43 PM » |
|
Well, if anyone is following this, here is how I changed out the air guide. What I took off was the tank, air box, carb runners and the (I think) choke linkage and removed the upper radiator hose and unbolted the radiator and let it hang forwards. The idea was to drop the carbs and move them back to get at the air guide. The carbs dropped a few inches but only was able to move them back less than 2 inches. I struggled like crazy to get the Std air guide out. Then I struggled even harder trying to get the I/S guide in place. I know I spent a few hours with no luck. Finally I laid the air guide on it's back on top of the carbs and then moved it forward and it almost fell down into place. Who would of thought it could be that easy? All along I was trying to slide it in from the side while it was upright.  I didn't want to take the frame apart to fit the rubber skirt, that seemed a bit much, so i cut it very carefully and got it how it is supposed to be and super glued it back together. All-in-all....I'm very happy with how it came out.  Most importantly, Laura loves the mod and that's what it was all about.  |
|
|
|
|
Logged
|
States I Have Ridden In |
|
|
|
BradValk48237
|
|
« Reply #13 on: March 19, 2010, 04:23:46 PM » |
|
Dang...... Does a standard come with an air guide?
Maybe why I go soooo much hot air, as there was nothing behind the radiator?!?!?!?
I didn't want to move the carbs, rad, etc...thats why I cut it.
Now that I have done it... will it make a difference? I won't know till I get it back to gether this weekend.
Just got the parts back from the painter today...... Looks almost original, but he hand did the pinstripe and it looks great. Have the 2 saddlebags together and you almost cant tell them apart till you put yer nose on it.
Thanks to Doug at Sheets Collision in Ypsilanti, MI!!!!!!
B
|
|
|
|
|
Logged
|
|
|
|
|
Ratdog
|
|
« Reply #14 on: March 19, 2010, 05:23:36 PM » |
|
I know the pain....
Just had the box off yesterday to replace the air guide that the PO had removed from my I/S...
I slipped the clamps up on the tube and worked them down on... you can feel in back to see if they are sitting good, then slipped the clamps back down and tightend... Had to really push down.. but it is do able... just have to work at it.
I did notice that there was glue around the tubes on the outside of the air box.. is this something the PO might have done? Or is that something from the factory...it was cracking and flaking a bit.
B
Do you know why the PO removed the air guide? When putting I/S pods on the wife's Std, I put an I/S air guide in to make the pods functional. It was quite a challenge until I figured it out. If there is ever a next time, it won't be so hard. The pods in white... that looks sharp. Nicely done Steve. |
|
|
|
|
Logged
|
Make yourselves sheep, and the wolves will eat you. - Benjamin Franklin. If it ain't Zesty, it's only a two-tone.  |
|
|
|


