Back in Oct. I customized my OEM antenna for a second time with the garage door. Now this is getting expensive. So I searched the internet for a solution. Here on the V.R.C.C. I had saw where some interstate owners had mounted their antennas in the fairing. Some used the rubber ducky type in the fairing. With a ride quickly approaching that I knew I would want an antenna for, I ran to the local auto parts store and went with the rubber ducky in the fairing method. Not real happy with that , getting poor reception. I found a company
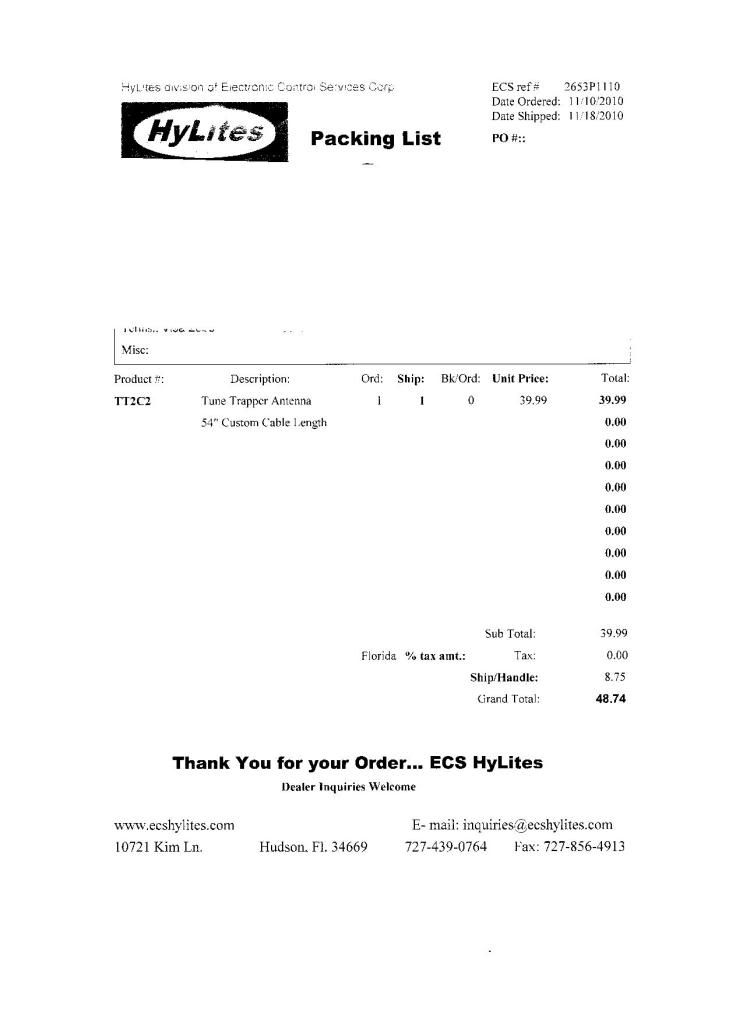
http://www.ecshylites.com/page/page/761353.htm that makes a hidden antenna for custom cars, Restoration ,and bikes. Called them and spoke to Steve Zink who I believe is the owner, about the product. It sounded like what I was looking for except for the cable length. They offered a 24" or a 6' and also offer extensions sold separately. I did not want another connection in the cable nor did I want a bunch of cable coiled up in the fairing. Steve was willing to work with me. He could make me what I wanted a 54" cable. But it would take maybe up to two weeks. Hey I do have an antenna, it just doesn't work well, so two weeks to get what I want is no big deal. He said could cut some off of the six ft. cable or catch one in production and make it to length at no charge. So thats what I did 54" model " TT2C2 " delivered for $48.74. If it works as advertised and cut to my desired length seems like a fair price to me.
Antenna came with in ten days.
 http://i1036.photobucket.com/albums/a443/1chip/Hidden%20Antenna%20Installation/Valkyrietoys015Medium.jpg[/img]]
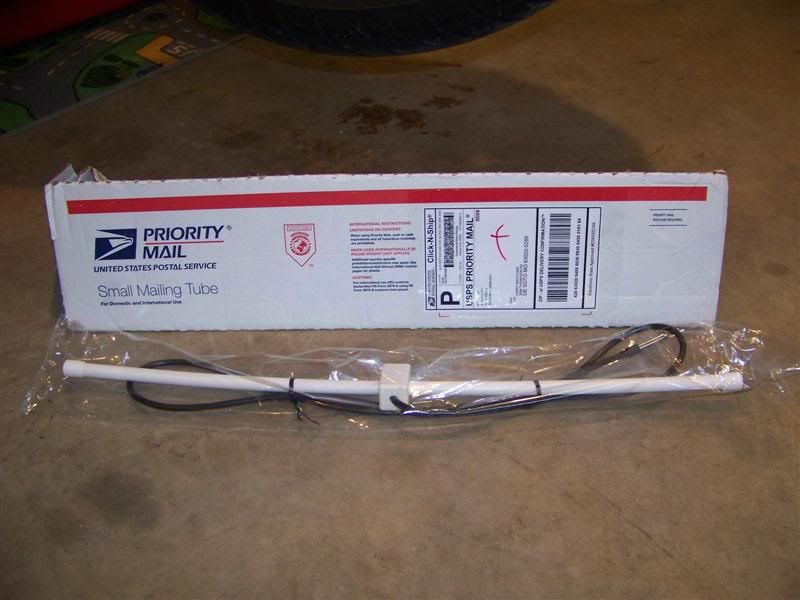
The motorcycle specific antenna is made with the cable connection in the middle of the antenna I think this will aid in mounting in the fairing.
http://i1036.photobucket.com/albums/a443/1chip/Hidden%20Antenna%20Installation/Valkyrietoys016Medium.jpg[/img]]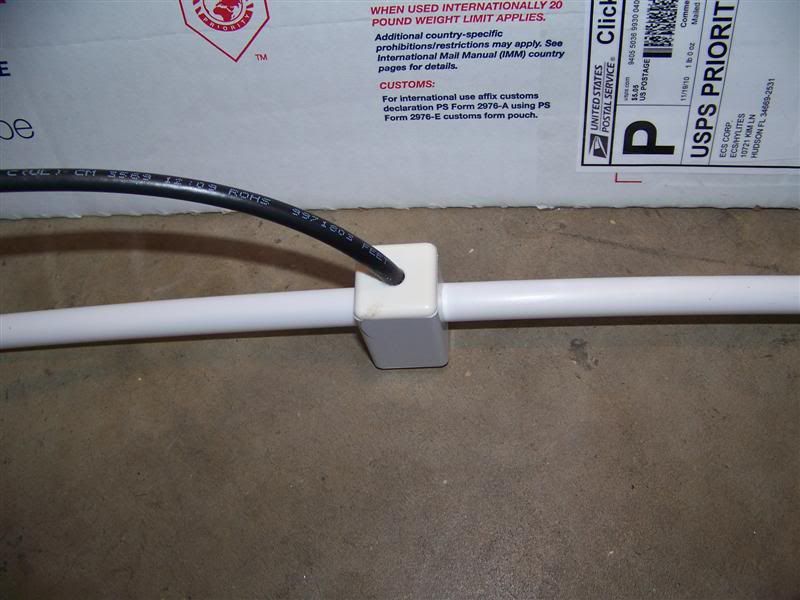
Installation was easy enough. I put the bike up on the lift and secured the front end, removed the seat, fuel tank,and plastic neck cover rt. side only
http://i1036.photobucket.com/albums/a443/1chip/Hidden%20Antenna%20Installation/Valkyrietoys024Medium.jpg[/img]]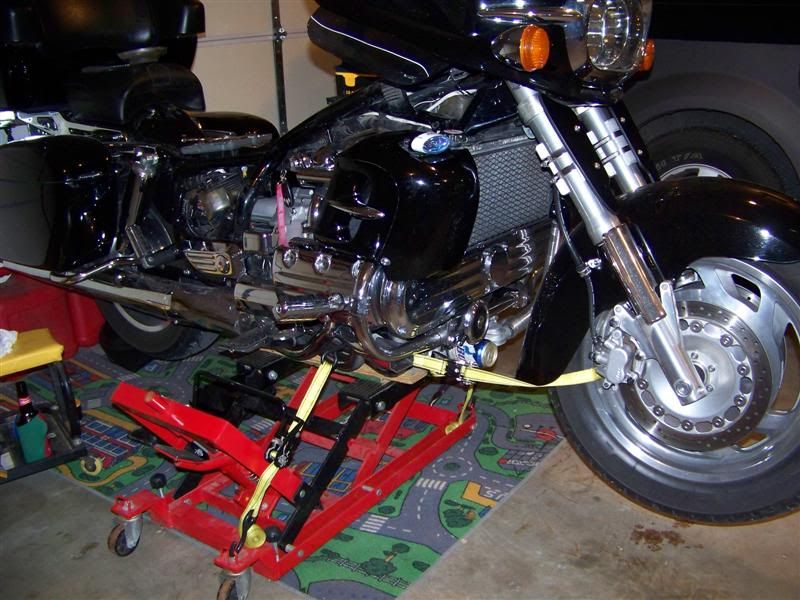
Then removed the front right speaker access panel from there I was able to slide the antenna in the fairing I kept it as high in the fairing as possible figuring this would help with reception. Steve said the antenna could be in contact with metal or plastic and reception would not be effected. I used a zip tie to secure it.on both sides.
http://i1036.photobucket.com/albums/a443/1chip/Hidden%20Antenna%20Installation/Valkyrietoys026Medium.jpg[/img]]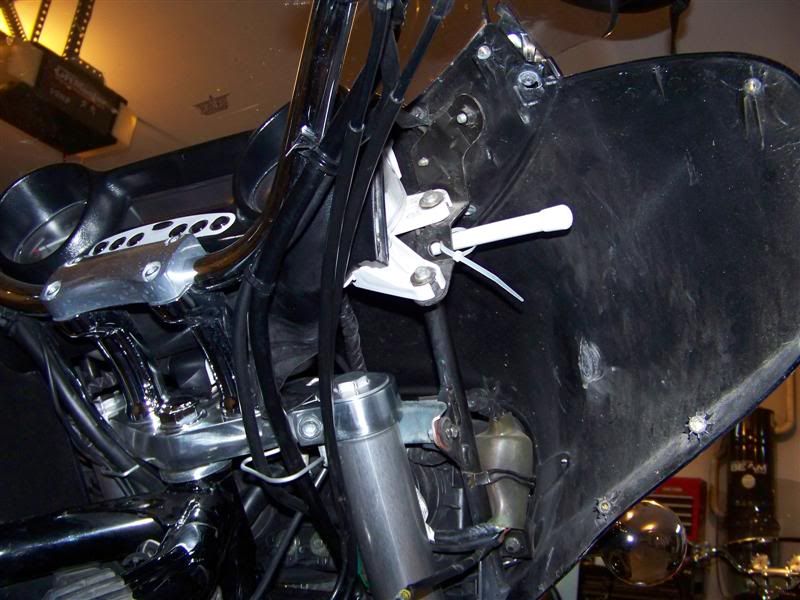
I fed the cable below the upper triple tree and near the neck ,next to the throttle cables,
http://i1036.photobucket.com/albums/a443/1chip/Hidden%20Antenna%20Installation/Valkyrietoys023Medium.jpg[/img]]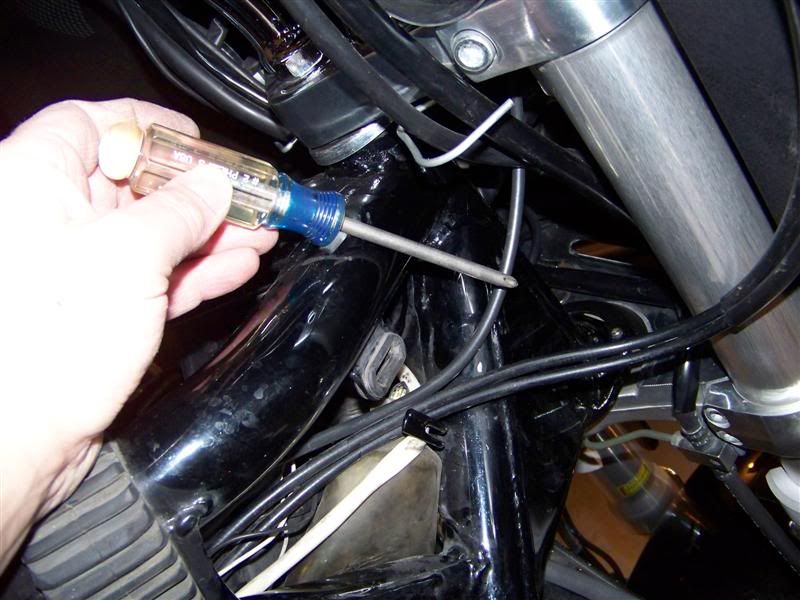
Then removed the air filter cover and ran the cable along the frame .
http://i1036.photobucket.com/albums/a443/1chip/Hidden%20Antenna%20Installation/Valkyrietoys021Medium.jpg[/img]]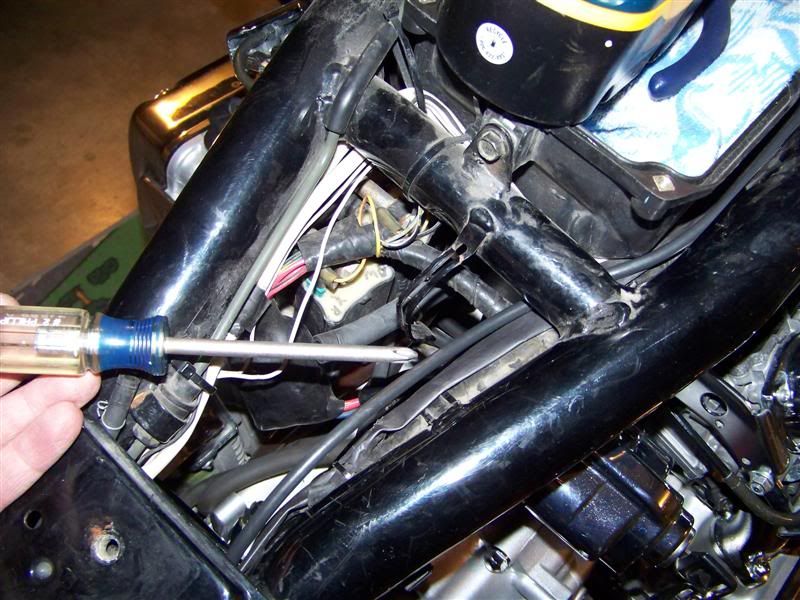
Ran the cable down to the radio connection I left a drip loop in the cable below the connection to help prevent water from running up into the connection..
http://i1036.photobucket.com/albums/a443/1chip/Hidden%20Antenna%20Installation/Valkyrietoys020Medium.jpg[/img]]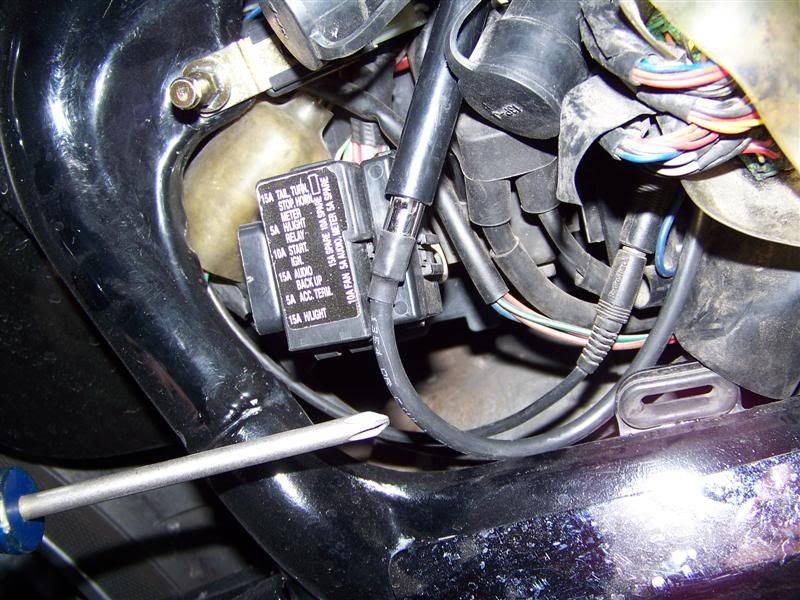
The install took about two hours along with cleaning and oiling the air filter,and rerouting a driving light wire harness thats location I've not been happy with.
I'm happy to say as of now I am very pleased with the reception, seems to be as good or better than the factory.
Hope this helps somebody else out on making a decision and maybe the installation .


