Valkyrie Riders Cruiser Club
June 17, 2025, 11:48:22 PM *
Welcome, Guest. Please login or register.

Login with username, password and session length
Ultimate Seats Link VRCC Store
Homepage : Photostash : JustPics : Shoptalk : Old Tech Archive : Classifieds : Contact Staff
News: If you're new to this message board, read THIS!
 
MarkT Exhaust
Pages: [1]   Go Down
Send this topic Print
Author Topic: Using A Rebel Indicator Harness to allow LED turn indicator on STD/TOURER  (Read 9822 times)
chrise2469
Member
*****
Posts: 295

Winnipeg Manitoba Canada


« on: November 17, 2011, 11:11:00 PM »

I recently did a post about upgrading the speedo and tach to LED lights
http://www.valkyrieforum.com/bbs/index.php/topic,34551.0.html
This post is about converting SOCKET, PILOT 37650-KEB-901 from a Honda Rebel to allow a LED for the trun indicator.

As we are all aware the turn indicator is very weak and almost impossible to see in the sun.  When I changed the speedo and tach bulbse I tried to upgrade the turn indicator bulb to an LED. Unfortunatly, the T6.5 wedge base is only available as a polarized bulb.  This means the indicator will only blink with one side of the bike.  At the same time as I did the Valk, I changed out the bulbs on my Honda Rebel.  I noticed that the rebel uses a 194 wedge base which is non-polarized.  A plan was rapidly formed.

I checked online and found that the cost for the wire harness was 7.98 at HDL.  At that price, I was willing to order it and modify the valkyrie harness as needed.  The part was ordered locally for 12 Cdn and it soon arrived in my hands.
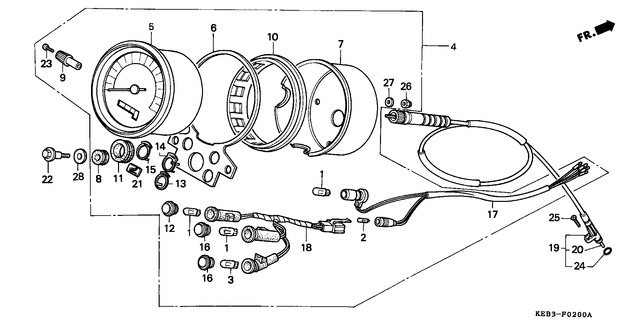

Part 18 is the harness.

I noticed that the connector was a six pin, same as the valk.  A quick check of the both bikes  wiring diagrams showed that yes, both are 6 pin and appear to be the same wiring.  The diagrams lied. The pins on the rebel must be moved to fit the valk wiring harness.

One large cavet is the led manufacture sates the the bulbs should not be installed into headlamp housings.  I'm willing to take my chances.

It's time for pictures so if you wish to do this mod this should help you. The photo's will show the connectors and wires and where they should go to.  Explanation below the photo's.
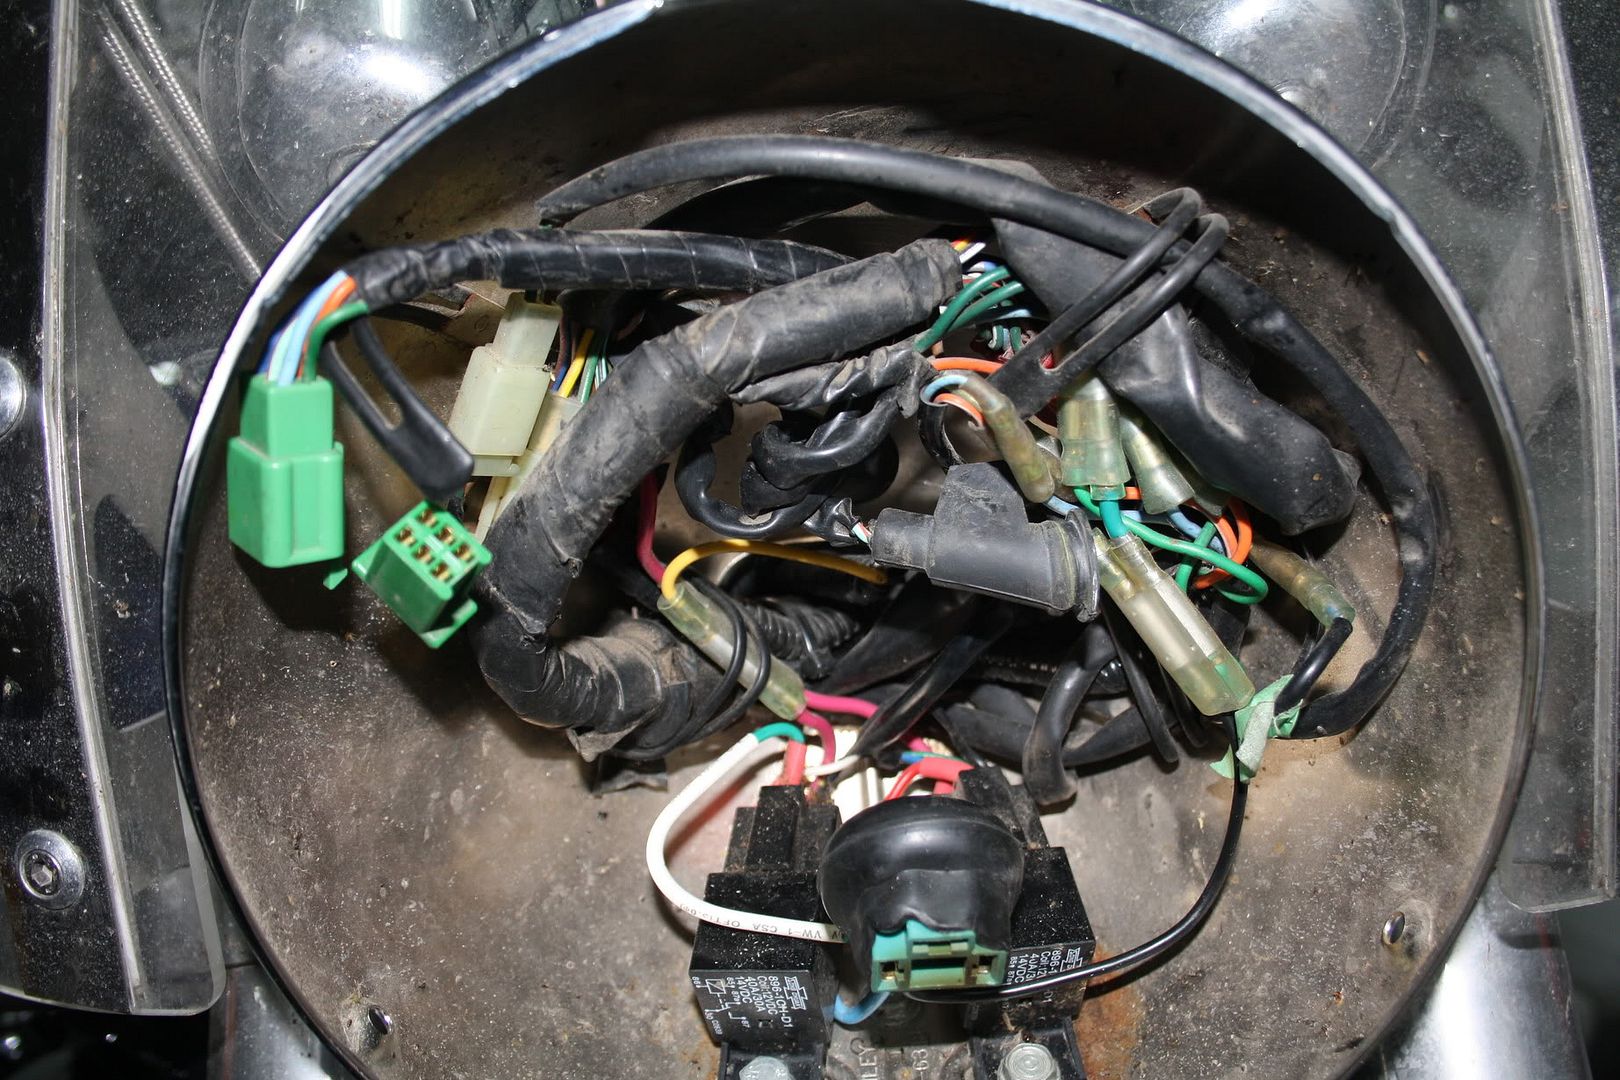

A general picture of the bulb wires and socket location.

Here is the valk plug
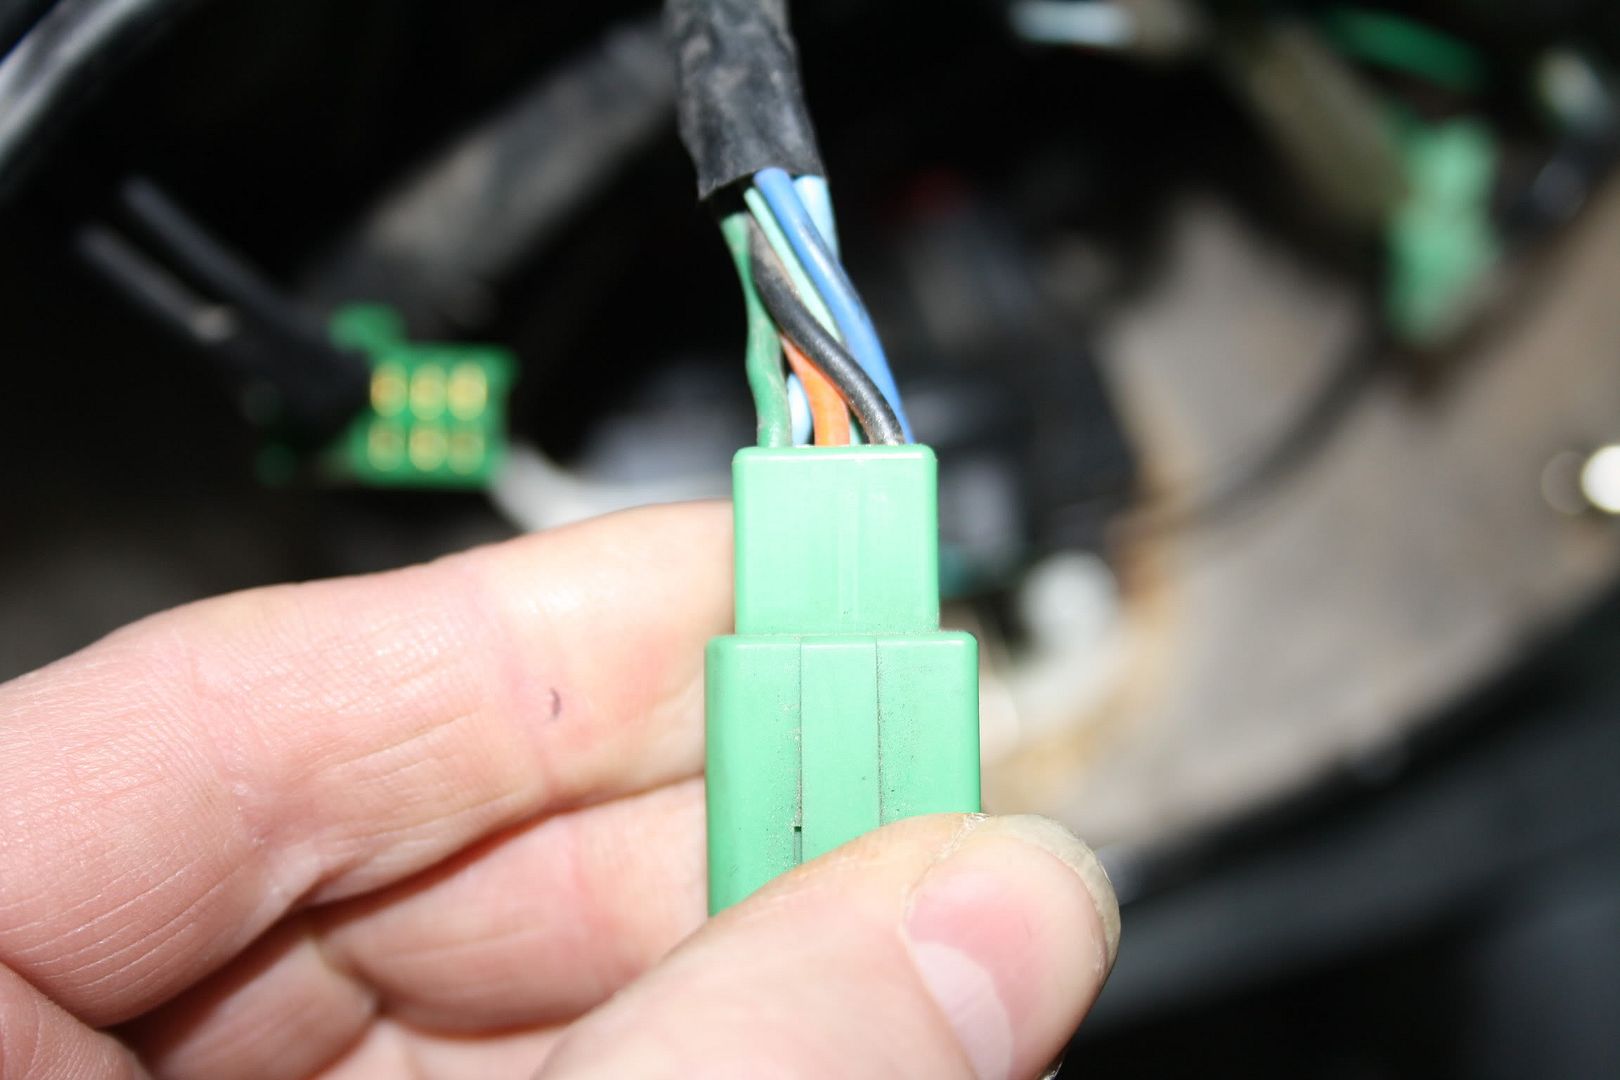
The front of the Valkyrie plug.
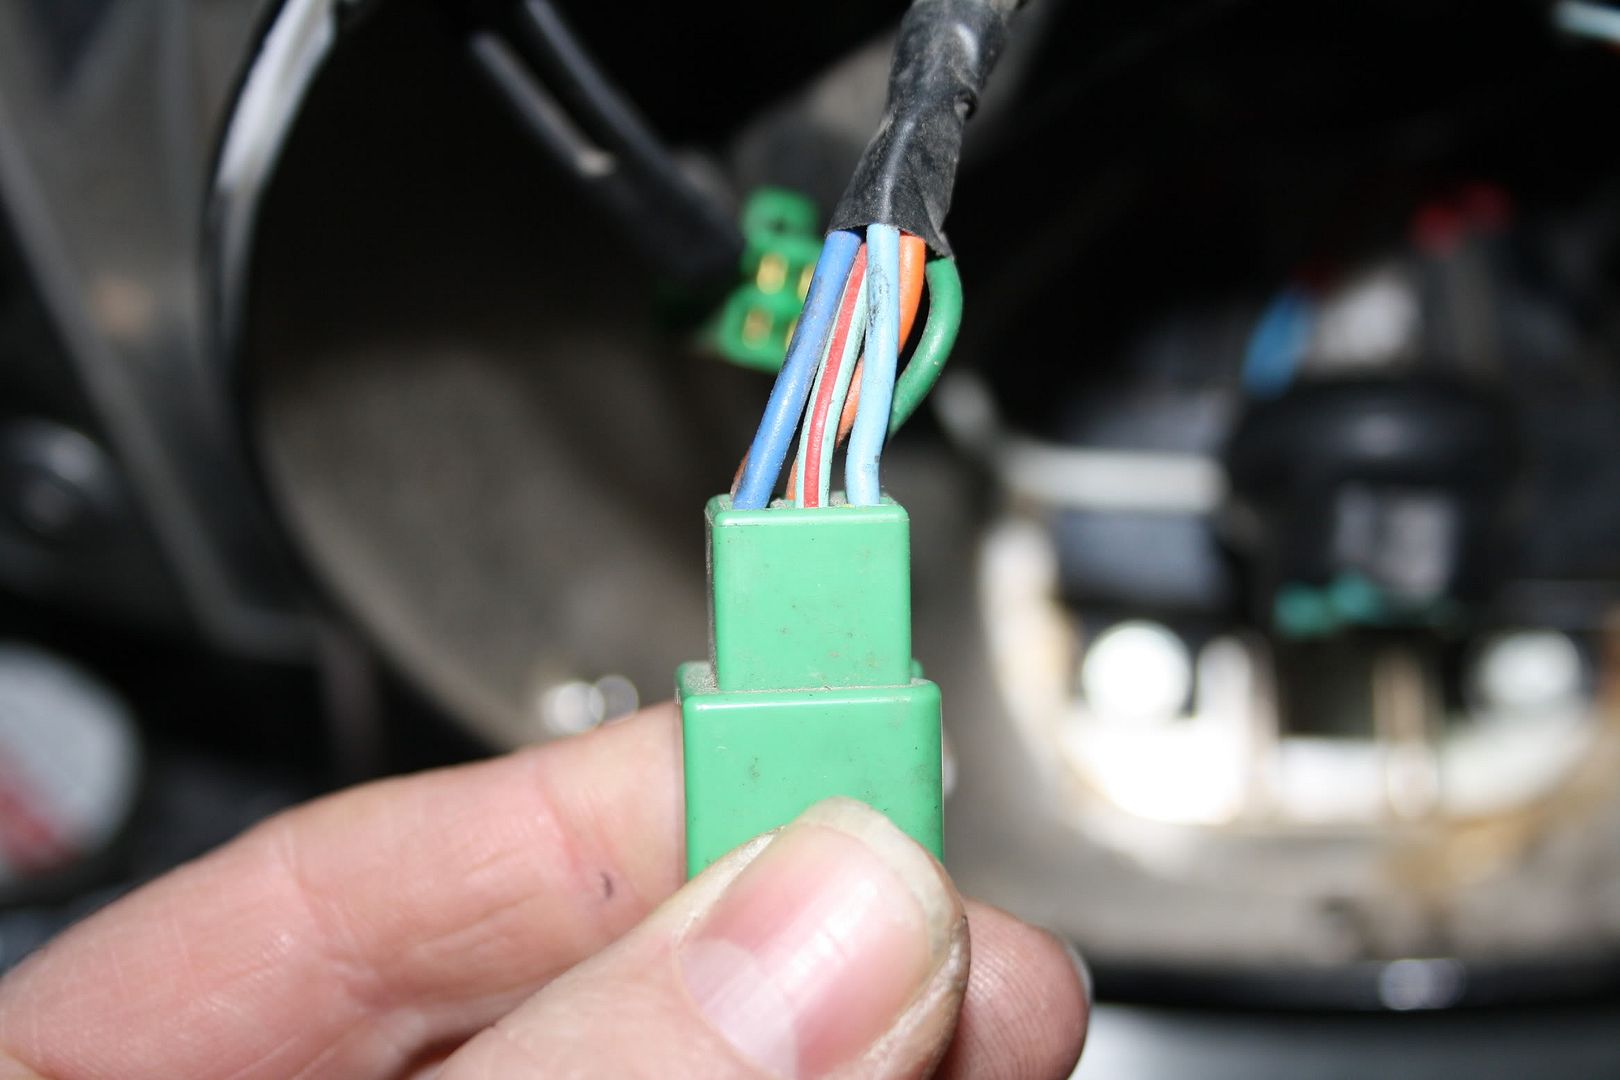

The rear of the Valkyrie Plug

The plugs and sockets of the Valkyrie are:
Turn Light Blue (LB)
       Orange(O)
Neutral Black/Brown (BL/BR)
           Light Green/Black(red on my wire) LG/BL
High Green (G)
       Blue(BU)

Here is the Rebel Plug
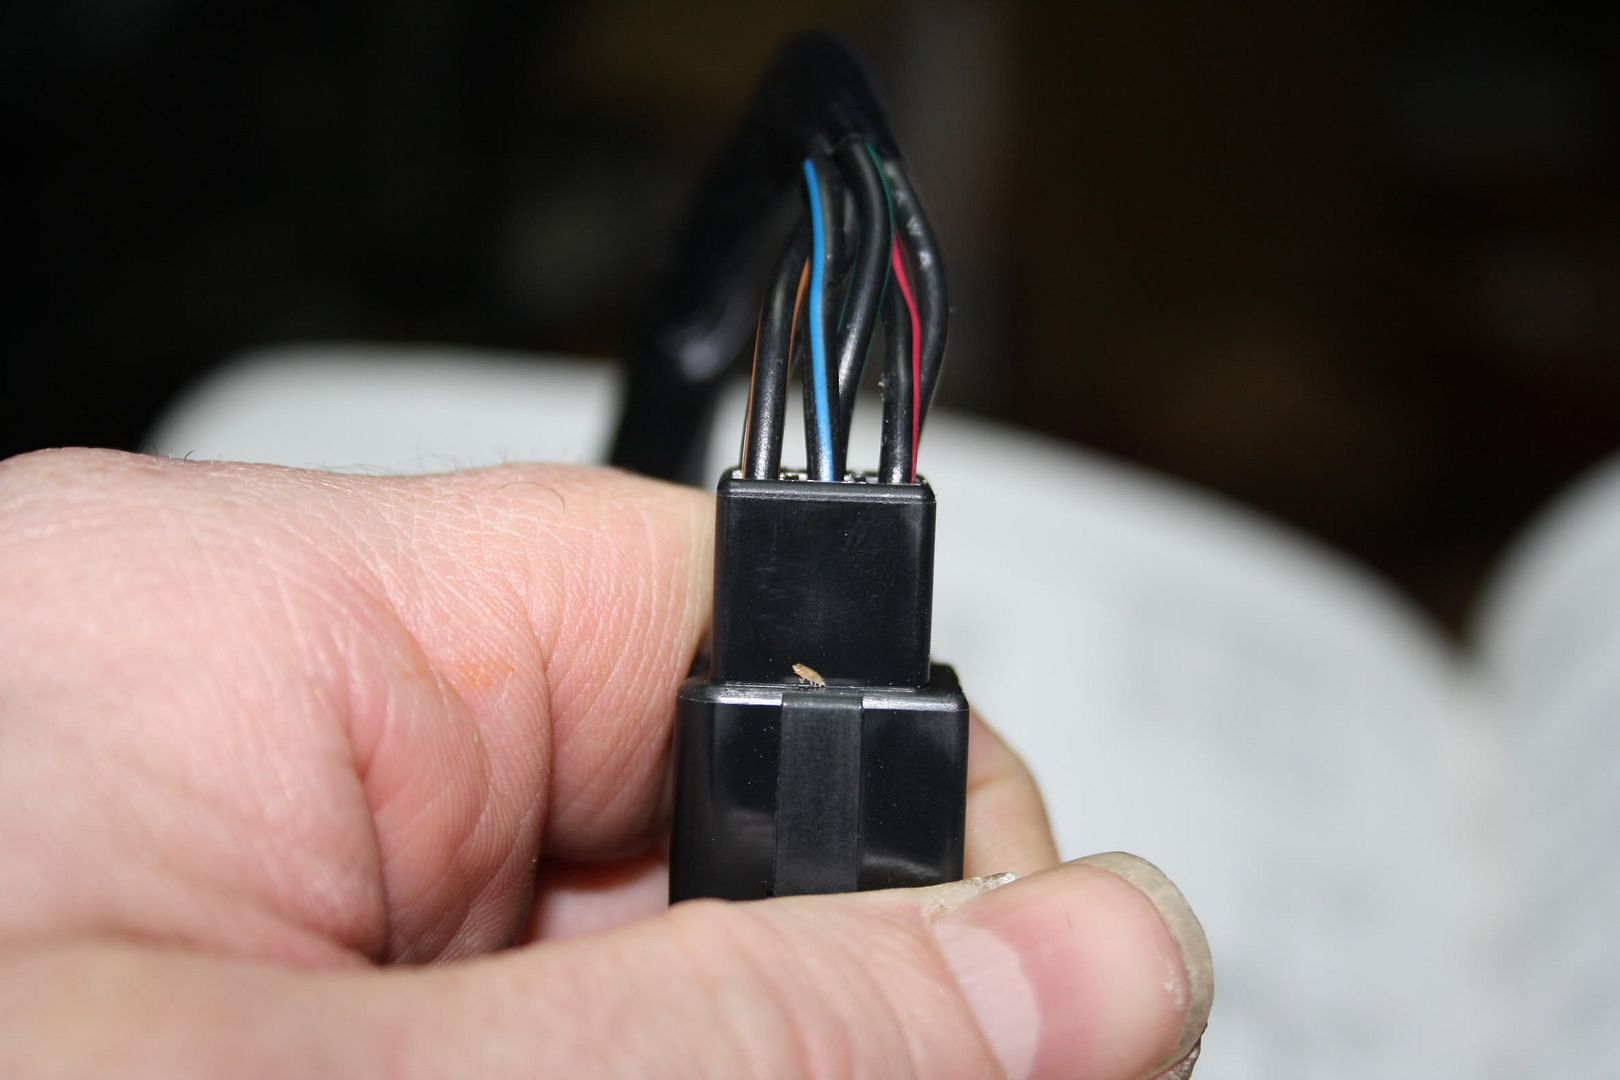
The front of the Rebel plug unchanged
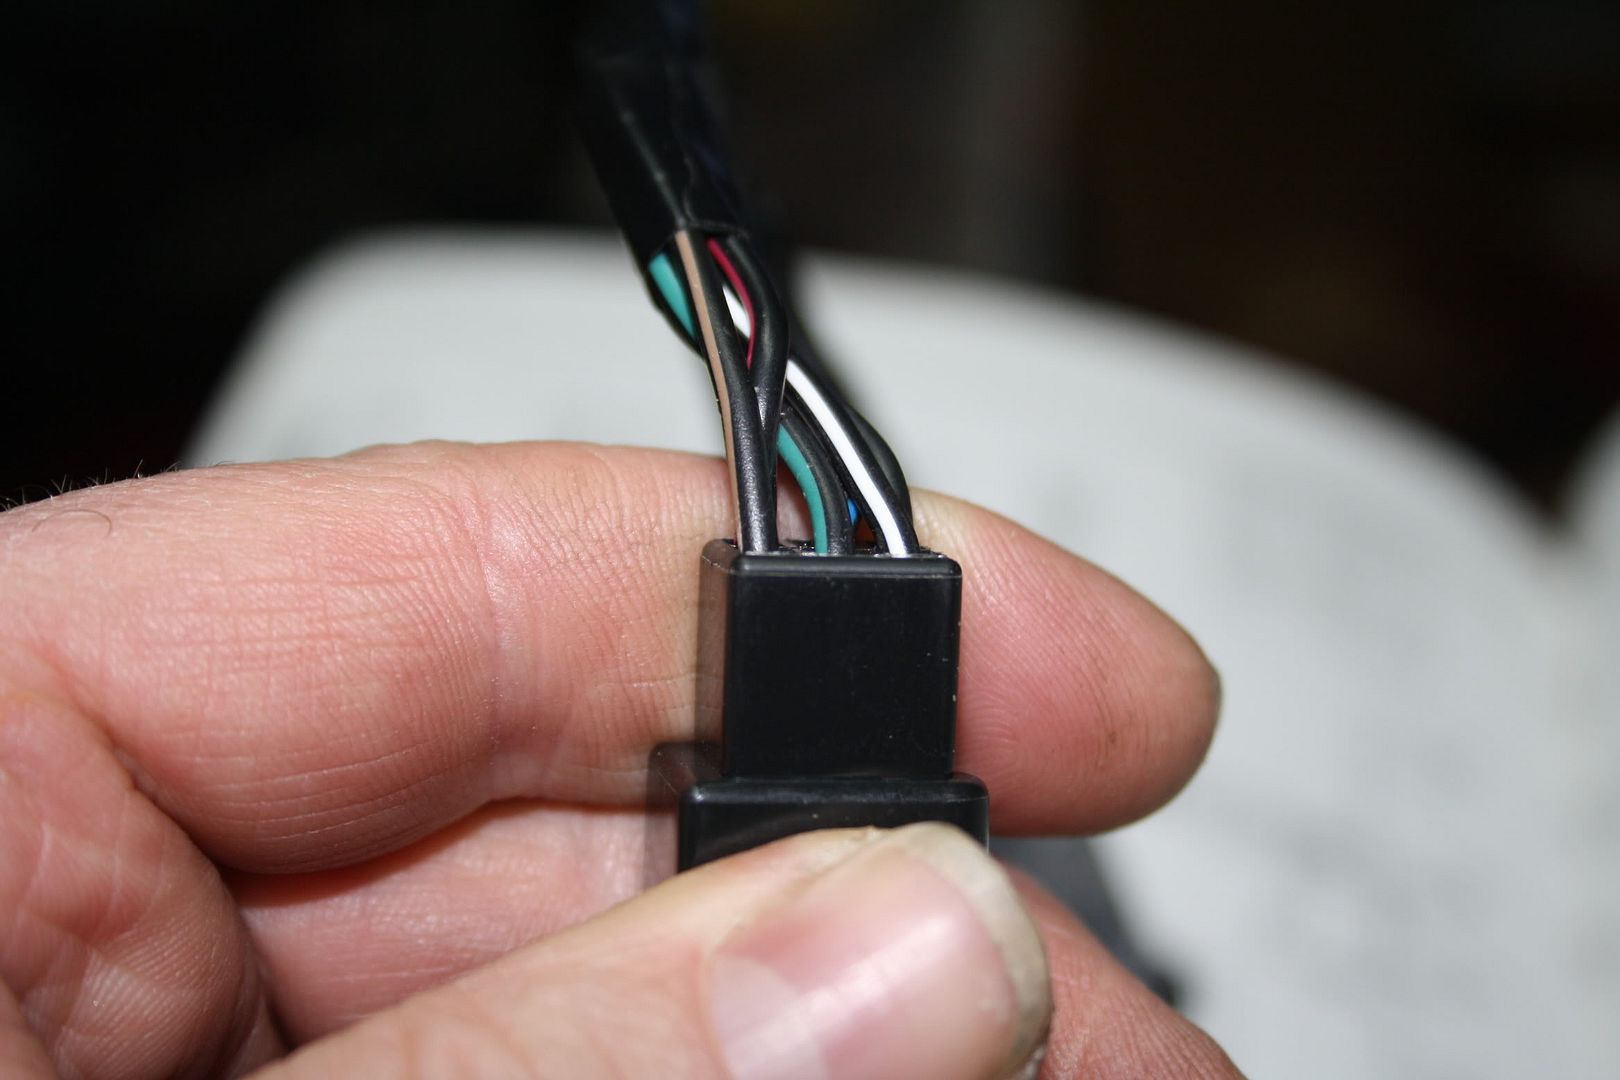

The rear of the Rebel plug unchanged.

The wires and indicator socket on the rebel are:
Turn  Black/white (BL/W)
        Black/orange (BL/O)
Neutral Black/Brown (Bl/Br)   small T6.5 bulb
           BLack/Red (Bl/R)
High Black/Blue (Bl/Bu)
      Black/Green

It is necessary to move the pins around in the socket of the Rebel to match the Valk.

I used this tool to extract the pins
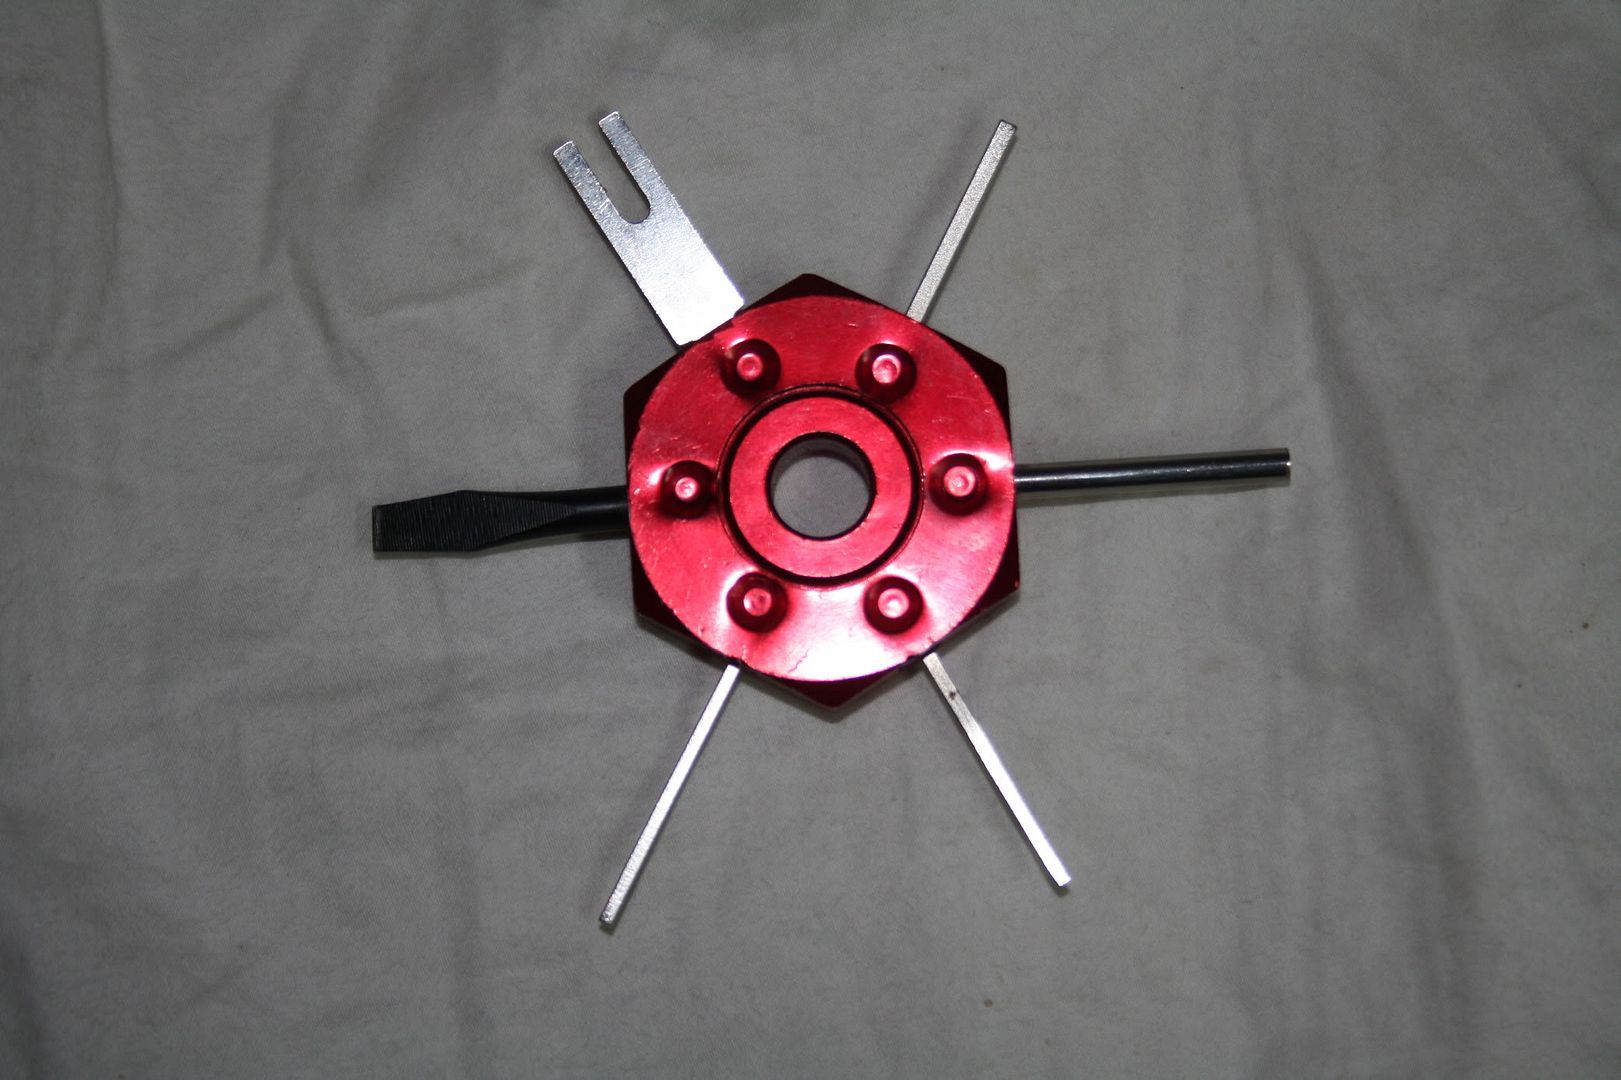
This is the Lisle 14900 terminal tool for GM.  A generic version should be available at Harbor Freight and princess auto.

With the pins removed and reseated in the correct order.
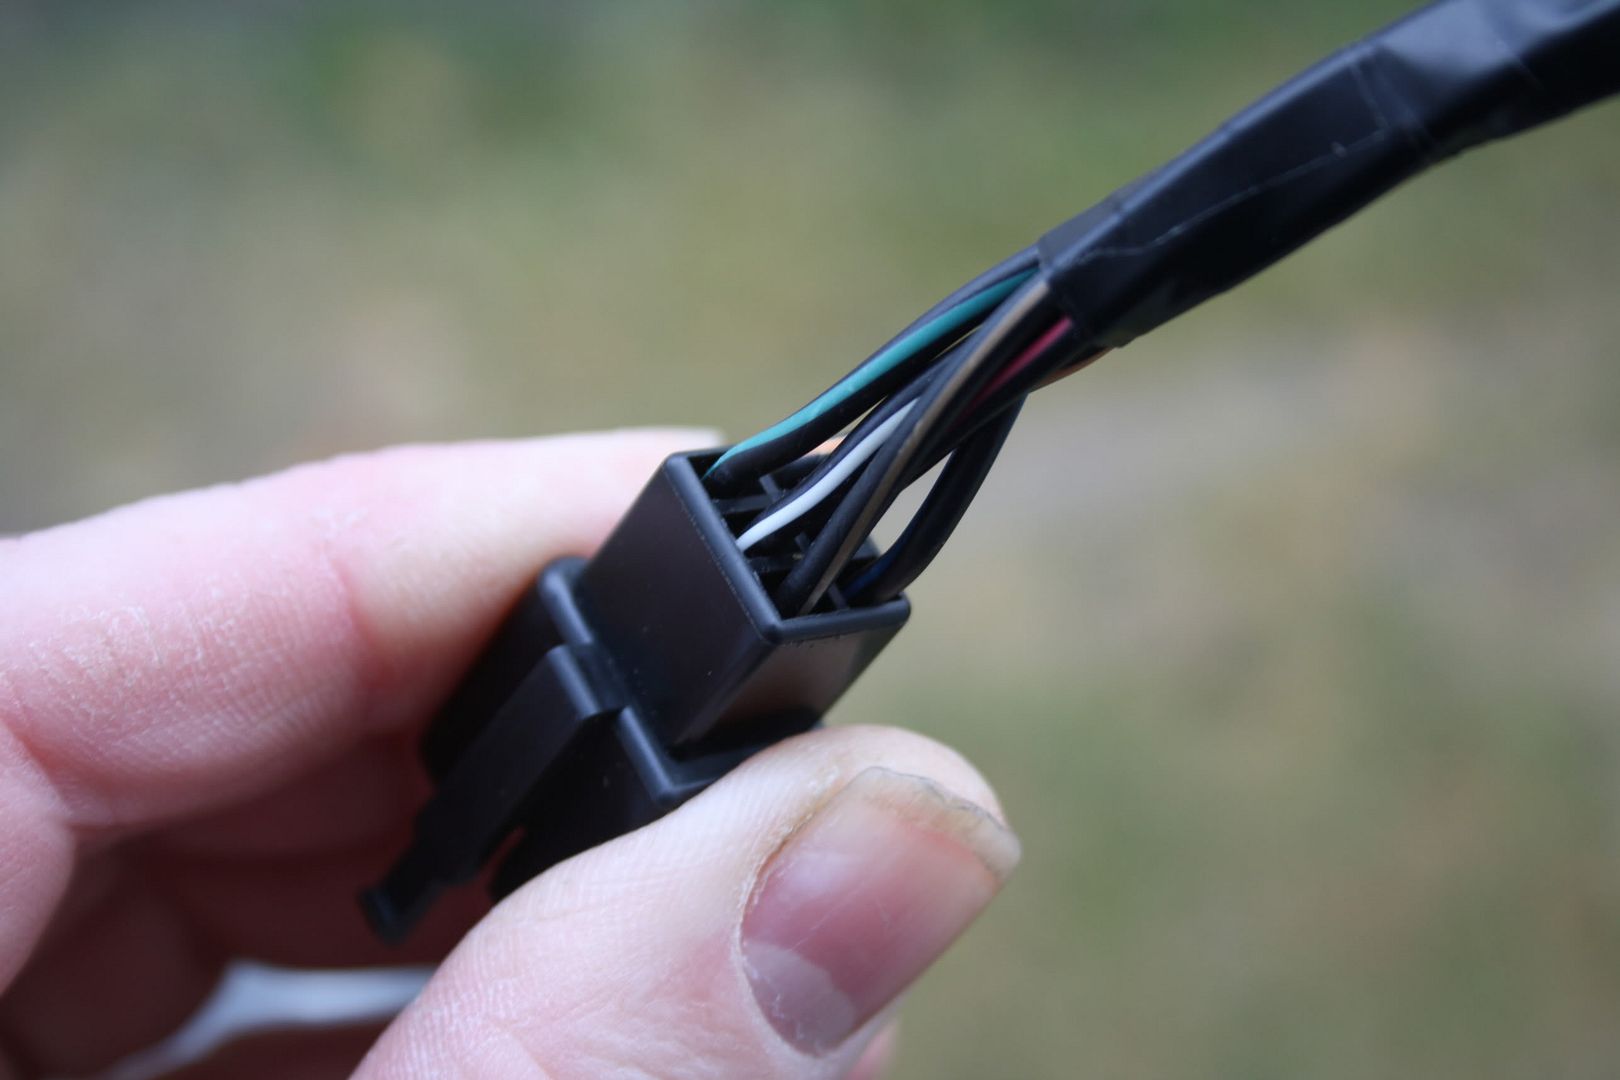
The front of Rewired Rebel connector.
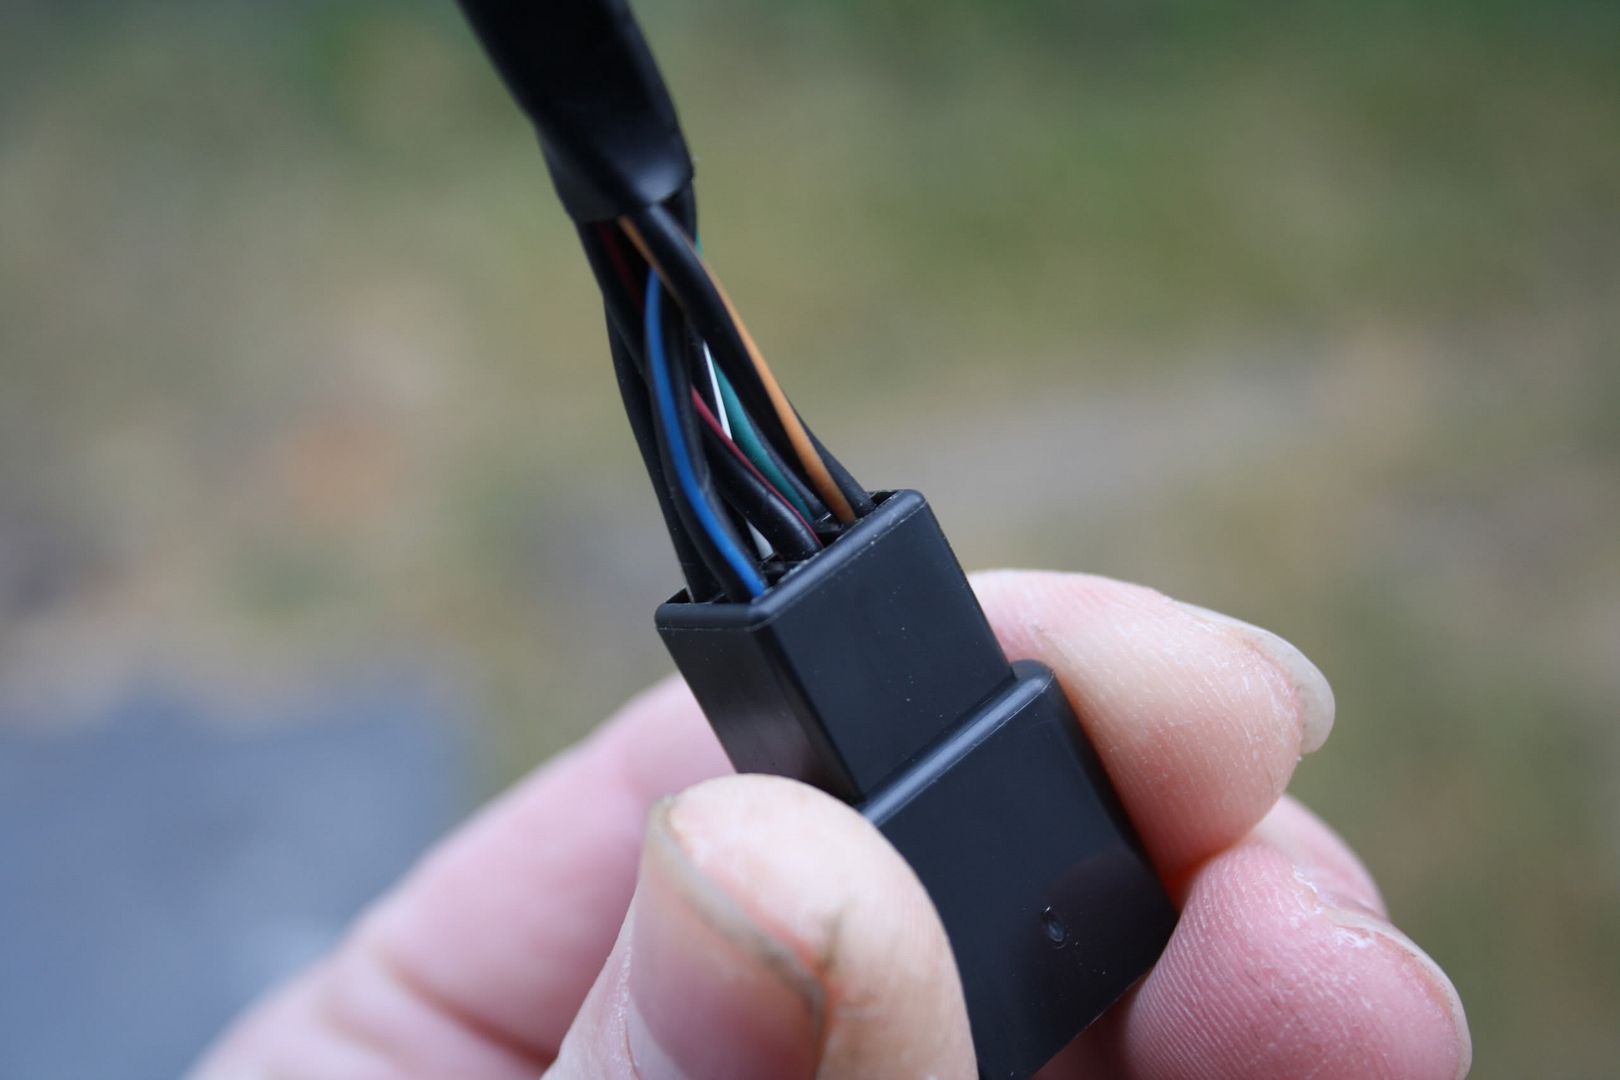

The rear of Rewired Rebel connector

Here is a photo of the bulbs that go into the sockets.
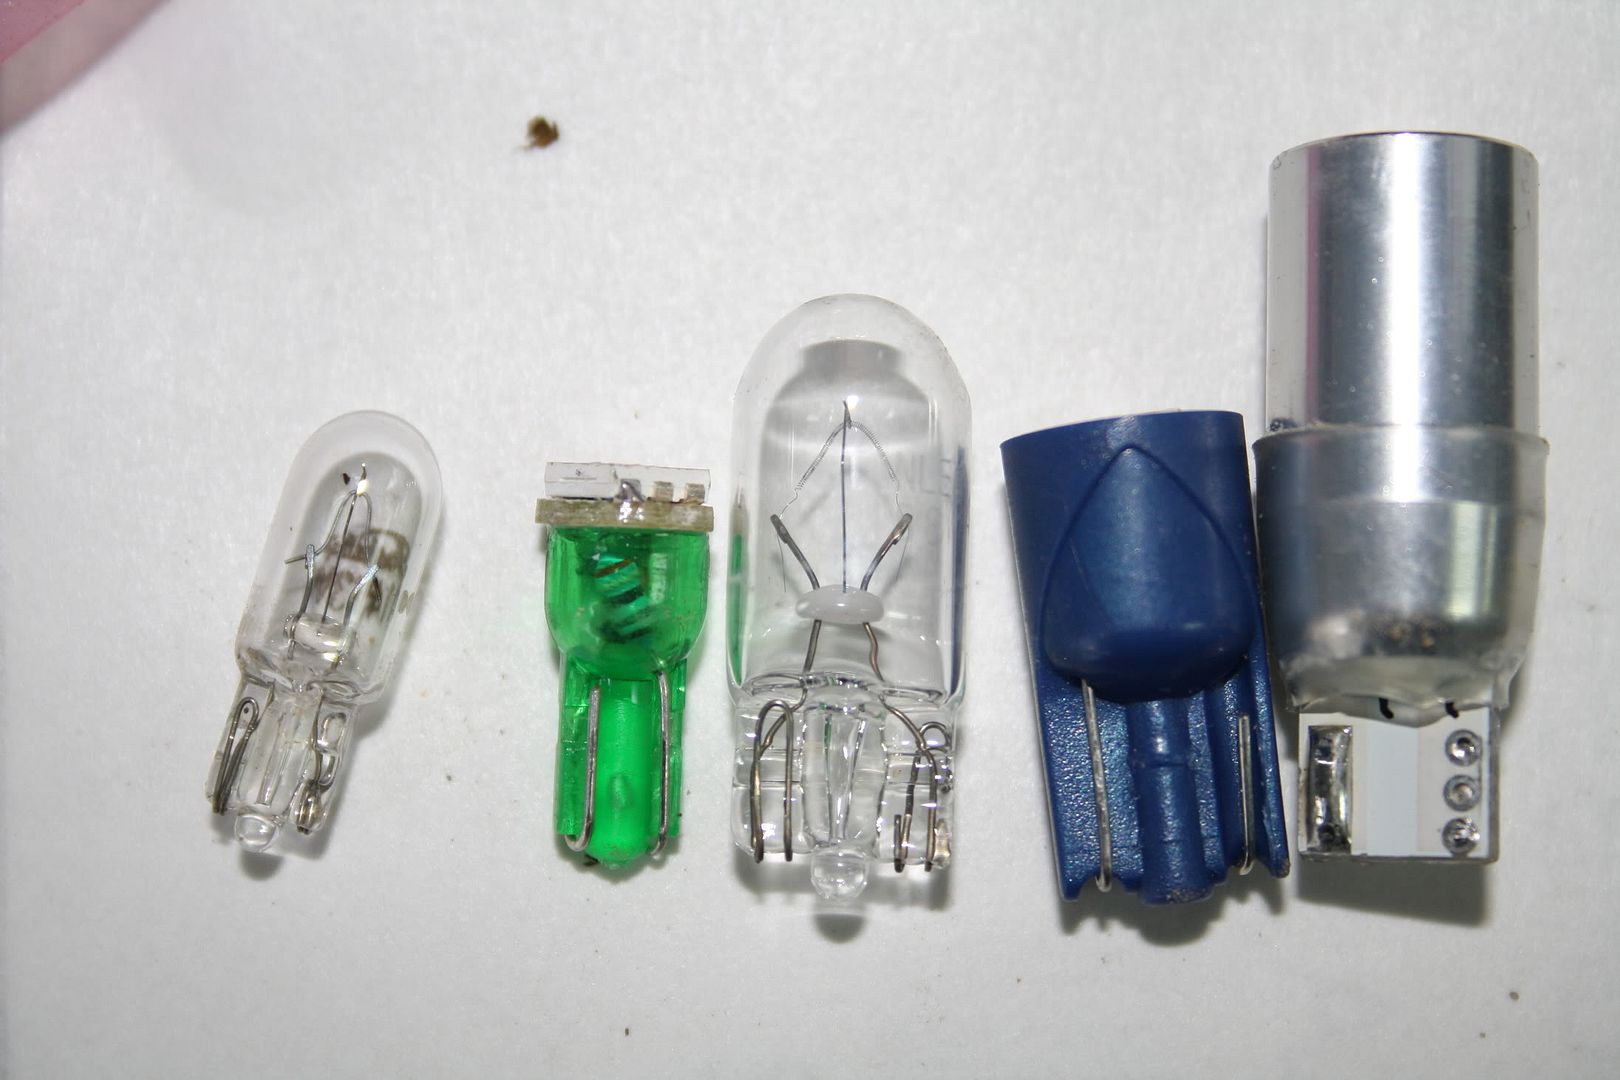
Left to right
1.5w T6.5, 24-GHP. 194 wedge, WLED-BHP, WLED-ALX
For the rebel harness I'm using the green 24-GHP for neutral, the blue WLED-BHP for high beam and the WLED-ALX for the turn. The ALX is a a 1 watt high power amber led with 15000 mcd. The incandescent bulbs are for comparison purposes. The valkyrie uses the T6.5 base for all the indicators.

EDIT: As of 20 Aug 15 the WLED-ALX is no longer in production.  Some substitutions could be:
WLED-A6  6000 mcd -bikerboy1951 reports using it.
921-A12 7900 mcd- untested and reading from spec sheet only
WLED-A4-32 or WLED-A4-90- untested and reading from spec sheet. The 32 or 90 is the degree of beam angle.  I would go with  the 32 degree.

An installation tip is to connect the new rewired harness and then put in the neutral and high beam LEDs.  If you have to reverse the bulbs its a lot easier outside the housing. Do not install the amber LED untill all the sockets have been installed back in the lamp housing.  When you install the amber LED hold the socket inside the headlamp housing and push down.  The bulb must be seated fully or the lens will not fit back on.

The results are pretty darn bright.  Here is a craptacular video that shows the difference
Valkyrie with rebel conversion.mp4powered by Aeva

Even if the LED's burn out, the larger 194 socket allows a brighter incandesent  bulb to be installed.  This is a very simple mod, with some good results.  

I hope someone finds this usefull.

Ride Safe.


« Last Edit: August 22, 2015, 09:42:33 AM by chrise2469 » Logged
CajunRider
Member
*****
Posts: 1691

Broussard, LA


« Reply #1 on: November 18, 2011, 12:56:54 AM »

Nice write up!  Thanks for the info!

I notice your headlight socket shows some excessive heat damage (not really BAD damage, but it's there)... you may want to look into replacing that.  Mine completely melted recently and shorted out the wires blowing the fuse.  Luckily my running lights run off a different fuse, so I was able to drive home that night! 

You can get a Toyota car headlight socket (I forget the model) that is the same type from an Auto parts store (NAPA, Auto Zone, Etc.). 

I did a quick solder & heat shrink job on mine.  It works great.   cooldude 
Logged

Sent from my Apple IIe
Tim H
Member
*****
Posts: 325


Louisville, KY


WWW
« Reply #2 on: November 18, 2011, 02:47:39 AM »

Great walkthrough.  I like to see mods like this spelled out to help others step through the process.  I had a instance yesterday where I couldn't tell if I was in Neutral unless I put my head in way to block the sun.  This is a nice upgrade, but I'm sure it has blinding effects at night.  coolsmiley
Logged

Tim (Savrip) Hopkins #33488

John Schmidt
Member
*****
Posts: 15193


a/k/a Stuffy. '99 I/S Valk Roadsmith Trike

De Pere, WI (Green Bay)


« Reply #3 on: November 18, 2011, 07:38:31 AM »

You can get around that with a $7 diode kit from Kuryakyn. It's installed across the turn indicator wiring in the headlight bucket. Anytime you use LED's for turn signals you have to do that, apparently also applies to using an LED for the amber indicator on the headlight as well.

Nice write-up, quite a dramatic change in brilliance.  cooldude
Logged

chrise2469
Member
*****
Posts: 295

Winnipeg Manitoba Canada


« Reply #4 on: November 18, 2011, 08:16:39 PM »

Nice write up!  Thanks for the info!

I notice your headlight socket shows some excessive heat damage
Thanks for the notice CajunRider.  That is the replacement high temp socket from Napa.  The rubber boot was mushed up like that when I got it.  The socket has some brown but it isn't brittle or flaking.

  This is a nice upgrade, but I'm sure it has blinding effects at night.  coolsmiley
Tim, in the dark garage it's pretty bright.  The nice thing about this mod is there are lots of 194 bulbs in led and incandescant that I can try.  Those T6.5 are expensive and not easy to find.  There's too much snow to do a night run until next April.

You can get around that with a $7 diode kit from Kuryakyn. It's installed across the turn indicator wiring in the headlight bucket. Anytime you use LED's for turn signals you have to do that, apparently also applies to using an LED for the amber indicator on the headlight as well.

Nice write-up, quite a dramatic change in brilliance.  cooldude
John, thanks.  I new about the diode kit but couldn't recall who made the darn thing.

Ride safe all.
Logged
Kep
Member
*****
Posts: 479


My "Mid-life Crisis "

Indiana


« Reply #5 on: November 29, 2011, 03:16:47 PM »

Just did this  upgrade to my 97 Std.  WOW....I'm gonna have to wear shades during the daylight when I have the turn signal on !   Thanks for the great insight into doing this....Honda should have made them this way from the factory ! Very inexpensive and quick modification and potential life saver !!!!
Logged

iba1990
Member
*****
Posts: 299


Rocky Mountain High !

Thornton, Colorado


« Reply #6 on: March 03, 2012, 12:46:08 PM »

TOTALLY good write up & advice. Saving the article. Thanks to ALL!!!!!
Logged
bikerboy1951
Member
*****
Posts: 259

Grand Forks, ND


« Reply #7 on: March 03, 2012, 01:24:07 PM »


I did this to my bike this winter.  There is no way you can ride and not know that your turn signal is still on and blinking.  Super nice write-up with pictures.
Highly recommend this mod.

Brad
Logged
salty1
Member
*****
Posts: 2359


"Flyka"

Spokane, WA or Tucson, AZ


« Reply #8 on: May 27, 2015, 08:05:05 PM »

Just want to report that I made the "chrise2469 mod" and I'm very impressed Chris. I have been negligent in cancelling turns and this will get my attention to cancel. I'm not habitual about it, but has concerned me. Thanks again Chris!
Logged

My rides:
1998 GL1500C, 2000 GL 1500CF,2006 GL 1800 3A

firea100
Member
*****
Posts: 303

East China Mi.


« Reply #9 on: August 21, 2015, 02:14:02 PM »

And the LED's came from "superbrite LED'S"?????
Larry in East China Mi.
Logged
salty1
Member
*****
Posts: 2359


"Flyka"

Spokane, WA or Tucson, AZ


« Reply #10 on: August 22, 2015, 05:45:59 AM »

And the LED's came from "superbrite LED'S"?????
Larry in East China Mi.

Yes they did. The orange bulb suggested by Chris was no longer available so I used a bright white bulb since it's behind an orange lens cover.
Logged

My rides:
1998 GL1500C, 2000 GL 1500CF,2006 GL 1800 3A

path
Member
*****
Posts: 6


"... in the end it is the Journey that matters."

PEORIA, AZ


« Reply #11 on: February 04, 2016, 08:55:32 AM »

You can get around that with a $7 diode kit from Kuryakyn.  ...

Kuryakyn has something for $7?!? ... lol
Logged

The more you know, the less you need to show.

1997 Valkyrie
1994 Intruder VS1400
salty1
Member
*****
Posts: 2359


"Flyka"

Spokane, WA or Tucson, AZ


« Reply #12 on: February 05, 2016, 02:43:03 PM »

One of the better mods I've made on my Valk!
Logged

My rides:
1998 GL1500C, 2000 GL 1500CF,2006 GL 1800 3A

Pages: [1]   Go Up
Send this topic Print
Jump to: