Valkyrie Riders Cruiser Club
June 24, 2025, 04:09:54 PM *
Welcome, Guest. Please login or register.

Login with username, password and session length
Ultimate Seats Link VRCC Store
Homepage : Photostash : JustPics : Shoptalk : Old Tech Archive : Classifieds : Contact Staff
News: If you're new to this message board, read THIS!
 
VRCC Calendar Ad
Pages: [1]   Go Down
Send this topic Print
Author Topic: Restoration of the piggies  (Read 3349 times)
custom1
Member
*****
Posts: 333


01 Interstate

SW Pa


« on: December 04, 2011, 07:52:19 PM »

Well let me start off by saying it worked, and I am very happy!

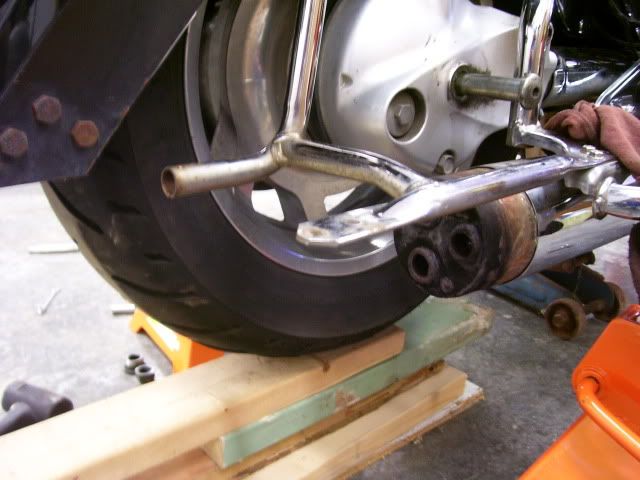
Here is what I started with. Piggies cut off flush and previous owner said two baffles drilled. I'll have to take his word for that unless there is a way to check?? (pic is from a previous project)


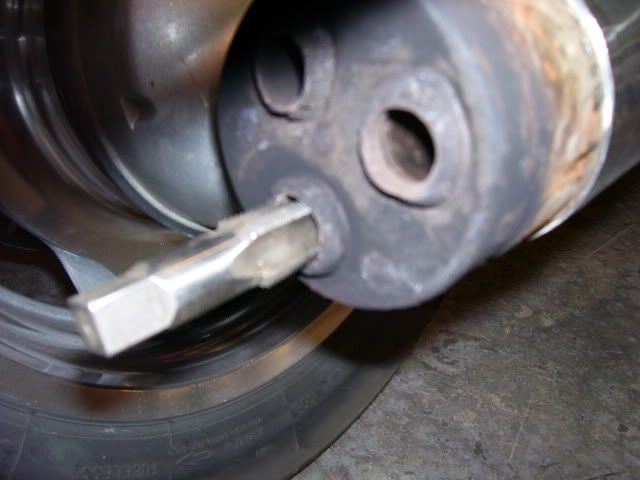
Discovered that a 1/2" pipe tap fits nice in the holes that are left.


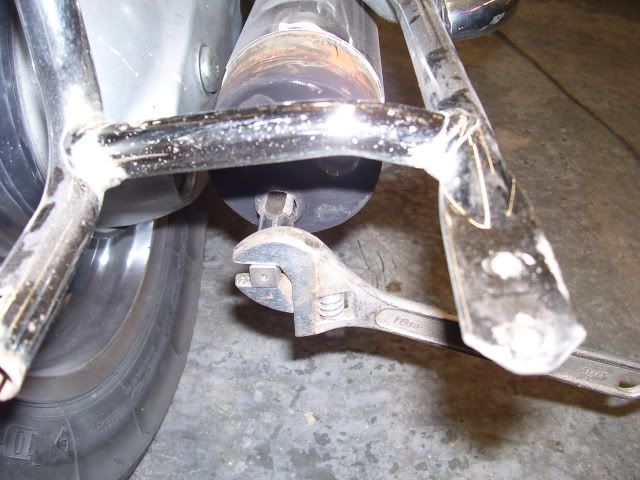
Not enough room under there for a T handle with the bag rails so just use a crescent wrench. Have to be careful to get it started straight.
 

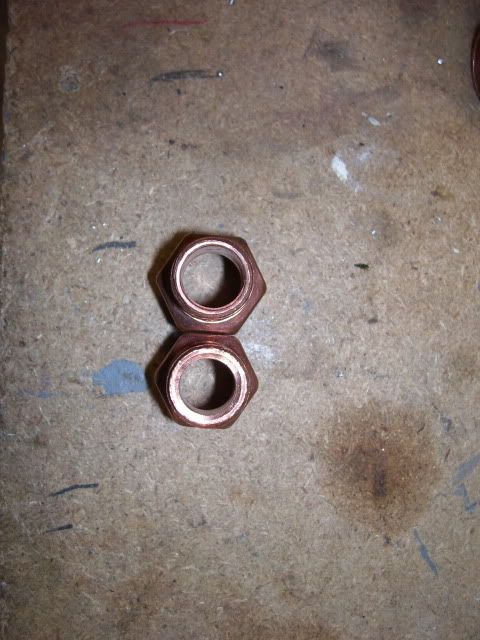
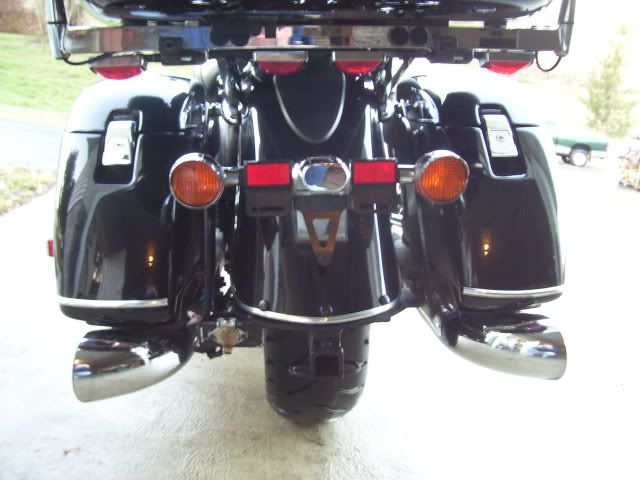
I think you see where this is going. I picked up 6 copper fittings. 1/2" pipe to 3/4" copper. The only down side I see is the ID of the threaded end of the fittings is a little restrictive. I ended up buying them at a local "old school" plumping supply place. Lowes wanted over $5 each. I paid $2.39. They only had 6 and they are from two different suppliers or decades. They have two different ID's. I plan on drilling them all out to 5/8" over the winter.


I had some 3/4 copper laying around. The longest I could fit in there with the curved pipes was 10"(plus the fitting). Actually two 10" and one 9" on the far inside. Still gets the exhaust to the end of the pipes which is what gets rid of the drone. It would be even better with straight pipes.
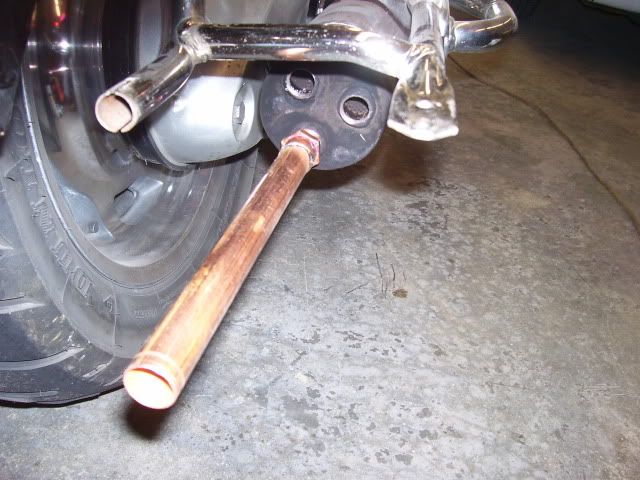
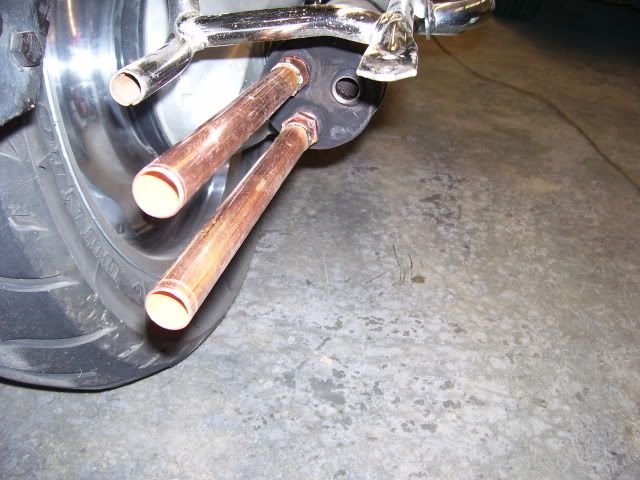
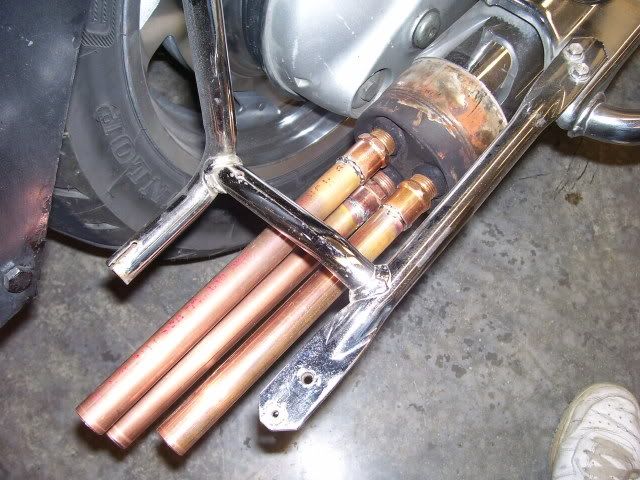


They are not in there final positions in that pic. Just a test run.

If you used soft copper you could probably even shape them to fit stock tips. The stuff I had on hand was the harder type.

While I was using the shop vac to get the shavings out of the pipes this piece of metal came back to the hole but wouldn't come out. I got a hold on it with some needle nose vise grips and had to cut it to get it out.
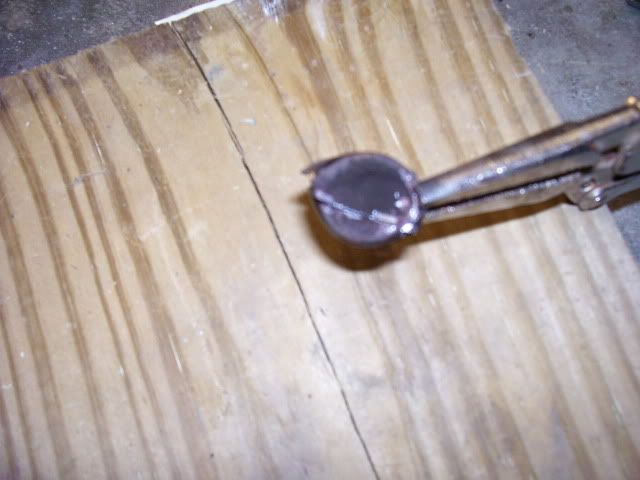
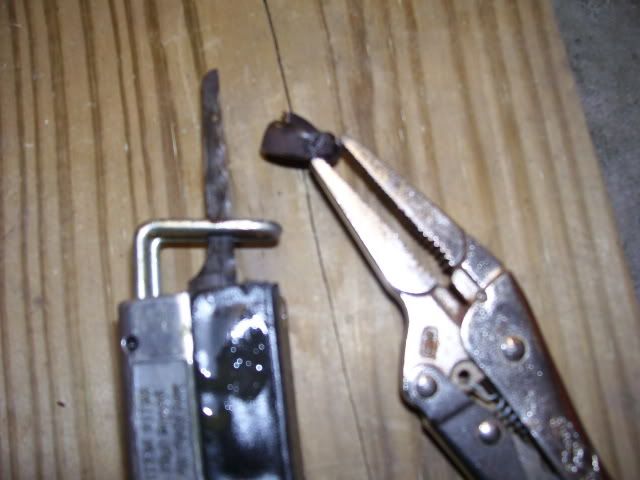


Looks like a plug left over from manufacturing process. Must have been a slow day at the Honda factory. I could always hear a rattle it that pipe at idle. I always thought it was debris in there from the original owner drilling  the baffles.

Anyway, I would have to say it was a success. Went for a 80 mile test ride. Sounds like a jet powered Porsche at hard throttle above 4 grand(man o man what a machine) and just a slightly irritated hornets nest cruising at 3 with very little drone. I can actually listen to my tunes in the helmet now. I'm sure you could tune it to whatever you wanted with  different lengths of pipe and tips.


Logged

John
Steve K (IA)
Member
*****
Posts: 1662

Cedar Rapids, Iowa


« Reply #1 on: December 04, 2011, 08:27:52 PM »

That piece you fished out of there looks like one of the "caps" that get drilled out.  Looks like the drill that was used just pushed it out instead of cutting through it.

Good job.  cooldude
Logged


States I Have Ridden In
9Ball
Member
*****
Posts: 2183


South Jersey


« Reply #2 on: December 04, 2011, 08:28:43 PM »

good work.....
Logged

VRCC #6897, Joined May, 2000

1999 Standard
2007 Rocket 3
2005 VTX 1300S
Grumpy
Member
*****
Posts: 3106


Tampa, Fl


« Reply #3 on: December 04, 2011, 08:54:05 PM »

Good job, but one question, are the fittings soldered on. Wondering how it will hold up to the heat.
Logged


Life is like a hot bath. It feels good while you’re in it, but the longer you stay in, the more wrinkled you get.
custom1
Member
*****
Posts: 333


01 Interstate

SW Pa


« Reply #4 on: December 04, 2011, 09:06:30 PM »

Yes they are soldered. Not sure what the melting temp is ? I "think" they will be Ok. Didn't get a chance to check them after the ride today. I'll  keep an eye on them.
Logged

John
Grumpy
Member
*****
Posts: 3106


Tampa, Fl


« Reply #5 on: December 04, 2011, 09:25:17 PM »

I think I am going the same route, time to quiet her down a little. I do have a torch setup, I think I will silver solder them in, a little higher heat resistance.
Logged


Life is like a hot bath. It feels good while you’re in it, but the longer you stay in, the more wrinkled you get.
Hedgehog
Member
*****
Posts: 393


WWW
« Reply #6 on: December 05, 2011, 05:29:33 AM »

That's cool. Smiley

Only problem I can forsee is electrolytic corrosion where the two dissimilar metals meet.

Reckon it would take a while to eat through though...

Ingenious solution anway.. cooldude
Logged

Dave King
Proud owner of Honda Valkyrie F6C 1997 Standard
& owner of BigBikeMad.com
Kep
Member
*****
Posts: 479


My "Mid-life Crisis "

Indiana


« Reply #7 on: December 05, 2011, 06:27:49 AM »

Phosphorus/Copper/Silver Alloy refrigeration brazing rod doesn't melt till about 1200 degrees and it's self fluxing....just for future reference .
Logged

gordonv
Member
*****
Posts: 5760


VRCC # 31419

Richmond BC


« Reply #8 on: December 05, 2011, 08:35:26 AM »

Silver solder is around 700+ F, and you end up brazing. I also thought you might end up with a little melting on those long extended trips, but unless it gets touched, it should re solidify.

I was also wondering about the drilling out of the id of the threaded portion, maybe drill it out a little further, but keep it intack, to cut down any back presure.
« Last Edit: December 05, 2011, 11:22:43 AM by gordonv » Logged

1999 Black with custom paint IS

R J
Member
*****
Posts: 13380


DS-0009 ...... # 173

Des Moines, IA


« Reply #9 on: December 05, 2011, 09:12:45 AM »

Silver solder is around 700+ F, and you end up brazing. I also thought you might end up with a little melting on those long extended trips, but unless it gets touched, it should re solidify.

I was also wondering about the drilling out of the id of the threaded portion, maybe drill it out a little further, but keep it instack, to cut down any back presure.

Back pressure creates Torque.
Logged

44 Harley ServiCar


custom1
Member
*****
Posts: 333


01 Interstate

SW Pa


« Reply #10 on: December 05, 2011, 10:03:36 AM »

The thinner walled fittings measure about .590 ID and the heavy ones are around .520 I think. I should be able to drill them to .625(5/8"). Right now there are 4 heavy ones and 2 thin ones in there, 2 and 1 per side.
I was a little worried about the restriction, but the Butt Dyno says it didn't lose anything that's for sure. I will still make them all the same while it's down for winter. I wonder what the new ones at Lowes measure? Probably really thin I would think with all the cost saving measures nowadays. I'll have to check.

R.J.--There has to be an "optimum amount" to the back pressure idea. Otherwise I could just thread six 1/2" pipe plugs in there and go like hell!!  Cheesy
Logged

John
Ricky-D
Member
*****
Posts: 5031


South Carolina midlands


« Reply #11 on: December 05, 2011, 11:35:36 AM »

Quote
"Back pressure creates Torque."

A little Exlax ought to give some relief. 2funny

***
Logged

2000_Valkyrie_Interstate
T.P.
Member
*****
Posts: 1963


Apple Valley, Minnesota.


« Reply #12 on: December 06, 2011, 05:04:22 PM »

Here are some earlier posts about restoring piggies.

http://www.valkyrieforum.com/bbs/index.php/topic,15020.msg126330.html#msg126330
Logged

"Well you can call me T, or you can call me P, or you can call me T.P. but you doesn't hasta call me Toilet Paper"
Pages: [1]   Go Up
Send this topic Print
Jump to: