Valkyrie Riders Cruiser Club
September 12, 2025, 03:24:48 AM *
Welcome, Guest. Please login or register.

Login with username, password and session length
Ultimate Seats Link VRCC Store
Homepage : Photostash : JustPics : Shoptalk : Old Tech Archive : Classifieds : Contact Staff
News: If you're new to this message board, read THIS!
 
VRCC Calendar Ad
Pages: [1]   Go Down
Send this topic Print
Author Topic: Pegs don't line up! What is wrong with this picture?  (Read 1375 times)
Fiat Lux
Member
*****
Posts: 61

Lethbridge, Alberta


« on: August 23, 2013, 09:04:26 PM »

I am gradually getting acquainted with my 2001 Standard and fixing all the mistakes committed by previous owners. But as you can see, my pegs don't line up! (Ignore the highway pegs, my issue is with the regular OEM pegs.)


Now before anyone can sneer at my Birkenstocks and white sox (after a long day in riding boots), here is the right side:


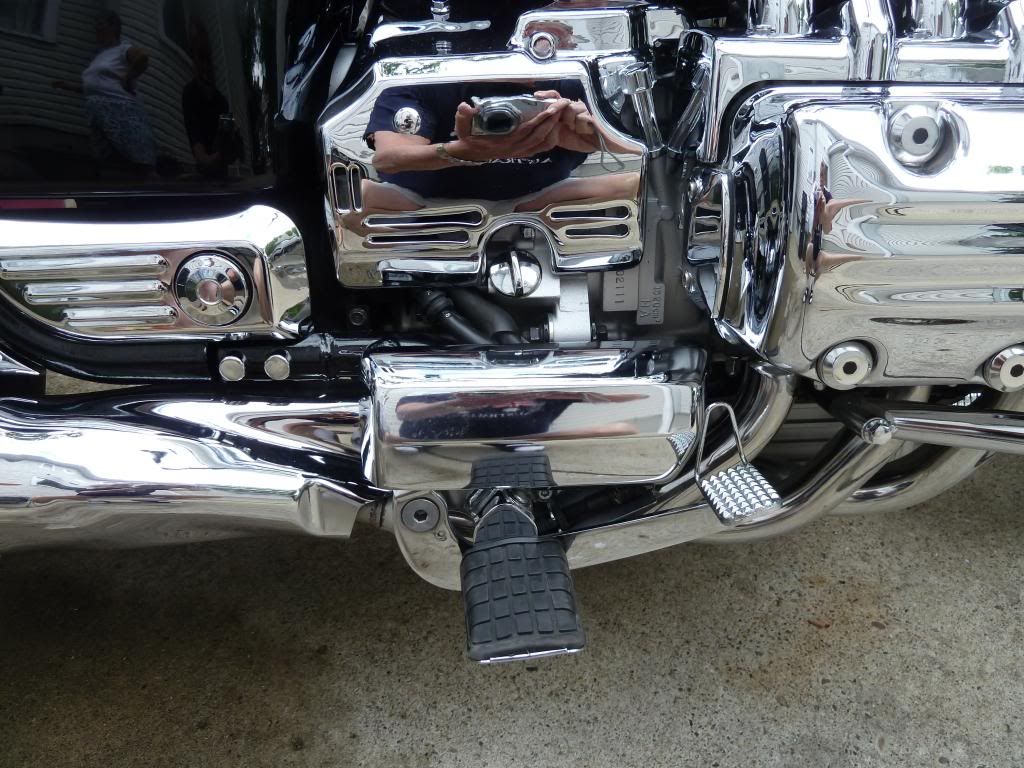
And here is the left side:


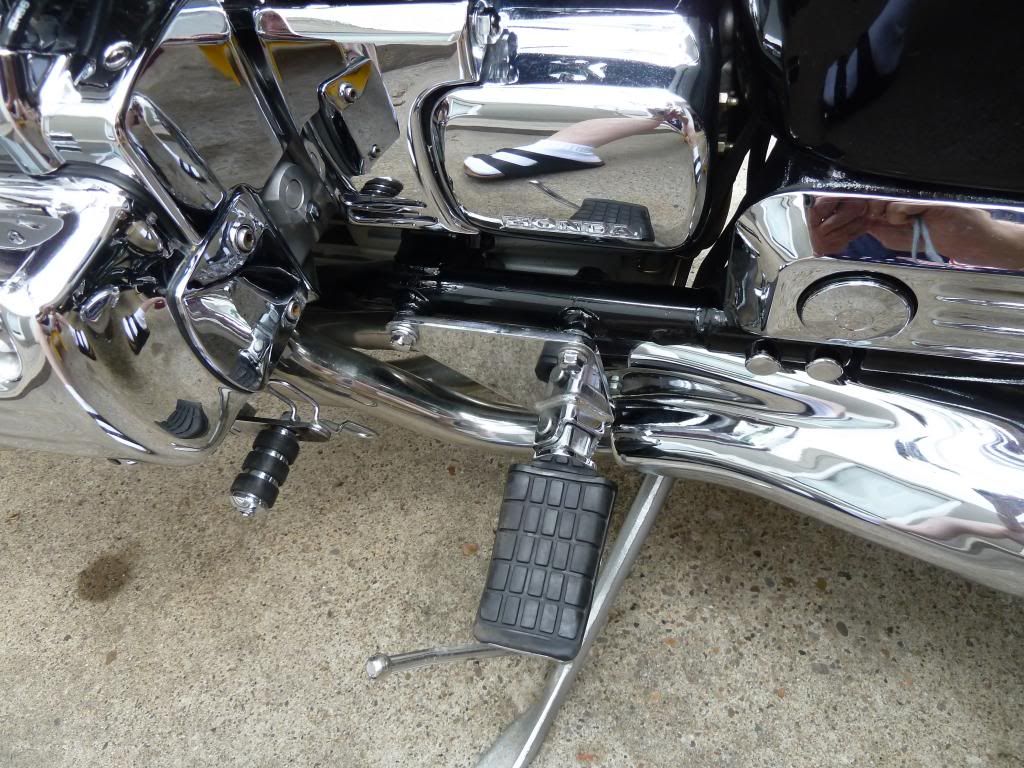
Now this is not a huge problem and I am almost getting used to the offset but there must be some really simple solution to this. What is wrong with this picture!

Fiat Lux from the balmy Alberta prairies to wherever you go riding on this last week of summer.
Logged
PhredValk
Member
*****
Posts: 1531


Edmonton, Alberta, Canada


« Reply #1 on: August 23, 2013, 11:23:29 PM »

Something really weird here. Individually, my pegs match yours EXACTLY. Left hanger tip is at the seam in the collector cover, like yours; and the right is right there in the crook of the elbow of the brake pedal lever, like yours. Yet from above mine look like they are part of the same strait bar, exactly across from one another. Any chance the bike has had some frame damage?
Fred.
Logged

Growing old is mandatory, growing up is optional.
VRCCDS0237
6tigo
Member
*****
Posts: 39


Member #655

Melbourne Fl


« Reply #2 on: August 24, 2013, 03:37:52 AM »

There is a peg relocation kit installed on the right side.  Most likely a Rattelbars. Remove the chrome cover and you will see the relocation plate behind the factory mounting bracket.  Do a search for Rattlebars relocation kit instructions and reverse to remove.  Check out a Honda parts diagram, you may have to purchase a brake line retainer.  
« Last Edit: August 24, 2013, 03:53:05 AM by 6tigo » Logged

Four boxes keep us free:
The Soap Box, The Ballot Box, The Jury Box, and The Cartridge Box.

"Any man who thinks he can be happy and prosperous by letting the American Government take care of him; better take a closer look at the American Indian."

Henry Ford
Thunderbolt
Member
*****
Posts: 3726


Worthington Springs FL.


« Reply #3 on: August 24, 2013, 04:00:24 AM »

What 6tigo said.  The right side has the peg relocation kit and the left does not.  The relo kit was made to move the pegs down an inch and forward a couple of inches.
Logged

Fiat Lux
Member
*****
Posts: 61

Lethbridge, Alberta


« Reply #4 on: August 24, 2013, 09:56:26 AM »

Thanks guys! This is very helpful. I am relieved that there is no frame damage. I must confess to removing the left side relocation kit because I did not like the floor boards that the bike came with and did not realize that the pegs would then be offset.

Now to the remedy. The Rattelbars people are no longer in business and I have had no luck finding relocation kit installation instructions.

Here is a really naïve question: How do I remove that chrome cover? It seems very firmly in position and I don't want to bend/break anything.

Have a good weekend! 
Logged
Skinhead
Member
*****
Posts: 8733


J. A. B. O. A.

Troy, MI


« Reply #5 on: August 24, 2013, 03:43:56 PM »

There is a 8 or 10mm bolt on the bottom holding it on, remove that and it will lift off.
Logged


Troy, MI
Valker
Member
*****
Posts: 3018


Wahoo!!!!

Texas Panhandle


« Reply #6 on: August 24, 2013, 04:24:01 PM »

Has anyone gone out and looked at their pegs? (I'm not near my Valk)
Every boxer BMW I've ever owned has had the pegs offset like that. It's cause is the different distance of the rods on the crank.
Logged

I ride a motorcycle because nothing transports me as quickly from where I am to who I am.
gordonv
Member
*****
Posts: 5764


VRCC # 31419

Richmond BC


« Reply #7 on: August 24, 2013, 05:27:51 PM »

Here is a really naïve question: How do I remove that chrome cover? It seems very firmly in position and I don't want to bend/break anything.


Also check out Dag's web site and get the service manual.
http://valkyrienorway.com/download.html

Dag also posts installation manuals there, so if you find a copy you might want to forward/offer to Dag to post for all to find in the future.
Logged

1999 Black with custom paint IS

6tigo
Member
*****
Posts: 39


Member #655

Melbourne Fl


« Reply #8 on: August 25, 2013, 03:59:26 AM »

Fiat Lux, I just e-mailed you Rattlebars Peg Relocation instructions.

Hope they help.
Logged

Four boxes keep us free:
The Soap Box, The Ballot Box, The Jury Box, and The Cartridge Box.

"Any man who thinks he can be happy and prosperous by letting the American Government take care of him; better take a closer look at the American Indian."

Henry Ford
Brian
Member
*****
Posts: 996


Monroe, NC


« Reply #9 on: August 27, 2013, 06:03:42 PM »

There is a 8 or 10mm bolt on the bottom holding it on, remove that and it will lift off.

The bolt uses and allen wrench that should be included in your tool kit. It appears as you do have the relocation kit on the right side. The first exhaust cover has a flat spot to allow the brake pedal pivot point to slightly overlap the cover. Yours is totally exposed and the brake lines are pulled tight. Removing that adapter plate is not a big deal.
Logged
Pages: [1]   Go Up
Send this topic Print
Jump to: