|
dr.danh
|
 |
« on: February 21, 2014, 07:45:13 PM » |
|
I have put all together as before. But for some reason I Cannot get the wheel to pull all way up this time. I have the poly o-rings this time. The caliper bracket to go in likes around 1/4". Does the o-ting go inside the final drive or flushes up? The o-ring is to big to go right inside. The pin hub is going all way up to damper bolts.
|
|
|
|
|
 Logged
|
|
|
|
|
Chrisj CMA
|
 |
« Reply #1 on: February 21, 2014, 08:05:15 PM » |
|
 And/Or an explanation that actually makes sense........REALLY |
|
|
|
|
 Logged
|
|
|
|
houstone
Member
    
Posts: 377
Can't get enough...
Santa Fe, TX
|
 |
« Reply #2 on: February 21, 2014, 08:42:24 PM » |
|
Not sure if it is similar to what I had, but I think I reinstalled my old rear shocks on the opposite sides after replacing the bushings, and saw a similar issue. If fact, the rear rotor was rubbing on the caliper in a left run, until I install some new shocks and the problem went away. Go figure...
|
|
|
|
|
 Logged
|
|
|
|
|
Bone
|
 |
« Reply #3 on: February 22, 2014, 03:36:20 AM » |
|
Maybe 2 thrust washers, 1 new & 1 old ? just a guess.
|
|
|
|
|
 Logged
|
|
|
|
|
indybobm
|
 |
« Reply #4 on: February 22, 2014, 06:04:03 AM » |
|
Is it possible to have too much grease in the final drive splines? This could keep the drive flange from going in all of the way. (grease does not compress)
If this were mine, I would:
1. Remove the wheel and take off the drive flange.
2. Insert the drive flange into the final drive and measure the distance from the drive flange to the final drive.
3. Remove the orings and grease from the drive flange and final drive.
4. Re-insert the drive flange into the final drive and see if it goes in farther.
|
|
|
|
|
 Logged
|
So many roads, so little time
VRCC # 5258
|
|
|
LinnB
Member
    
Posts: 71
VRCC #25552
Arnold, MO
|
 |
« Reply #5 on: February 22, 2014, 06:43:24 AM » |
|
Is the spacer on the caliper side in place? Which o-ring is too big?
|
|
|
|
|
 Logged
|
|
|
|
|
dr.danh
|
 |
« Reply #6 on: February 22, 2014, 07:47:08 AM » |
|
ok, i believe the problem is once get all together I cant get it to go past the third o-ring which is not letting it pull tight. spacer in place the caliper plate lacks about a 1/4 going in place. I have used the fur strip and took mallet against pumpkin as described. But cant seem to get that 1/4 inch. I have all off bike and all mates up but do have to take block and hammer to get spline hub to go past 3rd o-ring. Maybe the drive shaft has to be certain angle for spline to go past o-ring. any ideas?
|
|
|
|
|
 Logged
|
|
|
|
|
Bone
|
 |
« Reply #7 on: February 22, 2014, 07:51:07 AM » |
|
I would get another O-ring.
|
|
|
|
|
 Logged
|
|
|
|
Hoser
Member
    
Posts: 5844
child of the sixties VRCC 17899
Auburn, Kansas
|
 |
« Reply #8 on: February 22, 2014, 04:01:28 PM » |
|
Did you happen to replace the drive cushions? If You turned over the retaining plate accidentally, it is exactly 1/4 inch two wide. The plate is marked in and out. Put it in backward you will be 1/4 inch too wide and will cause all kinds of trouble. Don't ask me how I know this! Hoser  |
|
|
|
|
 Logged
|
I don't want a pickle, just wanna ride my motor sickle  [img width=300 height=233]http://i617.photobucket.com/albums/ |
|
|
wiggydotcom
Member
    
Posts: 3387
Do Your Best and Miss the Rest!
Yorkville, Illinois
|
 |
« Reply #9 on: February 22, 2014, 08:01:04 PM » |
|
I think the original poster is describing his situation correctly. I bought Orings from Redeye that were the polyurethane variety. I also couldn't get my wheel to seat past the oring no matter what I did.
I even used Redeye's instructions with a rubber mallet to "try" to get the wheel to seat....to no avail.
I removed the big oring and put in the original, which was in good shape...and all is well.
I would say just put your original back in if it isn't cut or damaged.
|
|
|
|
|
 Logged
|
VRCC #10177 VRCCDS #239  |
|
|
|
dr.danh
|
 |
« Reply #10 on: February 23, 2014, 07:26:02 AM » |
|
Made sure the plate was to outside. And wiggydotcom, your exactly right. Rather than put another o-ring on I did leave the Redeye 3rd exclusive ring on. No matter what i did I could not get it to go in. But I did take my porter power jaw and with little force get it to pull up. Like said I could get the o-ring to go in with wood block and hammer with all on table to make sure would work, but of course had to take apart to assemble under bike. Would think with the mallet and wood on pumpkin that would pull up. But wouldnt. Next service I'll have a oem ring on. Makes ya think that in Redeyes instructions he tells to take the mallet and wood and no other instructions mention that, So evid. others have had the same problem. Thanks for chiming in wiggydotcom. I was beginning to think i had other problems and also ones here thinking man he better take it to someone knows what there doing. This is my 3rd CT on.
|
|
|
|
|
 Logged
|
|
|
|
wiggydotcom
Member
    
Posts: 3387
Do Your Best and Miss the Rest!
Yorkville, Illinois
|
 |
« Reply #11 on: February 23, 2014, 08:38:45 PM » |
|
Glad it worked out for you, dr.danh.
I do want to point out that RedEye is a great vendor and provides a valuable resource to us here. I just installed a set of his intake Orings. For whatever reason, I just couldn't get the rear wheel to engage enough. I wouldn't hesitate to order from him again on his
other products.
|
|
|
|
« Last Edit: February 23, 2014, 08:40:53 PM by wiggydotcom »
|
 Logged
|
VRCC #10177 VRCCDS #239  |
|
|
|
dr.danh
|
 |
« Reply #12 on: February 24, 2014, 08:54:10 AM » |
|
same here. The o-ring was a pain but like said he is a good vendor for the Valk which vendors will slowly phase out. Have his desmog kit to put on when get a chance. Thanks
|
|
|
|
|
 Logged
|
|
|
|
sclark
Member
    
Posts: 47
VRCC# 35722
Madison, AL
|
 |
« Reply #13 on: February 24, 2014, 03:29:47 PM » |
|
Reference the Redeye O ring install. I initially had the same problem and no luck using the wood shim procedure called for in the Redeye instructions. Since the axle slid all the way through and seated with threads extending outside the left hand swing arm, I used a "washer stackup" on the axle to fill the gap (shim) where the brake caliper mounts. With the washers installed, I installed and tightened the axle nut, which fully seated the final drive. I then removed the axle nut and washer stackup, pulled the axle out enough to mount the brake caliper and then reseated the axle and installed the nut. The washer stack acts similar to any axle spacer and allows you to apply torque to the axle nut without the risk of bending the swingarm. Sorry no pictures but hope this helps in the future.
|
|
|
|
|
 Logged
|
|
|
|
wiggydotcom
Member
    
Posts: 3387
Do Your Best and Miss the Rest!
Yorkville, Illinois
|
 |
« Reply #14 on: February 24, 2014, 03:37:13 PM » |
|
Reference the Redeye O ring install. I initially had the same problem and no luck using the wood shim procedure called for in the Redeye instructions. Since the axle slid all the way through and seated with threads extending outside the left hand swing arm, I used a "washer stackup" on the axle to fill the gap (shim) where the brake caliper mounts. With the washers installed, I installed and tightened the axle nut, which fully seated the final drive. I then removed the axle nut and washer stackup, pulled the axle out enough to mount the brake caliper and then reseated the axle and installed the nut. The washer stack acts similar to any axle spacer and allows you to apply torque to the axle nut without the risk of bending the swingarm. Sorry no pictures but hope this helps in the future.
Thanks for the tip. That's an excellent idea!...I saved the O-ring and might just throw it back in on the next changeout....which will be a while. |
|
|
|
|
 Logged
|
VRCC #10177 VRCCDS #239  |
|
|
|
dr.danh
|
 |
« Reply #15 on: February 24, 2014, 04:29:50 PM » |
|
Now that you mention it. I cut a pc. of 1" I.D pipe to act as you did washers the length of gap and tighten the axle nut. Hoping to pull it up. No success. I am using the red o-ring but as said used my porta power jaws at axle hole with axle up to jaw to seat it up. Any way thank all for the info.
|
|
|
|
|
 Logged
|
|
|
|
|
Ricky-D
|
 |
« Reply #16 on: February 25, 2014, 09:15:35 AM » |
|
There is something inherently wrong with that 'O' ring to cause the problems
that so many are reporting.
With the stock items there are no problems and the low cost of the stock
makes the use of that particular (aftermarket) item a non starter.
Use a piece of wood and a mallet.
I've never heard such stupidity about a newly deployed aftermarket item such
as an 'O' ring.
And anyone that subscribes to that kind of irresponsible philosophy regarding
employing an 'O' ring is just as stupid.
***
|
|
|
|
« Last Edit: February 25, 2014, 10:03:34 AM by Ricky-D »
|
 Logged
|
2000_Valkyrie_Interstate
|
|
|
wiggydotcom
Member
    
Posts: 3387
Do Your Best and Miss the Rest!
Yorkville, Illinois
|
 |
« Reply #17 on: February 25, 2014, 09:42:31 AM » |
|
Darn, Ricky, I'm all broke up that you're so bothered by this.
I can't speak for others but I've had the rear wheels off of my Interstates more than a few times. I even change my own tires.
While I've NEVER had a broken Oring during rear end maintenance, thought I'd try the poly ones. Not sure if the OD was bigger or not but I did know what the problem was as soon as the wheel wouldn't go on...no biggie.
The only stupidity I saw was the fact that you were so bothered by it.
The REST of us are here to help each other.
|
|
|
|
« Last Edit: February 25, 2014, 01:08:47 PM by wiggydotcom »
|
 Logged
|
VRCC #10177 VRCCDS #239  |
|
|
blotar
Member
    
Posts: 145
VRCC #32549 VRCCDS#0237
Crosby, Texas
|
 |
« Reply #18 on: February 25, 2014, 06:53:47 PM » |
|
I am truely sorry, but I often like Ricky-D's attitude about all things mechanical. "get a bigger hammer" has never been in the 'good machine shop practice' handbook. Ricky, I have seen your posts for a long time and though maybe a little abrasive you have a great knowledge base and you give your advice freely.
Thanks,
Blotar
|
|
|
|
|
 Logged
|
|
|
|
wiggydotcom
Member
    
Posts: 3387
Do Your Best and Miss the Rest!
Yorkville, Illinois
|
 |
« Reply #19 on: February 25, 2014, 08:26:35 PM » |
|
I am truely sorry, but I often like Ricky-D's attitude about all things mechanical. "get a bigger hammer" has never been in the 'good machine shop practice' handbook. Ricky, I have seen your posts for a long time and though maybe a little abrasive you have a great knowledge base and you give your advice freely.
Thanks,
Blotar
We'll have to respectfully disagree. I don't question his knowledge base. But it's also very easy to Monday Morning Quarterback-which he does a LOT. After seeing 3 different posts about the same issue, he came to the conclusion, as we all did, that there "might" be a problem with the O-ring. But none of the three of us who posted were in the same garage at the same time. Concerning maintenance shops, I've worked in one at Caterpillar for 34 yrs. Many of our production parts sit in -100F freezers and are pressed in with hydraulic presses while at that temp. Tight tolerances are the norm rather than the exception. Dead blow(shot hammers), rubber mallets, lead babbits, etc ARE part of a good maint shop. We use em all the time. If you think everything always "falls into place" you don't work in the real world. |
|
|
|
|
 Logged
|
VRCC #10177 VRCCDS #239  |
|
|
|
dr.danh
|
 |
« Reply #20 on: February 26, 2014, 08:58:33 AM » |
|
True, I think these posts of the problem will definitely be helpful for any that may run into this problem in the future. I know it would have saved me labor time and headache if I had know about it.
|
|
|
|
|
 Logged
|
|
|
|
|
RONNIEB
|
 |
« Reply #21 on: February 27, 2014, 03:59:42 AM » |
|
Bless Rick's heart, maybe he wasn't held enough as a child. He gives good info most of the time, just has his "quirks".
|
|
|
|
|
 Logged
|
1999black standard; 2000 black tourer; 1999 red/black interstate  |
|
|
wiggydotcom
Member
    
Posts: 3387
Do Your Best and Miss the Rest!
Yorkville, Illinois
|
 |
« Reply #22 on: February 27, 2014, 04:48:19 AM » |
|
He gives good info most of the time, just has his "quirks".
Agreed..his contributions are valuable. I even messaged him to tell him that, not too long ago..as for your second thought...agreed.    |
|
|
|
|
 Logged
|
VRCC #10177 VRCCDS #239  |
|
|
KSDragonRider
Member
    
Posts: 777
The beatings will continue until morale improves
Salina, KS
|
 |
« Reply #23 on: February 27, 2014, 02:19:47 PM » |
|
had this problem with the polly orings before.
i run a bolt through, and pulled the splines onto the hub. after 200 miles, we pulled it back apart to change a bad tire, and the orings had already flat spotted and were leaking.
IIRC the owner paid 20 bucks for the set of washers, i replaced them with $2 each washers and fixed the issues.
Never again will i run those red junk orings.
|
|
|
|
|
 Logged
|
Dalen & Shay -> Salina, KS
VRCC Member #33950
1999 Red & Black Valkyrie Interstate

|
|
|
|
Rio Wil
|
 |
« Reply #24 on: February 27, 2014, 04:47:17 PM » |
|
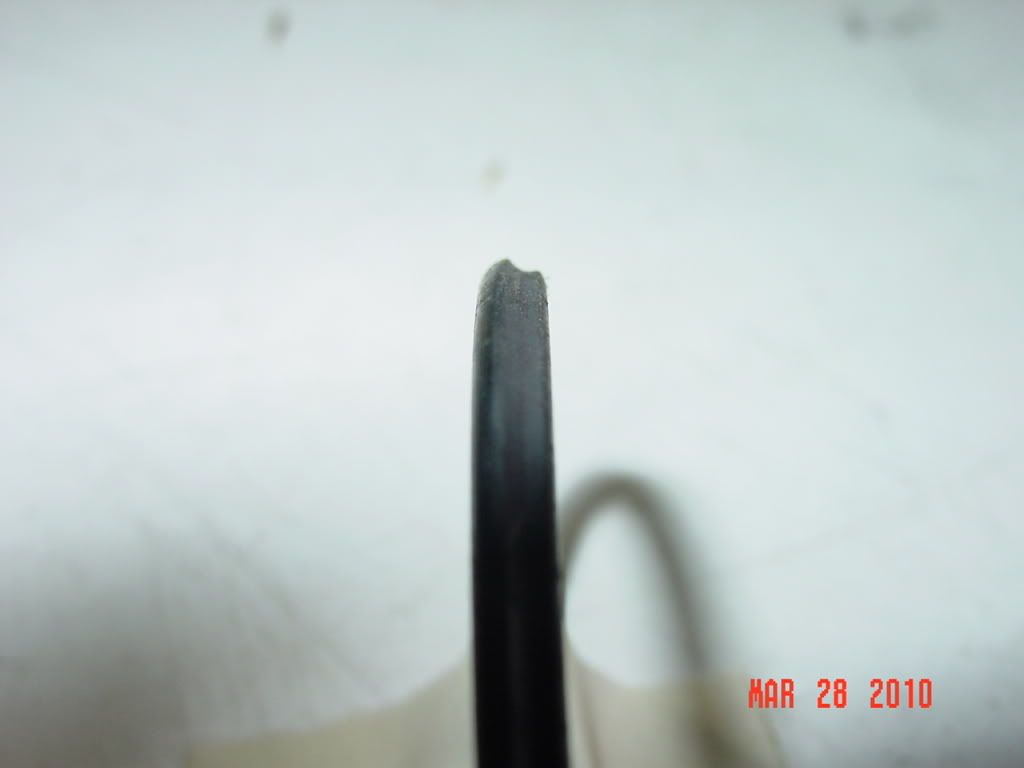
Take a look at one of the results of running a oversize oring that had to be forced into position...use your hammers and wooden blocks on the Cats and earth movers.....not needed as Ricky says for the final drive assembly. Ricky....keep posting man.....sometimes you are the only entertainment on this board (and I don't mean that in a mean way).....   |
|
|
|
|
 Logged
|
|
|
|
|


