Valkyrie Riders Cruiser Club
June 28, 2025, 04:14:49 AM *
Welcome, Guest. Please login or register.

Login with username, password and session length
Ultimate Seats Link VRCC Store
Homepage : Photostash : JustPics : Shoptalk : Old Tech Archive : Classifieds : Contact Staff
News: If you're new to this message board, read THIS!
 
Inzane 17
Pages: [1]   Go Down
Send this topic Print
Author Topic: Front wheel install caliper clicking  (Read 1424 times)
ValkISDan
Member
*****
Posts: 211


Forest Lake, MN


« on: February 05, 2015, 05:45:43 PM »

Sorry to open this one again. I just read an old thread with some good info on installing the front tire. I assembled my front end this time and had a clicking noise coming from the right side after the install. Some of the advice included loosening the left pinch bolts and pumping the front end to seat the axle. I loosened the left pinch bolts and an audible "pop" followed as the left fork shifted outward. I retightened the pinch bolts and the end of the axle appears to be more flush than before. My concern is I now have a small gap near the speed sensor due to the axle shifting outward (see picture) and Didn't this just release the torque on my main axle nut? Sorry it got a little wordy, I'm thinking of starting over, thoughts?

Logged
Red Diamond
Member
*****
Posts: 2245


Beaumont, Texas


« Reply #1 on: February 05, 2015, 05:56:21 PM »

Correction needed if I'm wrong, but the sequence is to flush the axle on the left, tighten the pinch bolts, tighten the axle nut on the right, pump the front end, tighten the right pinch bolts. The pop you heard was the left side of the axle snapping flush as it should have been after the initial install. Redo it in the correct sequence.
Logged


If you are riding  and it is a must that you keep your eyes on the road, you are riding too fast.
ValkISDan
Member
*****
Posts: 211


Forest Lake, MN


« Reply #2 on: February 05, 2015, 06:19:27 PM »

That's actually what I did the first time and thus the clicking. I think I just need to start over with more focus on tapping the axle exactly flush on the left side first.
Logged
Red Diamond
Member
*****
Posts: 2245


Beaumont, Texas


« Reply #3 on: February 05, 2015, 07:00:22 PM »

Maybe there is a slight misunderstanding, read what I posted and compare it to what you posted. The right or left side of a bike is the view you get when sitting on it.
Logged


If you are riding  and it is a must that you keep your eyes on the road, you are riding too fast.
ValkISDan
Member
*****
Posts: 211


Forest Lake, MN


« Reply #4 on: February 06, 2015, 05:20:55 AM »

You are correct, your procedure is what I initially did. I then read some thread the suggested the left side last that's when I experienced the pop and the slight gap in the photo. I will try the original procedure again, I must have been in a hurry the first time.
Logged
Bone
Member
*****
Posts: 1596


« Reply #5 on: February 06, 2015, 05:30:19 AM »

Good luck.

Really nice paint job.
Logged
indybobm
Member
*****
Posts: 1600

Franklin, Indiana VRCC # 5258


« Reply #6 on: February 06, 2015, 05:38:06 AM »

Looks like it is ok. The left side of the axle slips through the left fork and has a shoulder that butts up against the speedo housing. There will be what looks like clearance between the fork and the speedo unit.

Not sure if this is what you did but never tighten the right pinch bolts before you torque the axle bolt.

Push the axle in until it is flush with the left fork, tighten the left pinch bolts to hold the axle, torque the axle bolt, tighten the right fork pinch bolts, loosen the left pinch bolts, bounce the forks with the front brake applied, , retighten the left pinch bolts. Then check that the left caliper is centered over the left rotor.

« Last Edit: February 06, 2015, 05:46:26 AM by indybobm » Logged

So many roads, so little time
VRCC # 5258
Chrisj CMA
Member
*****
Posts: 14769


Crestview (Panhandle) Florida


« Reply #7 on: February 06, 2015, 05:53:40 AM »

It sounds like you have the left (clutch) side right now.  Lift up the front end DONT TOUCH THE LEFT SIDE AT ALL. 

Loosen the axle nut and the pinch bolts on the right, retorque the axle and then retighten the pinch bolts and you should be golden
Logged
RonW
Member
*****
Posts: 1867

Newport Beach


« Reply #8 on: February 09, 2015, 05:39:09 AM »

Quote
Lift up the front end ....

It's better to lift the wheel to do this procedure? Any why?


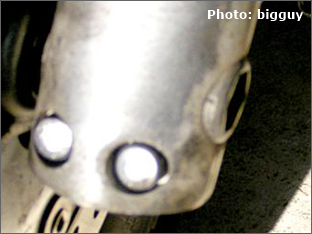
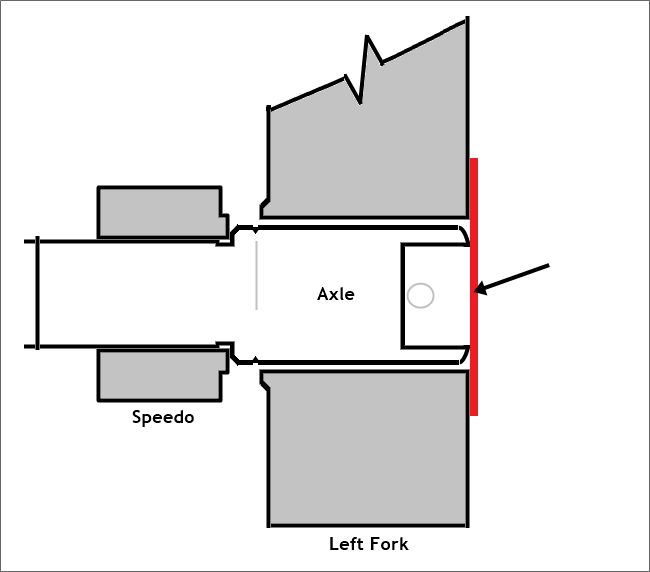
Anyways, the dilemma that I seem to have is that since the end of the axle is a little rounded .... if you align the *sides* of the axle to the outside of the fork you have something like below. That is, the crown of the axle won't be flush with the outside of the fork (arrow)....


Which looks something like this ....


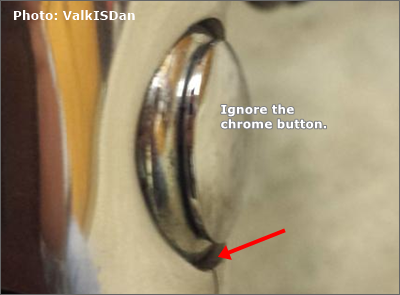
On the other hand, if you align the crown on the axle's end flush with the outside of the fork like so ....


You end up with an eyebrow recess, something like this ....


I'm aware of a so called factory reference mark (below), but it's almost impossible to sight after the axle shaft has been installed. So, hypothetically if the reference mark indeed registers the axle properly laterally, which of the 2 above options aligns the reference mark to the inside of the left fork?

Logged

2000 Valkyrie Tourer
Chrisj CMA
Member
*****
Posts: 14769


Crestview (Panhandle) Florida


« Reply #9 on: February 09, 2015, 05:50:24 AM »

second pic with that "eyebrow" thing is the right way
Logged
ValkISDan
Member
*****
Posts: 211


Forest Lake, MN


« Reply #10 on: February 09, 2015, 06:09:26 AM »

Nice diagrams. I'm assuming the small area to the left of the reference mark on the shaft will be exposed like my initial 2nd photo.
Logged
RonW
Member
*****
Posts: 1867

Newport Beach


« Reply #11 on: February 09, 2015, 08:33:31 AM »

Affirmative. Usually the speedo unit double-duties as a spacer which doesn't leave a gap after torquing the axle, but I guess this is an exception.
Logged

2000 Valkyrie Tourer
Pages: [1]   Go Up
Send this topic Print
Jump to: