John Schmidt
Member

Posts: 15370
a/k/a Stuffy. '99 I/S Valk Roadsmith Trike
De Pere, WI (Green Bay)
|
 |
« on: March 15, 2015, 05:16:27 PM » |
|
Well, crap! If it weren't for bad luck I wouldn't have any luck at all it seems. When I removed the block that clamps down on the cam, on the 1200 it allows the cam to drop down on the rear end of it. It almost caused mine to pull completely out of the timing belt pulley but I caught it. In the end, it did ruin the oil seal on the front of the cam so I now will have to drain the radiator to remove it....can't get to the belt covers with it still mounted. Then remove the timing belt covers and the left belt pulley. Then remove the small plate behind the pulley to replace the gasket and then reassemble with a new oil seal. If, after all this the engine still smokes heavily at first startup, I'll seriously consider tossing the entire project and not look back. The valve guides appear to be in good shape, no apparent movement at all. As for the bike, it has become a money pit, the only thing that has kept me in it is I got the bike for next to nothing which is a nice way to get a bike. I doubt I'll sell it as a project bike, I'll just trash it. Strip off a few of the smaller parts that are easy to pack/ship when sold and junk the rest. I did that many years ago with an old GL1000, also another low investment that was turning into a money pit. So, I pulled the engine and set it on the curb with the intent of helping the trash pickup load it up. I pulled everything off the frame, took a sawsall to the frame and junked it. I sold a few items off the bike and junked the rest. I did finally get one cylinder's valve seals changed late in the day yesterday. I'll pull all the stuff mentioned above which will at least allow me to turn the engine over manually to put the #4 piston at TDC, where I now have #2....the one I just completed. After bolting it all back together under the valve cover, I'll remove the pulley and small cover behind it. I've put a lot of effort and $$ into this thing over the last year or so and it has given me something to do and keep my mind off other things currently going on in the home. But I've about reached my breaking point and am fast losing interest. Sorry for the vent, I've about had my fill of this fool engine.  If I could find someone, somewhere, that can tell me what's involved in converting an FI engine to carbs, I have a lead on a decent one with relatively low miles. So far, the only answers I get are conjecture, but I know someone out there has made the switch. Oh well, this too shall pass.....I think!  |
|
|
|
|
 Logged
|
|
|
|
gordonv
Member
Posts: 5766
VRCC # 31419
Richmond BC
|
|
« Reply #1 on: March 15, 2015, 05:23:52 PM » |
|
Sorry to hear it's getting the better of you. It's nice reading your posts on your projects. Wish I had the room/time/ability to do the same. I still watch the auto shows to what and how to do some things.
|
|
|
|
|
Logged
|
1999 Black with custom paint IS   |
|
|
John Schmidt
Member
Posts: 15370
a/k/a Stuffy. '99 I/S Valk Roadsmith Trike
De Pere, WI (Green Bay)
|
|
« Reply #2 on: March 16, 2015, 12:59:29 PM » |
|
Well, I just ordered two new oil seals for the front end of the cams and two new gaskets. I'll wait until the parts arrive before continuing replacing valve stem seals so I can put it all back together and be done with it.....I hope.  I need to get to the place where I'm not continually messing with the engine so I can move on to another part of the bike. I've serviced the rear end, new o-rings, lubed, etc., cleaned and repainted the rear wheel and the final drive housing. The dirt and crud in the final and the wheel hub was horrendous. I finished the final off with three coats of a semi-gloss silver engine paint and it really looks sharp. Did the same to the rear caliper after painting the caliper mount a hammered black to match the frame. I just ordered a rear m/c for a '94 Wing, uses the same rebuild kit as my 1200. That will also get a coat or three of hammered black and will make an adapter to mount it and still use the existing pedal and actuator rod. Soon as the rear tire is replaced, the entire rear end goes back together for the final time. Then I'll be looking for a fender to replace the OEM monstrosity, I plan to mount it to the swingarm and shock brakets and have it move with the wheel. Don't get me wrong, I'm still irritated with this project but I need something to work on. It's the only real outlet I have, regardless of cost. Here's where I am on the rear end. The repainted mount & caliper, and cleaned/repainted final and wheel. I could have had the wheels powder coated for $150 but thought I'd try this first. Only took a couple hours so I'll do the same with the front wheel when the time comes. For now, I just shoved the axle in place so as to keep the painted stuff off the floor and being kicked around. 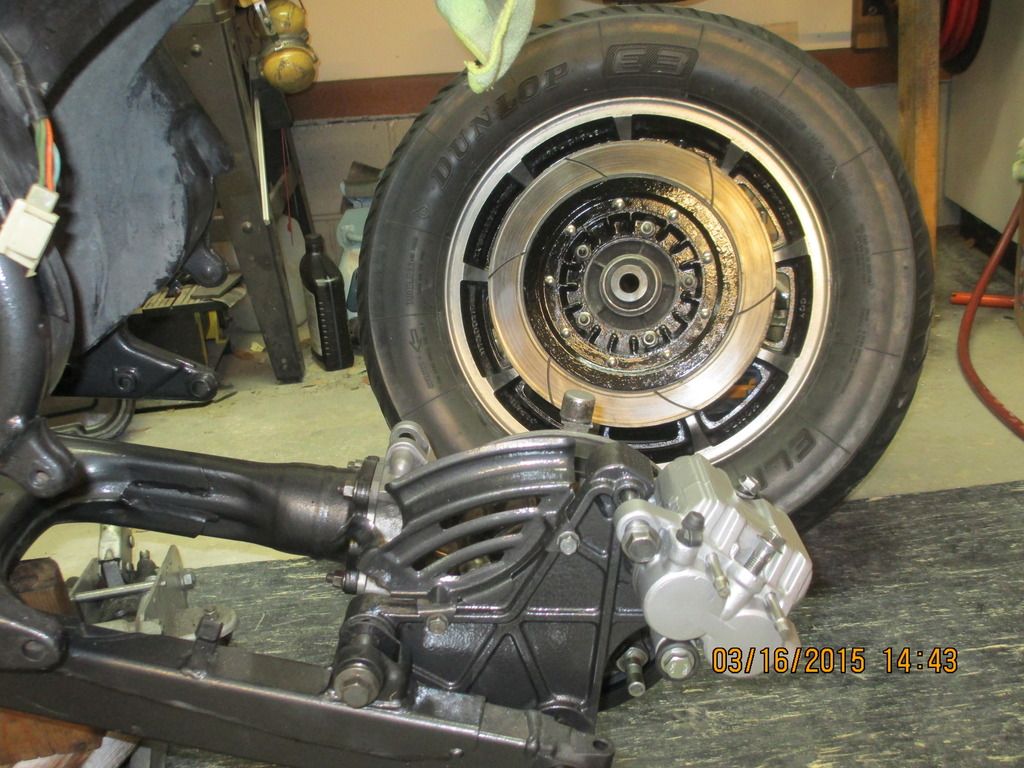 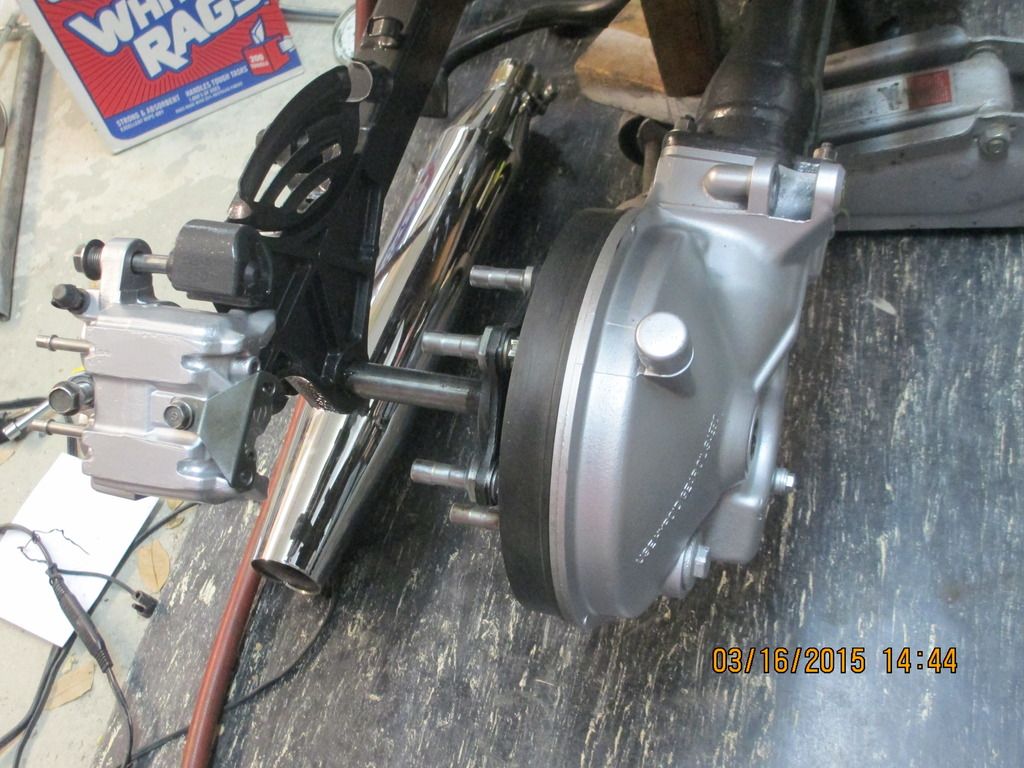 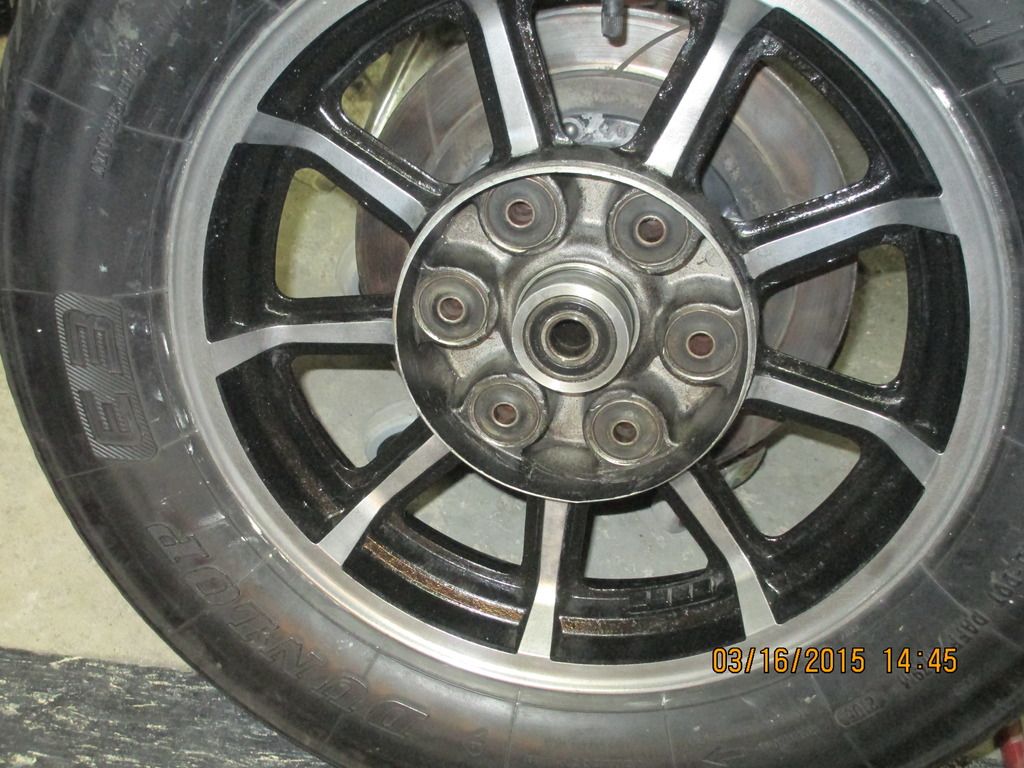 |
|
|
|
|
Logged
|
|
|
|
|
BonS
|
|
« Reply #3 on: March 16, 2015, 03:09:43 PM » |
|
I'm sorry for your frustration, John. The bits that you show in these photos are beautiful. I'd hate to think of it being sawn up in frustration. As to the money pit part, you look and behave like a perfectionist - and that's not bad - but it can be expensive in both dollars and emotionally. Keep up the good work!! I look forward to following this thread.  |
|
|
|
|
Logged
|
|
|
|
John Schmidt
Member
Posts: 15370
a/k/a Stuffy. '99 I/S Valk Roadsmith Trike
De Pere, WI (Green Bay)
|
|
« Reply #4 on: March 16, 2015, 04:12:34 PM » |
|
Bon, here's what I did to keep the cam from dropping out completely, the seal is already buggered up. I'll be pulling the timing covers off this evening in preparation to replacing the #4 valve seals and the front oil seal when it arrives.  |
|
|
|
|
Logged
|
|
|
|
|
BonS
|
|
« Reply #5 on: March 17, 2015, 06:18:21 AM » |
|
Darn it! That sure is interesting, and inconvenient, that cam did that. I sure didn't have that issue with the Valk. Perhaps I could have but the shop manual didn't warn me or mention it. The cams just stayed put even as the engine turned as we air-pressurized each cylinder in turn. I do seem to remember a picture on the 'net of a fellow working on a GL1000/1200 with a bungee cord tied to the end of the cam while he worked on it, but it was the pulley end as I recall.
Uh-Oh, John. Looking closely at your photo shows me that you have two valve springs per valve. You must compress both at the same time to get the keepers out. I'm hoping that your compressing tool teeth are long enough to grab the inner spring.
|
|
|
|
|
Logged
|
|
|
|
|
quexpress
|
|
« Reply #6 on: March 17, 2015, 06:34:26 AM » |
|
Sorry to hear that John. I know how projects can be very satisfying ... but on the other hand, could be very frustrating.
I hope that you'll get it worked out without too much loss.
|
|
|
|
|
Logged
|
I still have a full deck.
I just shuffle slower ...
|
|
|
John Schmidt
Member
Posts: 15370
a/k/a Stuffy. '99 I/S Valk Roadsmith Trike
De Pere, WI (Green Bay)
|
|
« Reply #7 on: March 17, 2015, 08:11:40 AM » |
|
......two valve springs per valve......
I realized that on the first spring I compressed. I was almost to the point of being able to release the keepers and heard a loud snap, couldn't figure out what it was at first. Before removing the compressor to reposition it, I got down close with a flashlight. The snap I heard was the inner spring slipping off, so I just reset the tool and started over....holding my breath. I found holding my breath did help.  That happened on both the valves I've done thus far, I just reposition the tool and start over. |
|
|
|
|
Logged
|
|
|
|
|
quexpress
|
|
« Reply #8 on: March 17, 2015, 12:06:19 PM » |
|
Just re-installed radiator after timing belt/valve seal change last weekend (had to wait for 2 hoses and T-stat from Western Honda) and fired up bike for the first time in over a week. Little sluggish at 1st-almost thought I was off a tooth which was perplexing since everyhing seemed to line up fine. Problem straightened out in less than a minute and bike was running fine.
Now my 2 cents...When I first got bike it smoked a lot, stunk up my garage and houseand wifey didn't like it. Side stand or center stand didn't matter. If it sat-it smoked. I am 3rd owner of bike and PO wasn't sure about timing belt age so I decided to tackle belts and stem seals.
After pulling covers noted 2 gates belts in decent condition already installed. Almost stopped right there but had the seals and new belts. Bike was on lift coolant drained etc. so I jumped in.
Belts went well no problem really, just took my time.
As for seals pulled valve covers and could see no way of removing springs with cams in the way...so, yanked both cam pulleys and 6 bolts per side-off popped the cams.
Now I used my homemade spring compressor shown below which mimics an idea from another member to remove springs (1 at a time)-same exact concept just used a piece of unistrut and some spacers I had lying around. (see pic below).
As I pulled original stem seals, I noted that each seal did not really seem brittle or worn and started to wonder if, in fact this was cause of smoke or not. One thing I did note was that several of the seal's bottom retaining rings had come off and were sitting on the valve seat. I was later discussing this with Neoracer and he pointed out that likely P.O. let bike sit a long time and seal fused to stem. Bike only had 28,000 miles.Starting engine would havecaused valve to move and this likely pulled seal off of it's seat leaving the ring behind-makes sense since seals have almost a metal washer on there underside that surrounds valve stem.
Next thing to note regarding the compressed airV rope to keep valves from falling in.I did neither.First, I lined up timing marks since I was changing belts. Once marks are aligned both forward cylinders will be near top so no those valves cannot fall into cylinder. As for the back 2 cylinders the exhaust valve wont fall in due to gravity so no worries there. Basically the only 2 valves to worry about are the 2 real cylinder intake valves. I did not use compressed air or rope-just changed them and had success but feel that was risky. I'd guess if you have an adapter that the air will do the trick but I'd only use it on the rear cylinders only since they are less likely to move at the lower end of travel and there is no reason to put air to the forward cylinders.
Now for the results. After the residual burned off smoke is gone. Even let bike cool several times and restarted with same result. Bike actually appears to be idling better (smoother) and part throttle operation is better. If you are changing belts I highly recommend spending a little extra time and money (about $50 for the stem seals and $30 forthe cam seals)and getting rid of an annoying issue if your bike smokes. I just mentioned cam seals-recommend installing the ones in front behind the cam pulleys at least. If you do this it willprevent pulling belts again-glad I changed em. Rear ones can be changed without removing anything else so your call.  wingsam41 wingsam4104-09-2011, 09:55 PM
|
|
|
|
|
Logged
|
I still have a full deck.
I just shuffle slower ...
|
|
|
|
quexpress
|
|
« Reply #9 on: March 17, 2015, 12:16:32 PM » |
|
 Hope this helps John. Normand |
|
|
|
|
Logged
|
I still have a full deck.
I just shuffle slower ...
|
|
|
|
pancho
|
|
« Reply #10 on: March 17, 2015, 12:26:19 PM » |
|
I don't know Stuffy,,,, sounds like you are pretty far down the road for that "tossin it" thinking,, I mean you need SOMETHING to do .... maybe a break from it for a bit..??
Sure is looking good what you've done so far,,,,,,,, it will be a sweet ride.
|
|
|
|
|
Logged
|
The most expensive things you will purchase, are those things you would not have needed if you had listened and obeyed.
|
|
|
John Schmidt
Member
Posts: 15370
a/k/a Stuffy. '99 I/S Valk Roadsmith Trike
De Pere, WI (Green Bay)
|
|
« Reply #11 on: March 17, 2015, 01:30:05 PM » |
|
This morning I finished replacing the stem seals on the left side. Since it was the only side that smoked I'm not planning on changing the right side at this time. If that changes, I have the seals on hand. I have the front cam seals ordered so this afternoon I'm pulling the left pulley off and the plate behind it. Needs a new gasket there anyway which I also ordered.....I ordered the same thing for both sides just in case I do the right side later on. For the record, installing the keepers on the intakes was not a problem. The exhaust however....I'll bet I dropped one of those fool things at least a half dozen times. I had a pan under the motor with an old towel in it so they didn't go anywhere, just aggravating to have to keep picking it up and try again. I found the rear fender I want....for $150(I have expensive taste). I plan to mount it something like it is shown in the link, just not quite as far down in front. I want the front to come even with the back edge of the swingarm and will create a flange to bolt to the fender and the s/a. Then add a vertical strut on either side, that should be all that's needed to hold the fender solid and have it move with the swingarm. Since I don't have any bike chains with a shaft driven bike, I'll dig up some hose and tape to the tire similar to one of the pictures. Then set the fender at that point so it hugs the tire. Should look OK. http://www.ebay.com/itm/361082450253?_trksid=p2055119.m1438.l2648&ssPageName=STRK%3AMEBIDX%3AIT |
|
|
|
|
Logged
|
|
|
|
|
BonS
|
|
« Reply #12 on: March 17, 2015, 07:46:55 PM » |
|
Yes, indeed, the intake side is easy peasy. The exhaust not so much. If you did that all by yourself and didn't scare the neighbors yelling then you did great!! I'm as anxious for you to deliver your verdict as you probably are.
|
|
|
|
|
Logged
|
|
|
|
John Schmidt
Member
Posts: 15370
a/k/a Stuffy. '99 I/S Valk Roadsmith Trike
De Pere, WI (Green Bay)
|
|
« Reply #13 on: March 17, 2015, 08:06:08 PM » |
|
Well, to make bad matters worse, as I was cleaning up the rocker box prior to installation I saw a problem with it. Won't go into it but someone had obviously worked on it before. I have two spare right heads so taking a chance it will work, I pulled the rocker box off one of those and installed it on the left side, you have to flip the ass'y. to work but it bolts right up. Since the heads and rocker box are machined as a set, I'm hoping for success here. If not, then I guess I'll have to go looking for a good left head. Good grief, what next. The cam moves pretty freely so maybe I'll get lucky. At least the cam wasn't scored up anywhere.
|
|
|
|
|
Logged
|
|
|
|
|


