I went through the whole faring cleaning and replacing parts that were either stuck or broken. The stuck parts were some of the screws that attach to the brass "sockets" and the broken parts were some of the plastic dash pieces.
I replaced the headlight using these instructions that can be found in the VRCC Shop Talk website.
http://www.valkyrieriders.com/shoptalk/interstateheadlight.htm Even with my big meat hooks, the replacement was pretty easy. The easiest thing I did all day.
I had 3 of the little brass threaded sockets that had spun in the plastic and had to be replaced and glued into place (JB Weld). I even had one in the chrome trim piece that covers the windshield bolts that stripped. I had to use my Dremmel tool and but a slot in it to get it out, because the phillips head was stripped.
While I was in there, I replaced the windshield (original 1999) with a short, black, windshield for summer riding. I know, a little late, but there is still a month of riding in the heat here in Houston. Anyway, now that I have gone through the whole faring, it will be MUCH easier to take apart and replace the windshield for a good clear or slightly smoked normal height shield.
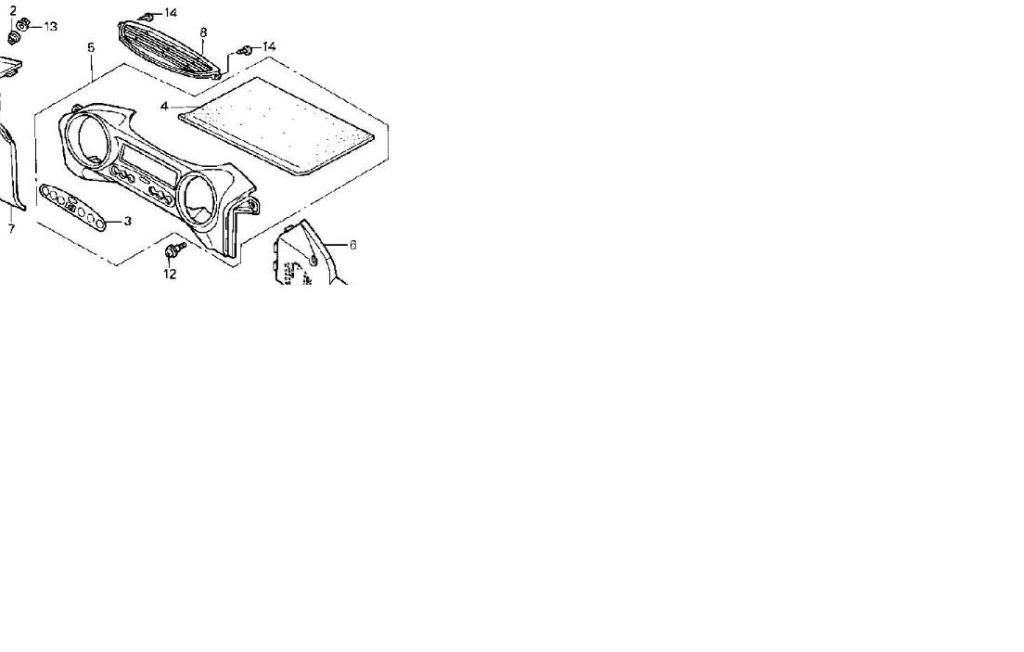
I don't know when it happened, but I found that my meter panel had some cracks one the left side and the right side had a chunk missing where the speaker panel attaches. I got the part (5 in the pic) with the plastic bezel, the indicator surround, and the rubber water shield from Ron Ayers. It was about $40 with shipping included.
On my trip to Inzane, I noticed that the dash lights behind the speedo are out and I can only see my speed if I am going over 100 mph...

I have ordered those and will replace all dash lights when they come in.
All things considered, it was pretty easy, just had to take my time and let the JB Weld set up all day before I put things back together. I put antisieze on all of the bolts/screws that thread, none on the self tappers, to make it a breeze to take apart when my new windshield comes in.
I will take some pics of the bike with the new windshield and the Meter Panel (damage) and post them in a while.
Thanks for listening.
Hay

Jimmyt


