|
Ramie
|
 |
« on: June 16, 2015, 05:34:40 PM » |
|
Would like some extra light on the front of my I/S mainly so people can see me coming easier. I would be nice to do pod light but seeing as they're no longer available does anyone have any alternative? Was thinking of something down lower but am open to suggestions and pics would be nice if someone has done something different.
|
|
|
|
|
 Logged
|
“I am not a courageous person by nature. I have simply discovered that, at certain key moments in this life, you must find courage in yourself, in order to move forward and live. It is like a muscle and it must be exercised, first a little, and then more and more. A deep breath and a leap.”
|
|
|
|
Jess from VA
|
|
« Reply #1 on: June 16, 2015, 07:31:15 PM » |
|
Motolights sells a nice (and expensive) brake caliper mount light. 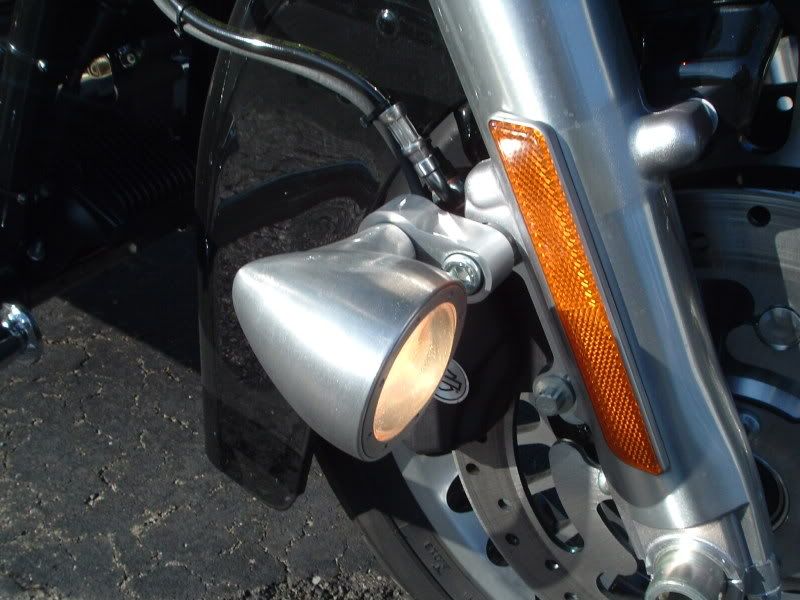 A small set could probably be mounted just outboard of the pods on the engine guard (PIAA 1100X), but they will have to be a bit crooked like mickey mouse ears, and there is the possibility of boot toes hitting them when on the Hwy pegs (depending on where you have them). The easiest place to mount is right under the fairing, but I don't like this location because they just melt into the dual headlamps when viewed by oncoming traffic, and you don't get the separation you are looking for for forward visibility. It ends up looking like one big light to oncoming traffic. Again they have to be small and account for fork compression (lest you ding the fender). My IS came with PIAA 1100Xs custom mounted on the fork wing plexiglass (one bolt each). Others have mounted them in front of the timing belt cover, on the outside edges. Mounts have to hold them far enough forward to clear the cover. Any mount under the engine guard (again small lights) diminishes light ahead at night, and if mounted underneath at the 4 and 8 o'clock may hit in a big lean or tipover. (slide a piece of plywood up to the front tire and lift it up to discover clearance). Here are my Motolights on the calipers and PIAA 1100X on the fork wings (sorry for big pic). The Motolights are 35W (but can be 50s) just to be seen by others in daylight, and the 1100Xs are for me to see at night (brighter than my headlamps).  |
|
|
|
« Last Edit: June 16, 2015, 07:38:53 PM by Jess from VA »
|
Logged
|
|
|
|
|
Dorkman
|
|
« Reply #2 on: June 16, 2015, 10:42:23 PM » |
|
Pretty sure I saw, from a distance, Motolights or something similar on a BMW. They were LED's, very bright in the daytime, and could have been mounted off the caliper bolts, or perhaps clamped to the down tubes. The LED's probably don't throw much light on the road at night, but they are surely way brighter than the stock headlight during daylight. I would be interested in some LED solutions.
|
|
|
|
|
Logged
|
|
|
|
|
Steve K (IA)
|
|
« Reply #3 on: June 16, 2015, 11:04:59 PM » |
|
Under the headlights. And, if you look close, you can see them under the crash bars. 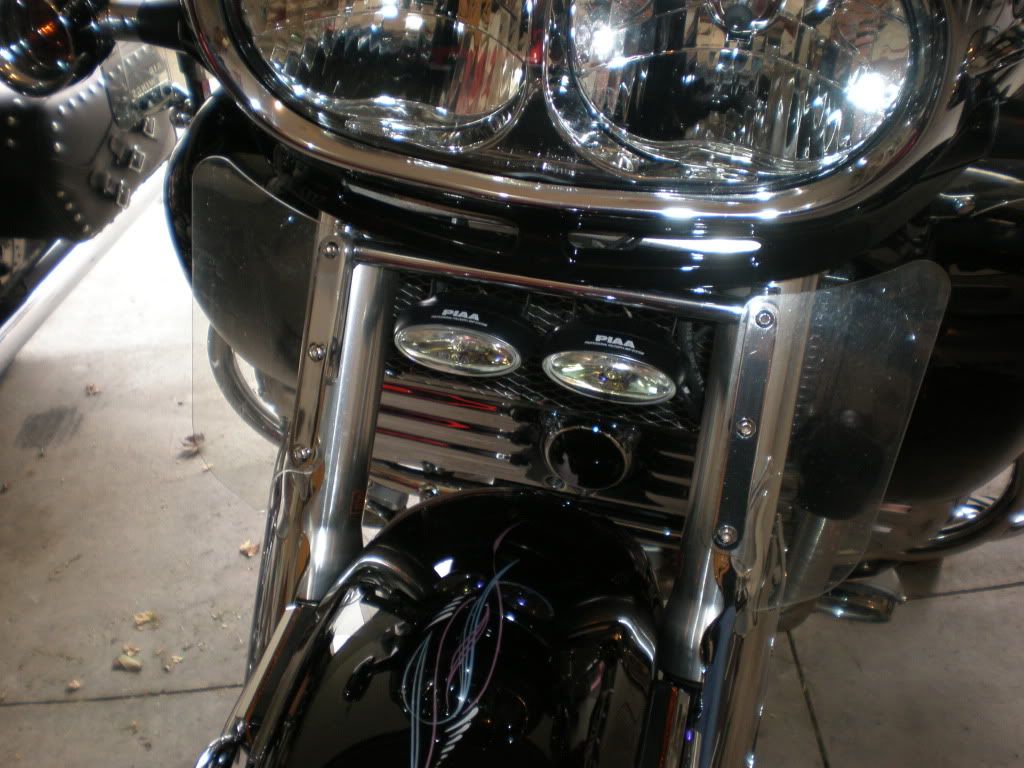 |
|
|
|
|
Logged
|
 States I Have Ridden In |
|
|
salty1
Member

Posts: 2359
"Flyka"
Spokane, WA or Tucson, AZ
|
|
« Reply #4 on: June 17, 2015, 03:37:36 AM » |
|
I mounted some PIAAs off the air scoops.  They are quite visible with the triangular pattern that is formed. 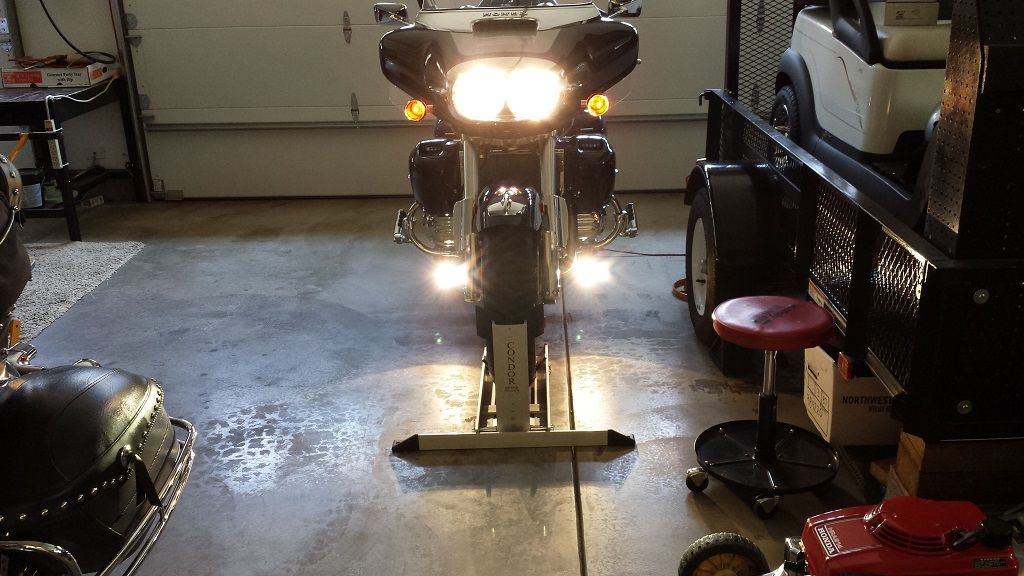 The lights came with a complete wiring kit including a relay and a on/off switch. 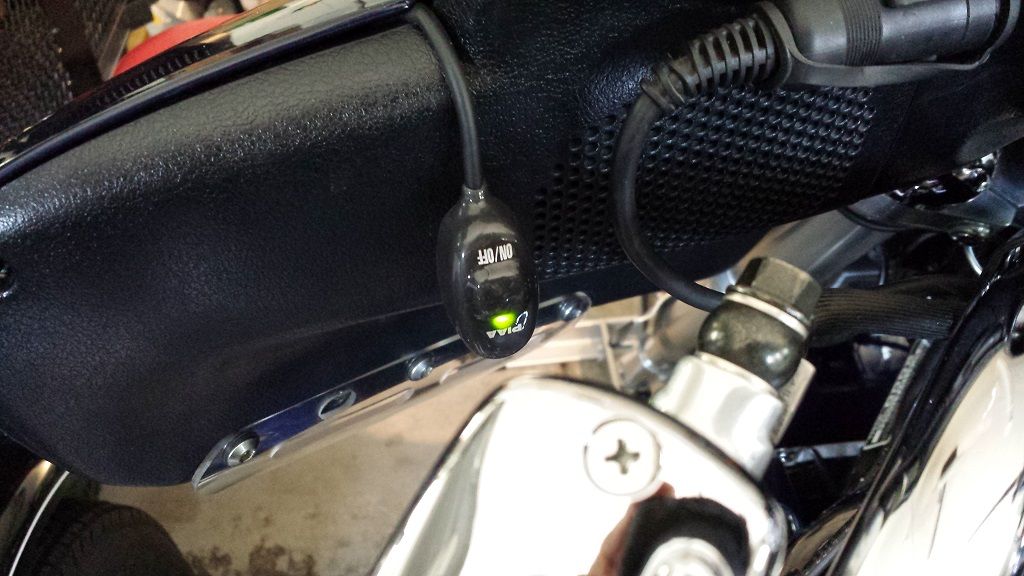 |
|
|
|
|
Logged
|
My rides: 1998 GL1500C, 2000 GL 1500CF,2006 GL 1800 3A   |
|
|
|
Ramie
|
|
« Reply #5 on: June 17, 2015, 05:42:07 AM » |
|
Thanks for all the ideas, you're right the PIAA's aren't cheap. Steve did you have a model or part number on those lights I can't seem to find them on PIAA's website.
|
|
|
|
|
Logged
|
“I am not a courageous person by nature. I have simply discovered that, at certain key moments in this life, you must find courage in yourself, in order to move forward and live. It is like a muscle and it must be exercised, first a little, and then more and more. A deep breath and a leap.”
|
|
|
salty1
Member
Posts: 2359
"Flyka"
Spokane, WA or Tucson, AZ
|
|
« Reply #6 on: June 17, 2015, 09:12:02 AM » |
|
Ramie, the piaa 73112 platinum 1100x driving lamp kit is $158 at Amazon. Not a bad price considering the quality and completeness of the kit.
|
|
|
|
« Last Edit: June 17, 2015, 09:25:11 AM by salty1 »
|
Logged
|
My rides: 1998 GL1500C, 2000 GL 1500CF,2006 GL 1800 3A |
|
|
|
Steve K (IA)
|
|
« Reply #7 on: June 17, 2015, 09:17:37 AM » |
|
Thanks for all the ideas, you're right the PIAA's aren't cheap. Steve did you have a model or part number on those lights I can't seem to find them on PIAA's website.
I think I got them on Amazon several years ago. I believe someone on the board had spotted them and posted about them. I do know they were $30.00...yea, I know. Cheap. I remember jumping on them Fast as not to miss getting a set at that price. They may have been a discontinued item as to why they were priced so low and you not being able to find them. They are fog lights, they have a yellow tint, but still Bright. The ones below the crash bars I got at J & P Cycles. They are Chris Products brand. They are Really Bright. http://www.jpcycles.com/product/ZZ33255 (price is for one) |
|
|
|
|
Logged
|
States I Have Ridden In |
|
|
|
PharmBoy
|
|
« Reply #8 on: June 17, 2015, 09:48:22 AM » |
|
|
|
|
|
|
Logged
|
A politician is a fellow who will lay down your life for his country. ~Texas Guinan
4th Infantry Tet Vet
99 Interstate
97 Bumble Bee
97 Red & White
|
|
|
|
Ramie
|
|
« Reply #9 on: June 17, 2015, 11:13:19 AM » |
|
All great options, the price of that PIAA kit on Amazon is pretty good, i wonder why their discounted by $127? Steve i don't think the pic of the ones mounted below your crash bar showed up, how are they mounted.
|
|
|
|
|
Logged
|
“I am not a courageous person by nature. I have simply discovered that, at certain key moments in this life, you must find courage in yourself, in order to move forward and live. It is like a muscle and it must be exercised, first a little, and then more and more. A deep breath and a leap.”
|
|
|
salty1
Member
Posts: 2359
"Flyka"
Spokane, WA or Tucson, AZ
|
|
« Reply #10 on: June 17, 2015, 12:03:41 PM » |
|
Salty1 here not Steve, I just used aluminum flat stock the same width as the light mount, drilled a hole in the center of the air scoop, drilled the bar on both ends and bolted it up. I can't remebered but I think the bar length was around 2.5 inches. I also polished the aluminum bar. The discount I can't explain, but I can tell you I love the light system.  |
|
|
|
|
Logged
|
My rides: 1998 GL1500C, 2000 GL 1500CF,2006 GL 1800 3A |
|
|
|
Steve K (IA)
|
|
« Reply #11 on: June 17, 2015, 01:24:02 PM » |
|
All great options, the price of that PIAA kit on Amazon is pretty good, i wonder why their discounted by $127? Steve i don't think the pic of the ones mounted below your crash bar showed up, how are they mounted.
These are the ones. http://www.jpcycles.com/product/ZZ33255At the time I mounted them, I was still working as a machinist/toolmaker and had access to material and machine tools. I used a 3/8 thick piece of aluminum cut the same size as the flat surface under the air scoops. Cut a thin piece of foam rubber the size of the aluminum and put it between the alum block and the scoop using 2 small screws, nuts and lock washers. Then attached the light bracket to the alum block again with rubber between those two parts. I drilled and tapped holes in the aluminum for the screws of the light brackets. I was trying to isolate any vibrations. I would take a close-up picture, but lost the cable to connect the camera to my computer. The biggest pain of this install was having to use a 90 deg. drill to put the holes under the scoops and getting the light brackets lined up to where they were pointed straight ahead. That steel is Hard. |
|
|
|
|
Logged
|
States I Have Ridden In |
|
|
|
Ramie
|
|
« Reply #12 on: June 17, 2015, 06:24:55 PM » |
|
Thanks Salty, I did have one more question is the relay separate or is it built into the switch you have on the faring. And a question for Steve how sturdy are the brackets that come with the lights.
Thanks again everyone.
|
|
|
|
|
Logged
|
“I am not a courageous person by nature. I have simply discovered that, at certain key moments in this life, you must find courage in yourself, in order to move forward and live. It is like a muscle and it must be exercised, first a little, and then more and more. A deep breath and a leap.”
|
|
|
|
DenverDave
|
|
« Reply #13 on: June 17, 2015, 07:22:47 PM » |
|
|
|
|
|
|
Logged
|
1999 interstate green/silver Denver, Colorado VRCC#32819 VRCCDS#0238  |
|
|
|
Steve K (IA)
|
|
« Reply #14 on: June 17, 2015, 11:37:04 PM » |
|
Thanks Salty, I did have one more question is the relay separate or is it built into the switch you have on the faring. And a question for Steve how sturdy are the brackets that come with the lights.
Thanks again everyone.
I would say sturdy enough for how and where they are mounted. I bent the left one when I dropped the bike 4-5 years ago. Took it off and straightened it. I've had them for more than 10 years. Think I replaced the bulbs no more than twice. |
|
|
|
|
Logged
|
States I Have Ridden In |
|
|
|
Mr.BubblesVRCCDS0008
|
|
« Reply #15 on: June 18, 2015, 03:07:38 AM » |
|
Go to the Texas board and post. Red diamond has a way to mount LED 55watt lights on the lower bolt of the pod. Lights are about 25 bucks and the replacement LED bulbs from home depot are about 20 bucks each. direct replacement only pulls about 3watts so easy on the charging system. I have a set on my valk and are very happy with them.
|
|
|
|
|
Logged
|
|
|
|
salty1
Member
Posts: 2359
"Flyka"
Spokane, WA or Tucson, AZ
|
|
« Reply #16 on: June 18, 2015, 04:08:44 AM » |
|
Thanks Salty, I did have one more question is the relay separate or is it built into the switch you have on the faring. And a question for Steve how sturdy are the brackets that come with the lights.
Thanks again everyone.
The relay is separate and comes with the kit as I recall. |
|
|
|
|
Logged
|
My rides: 1998 GL1500C, 2000 GL 1500CF,2006 GL 1800 3A |
|
|
|
|
|
Ramie
|
|
« Reply #18 on: June 26, 2015, 05:01:26 PM » |
|
To close this out and provide anyone who might search in the future, Red Dragon and Mr. Bubbles on the Texas board pointed me at something that worked for them. I ended up going with Optronics 55w from Wally world and replace the halogen bulbs with LED bulbs from Home Depot. Nogrey also pointed me to some LED at superbright https://www.superbrightleds.com/moreinfo/mini-auxiliary-lights/2-round-10-watt-led-mini-auxiliary-work-light/1386 but I had already started installing the Optronics. I mounted them on the bottom corner of the radiator pods. 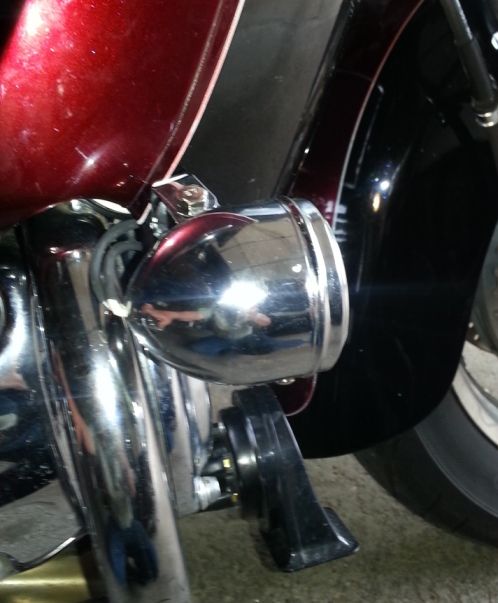 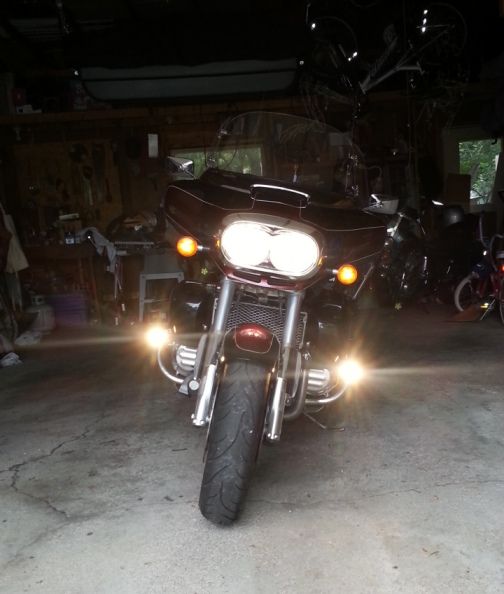 The worst part was the wiring luckily the PO had run two spare wires up the faring so I used one wire to run power and attached the relay to the faring support, installed a switch on the face of the pod, (I switched the ground) I mainly wanted the extra lighting so people can see me coming easier, I'm not counting on that happing but just a little extra insurance. Of course I had spend some time fixing some faring nuts. |
|
|
|
|
Logged
|
“I am not a courageous person by nature. I have simply discovered that, at certain key moments in this life, you must find courage in yourself, in order to move forward and live. It is like a muscle and it must be exercised, first a little, and then more and more. A deep breath and a leap.”
|
|
|
|
Punisher
|
|
« Reply #19 on: June 28, 2015, 02:33:55 PM » |
|
To close this out and provide anyone who might search in the future, Red Dragon and Mr. Bubbles on the Texas board pointed me at something that worked for them. I ended up going with Optronics 55w from Wally world and replace the halogen bulbs with LED bulbs from Home Depot. Nogrey also pointed me to some LED at superbright https://www.superbrightleds.com/moreinfo/mini-auxiliary-lights/2-round-10-watt-led-mini-auxiliary-work-light/1386 but I had already started installing the Optronics. I mounted them on the bottom corner of the radiator pods. The worst part was the wiring luckily the PO had run two spare wires up the faring so I used one wire to run power and attached the relay to the faring support, installed a switch on the face of the pod, (I switched the ground) I mainly wanted the extra lighting so people can see me coming easier, I'm not counting on that happing but just a little extra insurance. Of course I had spend some time fixing some faring nuts. What bulbs (part#) did you use from Home Depot? |
|
|
|
|
Logged
|
|
|
|
|
|
|
pago cruiser
|
|
« Reply #21 on: June 28, 2015, 10:05:01 PM » |
|
Clearwater Darlas. http://clearwaterlights.com/infopg_darla.htmlNot cheap, but with a rheostat to dim for conspicuity, or blaze for throwing light down the road. These are 2000 lumens each, and I have 2 on the bike and one on the hack. I like to mount mine a little higher than most do for conspicuity, primarily because you need some height to take advantage of the spot beam. Made some aluminum buttons to match the stamped steel turn receptacle, and reinforced the fairing mount bracket with a welded washer. Used Clearwater mounting brackets for a K1600. They have dozens of different mounting brackets, but absolutely no organization, except by bike model.  So you have to download and open up the install manual for every bike they make lights for in order to see what the bracket looks like... lame. The good news is that I now have install manuals for about 16 different bike...  I relocated the turns to the fairing, and installed 5" flexi leds just below the HONDA trim piece. Don't have a pic of those yet. Wiring is a little tricky, as they use a PCB with some weird stuff; like a "feature" to automatically turn the lights to "full power" whenever you hit the horn. ??? Let me know if you want more of the sordid install details. 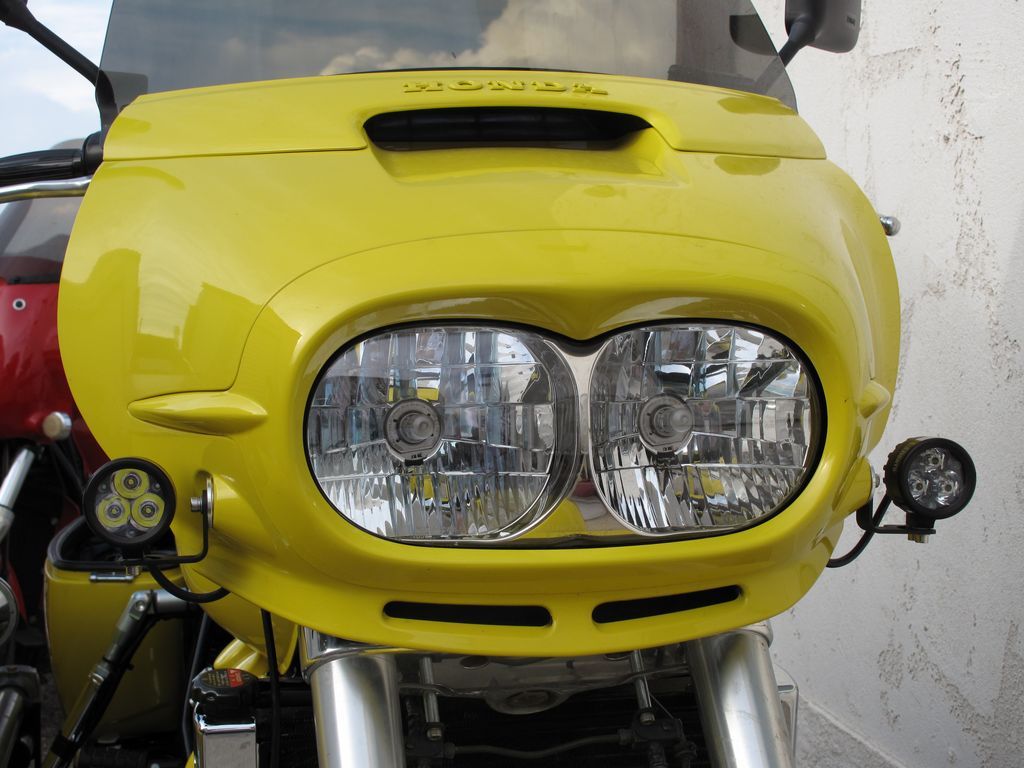 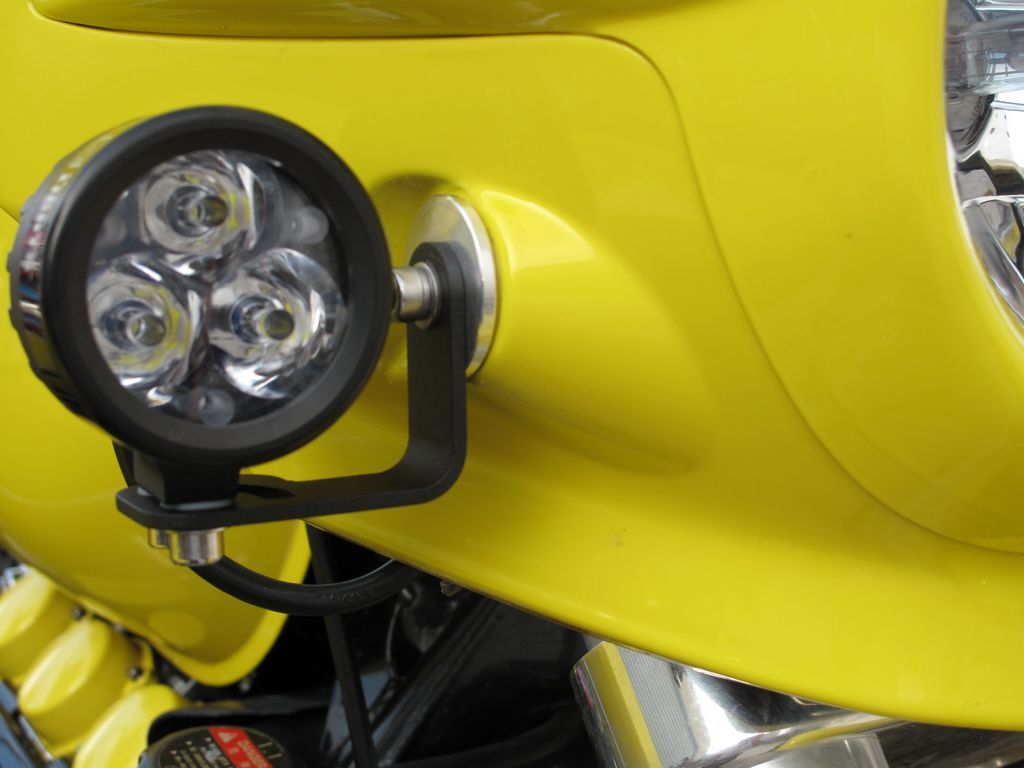 |
|
|
|
|
Logged
|
Just because you are not paranoid doesn't mean they're not out to get you
|
|
|
|


