|
cogsman
|
 |
« on: December 10, 2015, 05:10:38 PM » |
|
Hi All, As always, your help is greatly appreciated. Have a look at the center of this picture...  Are these 2 vertical hoses the only ones I need to remove before I pull the tank (after draining and removal of the petcock lever of course)? Do I need to clamp either of these? |
|
|
|
|
 Logged
|
|
|
|
|
Chrisj CMA
|
|
« Reply #1 on: December 10, 2015, 05:16:39 PM » |
|
Unless your bike is modified, there are only three hoses. Fuel line to petcock, vacuum line to petcock and tank vent to tail of tank. It's not that hard.
|
|
|
|
|
Logged
|
|
|
|
|
cogsman
|
|
« Reply #2 on: December 10, 2015, 05:32:06 PM » |
|
Thanks Chris. My problem is I don't know what I'm looking at. For example, the hoses in that picture... I don't know if they are connecting to the tank or what...
My bike is not a California model, so according to the manual I just need to remove the hose from the petcock. It talks about only the 1 hose unless I have a California model.
For those of you who have done it before I'm sure it's super easy, but I'm still learning.
My bike is a Standard, but it has a bigger tank. This is how I bought it. I don't know if anything else has been modified, though the horn has been shifted and it definitely has custom chrome covers on various parts.
|
|
|
|
|
Logged
|
|
|
|
|
The emperor has no clothes
|
|
« Reply #3 on: December 10, 2015, 05:39:41 PM » |
|
After you remove the petcock switch from the petcock. Remove the 2 bolts holding the tank on. Then standing on the right side of the bike lift the back of the tank up a few inches . You will then see the 3 hoses that you need to remove.  |
|
|
|
|
Logged
|
|
|
|
|
Bighead
|
|
« Reply #4 on: December 10, 2015, 06:56:40 PM » |
|
And there is no need to drain the tank just make sure the Petcock is off.
|
|
|
|
|
Logged
|
1997 Bumble Bee
1999 Interstate (sold)
2016 Wing
|
|
|
|
Jess from VA
|
|
« Reply #5 on: December 11, 2015, 10:57:34 AM » |
|
After you remove the petcock switch from the petcock. Remove the 2 bolts holding the tank on. Then standing on the right side of the bike lift the back of the tank up a few inches . You will then see the 3 hoses that you need to remove. The little trick that works for me is to slip a short 2X4 on edge between the rear of the tank and frame (that's about as much flex as you can get with the hoses still attached). With no helping hand, this lets you diddle around under there with both hands and a flashlight without having to hold the tank up while you work with one hand. |
|
|
|
|
Logged
|
|
|
|
John Schmidt
Member

Posts: 15373
a/k/a Stuffy. '99 I/S Valk Roadsmith Trike
De Pere, WI (Green Bay)
|
|
« Reply #6 on: December 11, 2015, 11:05:49 AM » |
|
The larger hose to the front of the petcock is the fuel line. The smaller one is about the size of a car window washer hose and goes to the front right side of the petcock. That's all that's connected to the petcock. The last one left to remove is at the back of the tank and slips on a small nipple that extends out, that's the overflow/breather tube. I also use a piece of 2x4 under the back end of the tank, leaves both hands free.
|
|
|
|
|
Logged
|
|
|
|
|
The emperor has no clothes
|
|
« Reply #7 on: December 11, 2015, 11:14:08 AM » |
|
After you remove the petcock switch from the petcock. Remove the 2 bolts holding the tank on. Then standing on the right side of the bike lift the back of the tank up a few inches . You will then see the 3 hoses that you need to remove. The little trick that works for me is to slip a short 2X4 on edge between the rear of the tank and frame (that's about as much flex as you can get with the hoses still attached). With no helping hand, this lets you diddle around under there with both hands and a flashlight without having to hold the tank up while you work with one hand. Good idea. Here all this time I've been doing it one handed   |
|
|
|
|
Logged
|
|
|
|
O-B-1
Member
Posts: 222
Show ain't over until the Fat Lady sings
Vancouver, WA

|
|
« Reply #8 on: December 11, 2015, 11:27:37 AM » |
|
And make DARN sure the tank is set somewhere safe, sturdy, and don't scratch it whilst lifting it. Don't let the bars swing into it either.... Just sayin'
|
|
|
|
|
Logged
|
David W. Mitchell
1999 Honda Valkyrie GL1500C
|
|
|
MarcusS
Member
Posts: 311
New To Me August 2013
North Houston
|
|
« Reply #9 on: December 12, 2015, 04:53:48 AM » |
|
I pulled my interstate take yesterday. Both the petcock hose bibs ( fuel and Vacuum) should face the front of the bike. They do not come strait down. The vent hose is very small line that does come strait down and it is just in front of the rear of the tank. The vent line comes down inside the frame just infront of the battery. I have the nice chrome engine guard covers that makes it difficult.
The interstate also has electrical connector for the fuel gauge that needs disconnected.
The pic you posted appears to show the smog lines that only need disconnected if you are pulling the air box.
|
|
|
|
|
Logged
|
Life goes on whether you are in it for the ride or not.
|
|
|
|
|
|
..
|
|
« Reply #11 on: June 05, 2017, 11:34:35 AM » |
|
For anyone else searching for help.
I found that once the petcock and bolts are removed. Go to the right side of the tan k and lift it up a little from the rear and then tilt the whole tank to the left away from the ignition switch. The 3 hoses will then be clearly visible and accessible.
DON'T FORGET TO GREASE THE nipples before reassembly so it's easier to slide them off next time.
The main fuel line on my bike had some obvious cracks. No doubt due to age so I'm going to replace that.
|
|
|
|
|
Logged
|
|
|
|
|
Firefighter
|
|
« Reply #12 on: June 05, 2017, 03:38:00 PM » |
|
I usually siphon fuel as the tank is heavy when full.
|
|
|
|
|
Logged
|
2000 Valkyrie Interstate, Black/Red
2006 Honda Sabre 1100
2013 Honda Spirit 750
2002 Honda Rebel 250
1978 Honda 750
|
|
|
MarkT
Member
Posts: 5196
VRCC #437 "Form follows Function"
Colorado Front Range - elevation 2.005 km
|
|
« Reply #13 on: June 05, 2017, 06:01:41 PM » |
|
I usually siphon fuel as the tank is heavy when full.
So do I. Less likely to ding it when it's not heavy. I made the longest one just for the tank removal.  |
|
|
|
|
Logged
|
|
|
|
mrgeoff
Member
Posts: 193
My 99 CT..."Liahona"
Augusta, GA.
|
|
« Reply #14 on: June 05, 2017, 06:24:04 PM » |
|
On my 99CT, the vent hose has been removed...Should I put one on, or is it ok without one...??? and what is the inside dia. of the hose...???
|
|
|
|
|
Logged
|
mrgeoff/SANDMAN
|
|
|
|
Harryc
|
|
« Reply #15 on: June 06, 2017, 02:15:31 AM » |
|
On my 99CT, the vent hose has been removed...Should I put one on, or is it ok without one...??? and what is the inside dia. of the hose...???
It's a small hose. I'd bet 1/4" would work. So if you leave it disconnected the vent will work, but if you overfill the tank on a hot day you'd have raw fuel being dumped onto a hot engine...not my idea of a good time.  You'd want the end of it down under the bike. Don't forget to put an open 'T' connector in the line about half way down. In other words leave one end open to the wind. |
|
|
|
« Last Edit: June 06, 2017, 02:25:35 AM by Harryc »
|
Logged
|
|
|
|
|
..
|
|
« Reply #16 on: June 06, 2017, 09:34:22 AM » |
|
Found this on floor under bike. Small alloy collar. Wot iz it? Were duz it go? 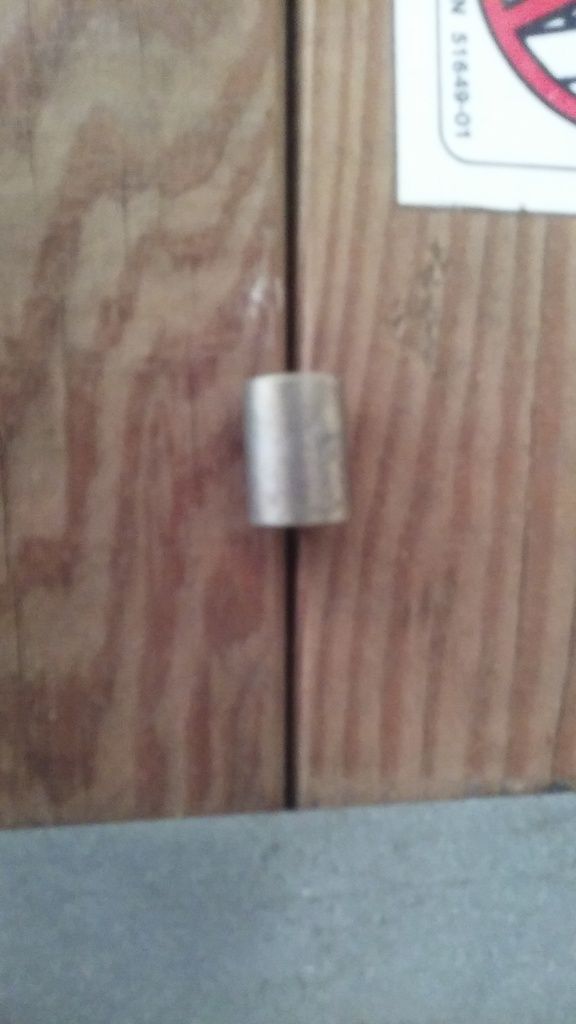 |
|
|
|
|
Logged
|
|
|
|
|
The emperor has no clothes
|
|
« Reply #17 on: June 06, 2017, 10:06:26 AM » |
|
Found this on floor under bike. Small alloy collar. Wot iz it? Were duz it go? Do you have the bag rails on your bike ? It looks like the collar that goes on the rear under the bag. |
|
|
|
|
Logged
|
|
|
|
hubcapsc
Member
Posts: 16821
upstate
South Carolina
|
|
« Reply #18 on: June 06, 2017, 11:59:24 AM » |
|
Weren't you just messing around under your tank? Don't you have those whacky extra covers under there that everyone likes?  There's little spacers and stuff associated with the covers, I learned about them when helping Stanley Steamer work on his bike... -Mike |
|
|
|
|
Logged
|
|
|
|
|
Jess from VA
|
|
« Reply #19 on: June 06, 2017, 12:11:31 PM » |
|
Called engine hangers. Though the engine does not hang from them (they use a couple spacers). There's a couple spacers on Kuryakyn trans covers too.
|
|
|
|
|
Logged
|
|
|
|
|
Bighead
|
|
« Reply #20 on: June 06, 2017, 06:38:47 PM » |
|
Weren't you just messing around under your tank? Don't you have those whacky extra covers under there that everyone likes? There's little spacers and stuff associated with the covers, I learned about them when helping Stanley Steamer work on his bike... -Mike c Yep and it can get frustrating figuring out which spacer goes where without instructions |
|
|
|
|
Logged
|
1997 Bumble Bee
1999 Interstate (sold)
2016 Wing
|
|
|
|
..
|
|
« Reply #21 on: June 06, 2017, 06:40:57 PM » |
|
Here's mine. I guess I'll have to "dry" fit it whilst I wait for the fuel line and a new ballast for my HID headlight.  |
|
|
|
|
Logged
|
|
|
|
|
Bighead
|
|
« Reply #22 on: June 06, 2017, 06:43:40 PM » |
|
I put mine on twice one time because one of the spacers is longer than the other two. It went on fine but was not straight vertically in other words the top or bottom would be in towards the engine if the long spacer is in the wrong spot.
|
|
|
|
|
Logged
|
1997 Bumble Bee
1999 Interstate (sold)
2016 Wing
|
|
|
|
..
|
|
« Reply #23 on: June 06, 2017, 06:48:26 PM » |
|
I put mine on twice one time because one of the spacers is longer than the other two. It went on fine but was not straight vertically in other words the top or bottom would be in towards the engine if the long spacer is in the wrong spot.
OTHER TWO??? Hmmm. Wonder if the other 2 dropped somewhere and I didn't hear them. I'll investigate tomorrow. Well Duh! I guess if there's one there has to be 2 more for the darn thing to fit correctly. I had to remove it to replace a switch for my halogen driving lights. |
|
|
|
|
Logged
|
|
|
|
|
Bighead
|
|
« Reply #24 on: June 06, 2017, 06:51:58 PM » |
|
Paul if yours has the studs mounted on the hanger you may not have three. Carolina bike and trike made a kit that eliminates the need for the spacers look on their web site and see if that my be the set up you have. Mine are from show chrome I think and yours are made by someone else.
Do yours mount with bolts from the outside or acorn nuts over a stud?
|
|
|
|
|
Logged
|
1997 Bumble Bee
1999 Interstate (sold)
2016 Wing
|
|
|
|
..
|
|
« Reply #25 on: June 06, 2017, 07:06:11 PM » |
|
Paul if yours has the studs mounted on the hanger you may not have three. Carolina bike and trike made a kit that eliminates the need for the spacers look on their web site and see if that my be the set up you have. Mine are from show chrome I think and yours are made by someone else.
Do yours mount with bolts from the outside or acorn nuts over a stud?
Bolts from outside. 2 had 10mm heads and 2 had 12mm head. I think. I'll have to check in the morning when I get back into the garage. Largest hole is where the switch fits. |
|
|
|
|
Logged
|
|
|
|
|
Jess from VA
|
|
« Reply #26 on: June 06, 2017, 07:11:17 PM » |
|
Largest hole is where the switch fits.It's been awhile, but that's how I remember it too.
|
|
|
|
|
Logged
|
|
|
|
|
..
|
|
« Reply #27 on: June 06, 2017, 07:14:38 PM » |
|
|
|
|
|
|
Logged
|
|
|
|
|
The emperor has no clothes
|
|
« Reply #28 on: June 06, 2017, 08:02:09 PM » |
|
Largest hole is where the switch fits.It's been awhile, but that's how I remember it too. You call your Johnson a switch ? |
|
|
|
|
Logged
|
|
|
|
mrgeoff
Member
Posts: 193
My 99 CT..."Liahona"
Augusta, GA.
|
|
« Reply #29 on: June 06, 2017, 08:36:13 PM » |
|
Thanks HarryC...I will put a vent hose on asap...!!!
|
|
|
|
|
Logged
|
mrgeoff/SANDMAN
|
|
|
|
Ramie
|
|
« Reply #30 on: June 07, 2017, 06:55:56 AM » |
|
|
|
|
|
|
Logged
|
“I am not a courageous person by nature. I have simply discovered that, at certain key moments in this life, you must find courage in yourself, in order to move forward and live. It is like a muscle and it must be exercised, first a little, and then more and more. A deep breath and a leap.”
|
|
|
|
DK
|
|
« Reply #31 on: June 08, 2017, 06:15:41 AM » |
|
If you aren't sure of what you are doing, it's a good idea to disconnect the battery while you're messing with the fuel system.
|
|
|
|
|
Logged
|
Machinery has a mysterious soul and a mind of its own.
|
|
|
|


