--received saddlebag guards for Christmas---no instructions.....
kc5tf, I don't know how far along you are with your installation but here's some notes. Most of the pics are from my Valk files which I took earlier while working on the bike. Odds are that your saddlebag guards are from an Ebay vendor, not Hondaline originals. My second set of saddlebags guards were knockoffs from Ebay. I had problems lining up the appendage (below). There are several Ebay vendors that sell identical products. They all post the same stock pics & just happen to be located in Dallas, so I assume they're the same entity. Same problem, irregardless which vendor. Or, maybe you didn't have a problem lining up the appendage at all.
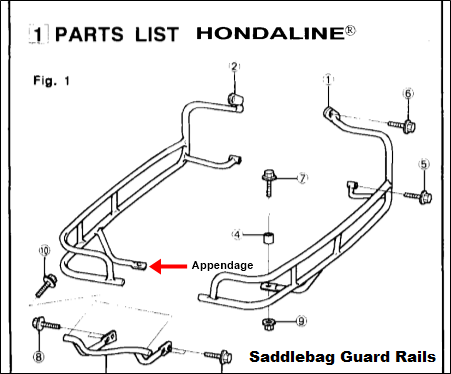
Bolt 7 above which secures the appendage goes through a hole on the bottom of the inner saddlebags (red arrow) .....
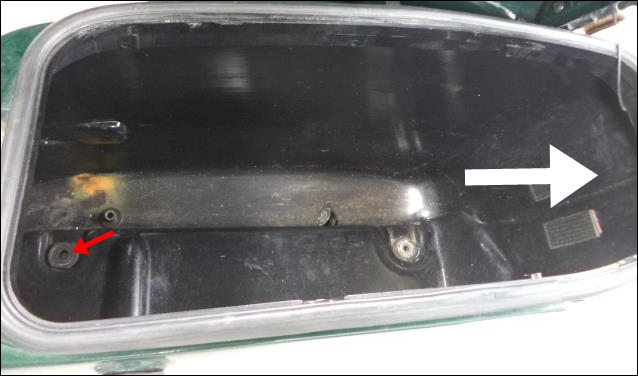
..... and screws into a welded nut on the saddlebag bracket. Nut 9 (diagram above) screws onto the shaft of Bolt 7 that protrudes out of the welded nut securing the appendage.

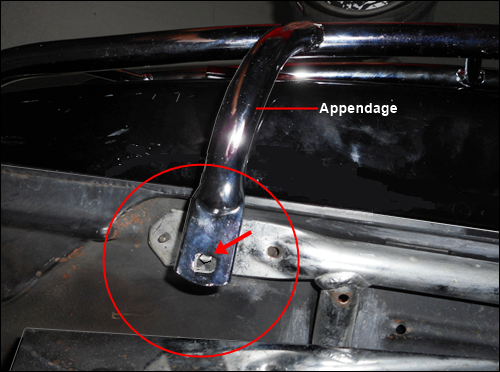
The appendages on mines were this far out of alignment. Had to slot the hole, actually enlarged the hole from slotting it in multiple directions as trying to align it turned out to be like hitting a moving target.
Genuine Hondaline® saddlebag guards would have included Spacer 4.
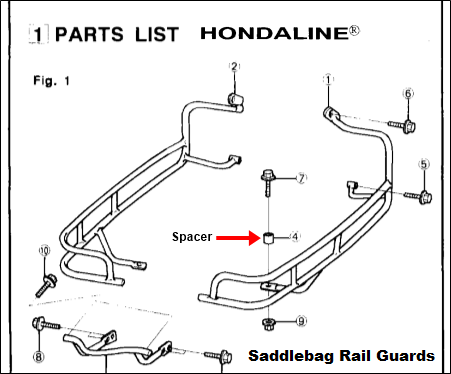
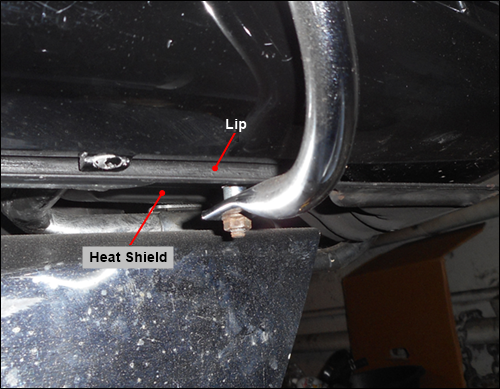
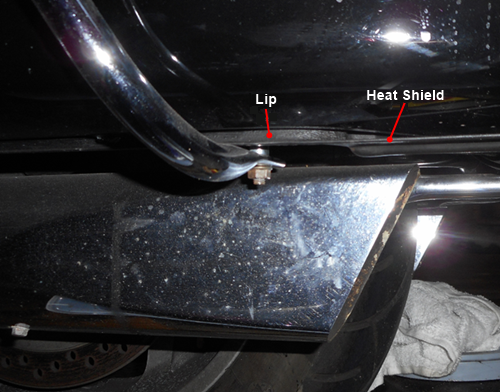
The reason for the spacer is that where the appendage tucks under the heat shield, the heat shield has a lipped edge, next 2 pics. The appendage would rest upon the lipped edge leaving a gap when tightened down. The spacer is approximately 5/16 inch long. If the spacer is a little longer it won't matter none. In fact, a little longer would mean that you have to bend the appendage less when tightening things down with Nut 9. The O.D. of the spacer could be as large as one inch.
Bolt 7 has to be longer than the exiting bolt due to the spacer. The Hondaline instruction sheet says the bolt is 47mm long. The Oem parts page quotes the same bolt as 28mm since that would be without the saddlebag guards. Just the
saddlebag brackets.


