|
BINOVC
|
 |
« Reply #40 on: June 19, 2020, 01:43:12 PM » |
|
I just did my final drive service (first time doing). I used the redeye poly o-rings, and had a (not) real fun time getting the wheel to mate with the final drive (they're slightly fatter that the other o-rings). The online instructions (no printed ones came with the o-rings) says to use a rubber mallet against the side of the pumpkin to seat the o-ring. Instead I used some 5/8 all-thread in place of the axle, with various washers and nuts (brake caliper bracket and axle spacer not installed yet). The all-thread protruding through both axle holes provides alignment. I then squeezed the wheel to the pumpkin by tightening the nuts. Also don't forget to clean out hour "ant home". I knew about this from my pre-study, but forgot to do it anyway. https://www.valkyrieforum.com/bbs/index.php?topic=103730.0That is to make sure the drain holes in the swing arm are open and not clogged. |
|
|
|
|
 Logged
|
|
|
|
|
Gizmo
|
|
« Reply #41 on: June 19, 2020, 01:49:36 PM » |
|
I'm considering ordering a few sets of the redeyes (I normally use the OEM ones) Curious if you would use them again. I really don't need more hassle getting the wheel on while the bike is jacked up in the air. I just did my final drive service (first time doing).
I used the redeye poly o-rings, and had a (not) real fun time getting the wheel to mate with the final drive (they're slightly fatter that the other o-rings).
|
|
|
|
|
Logged
|
|
|
|
|
BINOVC
|
|
« Reply #42 on: June 20, 2020, 08:58:06 AM » |
|
I probably will due to a) I bought 2 sets, b) I worked out a method of seating the o-rings, and c) Redeye's marketing/reasoning for using them. Redeye's explanation: https://redeye.ecrater.com/p/18218041/final-drive-o-rings-for-valkyrie-polyurethane, I realize others use o-rings from Carolina Bike (and possibly other sources), and report no issues. Redeye instructions: https://drive.google.com/file/d/12EhR3fFzJE2Hr2naW4OPt8gCeckdcV4w/viewPics of my allthread o-ring seating technique: https://www.flickr.com/photos/cocojen/50026047146/in/album-72157714791242771/https://www.flickr.com/photos/cocojen/50025501238/in/album-72157714791242771/My wooden jack adapter based on valyrieworld.com: https://www.flickr.com/photos/cocojen/50026046576/in/album-72157714791242771/You will find 5 or 6 article at valkyrieworld on the final drive maintenence (and other articles). He went a little farther than most by removing the pinion cup from the driveshaft (I didn't do it). https://www.valkyrieworld.com/test-docsI'd have to say that my biggest confusion factor was what lubes to use where. Many asks about this, many differing opinions. Alot of folks refer to "greasing the splines with (x product)" and don't mention which ones they're referring to (there's 3, driveshaft has 2 and final drive has 1, and the service manual has 3 different things to say about them). Hell I can't even remember exactly what I did now, except that I used combinations of Bell Ray waterproof grease, and Loctite LB 8012 Moly Paste! I believe the biggest consensus however is to grease thoroughly and regularly, and not so much in the pinion cup that would clog the oil holes, and use high quality waterproof grease (mainly referenced is the Bel Ray). I wish that Daniel Meyer would do a video on the technique that he demonstrates at INZANE (um to include the I/S variations, having to deal with side bags and trunk in the way  ) It's a learning experience, hopefully enjoyable! (this thread should be moved to 1500 tech) I'm considering ordering a few sets of the redeyes (I normally use the OEM ones) Curious if you would use them again. I really don't need more hassle getting the wheel on while the bike is jacked up in the air. I just did my final drive service (first time doing).
I used the redeye poly o-rings, and had a (not) real fun time getting the wheel to mate with the final drive (they're slightly fatter that the other o-rings).
|
|
|
|
|
Logged
|
|
|
|
Valkorado
Member

Posts: 10517
VRCC DS 0242
Gunnison, Colorado (7,703') Here there be twisties.
|
|
« Reply #43 on: June 20, 2020, 09:40:42 AM » |
|
I wish that Daniel Meyer would do a video on the technique that he demonstrates at INZANE
It's a learning experience, hopefully enjoyable!
(this thread should be moved to 1500 tech)
Yup. I don't enjoy the process at all even though I do it. Not fond of my lift and always get a bit paranoid using it. A good video would be awesome, as I like to follow along monkey see monkey do. I wish Daniel, Jeff, Hubcap or someone who can pretty much do this with their eyes closed would make a good instructional video covering lifting, best places to tie down, bungeeing the caliper, etc.. It would be helpful for newbies, intermediates and forgetful old farts. |
|
|
|
|
Logged
|
Have you ever noticed when you're feeling really good, there's always a pigeon that'll come sh!t on your hood? - John Prine 97 Tourer "Silver Bullet" 01 Interstate "Ruby"  |
|
|
|
Chrisj CMA
|
|
« Reply #44 on: June 20, 2020, 05:02:52 PM » |
|
As soon as my front tire will finally wear out, I’m going to do both front and rear. I’ll try go get a friend of mine that is good with video to film the process. No promises, I’ll see what I can do.
|
|
|
|
|
Logged
|
|
|
|
|
Gizmo
|
|
« Reply #45 on: June 20, 2020, 05:34:31 PM » |
|
I just wish I could clean my parts as well as BINOVC
Truly spotless!
|
|
|
|
|
Logged
|
|
|
|
Bret SD
Member
Posts: 4306
***
San Diego, Ca.
|
|
« Reply #46 on: June 24, 2020, 10:25:37 AM » |
|
Frustrating..  Carolina bike and trike just now printed a shipping label for the o-rings.. after ordering well over a week ago.. when ordering, the shipping estimated day of arrival was today.. aaarrrggghhhhhh |
|
|
|
|
Logged
|
Bret
02 Standard -- Blue & White
82 Aspencade -- Red
“No man has the right to be an amateur in the matter of physical training. It is a shame for a man to grow old without seeing the beauty and strength of which his body is capable.” Socrates
|
|
|
Bret SD
Member
Posts: 4306
***
San Diego, Ca.
|
|
« Reply #47 on: June 29, 2020, 03:31:28 PM » |
|
Update: Found the o-ring missing inside the pumpkin spline, installed 3 o-rings and lubed everything, all seemed to be going great.. except for the driveshaft. I couldn't get the driveshaft seated into the u-joint so I pulled it from the pumpkin and got it to seat while lifting it inside the swing arm with a screwdriver. It felt like it seated into the pinion cup when I installed the final drive.. Then I started the bike in neutral and could see the splines turning very slowly.. good I thought, all is well. I bolted everything back together and took it down, ready for a test drive.. no joy, the shaft is NOT seated into the cup all the way, some very light grinding when any torque was applied. Tomorrow I get to pull it apart again and try to install the pumpkin with the drive shaft already in the cup. Is there a trick to get the drive shaft seated? Right now I'm bummed out and sleep deprived, maybe tomorrow will go better. Any help would be greatly appreciated   |
|
|
|
|
Logged
|
Bret
02 Standard -- Blue & White
82 Aspencade -- Red
“No man has the right to be an amateur in the matter of physical training. It is a shame for a man to grow old without seeing the beauty and strength of which his body is capable.” Socrates
|
|
|
|
Chrisj CMA
|
|
« Reply #48 on: June 29, 2020, 03:48:39 PM » |
|
It usually takes a healthy jiggle to get it in. What you have now is not knowing if the blind mating of the drive shaft to the pinion cup could have pushed the oil seal out of place. It’s never advisable to assemble the drive shaft separate from the final drive.
|
|
|
|
|
Logged
|
|
|
|
Bret SD
Member
Posts: 4306
***
San Diego, Ca.
|
|
« Reply #49 on: June 29, 2020, 04:51:20 PM » |
|
It usually takes a healthy jiggle to get it in. What you have now is not knowing if the blind mating of the drive shaft to the pinion cup could have pushed the oil seal out of place. It’s never advisable to assemble the drive shaft separate from the final drive.
Thanks Chris, I should have reported the problem here first, instead of pushing to get it done. Oh well, more practice doing the job I guess. Another mistake I made was tightening the drive nuts before final assembly and torquing the axle nut., this I saw after the fact in your write up on the process. So I get to redo it the right way this time.. Other than the drive shaft problem, re-assembly went pretty smooth, and lining up the axle was fairly easy.. I've learned over many years of doing my own mechanical work to not celebrate until it's time. It's not time yet.. Haha If the oil seal is undamaged I should be able to get the bike back on the road tomorrow. I didn't even get to put the tools away after the job Haha.. |
|
|
|
|
Logged
|
Bret
02 Standard -- Blue & White
82 Aspencade -- Red
“No man has the right to be an amateur in the matter of physical training. It is a shame for a man to grow old without seeing the beauty and strength of which his body is capable.” Socrates
|
|
|
Willow
Administrator
Member

Posts: 16858
Excessive comfort breeds weakness. PttP
Olathe, KS

|
|
« Reply #50 on: June 29, 2020, 05:04:48 PM » |
|
The trick to getting the driveshaft to seat into the U-joint is to raise the swingarm to very near level to get the U-joint to match the driveshaft coming in. You may have to jiggle it up and down a bit. It works best with four hands.
|
|
|
|
|
Logged
|
|
|
|
Bret SD
Member
Posts: 4306
***
San Diego, Ca.
|
|
« Reply #51 on: June 29, 2020, 05:42:04 PM » |
|
It works best with four hands.
Truth^^   Tomorrow will tell the tale.. |
|
|
|
|
Logged
|
Bret
02 Standard -- Blue & White
82 Aspencade -- Red
“No man has the right to be an amateur in the matter of physical training. It is a shame for a man to grow old without seeing the beauty and strength of which his body is capable.” Socrates
|
|
|
|
The emperor has no clothes
|
|
« Reply #52 on: June 29, 2020, 06:38:12 PM » |
|
Raising the swing arm like Willow said is definitely the way to to do it. I'm confused about the light grinding you are hearing. The shaft is either going to be in the cup or it's not. The order of retightening is pretty important.
|
|
|
|
|
Logged
|
|
|
|
Bret SD
Member
Posts: 4306
***
San Diego, Ca.
|
|
« Reply #53 on: June 29, 2020, 06:55:42 PM » |
|
Raising the swing arm like Willow said is definitely the way to to do it. I'm confused about the light grinding you are hearing. The shaft is either going to be in the cup or it's not. The order of retightening is pretty important.
I think what's happening is the drive shaft splines are pushed together at the very tips by spring pressure, very light clutch and throttle will move the bike.. anything more than that 'pops' it apart and the spline tips grate on each other. I did this very gently and as minimally as possible while looking and listening. I know the DS is all the way into the front, and wheel splines have to be engaged fully for the wheel to bolt up.. so that leaves the pinion cup non-engagement as the only possible culprit, so far as my sleuthing goes anyway. |
|
|
|
|
Logged
|
Bret
02 Standard -- Blue & White
82 Aspencade -- Red
“No man has the right to be an amateur in the matter of physical training. It is a shame for a man to grow old without seeing the beauty and strength of which his body is capable.” Socrates
|
|
|
Bret SD
Member
Posts: 4306
***
San Diego, Ca.
|
|
« Reply #54 on: June 30, 2020, 11:16:19 AM » |
|
The Phat girl is on the move again! It literally took me less than an hour, including raising and prepping the bike, to remove the pumpkin and drive shaft. As I suspected, the snap ring kept the shaft from going into the pinion cup.. so I popped it in there, gave a good shake while re-installing and the front engaged without issue.. took her for a 10 mile test ride at around 40 psi in the rear, different for sure, but I'll get used to it quickly as it was comfortable leaning into her a bit on some twisties. Things couldn't have gone smoother, Ill post a pic of the new DS tire on her |
|
|
|
|
Logged
|
Bret
02 Standard -- Blue & White
82 Aspencade -- Red
“No man has the right to be an amateur in the matter of physical training. It is a shame for a man to grow old without seeing the beauty and strength of which his body is capable.” Socrates
|
|
|
|
Chrisj CMA
|
|
« Reply #55 on: June 30, 2020, 12:25:43 PM » |
|
The Phat girl is on the move again! It literally took me less than an hour, including raising and prepping the bike, to remove the pumpkin and drive shaft. As I suspected, the snap ring kept the shaft from going into the pinion cup.. so I popped it in there, gave a good shake while re-installing and the front engaged without issue.. took her for a 10 mile test ride at around 40 psi in the rear, different for sure, but I'll get used to it quickly as it was comfortable leaning into her a bit on some twisties. Things couldn't have gone smoother, Ill post a pic of the new DS tire on her Did you leave the pumpkin nuts finger tight until immediately after the axel got torqued to 81 ft lbs? |
|
|
|
|
Logged
|
|
|
|
Bret SD
Member
Posts: 4306
***
San Diego, Ca.
|
|
« Reply #56 on: June 30, 2020, 12:37:14 PM » |
|
The Phat girl is on the move again! It literally took me less than an hour, including raising and prepping the bike, to remove the pumpkin and drive shaft. As I suspected, the snap ring kept the shaft from going into the pinion cup.. so I popped it in there, gave a good shake while re-installing and the front engaged without issue.. took her for a 10 mile test ride at around 40 psi in the rear, different for sure, but I'll get used to it quickly as it was comfortable leaning into her a bit on some twisties. Things couldn't have gone smoother, Ill post a pic of the new DS tire on her Did you leave the pumpkin nuts finger tight until immediately after the axel got torqued to 81 ft lbs? Yes, thank you.. I have a mystery now, below is a pic of where the bag frame mounts up, the holes are now offset and rigid, no amount of test prying etc. seems to move anything, including some gentle fender prying under the seat. 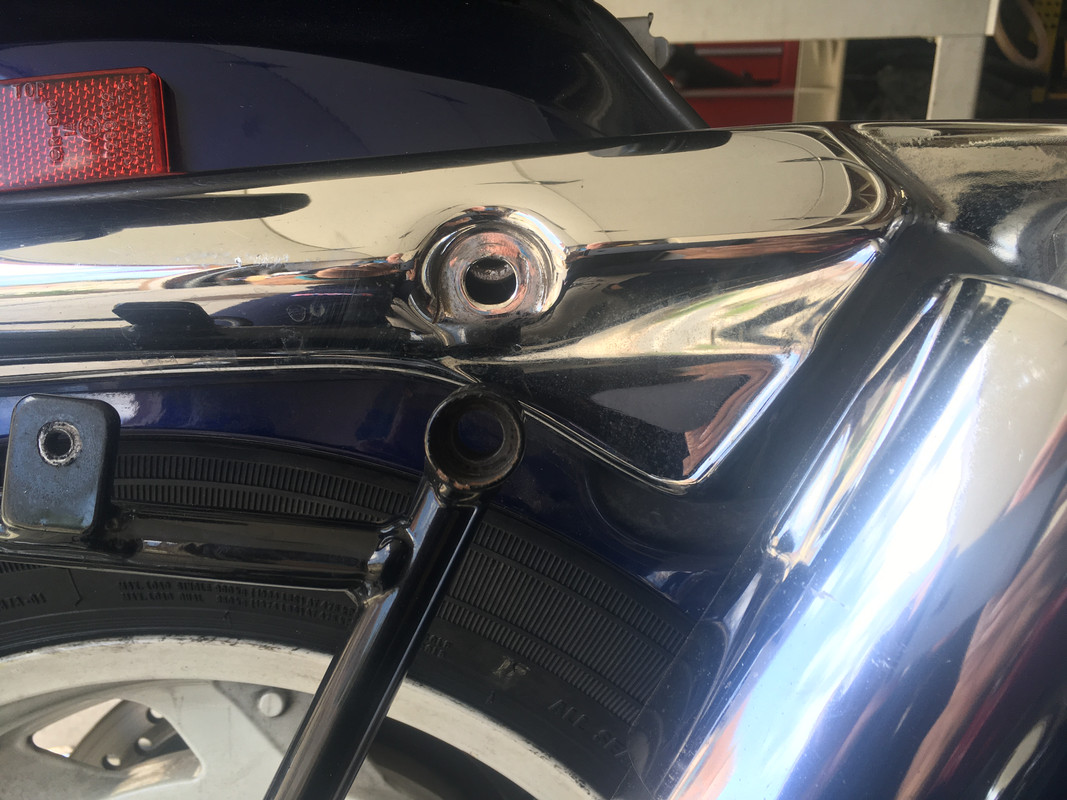 Here she is with the DS tire mounted.. edit: suppose I should've blurred the plate numbers.. fuggit, I don't care 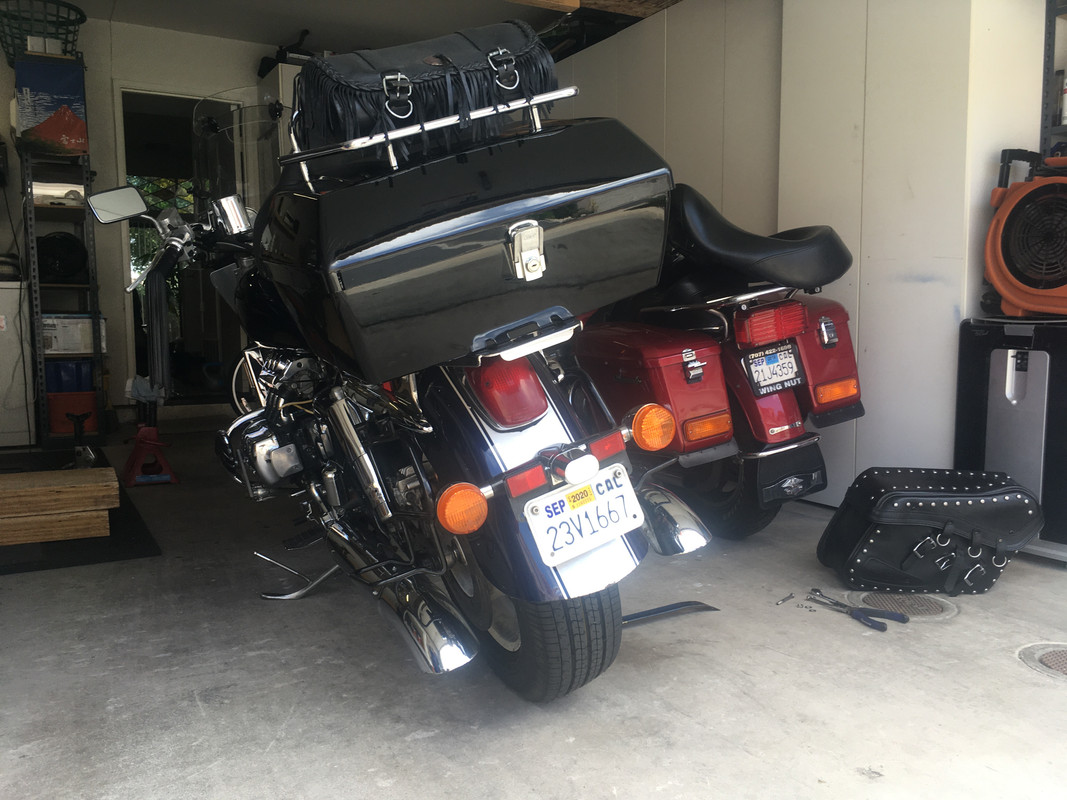 |
|
|
|
« Last Edit: June 30, 2020, 12:43:26 PM by bretshim »
|
Logged
|
Bret
02 Standard -- Blue & White
82 Aspencade -- Red
“No man has the right to be an amateur in the matter of physical training. It is a shame for a man to grow old without seeing the beauty and strength of which his body is capable.” Socrates
|
|
|
|
Chrisj CMA
|
|
« Reply #57 on: June 30, 2020, 12:45:08 PM » |
|
You need two people. One to get the bolts started. The other t lift up at the tail of the fender
|
|
|
|
|
Logged
|
|
|
|
Bret SD
Member
Posts: 4306
***
San Diego, Ca.
|
|
« Reply #58 on: June 30, 2020, 12:54:14 PM » |
|
You need two people. One to get the bolts started. The other t lift up at the tail of the fender
Hmmm.. I tried lifting and looking, but had no success due to poor leverage, thanks for the tip, I'll have a strong buddy help me do it. |
|
|
|
|
Logged
|
Bret
02 Standard -- Blue & White
82 Aspencade -- Red
“No man has the right to be an amateur in the matter of physical training. It is a shame for a man to grow old without seeing the beauty and strength of which his body is capable.” Socrates
|
|
|
Bret SD
Member
Posts: 4306
***
San Diego, Ca.
|
|
« Reply #59 on: June 30, 2020, 01:39:25 PM » |
|
You need two people. One to get the bolts started. The other t lift up at the tail of the fender
Ok, done.. lifted her up and put stands under the engine guard, then swung the lift to the back, put some thick padding on the jack platform, lifted carefully and eased things into place.. all done for now. Thank you a ton Chris, and all others who contributed to helping me navigate through this process   Next time I'll know exactly what to do and expect.. the first time is always the worst time Haha Cheers brothers! |
|
|
|
|
Logged
|
Bret
02 Standard -- Blue & White
82 Aspencade -- Red
“No man has the right to be an amateur in the matter of physical training. It is a shame for a man to grow old without seeing the beauty and strength of which his body is capable.” Socrates
|
|
|
|
Chrisj CMA
|
|
« Reply #60 on: June 30, 2020, 01:59:15 PM » |
|
You need two people. One to get the bolts started. The other t lift up at the tail of the fender
Ok, done.. lifted her up and put stands under the engine guard, then swung the lift to the back, put some thick padding on the jack platform, lifted carefully and eased things into place.. all done for now. Thank you a ton Chris, and all others who contributed to helping me navigate through this process Next time I'll know exactly what to do and expect.. the first time is always the worst time Haha Cheers brothers! You’re welcome |
|
|
|
|
Logged
|
|
|
|
Valkorado
Member
Posts: 10517
VRCC DS 0242
Gunnison, Colorado (7,703') Here there be twisties.
|
|
« Reply #61 on: June 30, 2020, 02:03:29 PM » |
|
Woo-hoo! I still like 42 in that tire. Now, go shred the roads!
|
|
|
|
|
Logged
|
Have you ever noticed when you're feeling really good, there's always a pigeon that'll come sh!t on your hood? - John Prine 97 Tourer "Silver Bullet" 01 Interstate "Ruby" |
|
|
Bret SD
Member
Posts: 4306
***
San Diego, Ca.
|
|
« Reply #62 on: June 30, 2020, 02:43:06 PM » |
|
Woo-hoo! I still like 42 in that tire. Now, go shred the roads!
Haha.. Thanks Valkorado! I'll go with the 42 for awhile.. When I first took off to test ride it was at 32 and no bueno.. I'll report back later after the tire's broken in more and the release agent crap is gone. Have you had some even tread wear at that psi? How many miles are you getting from a tire? I'd be happy with 10,000 + |
|
|
|
|
Logged
|
Bret
02 Standard -- Blue & White
82 Aspencade -- Red
“No man has the right to be an amateur in the matter of physical training. It is a shame for a man to grow old without seeing the beauty and strength of which his body is capable.” Socrates
|
|
|
|
Chrisj CMA
|
|
« Reply #63 on: June 30, 2020, 02:55:26 PM » |
|
Woo-hoo! I still like 42 in that tire. Now, go shred the roads!
Haha.. Thanks Valkorado! I'll go with the 42 for awhile.. When I first took off to test ride it was at 32 and no bueno.. I'll report back later after the tire's broken in more and the release agent crap is gone. Have you had some even tread wear at that psi? How many miles are you getting from a tire? I'd be happy with 10,000 + Really only 10,000 miles on a car tire. I thought one of the Benefits to a CT was more miles. I get way more than 10K on a motorcycle tire |
|
|
|
|
Logged
|
|
|
|
Valkorado
Member
Posts: 10517
VRCC DS 0242
Gunnison, Colorado (7,703') Here there be twisties.
|
|
« Reply #64 on: June 30, 2020, 03:04:52 PM » |
|
Guaranteed!
baird4444 was just up today. I've got a CT-1000 on both bikes and probably haven't racked up more than 5 or 6 k on either tire yet. He installed one on his daily commuter last year and just got back from a trip to Wyoming. He's running 42 psi also. Says he's right at 10,000 miles on it and the tread looks spankin' new! And that's riding mainly on Colorado sandpaper chip seal. I'm guessing it's good for at least 30,000!
|
|
|
|
« Last Edit: June 30, 2020, 03:10:14 PM by Valkorado »
|
Logged
|
Have you ever noticed when you're feeling really good, there's always a pigeon that'll come sh!t on your hood? - John Prine 97 Tourer "Silver Bullet" 01 Interstate "Ruby" |
|
|
Bret SD
Member
Posts: 4306
***
San Diego, Ca.
|
|
« Reply #65 on: June 30, 2020, 05:33:29 PM » |
|
Woo-hoo! I still like 42 in that tire. Now, go shred the roads!
Haha.. Thanks Valkorado! I'll go with the 42 for awhile.. When I first took off to test ride it was at 32 and no bueno.. I'll report back later after the tire's broken in more and the release agent crap is gone. Have you had some even tread wear at that psi? How many miles are you getting from a tire? I'd be happy with 10,000 + Really only 10,000 miles on a car tire. I thought one of the Benefits to a CT was more miles. I get way more than 10K on a motorcycle tire Actually I was hoping for 20k but didn't want to seem greedy |
|
|
|
|
Logged
|
Bret
02 Standard -- Blue & White
82 Aspencade -- Red
“No man has the right to be an amateur in the matter of physical training. It is a shame for a man to grow old without seeing the beauty and strength of which his body is capable.” Socrates
|
|
|
Bret SD
Member
Posts: 4306
***
San Diego, Ca.
|
|
« Reply #66 on: June 30, 2020, 05:36:27 PM » |
|
Guaranteed!
baird4444 was just up today. I've got a CT-1000 on both bikes and probably haven't racked up more than 5 or 6 k on either tire yet. He installed one on his daily commuter last year and just got back from a trip to Wyoming. He's running 42 psi also. Says he's right at 10,000 miles on it and the tread looks spankin' new! And that's riding mainly on Colorado sandpaper chip seal. I'm guessing it's good for at least 30,000!
Ha, man that sounds awesome! I can't wait to get some miles on her.. |
|
|
|
« Last Edit: July 01, 2020, 05:04:22 AM by bretshim »
|
Logged
|
Bret
02 Standard -- Blue & White
82 Aspencade -- Red
“No man has the right to be an amateur in the matter of physical training. It is a shame for a man to grow old without seeing the beauty and strength of which his body is capable.” Socrates
|
|
|
|


