NOTE: There are several edits in this post today, 7/8/19, bringing this current - these edits aren't annotated with dates this time. Also current edits are not added to my subsequent posts further down in this thread, but all current updates are in the first post.
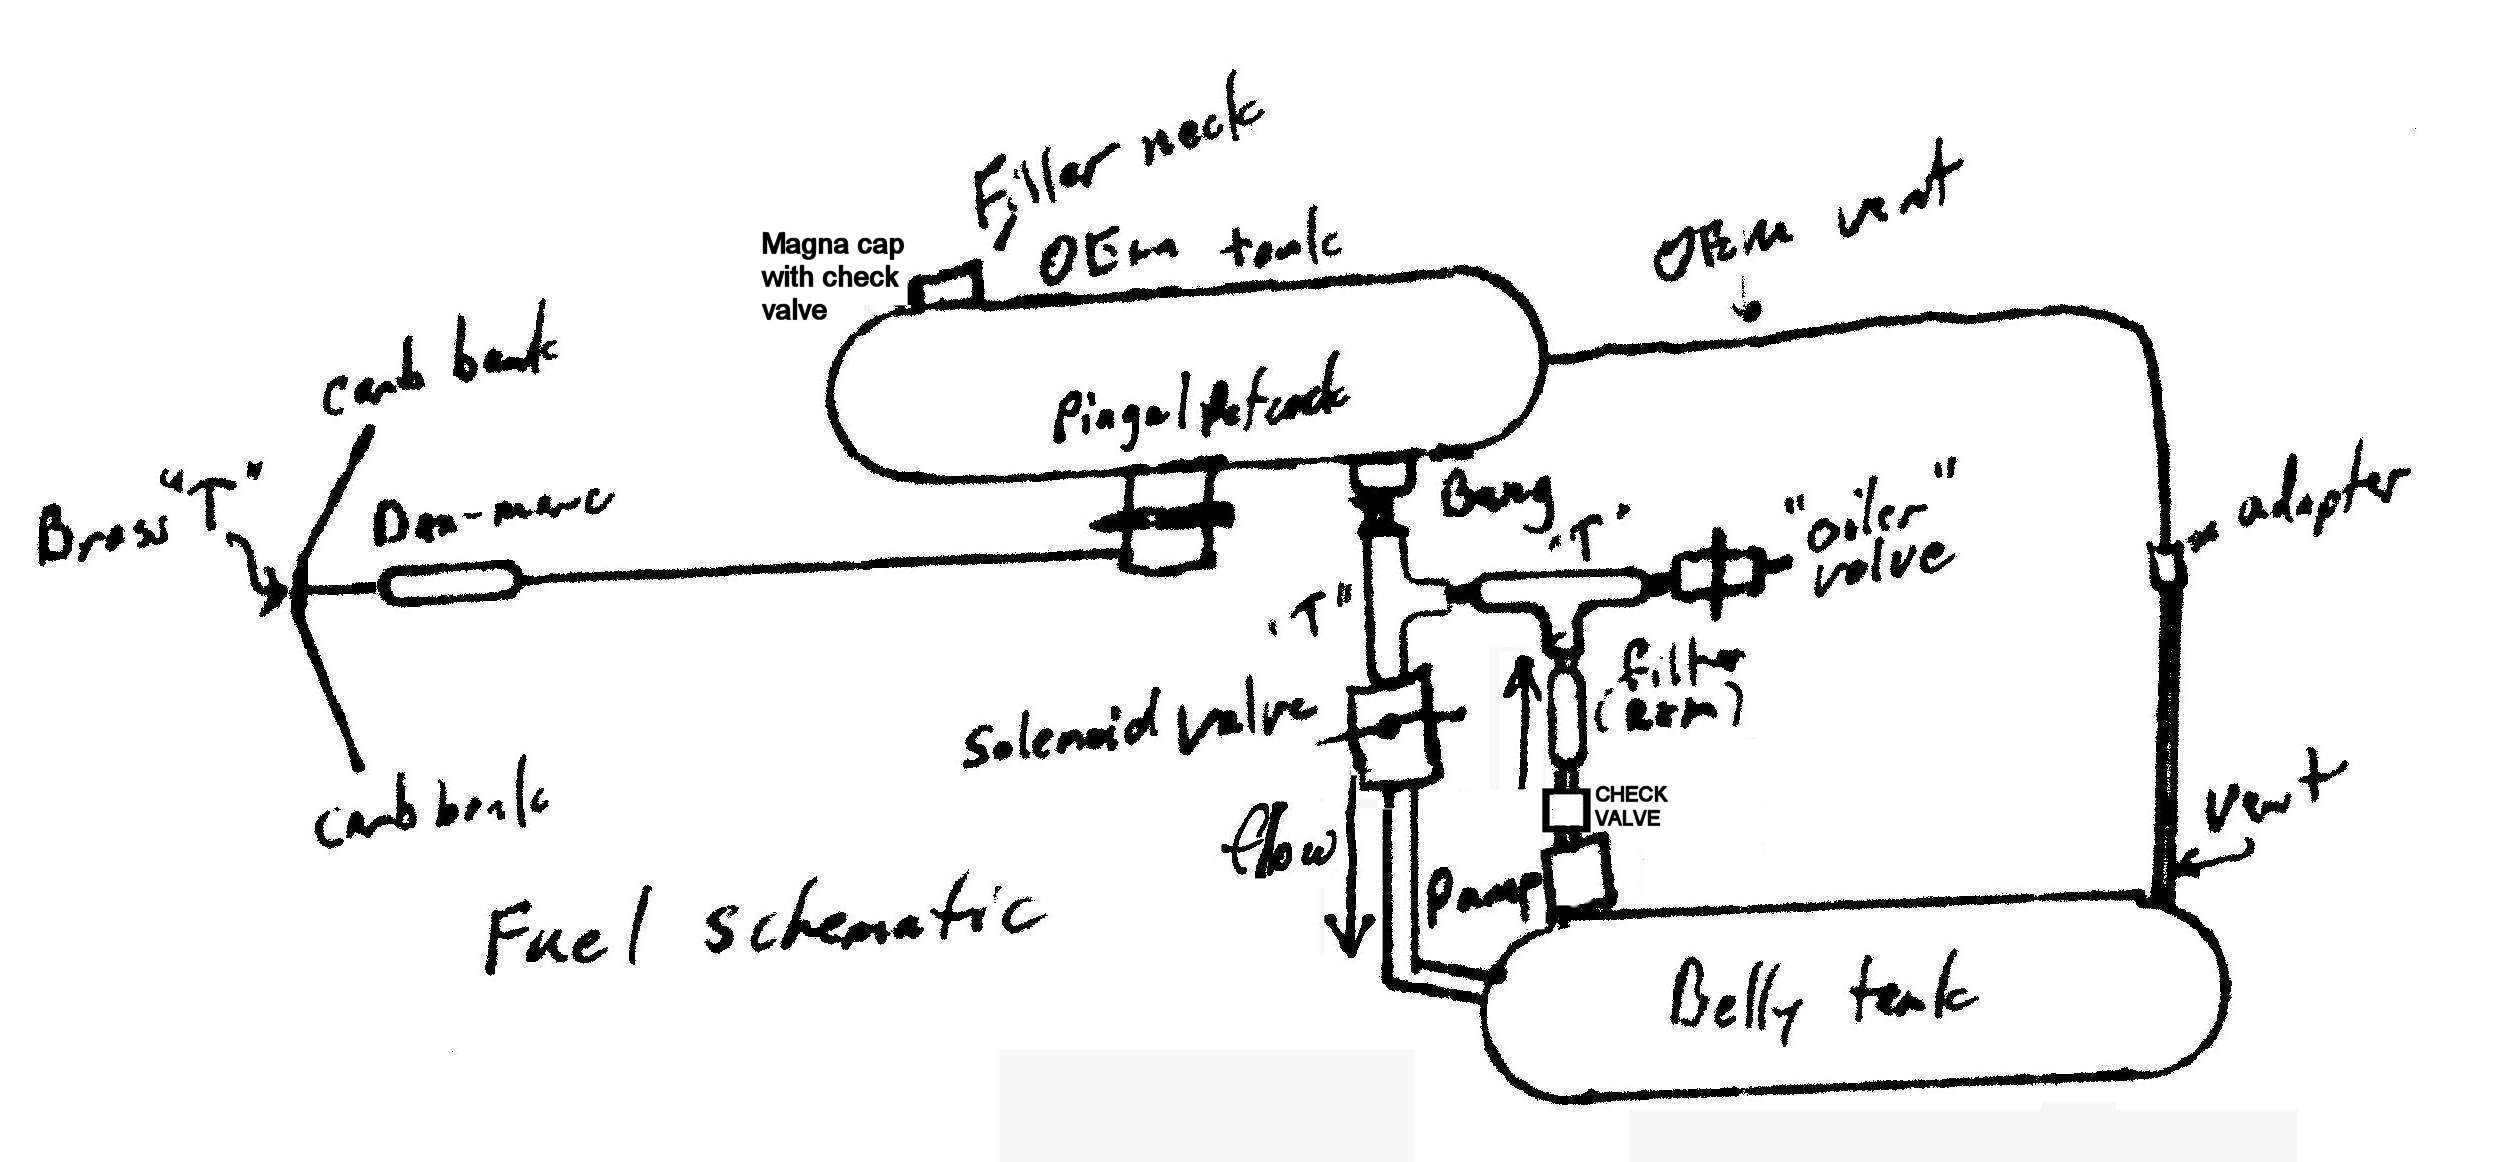
I've been asked by several to summarize my findings on the modified belly tank install. That is, installed as a large reserve while preserving the OEM gravity feed. The final design I arrived at, after much tweaking and fixing fit and flow problems.
NOTE: some admin decided the word "cοck" has to be censured into "pencil". So I changed all instances of "petcοck" into "petcοck". Different ASCII code.
If you don't like what I've done - don't do it. I don't need negative criticism in return for my experimenting and developing this system. OTOH, I welcome helpful suggestions. There are definite advantages to this design, and drawbacks - it takes some effort and cost, but it's more robust, has a groovy fuel panel with lights and switches ( Feels like an airplane ) and doesn't depend on a fuel pump that might fail and has failed for some (Dick's failed 3 times - R&M put in their instruction, "If the pump fails, just reroute the fuel line back like it was before." (paraphrasing)) I'm not doing that on the side of the road in the dark and cold with limited tools and texting cagers whizzing by. That's hard enough in a heated shop with the right tools, lights and a lift. Yeah I've heard the reports "never failed for me". I don't care. I don't want to worry about it - I also know about Dick, and Josh Chamber's fuel pump failed so he plumbed it back to the OEM setup to resume his ride. I don't trust the fuel pump reliability for very good reason. I've replaced the pump once and now have spares - I bring a couple with me to Inzanes in case someone else needs one.
EDIT 09/2016: April 2016, group ride to GOTF, Damon's pump was complaining loudly - he also had a pump failure on another ride, so bought a 2nd and planned to install it as a backup.
End edit. This mod also adds the ability to easily help others who need fuel in the middle of the desert, which I've done several times. The mod could also be done more easily than I did - w/o the relays and lights and fuel panel and solenoid and drain petcοck and even the Dan-Marc. This bike is also desmogged - another task ripe for criticism. And a LOT of other mods.
http://www.valkyrieforum.com/bbs/index.php/topic,107621.0.html I LIKE tinkering on my bikes. I LIKE challenges. Keeps my brain exercised and fresh. So this complex task is FUN for me.
Changes to the R&M OEM install:
In sum:
1. A valve must be installed in the fill tube to the belly tank. Hereinafter referred to as the "bung line". I connected the fuel pump outlet to the bung line, above the valve. Installed a petcοck in the same location, for draining the fuel, or to attach a tube for sharing gas.
2. A Dan-Marc electric fuel shutoff valve is needed to prevent hydrolock since the gravity flow from the main tank is retained. This is installed in the OEM fuel line, right before the T that splits the fuel to the carb rails. The fuel filter provided by R&M is installed in the fuel line just upstream of the Dan-Marc. This filter tested to have much better flow than two others I tested.
EDIT 09/2016: The R&M fuel filter is moved to the pump line from the belly tank. I was getting starvation at low fuel levels and moved the filter to eliminate it as the cause.
End edit.
3. The OEM gravity fuel flow is retained. So the fuel line is connected to the petcοck same as OEM. However the petcοck is modified to be manual (vacuum fn removed) as given in the R&M instructions.
EDIT 09/2016: Replaced the POS OEM petcοck with a forward-feed Pingel. And added a lever extension to make it findable by feel.
End edit.
4. The belly tank vent is connected to the OEM main tank vent with appropriate adapter, instead of to the petcοck per R&M. A vent must then be provided for both tanks. I drilled a very small hole in the main tank fill neck.
EDIT 01/2017: Changed the filler cap to a vented one for a Magna about 3 months ago. Plugged the drill hole. The vented cap has a check valve. Should help against spillage if the bike is dropped on it's side with a full tank.
End edit.
5. A means must be provided to power the fuel pump. I used a toggle switch mounted on a fuel control panel I made, to control the fuel pump. That's been changed a lot with a timer and more switches - documented below.
In more detail, of numbers above:
1. The bung line valve must have good flow, as it is used to fill the belly tank while you are at the gas pump. A ball type valve with 90° throw, such as used to control natural gas, would be a good choice. I installed a large electric solenoid valve, and power it with a relay wired as a latch. The relay is powered from pin 87a (N.C.) of the relay that powers the bike's aux. fuse panel with ignition on, via pin 87 (N.O.) - in this case, provides power to the solenoid relay with ignition off. The solenoid relay is wired with pin 87 (N.O.) to the solenoid, to the red LED on the panel, and a diode inline to pin 85 to act as the "latch". In use, when filling the main tank with ignition off, the panel push button ( also to pin 85 ) activates the latch relay, the solenoid valve opens so fuel can fill the belly tank. The valve remains open until the ignition is activated, when pin 87a of the fuse panel relay is unpowered and the latch relay turns off. The red light on the panel is to warn me I am using power while the engine is off.
EDIT 05/2017: After several month's use I discovered that the bung brass so-claimed "fuel solenoid" isn't - it was seriously leaking fuel down to the belly tank. Found a source online of true fuel solenoids -
http://ussolid.com It turns out, fuel solenoids need to have internal gaskets made of fuel and especially ethanol-resistant material - namely VITON. I ordered and installed a solenoid that looks identical to the one in the pics below except it's made of stainless steel and has VITON gaskets. Not leaking now.
End edit.
EDIT 09/2016: While I'm talking about the bung line, I removed the bung provided by R&M (torched it out) and replaced it with the appropriate sized galvanized bushing, so there is no tube rising up inside the tank. Not needed since I'm not using their reserve scheme. This enables draining almost ALL of the fuel via the "oiler" valve. (think WWII convoy fueler ships) In conjunction with the fuel pump, I can also drain the fuel from the belly tank. Comes in handy when I want to pull the tank for maintenance underneath. Or drain old fuel (like that ever happens)
End edit.
These sizes may need to be adjusted for what is available. All bought at a True Value Hardware except the solenoid, online. All thread fittings and even the flare fittings assembled with fuel compatible pipe dope. Remember gasoline with ethanol has very low viscosity so even tapered brass fittings will leak w/o dope. The flare fittings leaked too, until I learned to seal them on the flare faces with dope, and added light oil on the threads so they could be torqued tightly. Do not use compression fittings - they will leak from vibration - they are only for water fittings. use flare, barb, or brass iron pipe threaded (I.P.) with fuel compatible joint compound (pipe dope) only. Yep found this the hard way.
EDIT 09/2016: Tried many kinds of pipe dope, all leaked. Finally went to yellow teflon tape (really it's called PTFE thread seal tape) and no more leaks. Be sure to end the tape before the end of the threads so a piece doesn't break off and get in your fuel system. Also don't put dope on the flare fitting faces - makes leaking worse.
End edit.
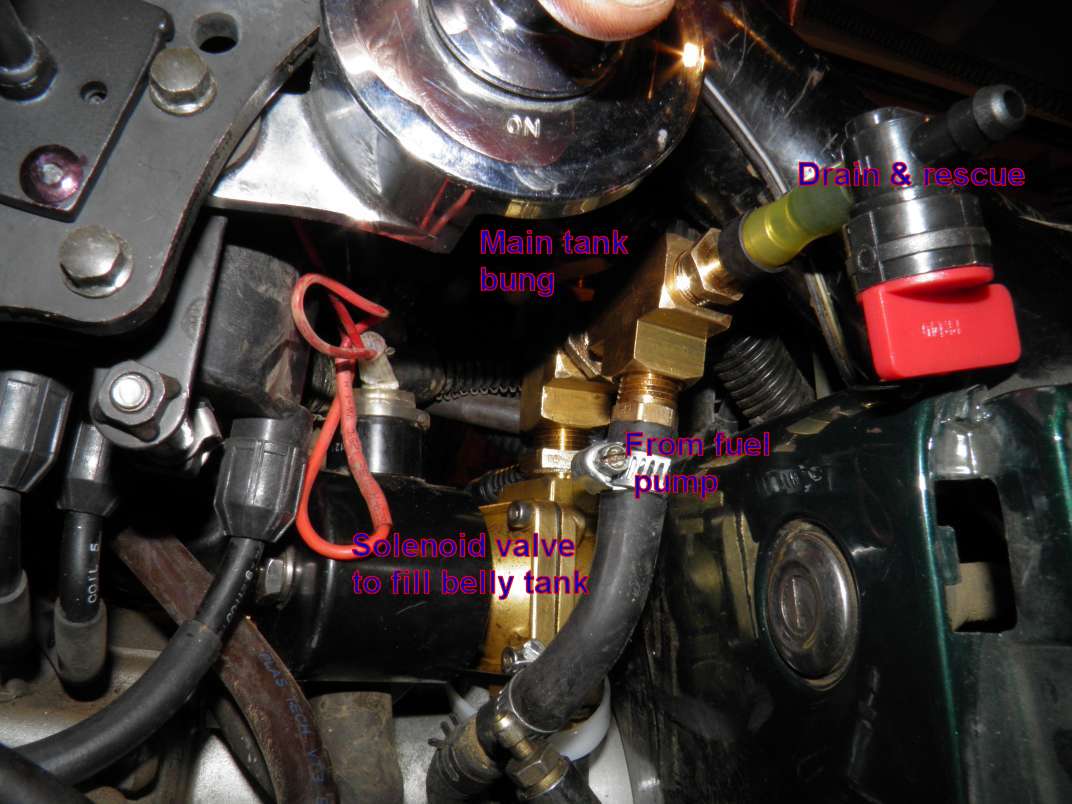
All of the fittings above the filler solenoid are brass. From the flare fitting at the bung provided by R&M, I installed a double-end 3/8 tube flare union. Top to bottom, a 3/8 flare to 3/8" I.P. adapter, 3/8" I.P. to 1/2 I.P. bushing, 1/2" X 1/2 X 1/2 T, 1/2" X 1 nipple, Large fuel solenoid with female 1/2" I.P. in & out, 1/2" I.P. to 1/2 hose barb. Off the 1/2" side port of the T, a 1/2" I.P. X 3/8" I.P. bushing, a 3/8" I.P. X 1 I.P. nipple, a 3/8" X 3/8 X 3/8T, a 3/8" X 1/4 bushing, a 1/4 I.P. to hose barb adapter, small piece of 1/4" fuel tube, and a plastic petcοck with barbs in & out. Off the side port of the small T, a 3/8" I.P. to hose barb adapter, then the fuel line from the belly tank fuel pump.
EDIT 09/2016: Changed several of the above brass fittings, for fitment reasons and to increase the flow through the bung valve. The plumbing now looks like this (yeah I wish it was chrome or otherwise more attractive). Note I had an extra key made and brazed a lever to it so I can release the seat latch as the plumbing is in the way to insert a key and my hand. NOTE the look and layout of these fittings is changed again - look near the end of this post.
 End edit
.
2. Replace the OEM plastic T that splits the fuel to the carb rails, with a brass one with screw-in barbs. I think they are 3/8 but could be wrong. The size that matches the port size of the Dan-Marc. Then you can put the Dan-marc right next to the T with a small nipple and save a couple inches on the fuel line length needed. This leaves you enough OEM fuel hose to connect to the OEM petcοck, leaving enough flex so no problem connecting when R&Ring the tank. Be sure the fuel line is steady downhill, no loops, no places for an air bubble to impede flow.

 EDIT 09/2016:
 Went to the larger Dan-Marc than in the pic. Made sure the gravity line is downhill only. No more starvation. The larger Dan-Marc looks like this - again, the fuel filter partly visible is moved from this line to the pump line next to the "oiler" valve. After this pic, added wire ties bridging between the crossbraces to support the weight of the Dan-Marc so it wouldn't sag over time and cause an uphill run of the fuel line, creating a starving problem.
 End edit
.
The Dan-Marc is powered by a latch relay that is powered by the black-white wire off a coil (same wire comes off the kill sw and goes to the ECM). Hidden on the bike is a momentary sw that must be activated shortly after the ignition is. When the latch relay is triggered by the momentary sw, it will power the Dan-Marc until the kill sw is activated, the ignition is turned off, or the safety switches - tipover relay, clutch, sidestand or neutral switches turns it off. This provides fuel security against theft, hijacking, or accidents. When the Dan-Marc is on, a hidden LED reflects off the chrome indicating fuel is on. If hijacked - hit the kill sw, hand the perp the bike and tell the a-hole to unkill it and hit the starter. Then tell 911 the perp is on the big shiny bike, outta gas a mile away.
How to wire a latch relay - diagram thanks to BonS:

The relay panel to power all of the accessories I knew I was going to install. Wired this in, in the beginning to organize the wiring instead of the one-at-a-time mods I added to Deerslayer which created a rat's nest of wires. This panel lifts out for service. Still, I could fit only 11 relays on this panel; I needed 10 more which are under the right cover, behind the tank gussets and in the bucket. Fuses for the new circuits are mostly in a PC-8 panel under the right cover, while the OEM fuses remain where Honda put them. All relays and fuses are labelled, while the new wire colors are undocumented. The labels really help maintenance and troubleshooting. These are standard automotive 5-pin relays, available at all auto parts stores if you need to replace them. In many years I have had to replace like one. Pretty reliable.

3. --
4. I installed a long fuel line to act as BT vent, routed it behind the center panel, installed a brass barb - I.P. adapter, a 90° elbow, and a I.P. - small barb adapter to fit the belly tank vent to the 1/8" hose (I think) of the OEM main tank vent. Recall above edit - installed a vented gas cap to complete the venting.
5. I installed a green LED indicator and a toggle sw in the fuel control panel. Installed a standard 5-pin relay on the relay panel, and wired it as a latch relay.
EDIT 01/2017: Note - see edit below, rewired power source so the following has changed.
End edit. The power of that relay comes from the Dan-Marc relay's output - so the Dan-Marc relay must be on for the fuel pump to work, and that provides the same security via the fuel pump. I had designed an auto-shutoff for the fuel pump for when it had transferred all the gas, but it used a pressure sw which is incompatible with the diaphram pump. I also have not addressed the situation of, running the fuel pump before there is enough room in the main for another 3 gal of gas. Not a problem; just wait to transfer fuel until there's 110 miles on the ticker or the bike needs the reserve. So it's not idiot proof. My purpose was to have a really large reserve while retaining the original OEM design of a gravity feed fuel system, while protecting against hydrolock and I have accomplished that.
 EDIT 01/2017:
 Added a programmable timer relay to control the time the pump runs. The timer from
http://www.3rdbrakeflasher.com/timer-c-68/multifunctional-5v20v-time-delay-relay-timer-5-amp-p-192.html Rewired it so it's powered from the same circuit as the filler solenoid valve, so it can run with engine off. That's handy if I want to drain all the fuel via the oiler valve, including the belly tank. Put the relay in a small box and added switches and the LED fixture for programming it.
 EDIT 05/2017:
 On the ride to Inzane last year, had an incident from a Harley asshole. Finished pumping gas, greeted the Harley rider on the other side of the pump, and went to the jon. On returning, the HD guy is gone; went to start the bike and it wouldn't. Oops the choke is on. Hmm. So is the high beam switch. Started up and headed out. A couple minutes down the road and gas is gushing out the filler and soaking my crotch. DAMN - THE FUEL PUMP TOGGLE IS ON. That would have been really serious if it ignited. Mr. funny guy Harley rider had switched all of my left handlebar switches. WTF. Asshole. Upon return, I added to the next paragraph's mods, moved the fuel pump timer programming / enable toggle to a mount I can reach but out of sight (out from behind the right cover) to disable the fuel pump. Now it's always disabled until I need it. And we have a new rule -
ONE OF US IS ALWAYS WITH THE BIKES AT A GAS STOP.
Note that - we have had other Harley vandal incidents over the years - always by cowards who did their mischief then ran away. That will happen to you if you ride a non-Harley long enough. It's usually something like the kill switch activated. We already park the bikes where we can see them at food stops. Overnights, always try to stay in Mom & Pop style motels with our own outside door, the bikes 10 feet away. When riding alone or with S.O. - open carry - discourages road rage and this kind of nonsense. Also have NRA sticker on the bike. No. Not being unfair - I notice bike marques - and who left - followed by tampering on my ride. And pissed they f'd with it and ran away. God help them if I catch anybody but especially a HD rider tampering with my bikes. These are the same yahoos that throw adolescent 'Merican Iron Rice-Grinder Basher sledgehammer parties. Notwithstanding Valkyries were made in Marysville Ohio, even stamped with "MADE IN USA" on the pillion seat and cast on the engine block - when harleys couldn't legally qualify for the claim. I get it - gotta be tough when your prideful ride, which cost like a new cage is outperformed in performance, reliability, handling, longevity, size and value by a bike that cost half as much. Gotta find ways to salvage your bruised pride. But f-ing with my bike is off limits and God help you if I catch you at it.

Changed the toggle sw on the panel so it arms the circuit, then added a pushbutton sw to activate the timer relay. Presently set to run for 9:35 - the time for a full transfer (now takes 17:12 - see edit below). Hitting the button a second time stops the timer and the pump - so does shutting off the toggle. Activating the pump requires all 3 switches in the right sequence with the first switch hidden. Ignition not required - need to pump fuel also with the key off.

Added a Rostra electronic cruise control 05/18. Panel now looks like this. This is shielded by the tipped windscreen, with open access to the wires for maintenance. Have never had issues with water. Visible is the Sirius/XM antenna.

Consensus among those with fuel pump failures, suspects that is caused by heat. So I added a heat shield between the headers and the fuel pump. Note the belly tank version of my permanent mounted lift adapter - available like this or for non-BT equipped bikes. Lightweight, strong, 5 minute install - you can lift the bike on a road trip with any standard bike lift, w/o bending the exhaust. More info at
http://www.valkyrieforum.com/bbs/index.php/topic,105040.0.html End edits
.
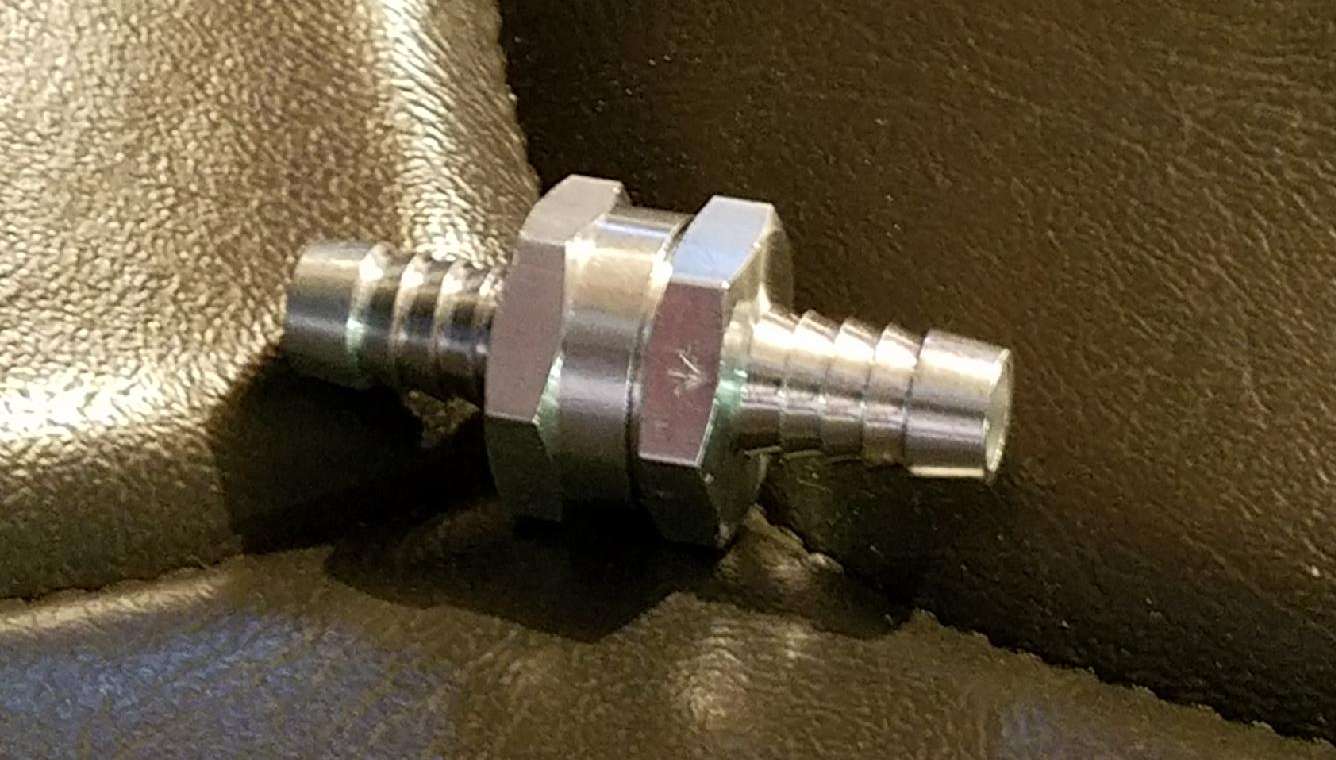
EDIT 09/2017:Having a drain-down problem with my setup. Have isolated it to the fuel pump. Measured it, leaks the entire 3 gallons to fill the belly tank in 19 hours. That's a tablespoon (0.5oz) every 89 seconds. If I pump up my belly tank contents - 2 hours later it takes 61 seconds to pump back up what leaked down. (It takes 9:35 to pump up the entire 3 gal. ) Significant leak. Way more than needed to cause hydrolock. So don't assume your belly tank will prevent hydrolock - you still have gravity pressure pushing gas through your system - install a Dan-Marc anyway.
Caveat - this leak is in the opposite direction of what would be needed to cause hydrolock for your standard install. If they have a check valve (one way) inside the pump, it has to be in the direction of normal output, and it's leaking with back pressure. If there's no mechanism to stop forward flow when it's off - it's not protecting you.
Another caveat - this is measured on my system only. Statistically insignificant. Maybe my pump has a problem. Roger (at RM Works who made the belly tank) says it may have sand in it. Whatever - if mine has sand, so does everyone else's. Regardless of the fault, it must be addressed - when the starter goes CLUNK you still have an expensive fix if you didn't.
Added a fuel check valve in the pump-up line. No more leakdown.
 End edits
.
EDIT 07/2018: Last edit. I promise.

Dammit. Thought I was done.

The above check valve leaked. I found a better one with Viton seal inside and a stronger spring - rated at 1 lb cracking pressure. Per Roger at R&M the pump output is consistent at 3 lb. Installed this one and measured pump-up time is now 17min 12 sec. changed the timer to that.
EDIT - CHECK VALVE REMOVED - SEE BELOW. 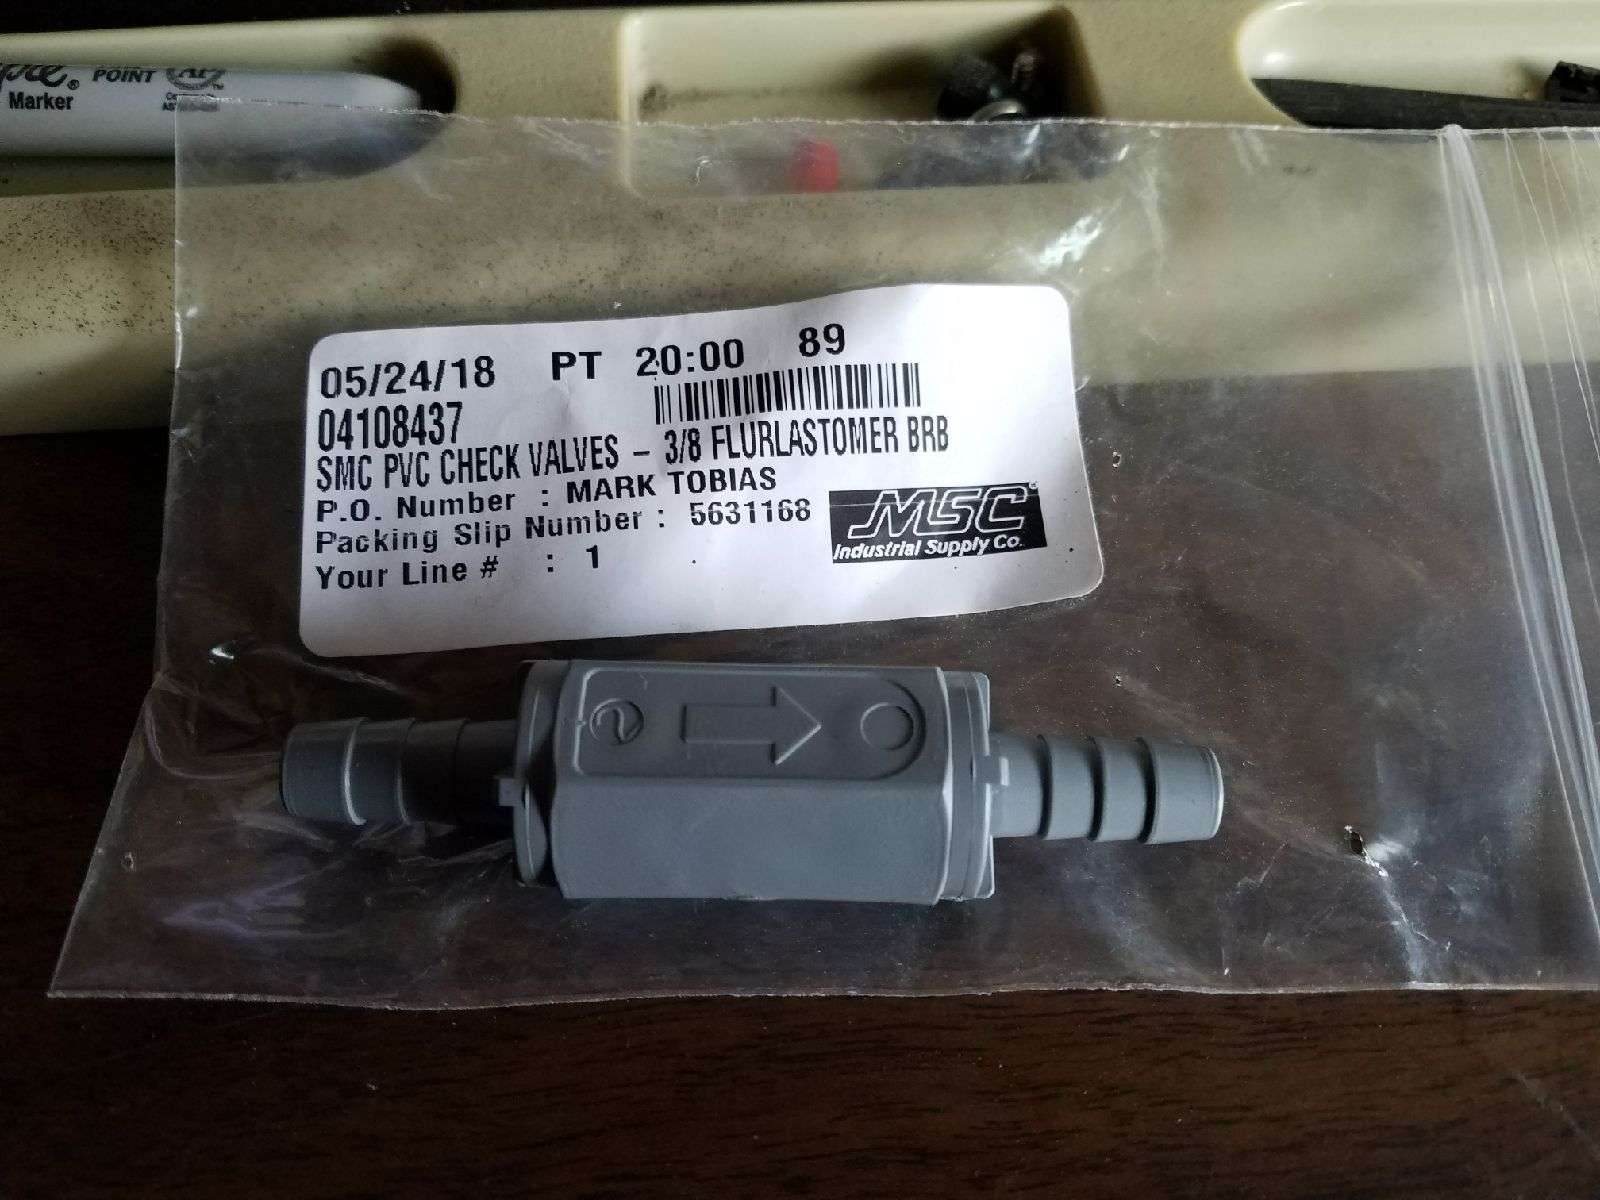 EDIT 04/2019:
Above check valve got too strong on cracking pressure. Made it look like the pump failed, so I replaced the pump. Found a bundle of 4 new pumps at just over the price of one, on ebay - same maker & P/N - search for "Purolator Facet FAC 40178" there. Replaced the elbow at the pump inlet with a "T" with drain cap. Measured what the tank delivers - it's 365oz not 384 which would be 3 gallons - it delivers 19 oz light from the claimed volume.
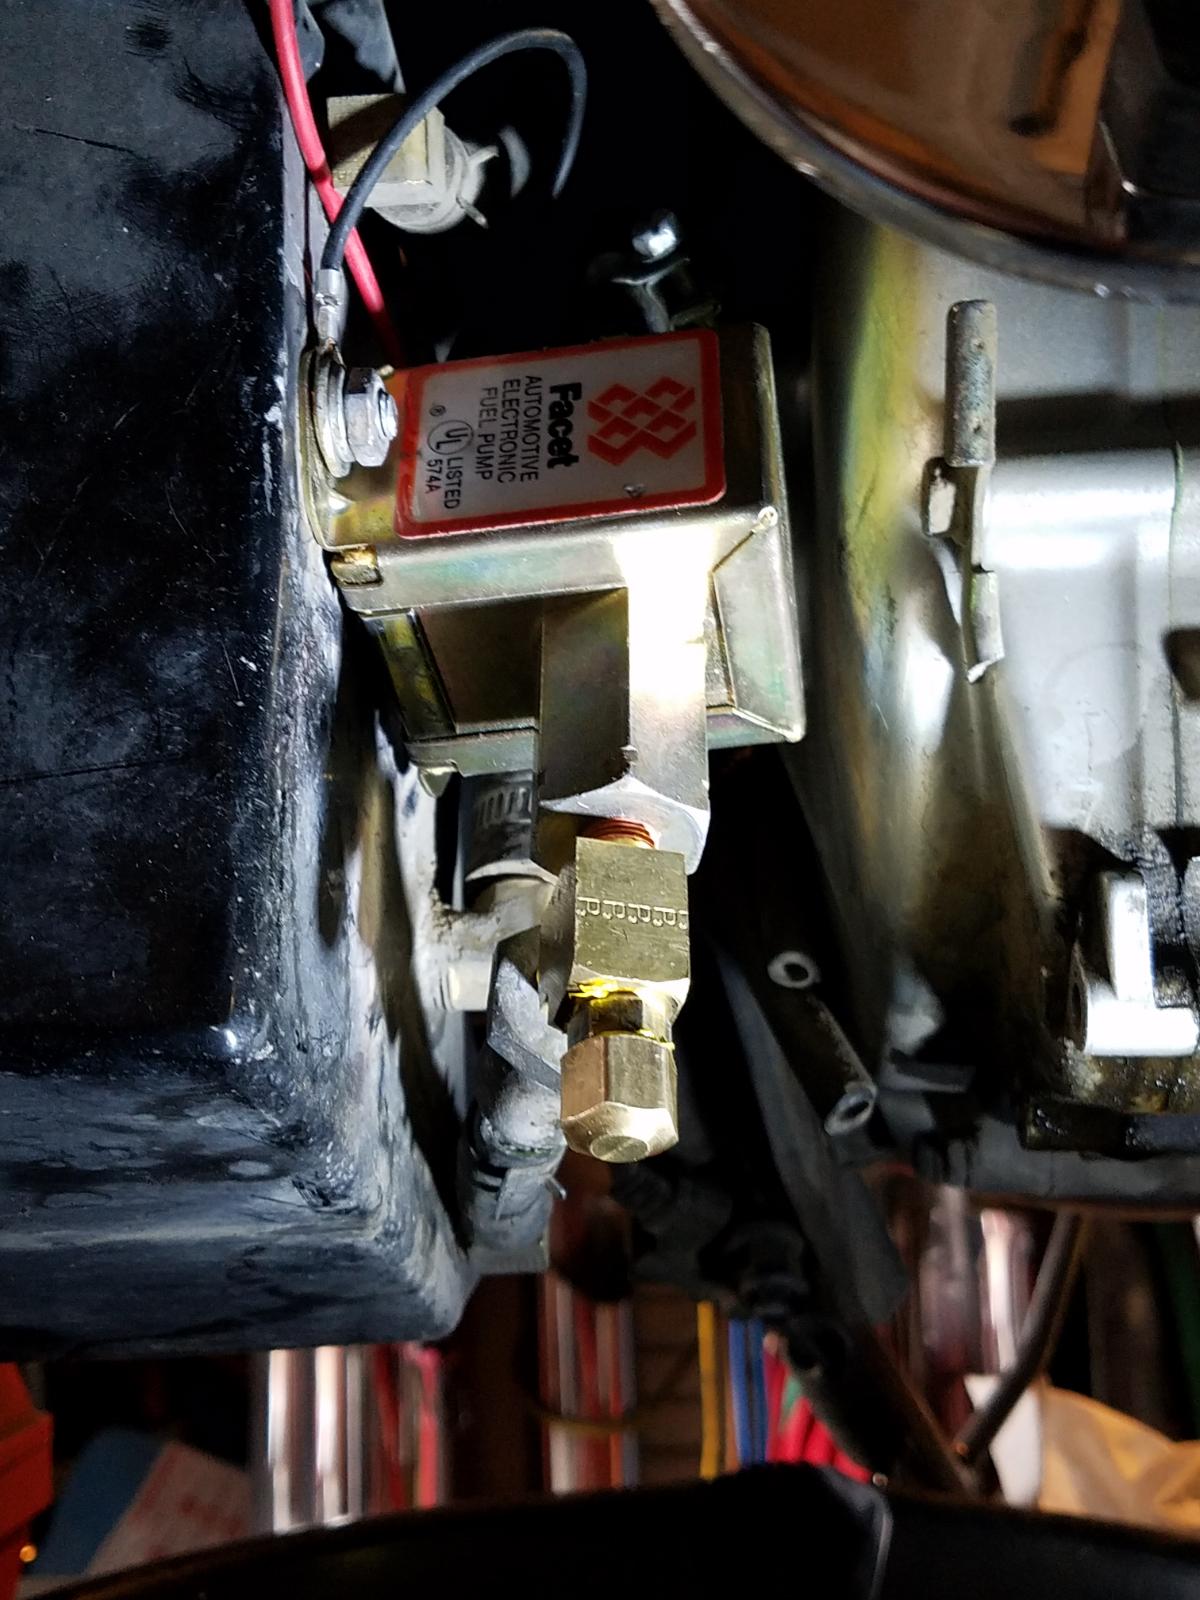
Tested the check valve - it has developed FAR too much pressure required to crack it. Removed it and replaced with a ball valve. Pump up time is now 9:04. I set these ball valves so the handle throws in the same direction as the desired fuel flow. IOW, the back valve is turned UP while the "oiler" fuel sharing valve is turned DOWN. So there's no potential for throwing the wrong valve by feel.

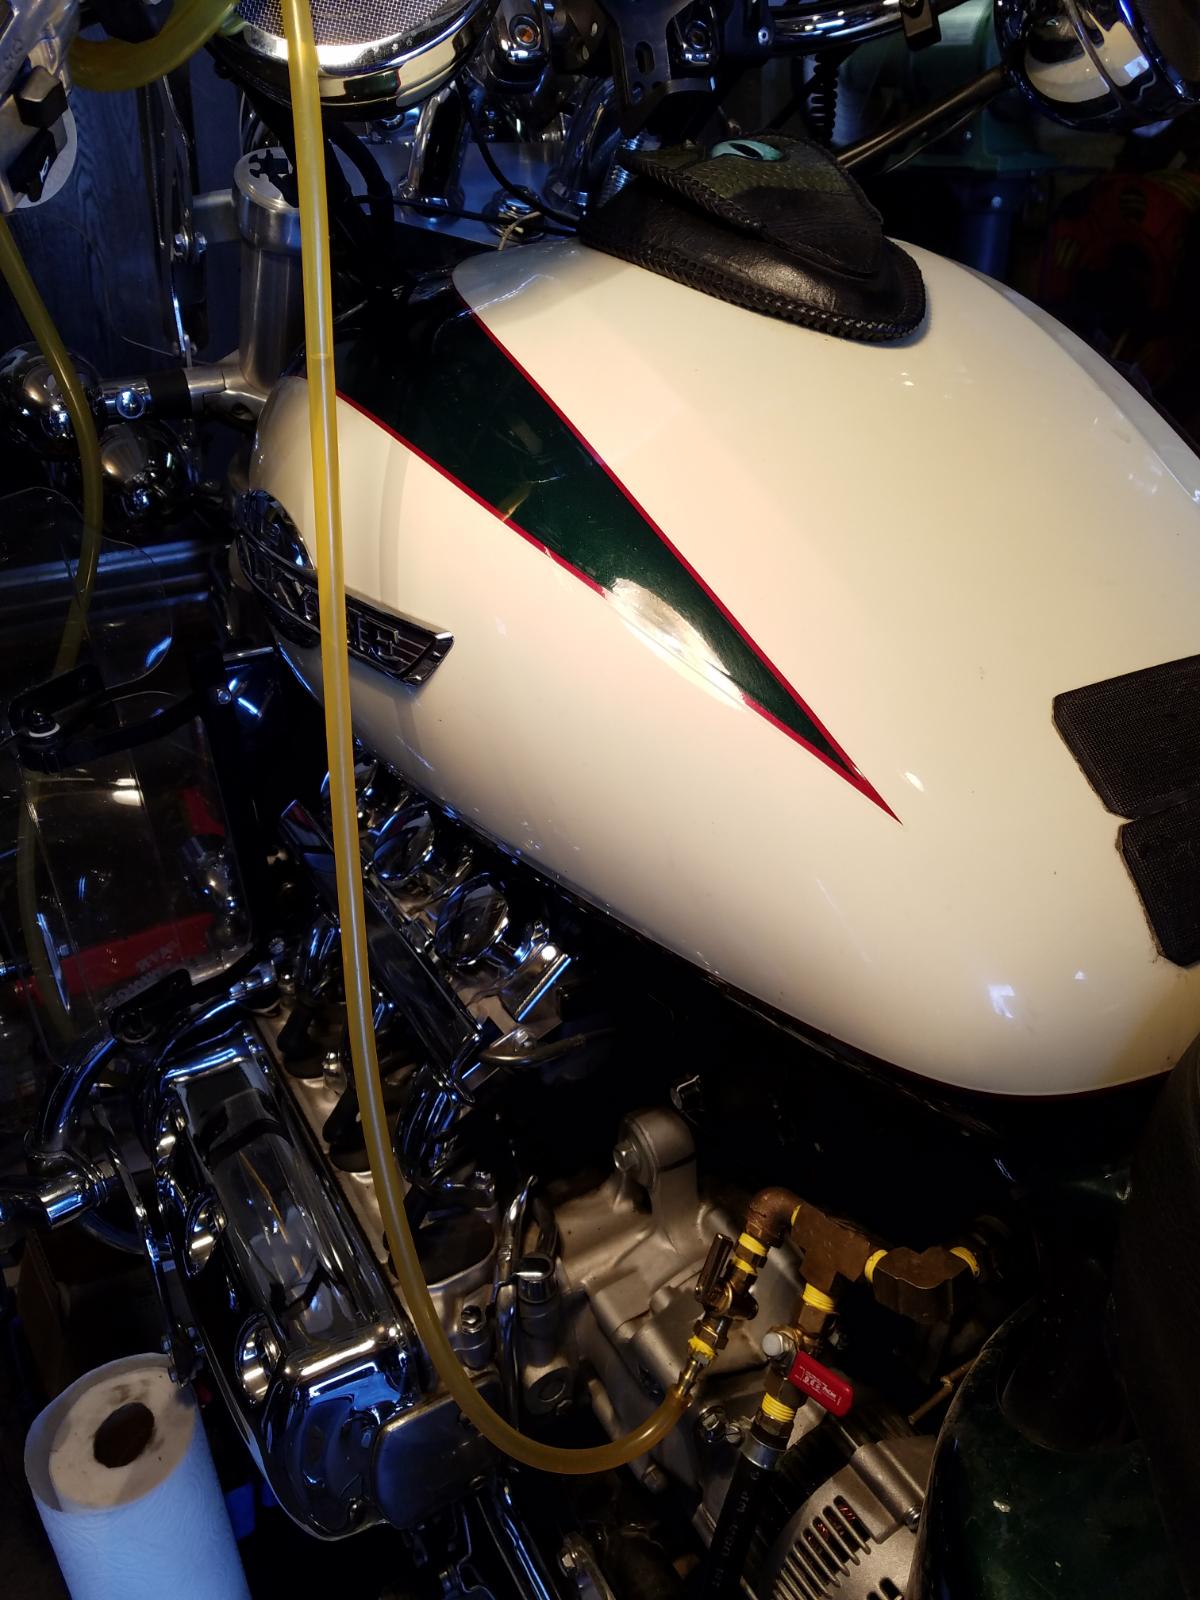
Incidentally - discovered (DUH) I can SEE the fuel level in the main tank if I connect the transparent fuel line ( I carry to share fuel or other uses ) to the "oiler" valve, drape it over the handlebar and open the valve. Like this. Useful.
Didn't mention yet, while at Taos Inzane, a friend told me of his friend who had an I/S tank in the same colors as my Tourer, for sale. Awesome! Made the deal and now Jade has the bigger 6.9 gal I/S tank so fuel total is about 1248oz or 9.75gal. Really good for pulling trailers esp a Timeout camper, which destroys mileage.
Standard/Tourer tank compared to I/S. Both higher and wider.

 End edits
.
Just to put this in one place, here's a hand-diagram of the fuel setup:
