fordmano
Member

Posts: 1457
San Jose, CA. 1999 I/S 232 miles when bought 11/05
San Jose, CA.
|
 |
« Reply #40 on: November 25, 2010, 08:14:40 PM » |
|
This a bit out of order but I wanna share my carb synch setup since it has been a hot topic again recently. Let's start with the finsihed (almost finished) setup and yes there are 7 gauges on my Carb Synch bar. The 7th is for the possiblity that one fails and I wanna be ready for that I was an Eagle Scout. 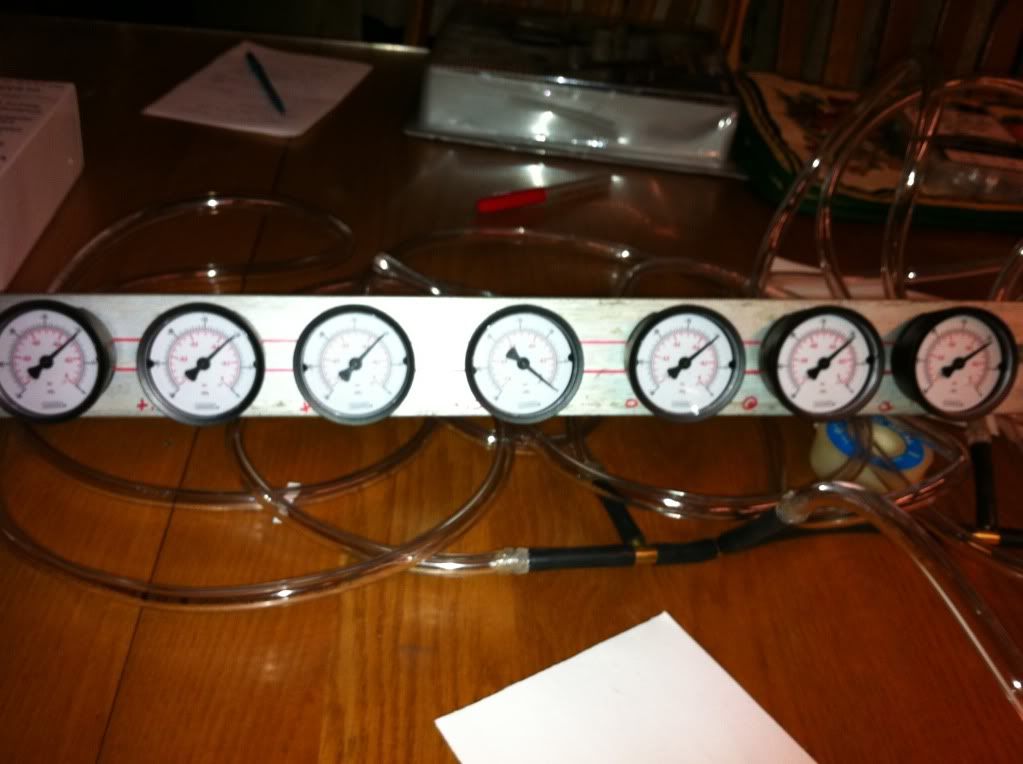 All the vinyl tubing is attached and I am testing them all on a single manifold to see if they are close to each others reading. I used brass "T's" from fish store to create the manifold connecting them all together using standard automotive vaccum tubing. then I attached my new MityVac hand held vaccum pump, and they are within .5inHG from each other so we should be good 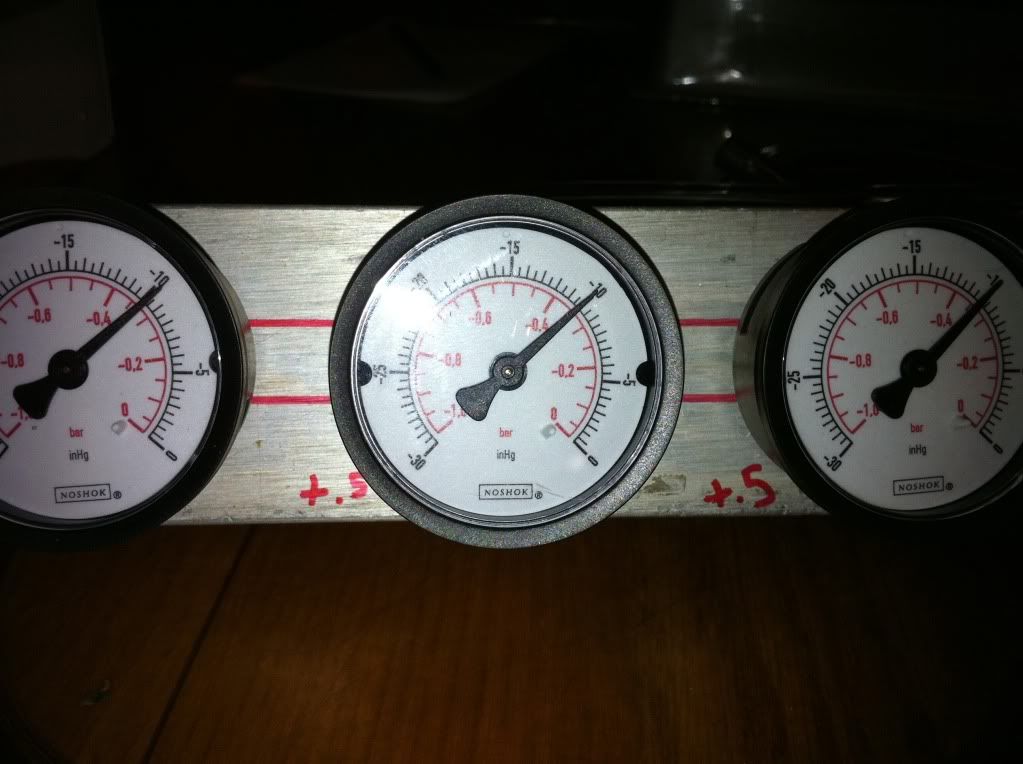 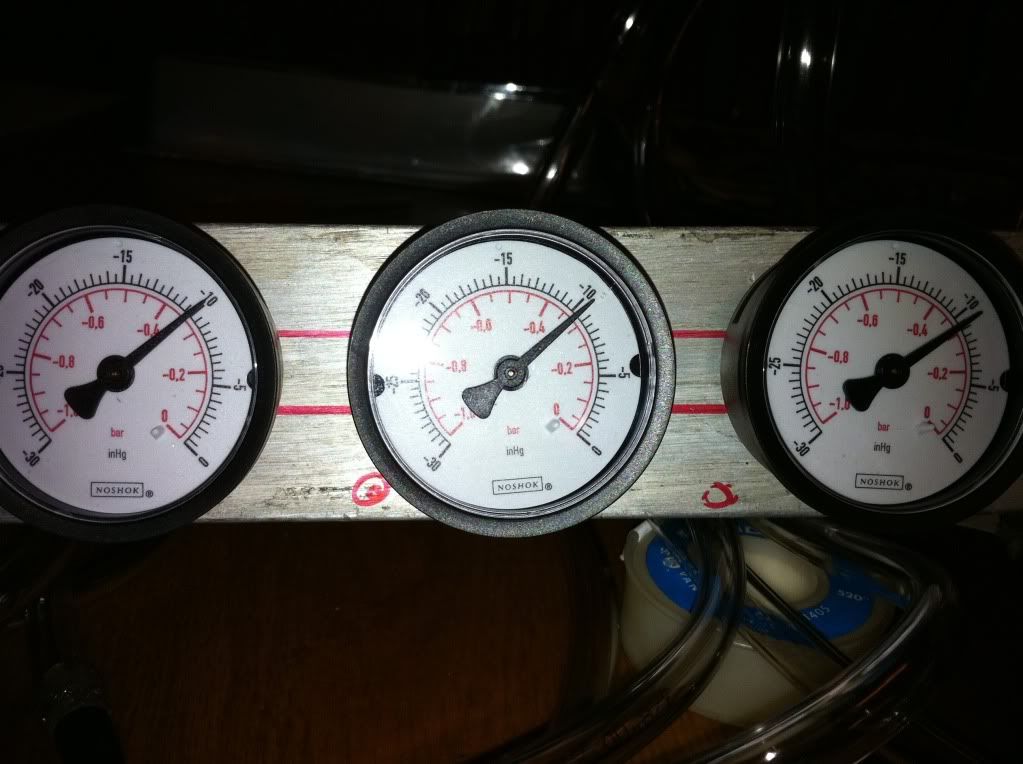 , 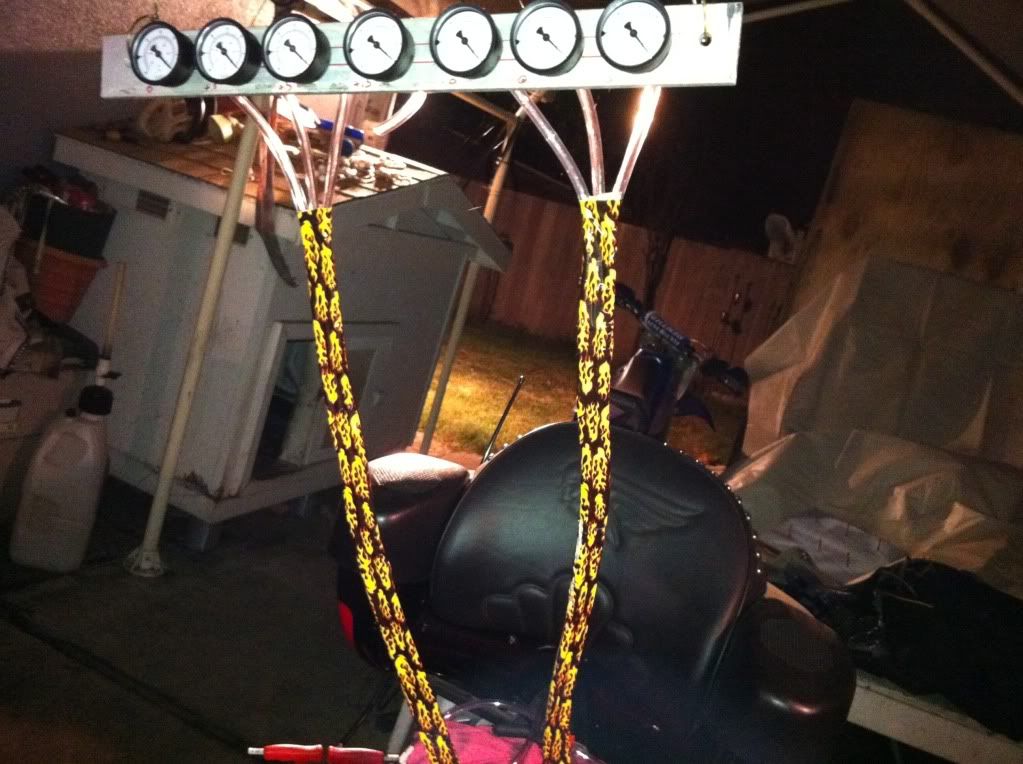 , 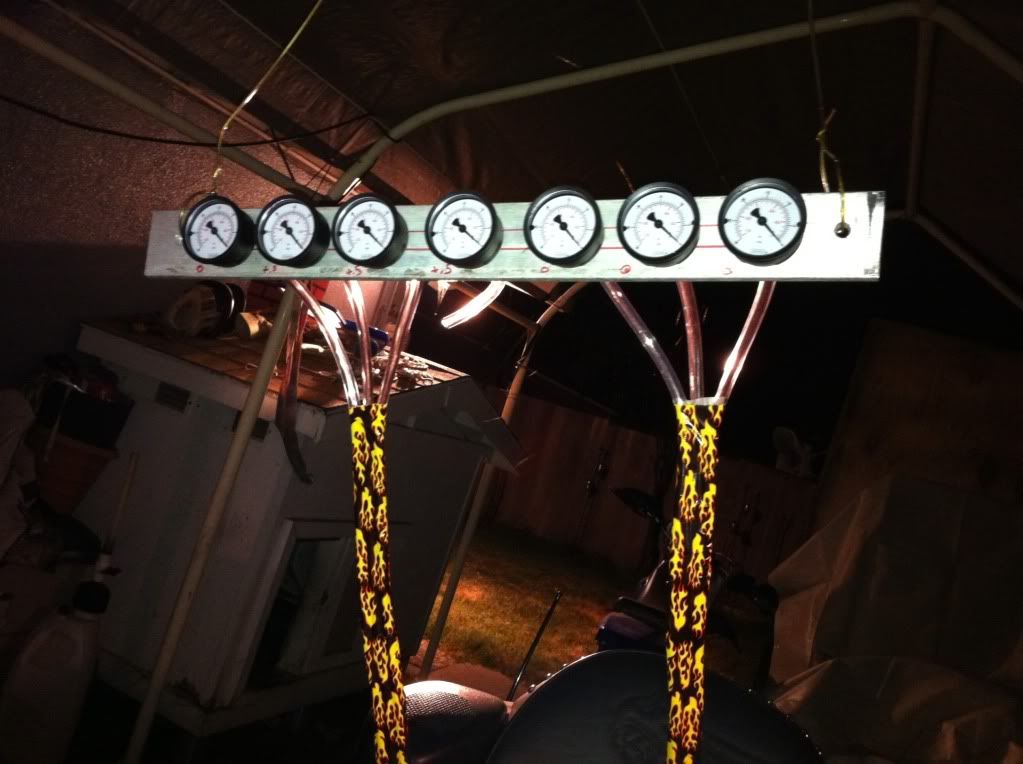 |
|
|
|
« Last Edit: February 16, 2011, 03:47:43 AM by fordmano »
|
 Logged
|
  83GS550 93XR650L TARD! 97WR250 99ValkyrieI/S Tri-tone 01YZ125(x2) 05DRZ-125 |
|
|
fordmano
Member
Posts: 1457
San Jose, CA. 1999 I/S 232 miles when bought 11/05
San Jose, CA.
|
|
« Reply #41 on: November 25, 2010, 08:28:16 PM » |
|
|
|
|
|
« Last Edit: February 16, 2011, 03:50:19 AM by fordmano »
|
Logged
|
83GS550 93XR650L TARD! 97WR250 99ValkyrieI/S Tri-tone 01YZ125(x2) 05DRZ-125
|
|
|
fordmano
Member
Posts: 1457
San Jose, CA. 1999 I/S 232 miles when bought 11/05
San Jose, CA.
|
|
« Reply #42 on: November 25, 2010, 08:41:00 PM » |
|
This is BIG for me. My first attempt at posting a video and the first startup after reasembly of the carbs this is prior to doing the synching. Please be patient this may take a few minutes for me to figure it out.....
If you notice there is NO fuel supply only what I was able to fill the carbs and the line with, remember this is a huge list of work to be done especially for me and my current health condition. Yes I know I should not be running it without the air cleaner in place but I just had to hear my Fat Lady roar again. |
|
|
|
« Last Edit: February 16, 2011, 03:51:40 AM by fordmano »
|
Logged
|
83GS550 93XR650L TARD! 97WR250 99ValkyrieI/S Tri-tone 01YZ125(x2) 05DRZ-125
|
|
|
fordmano
Member
Posts: 1457
San Jose, CA. 1999 I/S 232 miles when bought 11/05
San Jose, CA.
|
|
« Reply #43 on: November 25, 2010, 09:07:13 PM » |
|
Ok lets get back on track again. So I decided it was time to start working on installing the HID lightimg. This was tricky I wanted to try something different and so my Lovely wife came up with the idea of gluing or using adhesive to hold the ballist to the fairng this will help during install or removal of the fairing with the wiring kit that came with the lights.. so lets just have the pictures speak for them selves. 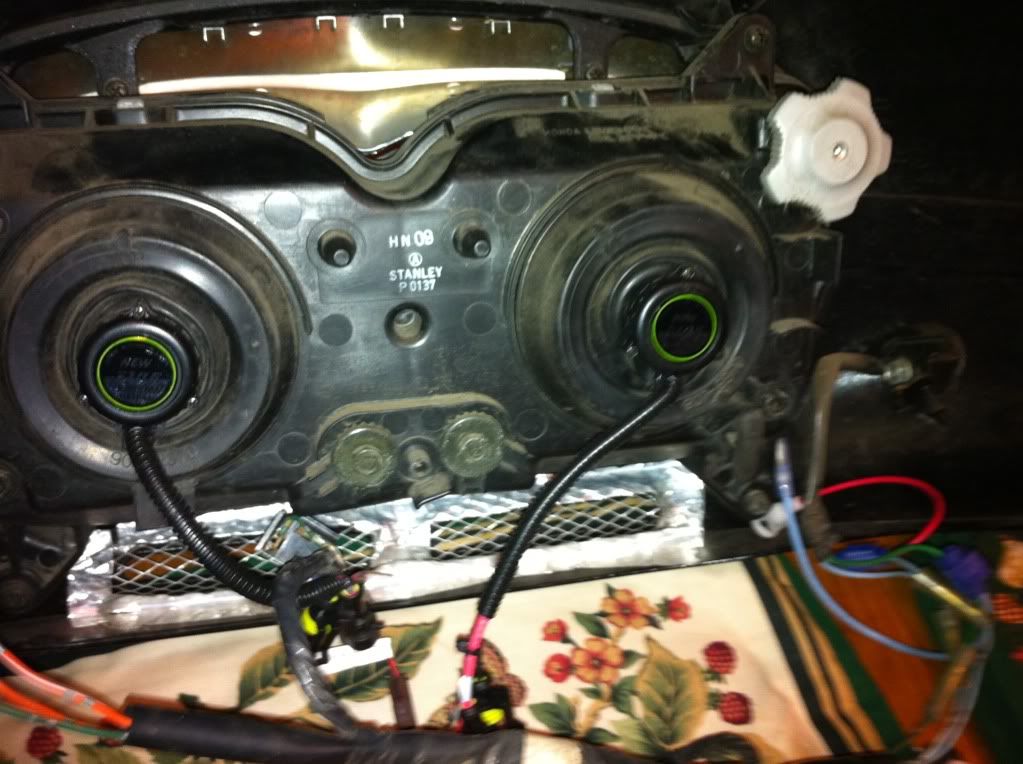 The first picture is with the fairing sitting in its upright normal position. 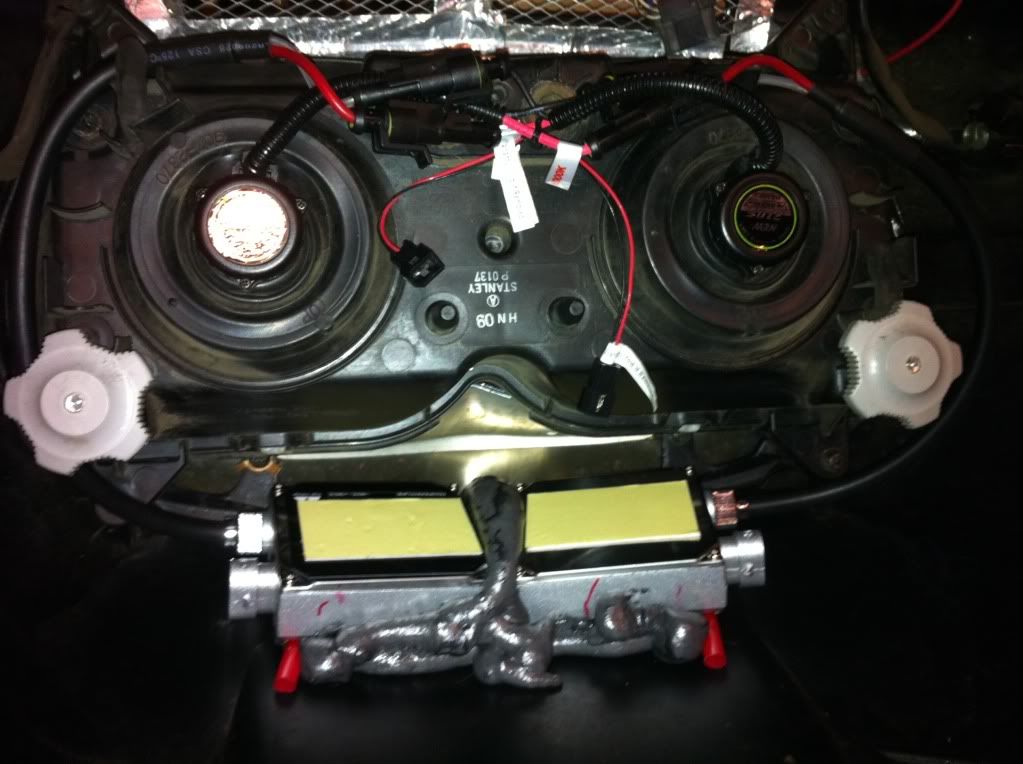 the second picture is the fairing upside down to attach them on the underside. 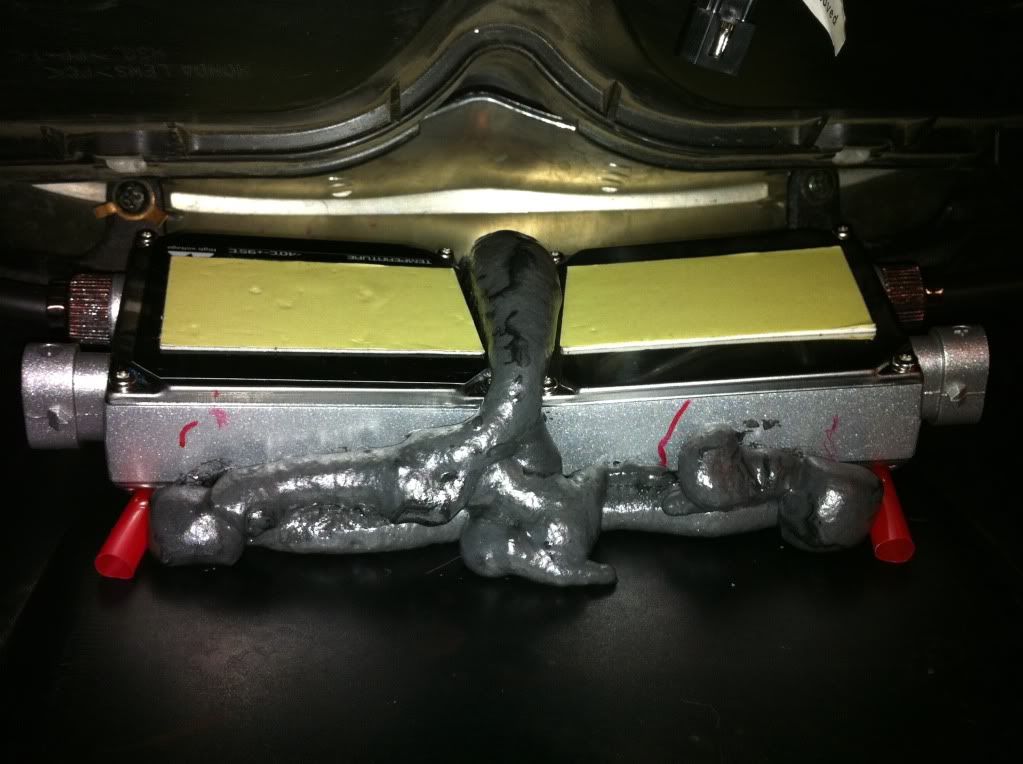 what this adhesive is,,,,,, it is actually outdoor expanding foam for attaching brick and or rocks in your landscaping. so it is water proof and has adhesive properties. I sure hope it holds I attached them to the underside of the top of the fairing as far forward as I could get them up near the headlight assembly. |
|
|
|
« Last Edit: February 16, 2011, 03:52:43 AM by fordmano »
|
Logged
|
83GS550 93XR650L TARD! 97WR250 99ValkyrieI/S Tri-tone 01YZ125(x2) 05DRZ-125
|
|
|
fordmano
Member
Posts: 1457
San Jose, CA. 1999 I/S 232 miles when bought 11/05
San Jose, CA.
|
|
« Reply #44 on: November 25, 2010, 09:13:21 PM » |
|
These new HID lights are something to behold, They are VERY bright and only draw 35watts when fired up instead of the 60watts my PIAA's were drawing. this will be mostly a personal preference on the color they look blue to the PIAA's but depending on your opinion the PIAA's now look a bit yellow compared. 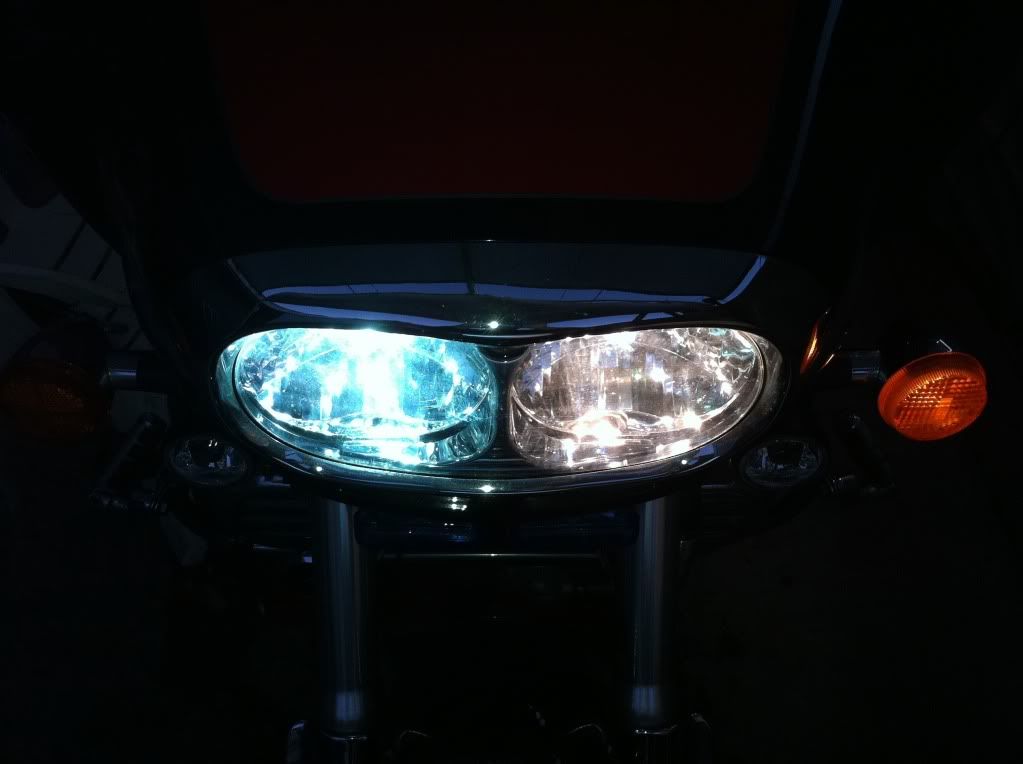 Now keep in mind I have only lit these up while sitting still in my back yard and without the fairing installed completely proper. 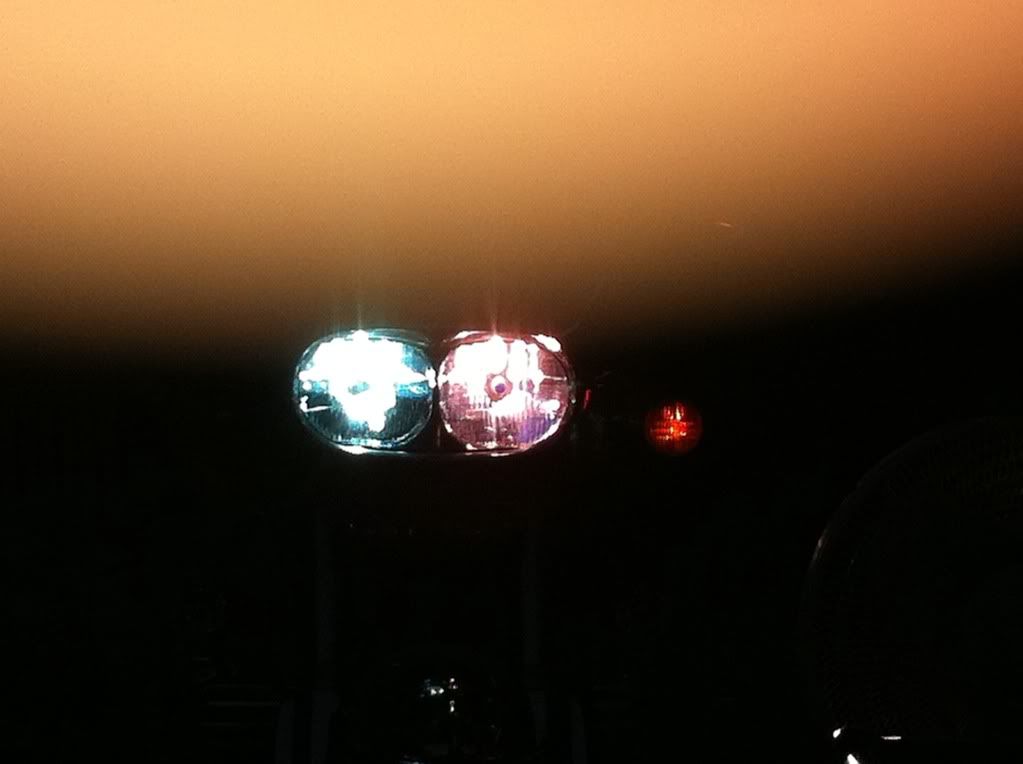 Here is a picture of the headlight assembly with the new HID's installed. 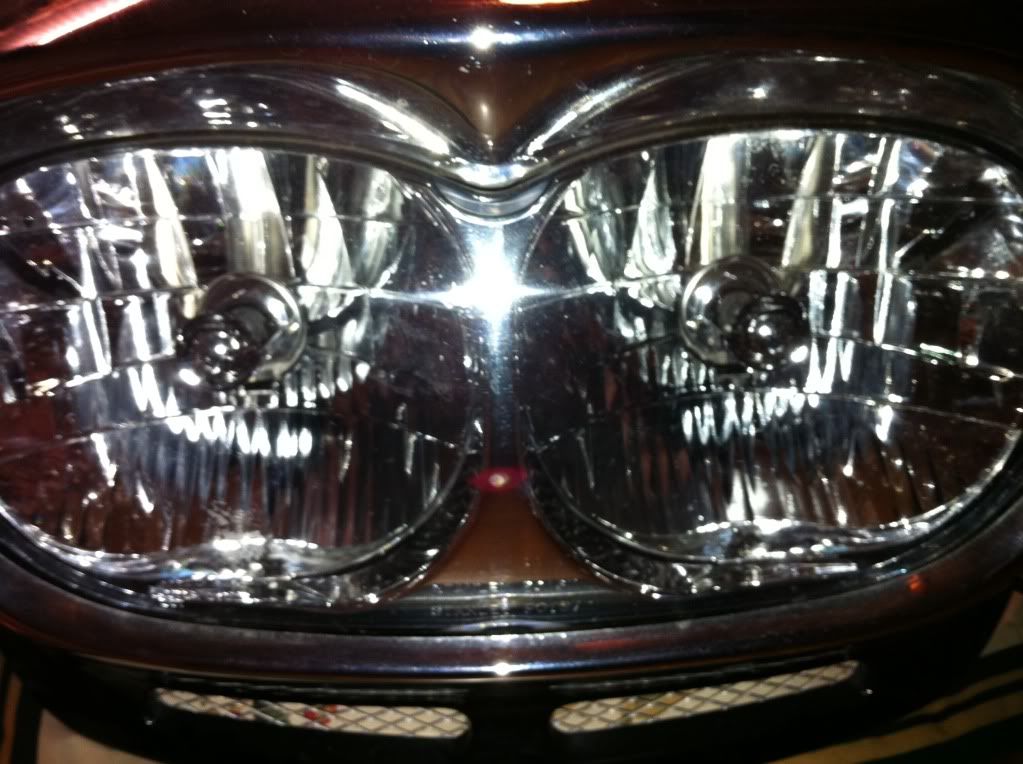 |
|
|
|
« Last Edit: February 16, 2011, 03:53:28 AM by fordmano »
|
Logged
|
83GS550 93XR650L TARD! 97WR250 99ValkyrieI/S Tri-tone 01YZ125(x2) 05DRZ-125
|
|
|
fordmano
Member
Posts: 1457
San Jose, CA. 1999 I/S 232 miles when bought 11/05
San Jose, CA.
|
|
« Reply #45 on: November 25, 2010, 09:22:59 PM » |
|
|
|
|
|
« Last Edit: February 10, 2011, 12:38:23 AM by fordmano »
|
Logged
|
83GS550 93XR650L TARD! 97WR250 99ValkyrieI/S Tri-tone 01YZ125(x2) 05DRZ-125
|
|
|
fordmano
Member
Posts: 1457
San Jose, CA. 1999 I/S 232 miles when bought 11/05
San Jose, CA.
|
|
« Reply #46 on: November 25, 2010, 09:29:43 PM » |
|
Well thats about all I have for ya'll tonight, now maybe I will have some front end work pictures after tomorrow need to get my tires off the bike and down to the shop for the new Avons to be installed still debating on dyna beads or spin balance or just static balance well maybe all the above or atleast 2 out of three. I am thinking about just having the shop do the simple bubble (static) balance then add Dyna beads when I get them home after install.
Also I think I will hold off mostly due to funds on the front springs install and a full rebuild of the forks, I think I wll just dump out the 11 plus year old fluid and fill them back up to spec with fresh synthetic fork oil I just happen to have a couple bottles in the garage. I also have to pull the head bearings and decide if I need a new set or just repack and re-tighten again and try them out.
|
|
|
|
« Last Edit: November 25, 2010, 10:33:10 PM by fordmano »
|
Logged
|
83GS550 93XR650L TARD! 97WR250 99ValkyrieI/S Tri-tone 01YZ125(x2) 05DRZ-125
|
|
|
|
Sodbuster
|
|
« Reply #47 on: November 26, 2010, 05:48:25 AM » |
|
fordmano
Everything is looking good - you have a lot of attention to detail - the pictures are awesome
I noticed some of your socket head screws have some rust in the them - a little trick I use is to cut a q-tip in half - put in a cordless drill - put a dab of semi-chrome polish on end (or something similar) and stick in socket and give er a spin - follow up with a dry q-tip and you're done - but that's only if you're anal like I am.
|
|
|
|
|
Logged
|
VRCC # 30938 '99 Std. - Black & Silver - "Spirit Horse" Dear God, Seriously .... Thanks for creating beer. You rock !!  |
|
|
|
Ricky-D
|
|
« Reply #48 on: November 26, 2010, 08:12:28 AM » |
|
I'm not so sure that rear brake pads will fit on the front.
Reason: The rear brake pads are quite a bit thicker than the front pads and they may not fit inside the caliper along with the stock Valkyrie rotors.
***
|
|
|
|
|
Logged
|
2000_Valkyrie_Interstate
|
|
|
fordmano
Member
Posts: 1457
San Jose, CA. 1999 I/S 232 miles when bought 11/05
San Jose, CA.
|
|
« Reply #49 on: November 26, 2010, 09:14:52 AM » |
|
Excellent suggestion you got there Sodbuster, I will surely try this out when I get back to it over the weekend.
Thanks a bunch.
|
|
|
|
|
Logged
|
83GS550 93XR650L TARD! 97WR250 99ValkyrieI/S Tri-tone 01YZ125(x2) 05DRZ-125
|
|
|
fordmano
Member
Posts: 1457
San Jose, CA. 1999 I/S 232 miles when bought 11/05
San Jose, CA.
|
|
« Reply #50 on: November 26, 2010, 09:18:05 AM » |
|
Ricky-D, thanks that is what I was looking for I just thought that I have heard of folks using the Rears on the Front.
Thank you,
|
|
|
|
|
Logged
|
83GS550 93XR650L TARD! 97WR250 99ValkyrieI/S Tri-tone 01YZ125(x2) 05DRZ-125
|
|
|
gordonv
Member
Posts: 5766
VRCC # 31419
Richmond BC
|
|
« Reply #51 on: November 26, 2010, 01:09:38 PM » |
|
I think the rear to front was when using the replacement rotor or the GW one. Either one was thinner than the stock Valk, and therefore gave yu the extra room to fit the rear pad in the front caliper.
|
|
|
|
|
Logged
|
1999 Black with custom paint IS   |
|
|
fordmano
Member
Posts: 1457
San Jose, CA. 1999 I/S 232 miles when bought 11/05
San Jose, CA.
|
|
« Reply #52 on: November 26, 2010, 04:32:50 PM » |
|
Ahhh yes of course that would make perfect sense that the thicker rears would fit with thinner rotors in place.
I guess I just did not pay that much attention when I read about using rear pads on the front.
Thanks for the clarification on that topic gordonv you just saved me some time money and trouble.
|
|
|
|
|
Logged
|
83GS550 93XR650L TARD! 97WR250 99ValkyrieI/S Tri-tone 01YZ125(x2) 05DRZ-125
|
|
|
fordmano
Member
Posts: 1457
San Jose, CA. 1999 I/S 232 miles when bought 11/05
San Jose, CA.
|
|
« Reply #53 on: December 02, 2010, 04:33:49 PM » |
|
OK ok ok,,, finally got released by my doctor to head back to work and she said it would be ok for me to tinker around with the bike again as long as I am very careful,,,,, so I started doing a couple things today. But first here is a quick tip that I am sure LOTS of ya'll already know. When you are removing the rear tire of our lovely (in my case very dirty) Fat Lady there is a little slot on the bottom of the plastic ring that is a water/dust guard for the differential and the splines. VERY carefully insert a LARGE flat bladed screwdriver in there before you try to pry or move the rim away from the differential this little slot allows you to gently push the hub away from the splines and keep it with the rim so you will have clearence to get your tire/rim out. Now this was all done on an I/S and I did not drop the saddle bag heat shields or bracing and did not touch the exhaust at all It looks like this, 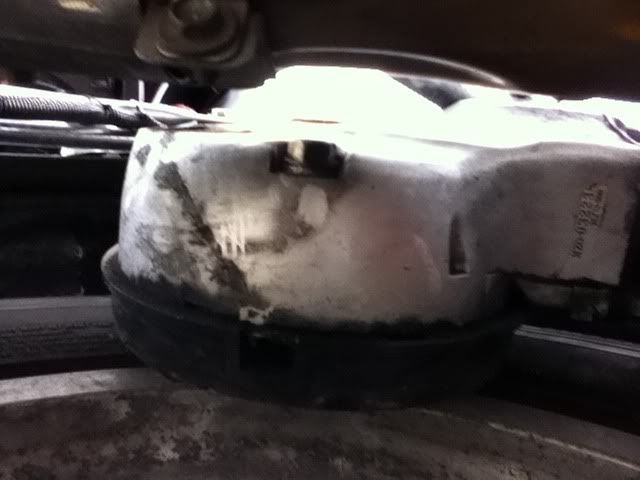 It is really difficult to get a good picture of this, remember this picture is taken from underneath the bike looking up at the pumpkin. This picture is a little clearer. 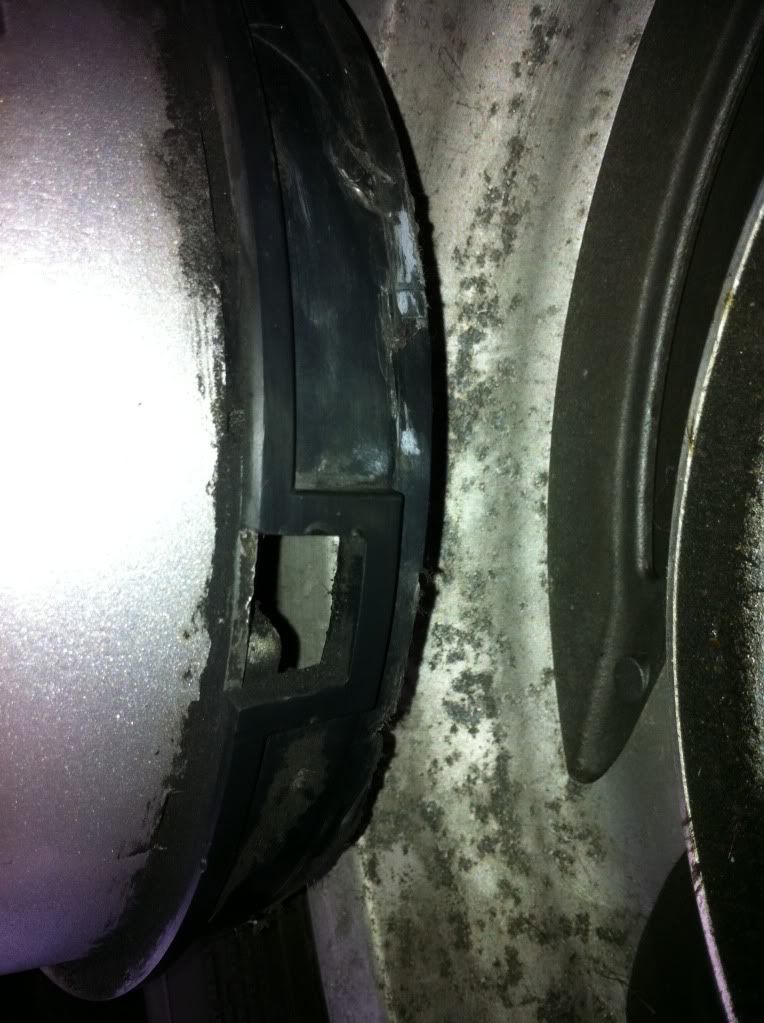 If you still cant see the slot on the bottom side of the pumpkin let me highlight it for you. 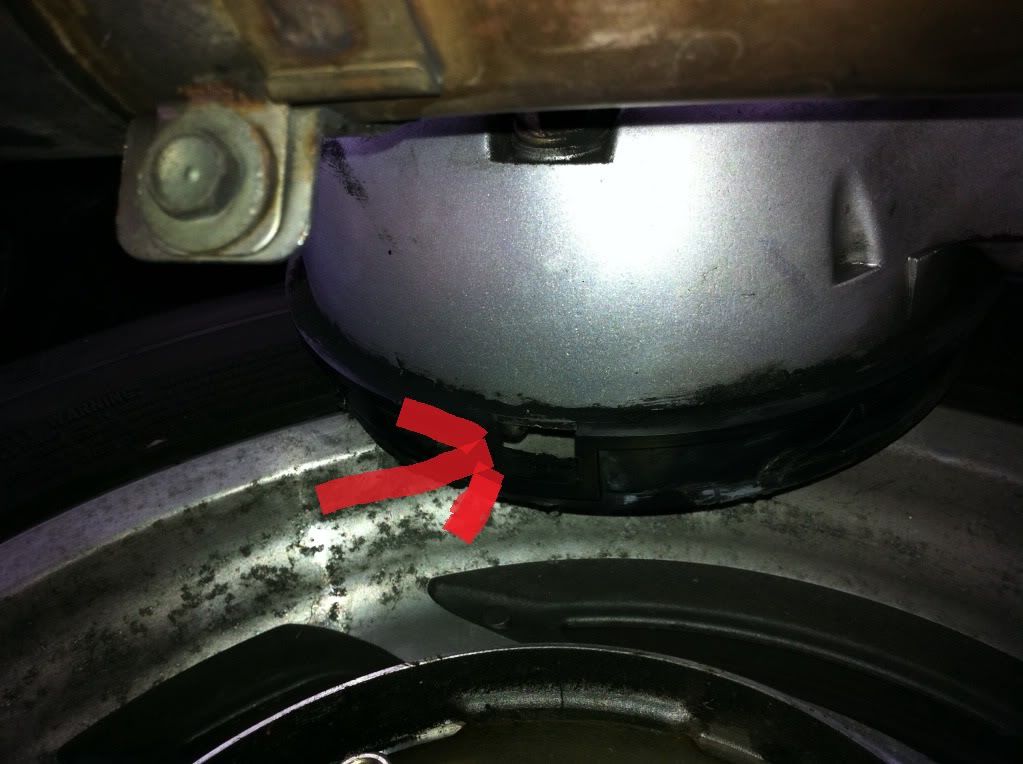  |
|
|
|
« Last Edit: February 16, 2011, 03:57:23 AM by fordmano »
|
Logged
|
83GS550 93XR650L TARD! 97WR250 99ValkyrieI/S Tri-tone 01YZ125(x2) 05DRZ-125
|
|
|
MP
Member
Posts: 5532
1997 Std Valkyrie and 2001 red/blk I/S w/sidecar
North Dakota
|
|
« Reply #54 on: December 02, 2010, 04:37:12 PM » |
|
Good pics, thanks! Makes me feel better about how my rear wheels look! LOL  MP |
|
|
|
|
Logged
|
 "Ridin' with Cycho" |
|
|
fordmano
Member
Posts: 1457
San Jose, CA. 1999 I/S 232 miles when bought 11/05
San Jose, CA.
|
|
« Reply #55 on: December 02, 2010, 04:48:44 PM » |
|
Now I dont wanna hear no jokes or pokes about how bad my rims look, I know they are junkie looking and I need to spend time on my girl but I just dont have any extra I ride I don't clean. Well one of our local shops is having what they call a crazy stupid tire sale. they offer free mounting and balance with the purchase of any tire off the bike so I had to get them damn tires off today so I can drop them off day after tomorow should get front and rear Avon for under $390 out the door. 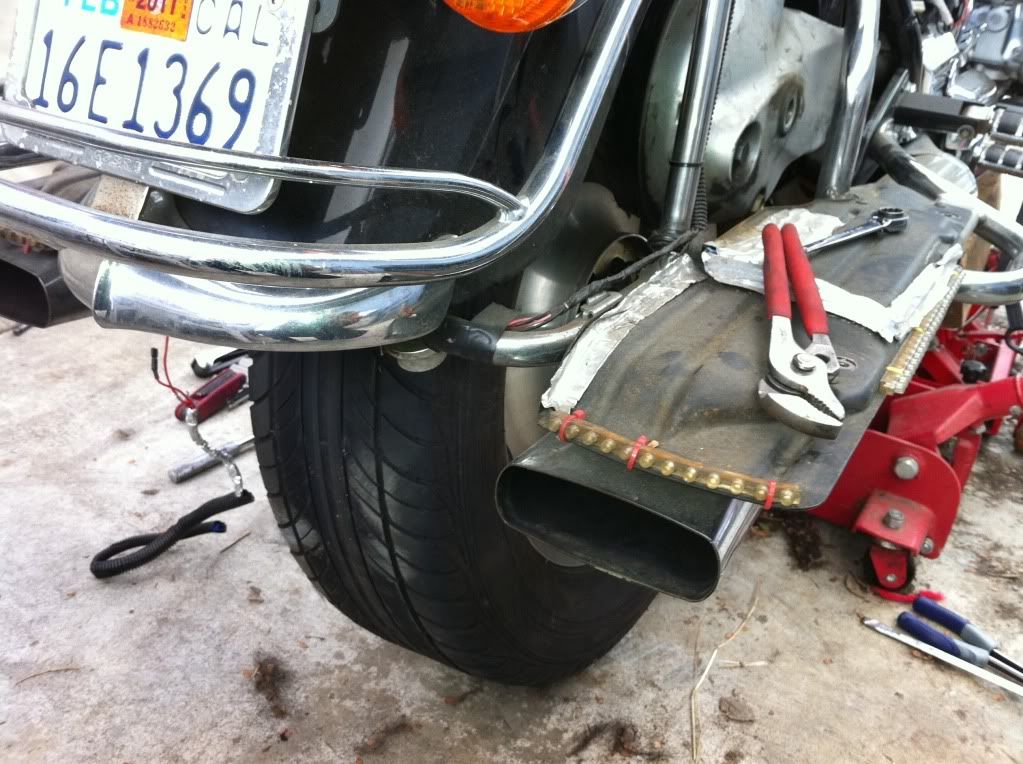 So I dont show the same exact picture twice. If you look at the rear of the underbag heatshield there is a 4" strip of LED's those are actually Red in color and I attached them to my brake light cicuit very nice hidden touch I will get a picture of that when the bags go back on when the light is not in use they are virtually unseen and when the brake is applied they light up the bottom of my RED saddle bags very nicely. 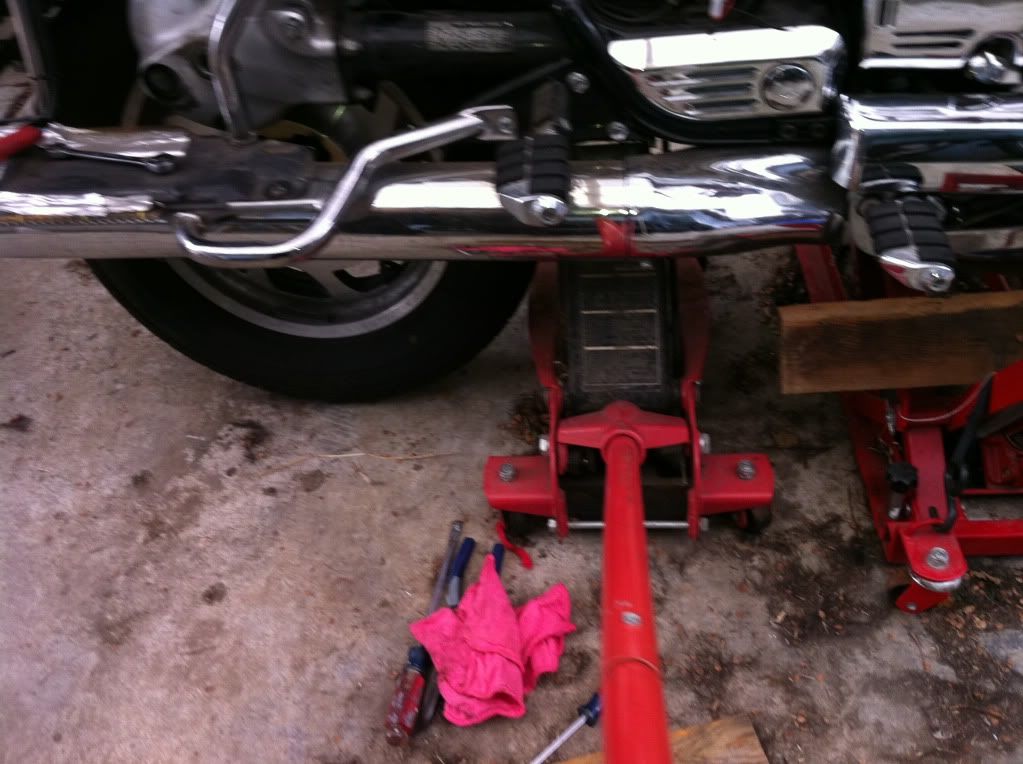 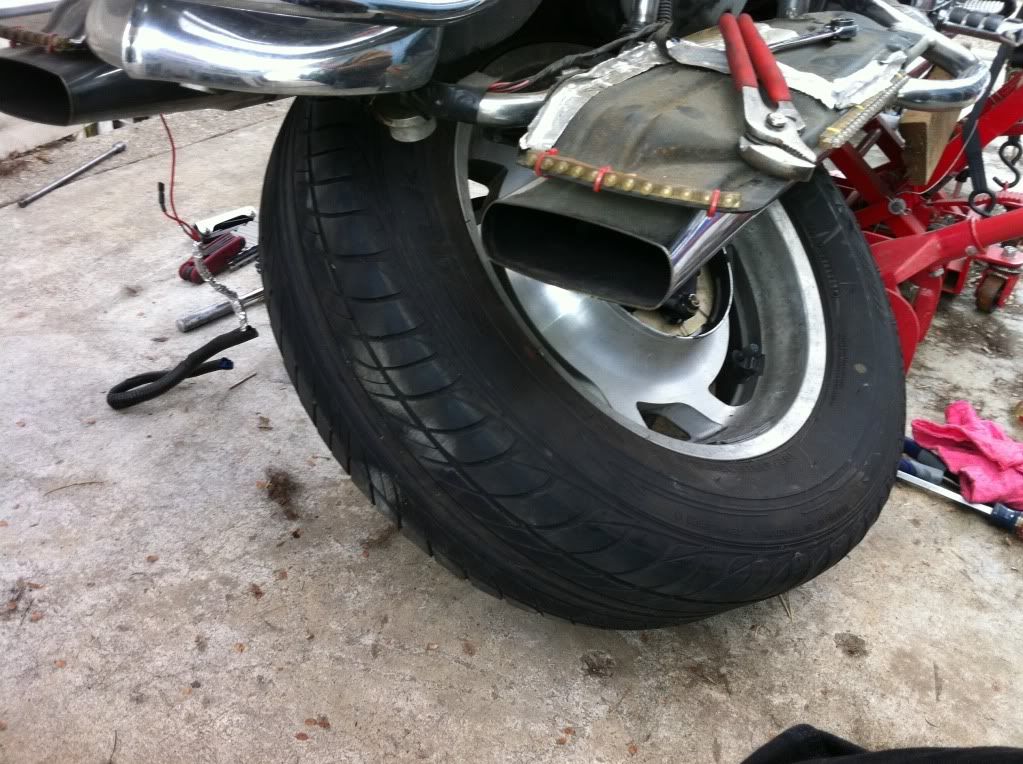 If you look closely you can see another strip of LED's on the side outer edge of the heat shield those are Yellow LED's and they are attached to the ,,,,,,,,, yep you figured it out the turn signals very low draw and very bright for those cagers that arent paying full attention . I will get video of the lights toward the end of this project. 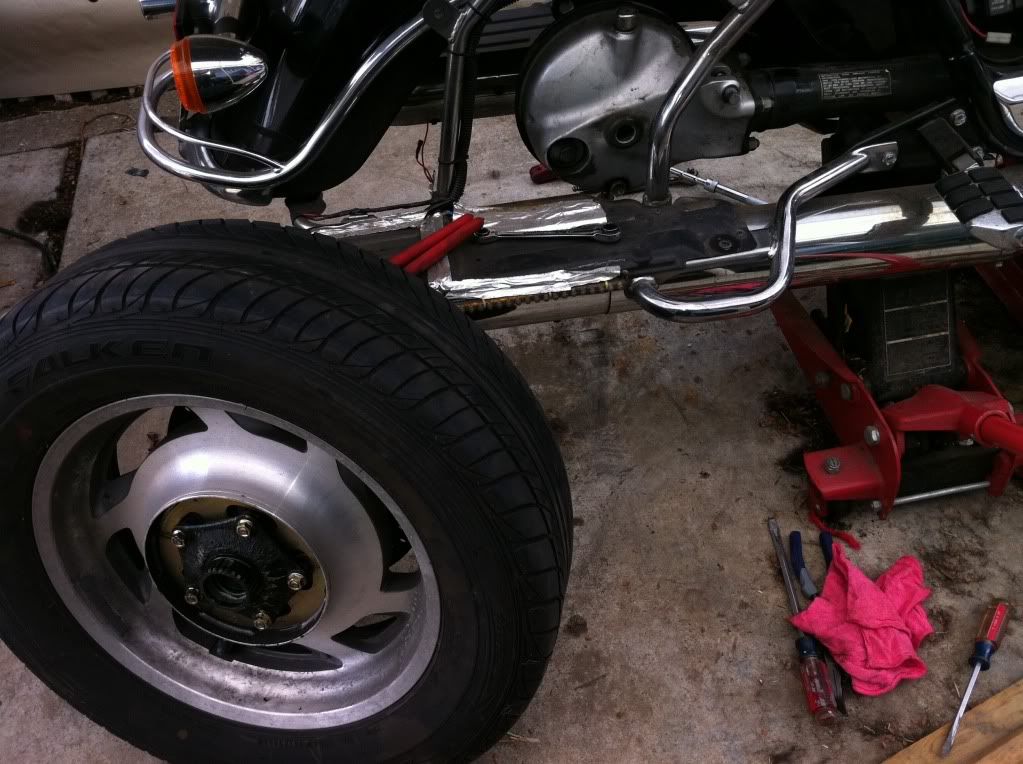 I will probably go back over to the dark side later but with the odd handling issues I have had I just gotta set my mind at ease by going back to a M/C specific tire for a little bit. |
|
|
|
« Last Edit: December 02, 2010, 05:20:14 PM by fordmano »
|
Logged
|
83GS550 93XR650L TARD! 97WR250 99ValkyrieI/S Tri-tone 01YZ125(x2) 05DRZ-125
|
|
|
fordmano
Member
Posts: 1457
San Jose, CA. 1999 I/S 232 miles when bought 11/05
San Jose, CA.
|
|
« Reply #56 on: December 02, 2010, 04:52:29 PM » |
|
I had better get on HDL and order some "O-rings" or at least check my stockpile of parts to see if I have any still. 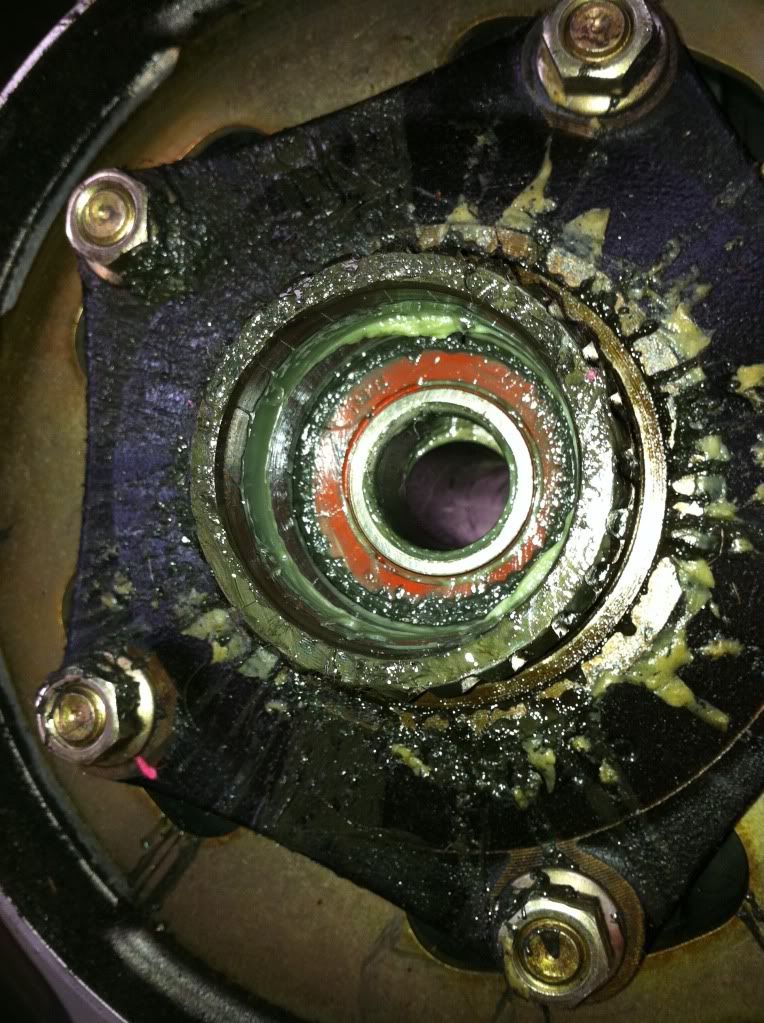 Do you think maybe last tire swap I used a little bit too much grease? That will get all cleaned up also. But I guess in most places to much lube is better than not enough I hate it when I run dry.  |
|
|
|
« Last Edit: February 16, 2011, 03:59:14 AM by fordmano »
|
Logged
|
83GS550 93XR650L TARD! 97WR250 99ValkyrieI/S Tri-tone 01YZ125(x2) 05DRZ-125
|
|
|
fordmano
Member
Posts: 1457
San Jose, CA. 1999 I/S 232 miles when bought 11/05
San Jose, CA.
|
|
« Reply #57 on: December 02, 2010, 04:55:19 PM » |
|
Well thats all for today kiddies, pain  is coming back and its getting dark and cold out  I will get something else done tomorrow for those  that are following along with all of this,  |
|
|
|
« Last Edit: December 02, 2010, 05:25:11 PM by fordmano »
|
Logged
|
83GS550 93XR650L TARD! 97WR250 99ValkyrieI/S Tri-tone 01YZ125(x2) 05DRZ-125
|
|
|
|
Jess from VA
|
|
« Reply #58 on: December 02, 2010, 05:47:31 PM » |
|
Nice touch with the LEDs, and the lube is just right............ but the wheels do look like a space shuttle that has just reentered the atmosphere. Keep on posting with pics.... these posts are what a bike forum is all about! |
|
|
|
|
Logged
|
|
|
|
fordmano
Member
Posts: 1457
San Jose, CA. 1999 I/S 232 miles when bought 11/05
San Jose, CA.
|
|
« Reply #59 on: December 02, 2010, 05:47:44 PM » |
|
I was looking around and found a couple pictures of how I used LED's in the fairing as additional turn signals for side front viewing Just though soembody would get an idea for thier own cool looking hidden LED lights. Here is the backside or inside of Fairing. 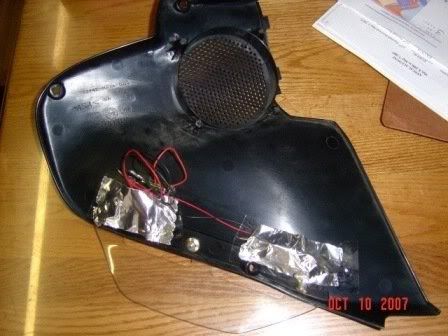 This is the front side very hard to see in day light but at night they show up well and illuminate the entire clear platic wing or whatever it is called on the underside of the fairing. 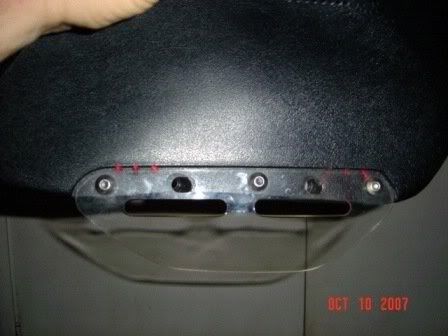 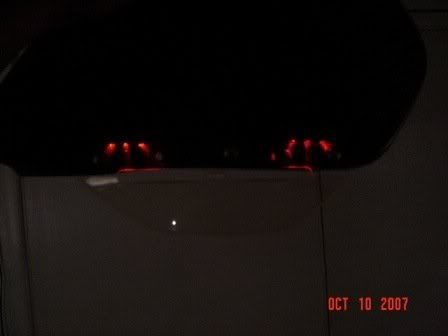 When riding the entire plastic shield glows around the edges and you dont really see the individual lights, I got my idea at a stationary store they have those flourescent clip boards and the edges look very cool when any light hits them so why not on these plastic wings. |
|
|
|
« Last Edit: February 16, 2011, 03:59:55 AM by fordmano »
|
Logged
|
83GS550 93XR650L TARD! 97WR250 99ValkyrieI/S Tri-tone 01YZ125(x2) 05DRZ-125
|
|
|
|
Ricky-D
|
|
« Reply #60 on: December 03, 2010, 09:39:21 AM » |
|
Yep, you can remove the rear tire that way - Ok.
Be sure you support the tire because the danger is the u-joint will crack the bearing cups within the u-joint if all the weight is transferred to that part of the drive train.
You'll hear them crack!
***
|
|
|
|
|
Logged
|
2000_Valkyrie_Interstate
|
|
|
fordmano
Member
Posts: 1457
San Jose, CA. 1999 I/S 232 miles when bought 11/05
San Jose, CA.
|
|
« Reply #61 on: December 03, 2010, 10:18:46 AM » |
|
Yes, you are correct there Ricky-D.
I guess there are a lot of little steps like that one that I am forgetting to ad in or maybe I unconsciously figure the pictures or the knowledge folks Already have will guide them past what I did not type. Somewhere in my pictures if you look closely you will see a standard floor jack under the bike as well as the cycle lift and guess where it is located under the very furthest front part of the swing arm as to support said swing arm allowing me to raise and lower as needed to facilitate the removal and installation of the rear rim and tire assembly.
Sir I thank you for your expert advice and anyone else that happens to notice I missed anything feel free to add to this thread.
Please keep in mind I am not a professional nor am I trying to create a pictorial shop manual, I am a untrained BOZO that is sharing some of the highlights of a few tasks I am performing.
Thanks
Matt
|
|
|
|
|
Logged
|
83GS550 93XR650L TARD! 97WR250 99ValkyrieI/S Tri-tone 01YZ125(x2) 05DRZ-125
|
|
|
|
Kaiser
|
|
« Reply #62 on: December 03, 2010, 01:38:24 PM » |
|
Please keep in mind I am not a professional nor am I trying to create a pictorial shop manual, I am a untrained BOZO that is sharing some of the highlights of a few tasks I am performing.
Dang - after seeing what you are capable of doing - I sure wish I was an untrained BOZO. Oh wait a minute - I am. Well then, I guess I was an untrained BOZO with some of the skillz you've got. Nice work and thanks for all the pictures. I for one truly appreciate your efforts. Hope it's nice weather where you are at when you get the bike all back together again. |
|
|
|
|
Logged
|
|
|
|
Tundra
Member
Posts: 3882
2014 Valkyrie 1800
Seminole, Florida
|
|
« Reply #63 on: December 05, 2010, 07:52:32 AM » |
|
That's one way of doing it, do every Valkyrie project all at once Tear her down once and get it ALL done. It's taken me years to do everything your doing in one shot. You should have many happy, trouble free miles. Nice job, nice post |
|
|
|
|
Logged
|
If you can't be a good example: be a WARNING!!
|
|
|
fordmano
Member
Posts: 1457
San Jose, CA. 1999 I/S 232 miles when bought 11/05
San Jose, CA.
|
|
« Reply #64 on: December 07, 2010, 11:54:10 PM » |
|
Hello to all again, I am back at it. Been very sore with the shoulder and short on time with being back to work on my wonderful schedule 8:00pm-4:00am Tues.-Sat. nights. So I managed to get one of the little things started that I wanted to get taken care of during this long list of changes. I addeed a second set of LED's under my Saddle bags as auxilary brake lights. This is what I had done early last year, a single row of LED's 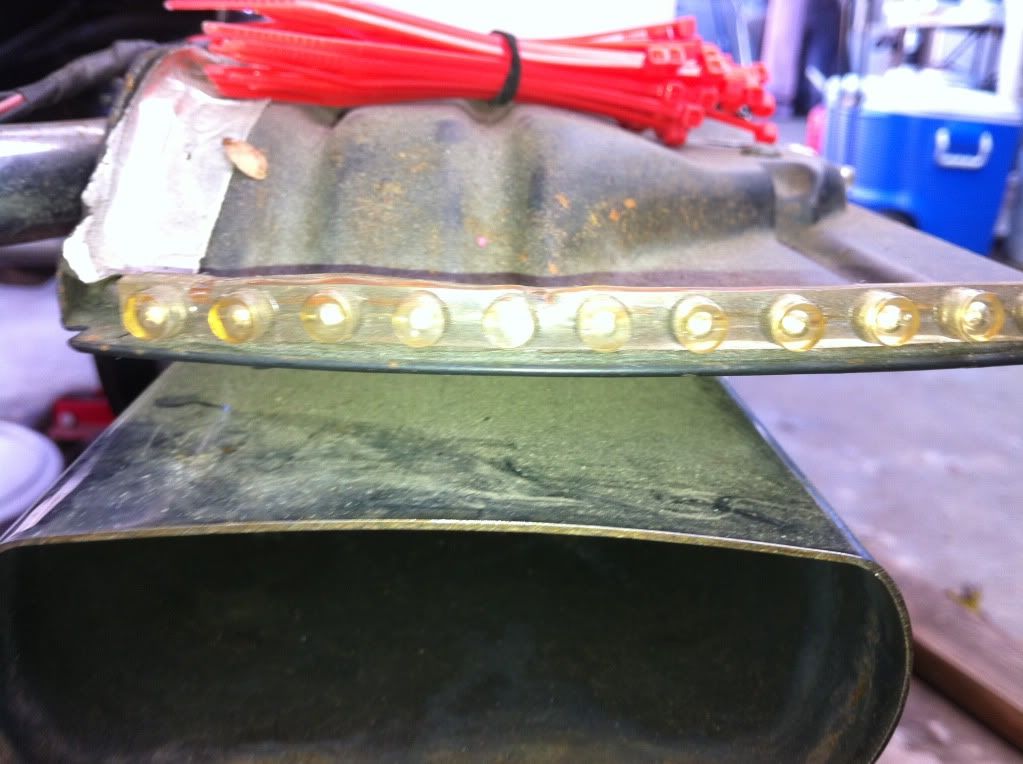 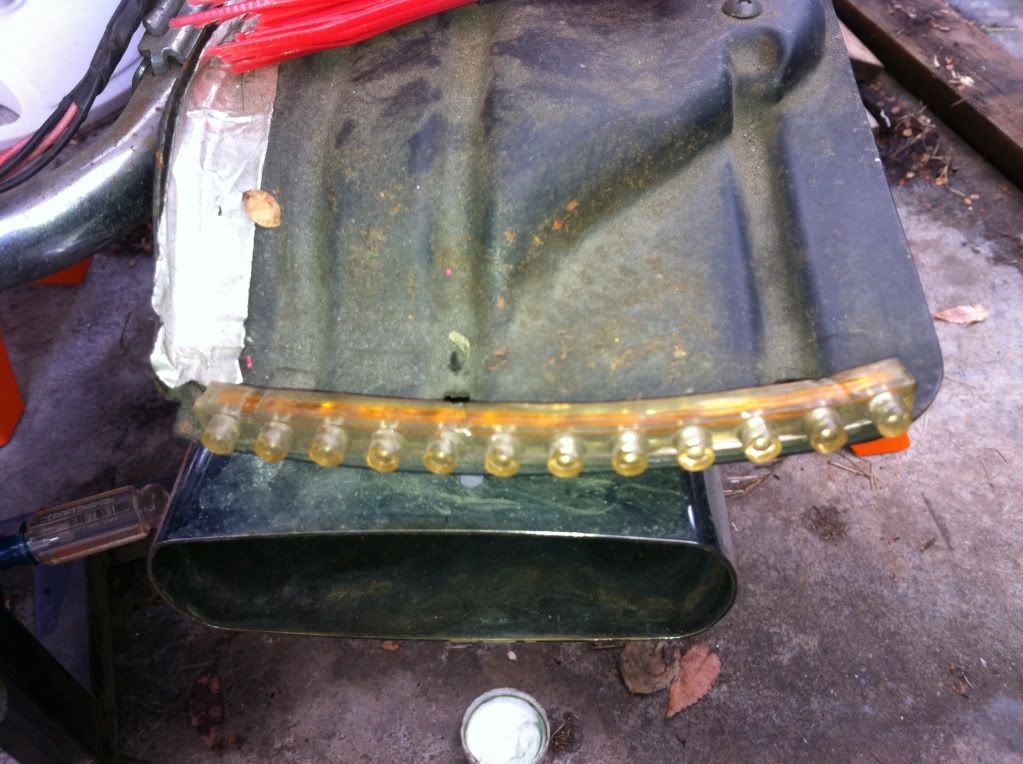 And this is how they looked when lit up. 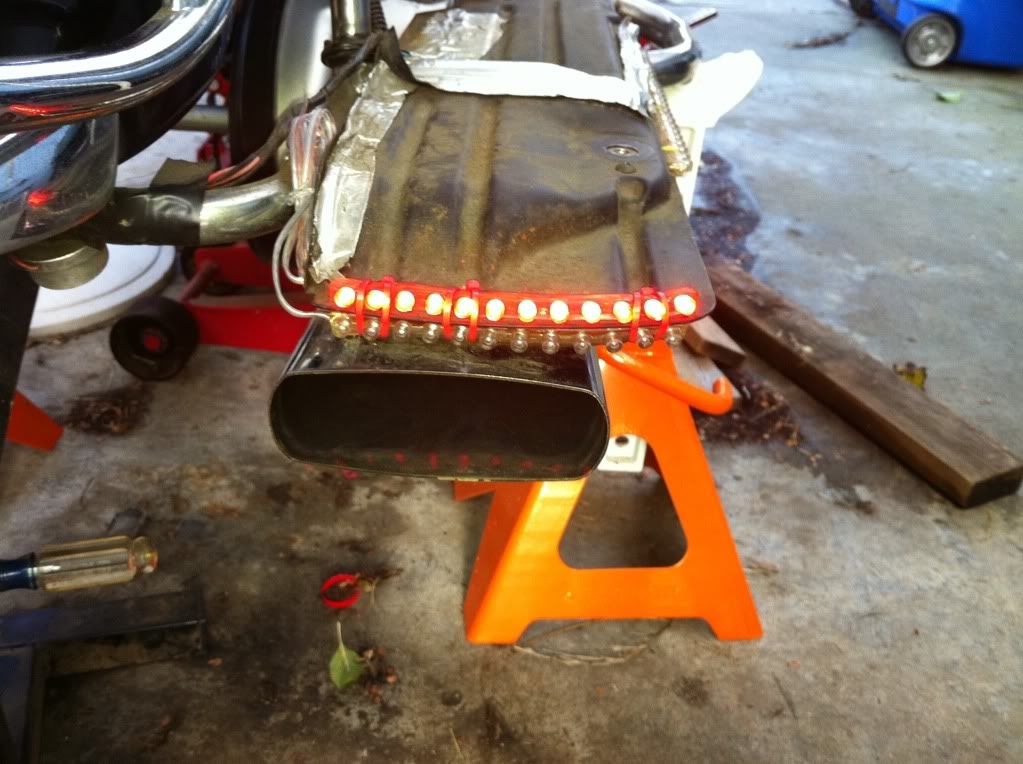 Yes I know there are 2 strips installed in this picture but I had forgotten to take a picture with what one strip lit up looked like. 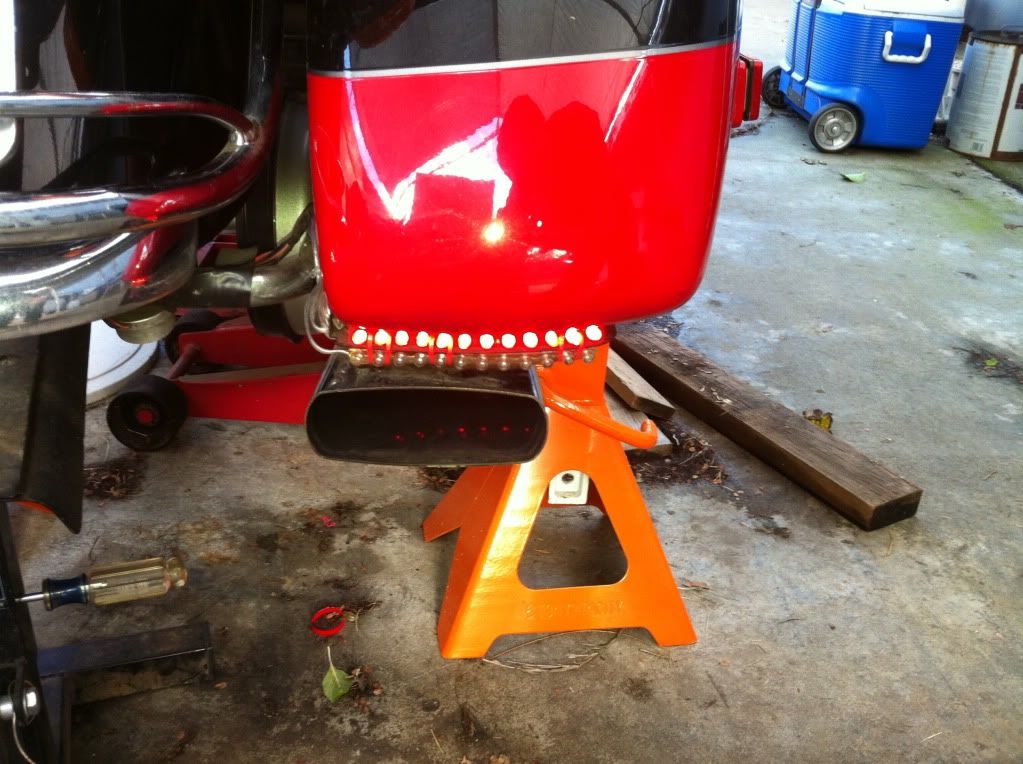 Not too shabby in my mind. I almost forgot to share the info of where I found these LED's they are VERY reliable and VERY bright. 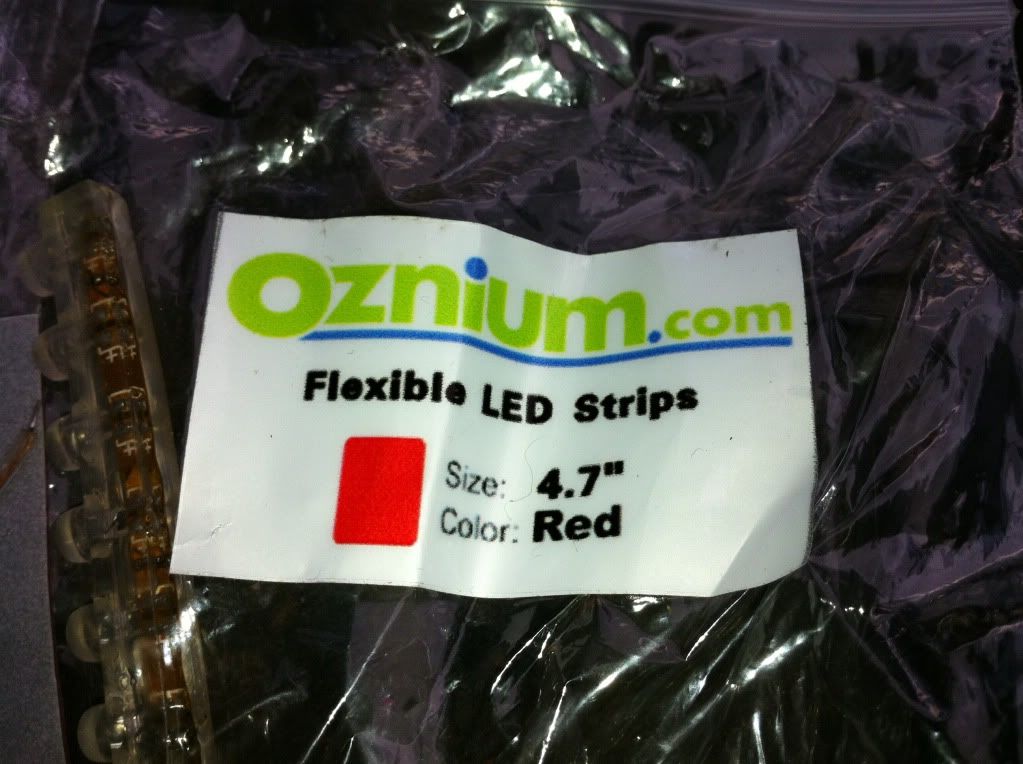 |
|
|
|
« Last Edit: December 08, 2010, 12:24:54 AM by fordmano »
|
Logged
|
83GS550 93XR650L TARD! 97WR250 99ValkyrieI/S Tri-tone 01YZ125(x2) 05DRZ-125
|
|
|
fordmano
Member
Posts: 1457
San Jose, CA. 1999 I/S 232 miles when bought 11/05
San Jose, CA.
|
|
« Reply #65 on: December 08, 2010, 12:05:51 AM » |
|
Now for the install of the second strip, I will get pictures of the wiring in the next day or so. I did however did a very simple tap and splice type of install I just tagged them into the brake light wires under the seat. I need to pull ALL of my old wiring projects and start over so I can make some room for my Audiovox cruise control to reside under my seat.  I used the double back tape that came with the lights but I also drilled 3 holes through the heatsheild to run little zip-ties just for safety. I just used some rubbing alcohol and paper towels to clean the mounting surface, the set I installed last year were still very solidly stuck in place after many thousand miles of riding and all types of mild California weather.  As you can se I did not clean up the wiring at this point I was trying to hurry up and get you some pictures 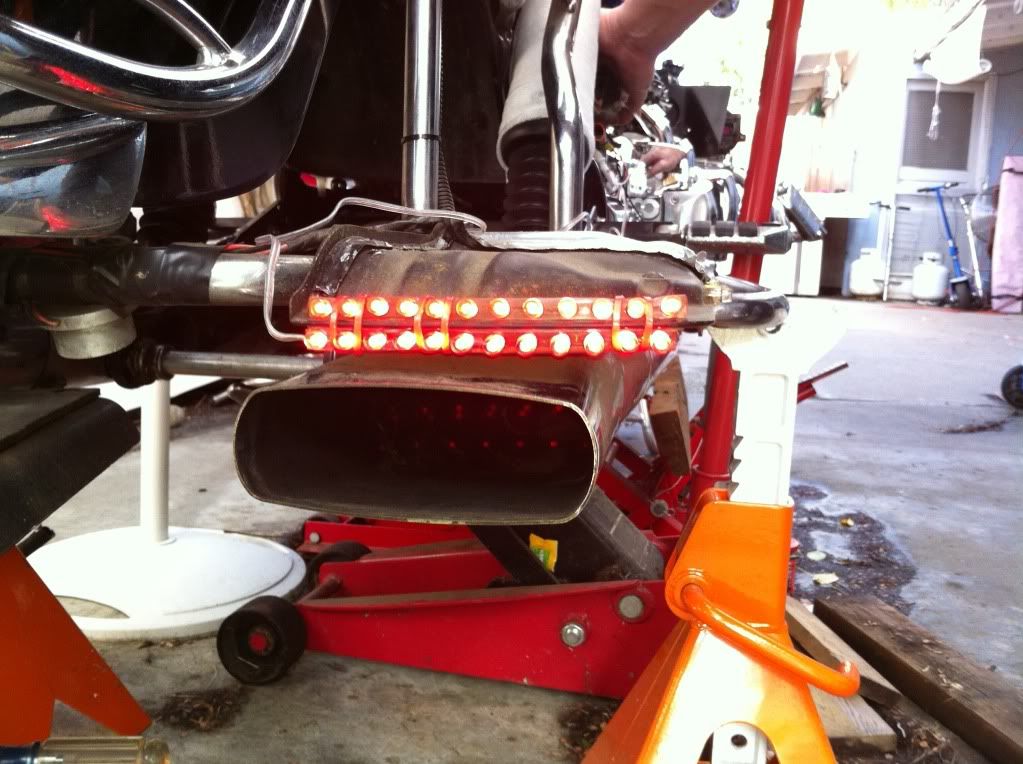 And now for the best picture as of yet for this step of the LED installs 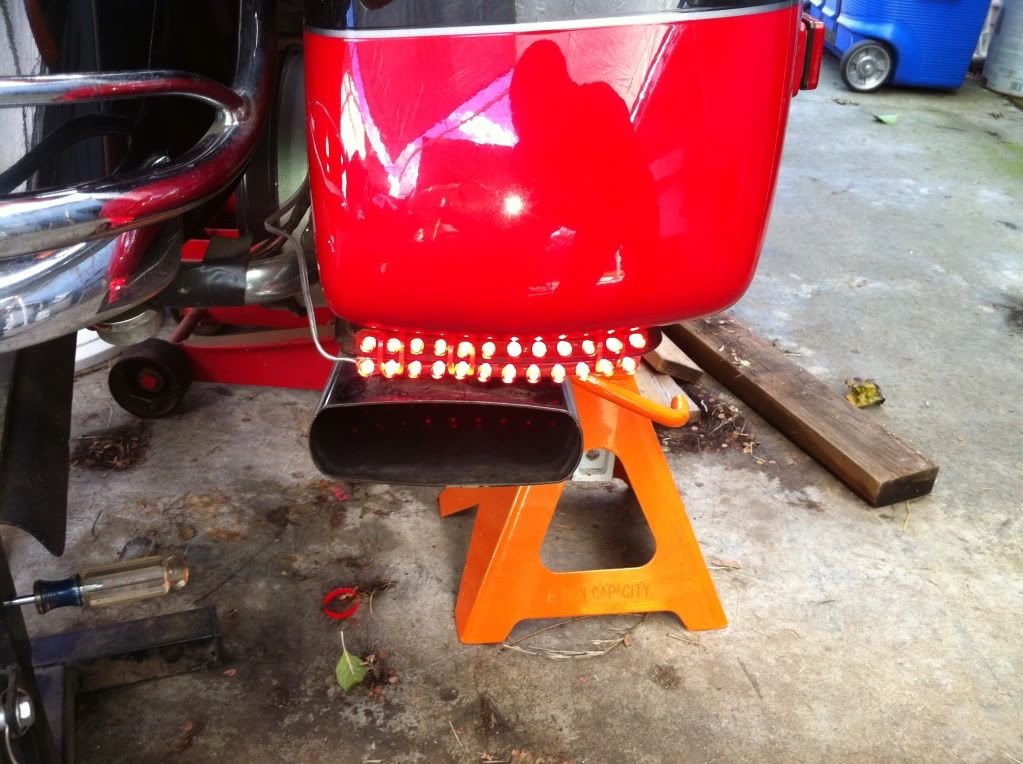 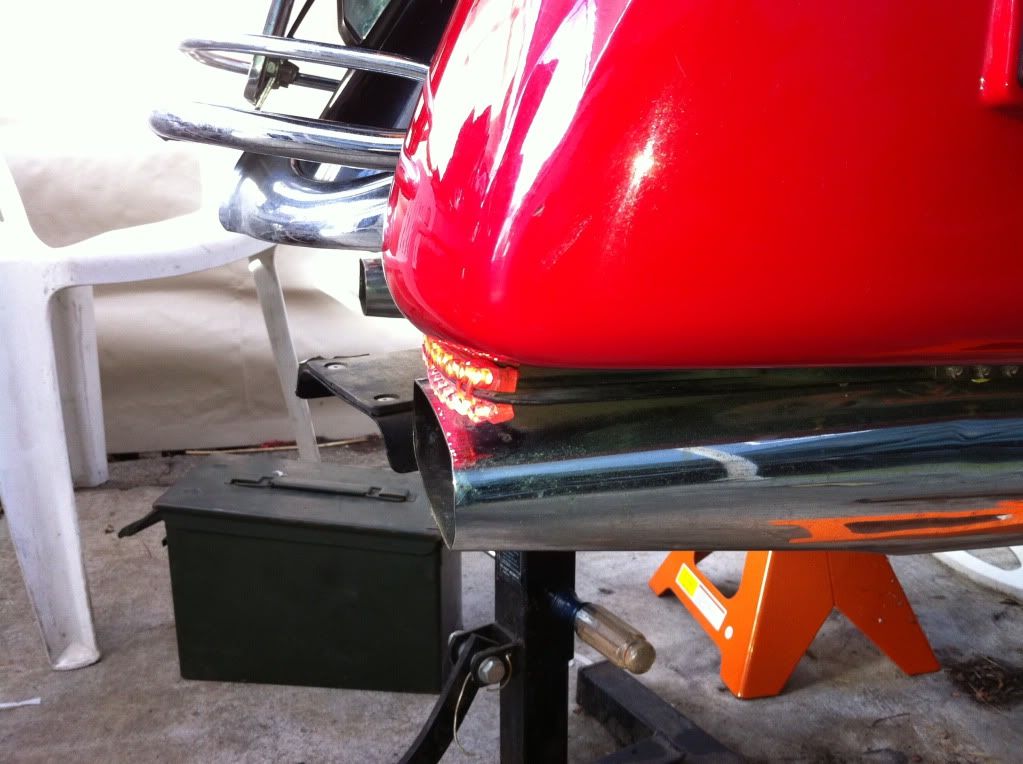 |
|
|
|
« Last Edit: February 16, 2011, 04:07:48 AM by fordmano »
|
Logged
|
83GS550 93XR650L TARD! 97WR250 99ValkyrieI/S Tri-tone 01YZ125(x2) 05DRZ-125
|
|
|
fordmano
Member
Posts: 1457
San Jose, CA. 1999 I/S 232 miles when bought 11/05
San Jose, CA.
|
|
« Reply #66 on: December 08, 2010, 12:15:38 AM » |
|
Here is a old picture of another of their products I used these as a running light I got a lot of attention with these they are 1WATT LED flood lights designed for the boating world and for lighting stairways. 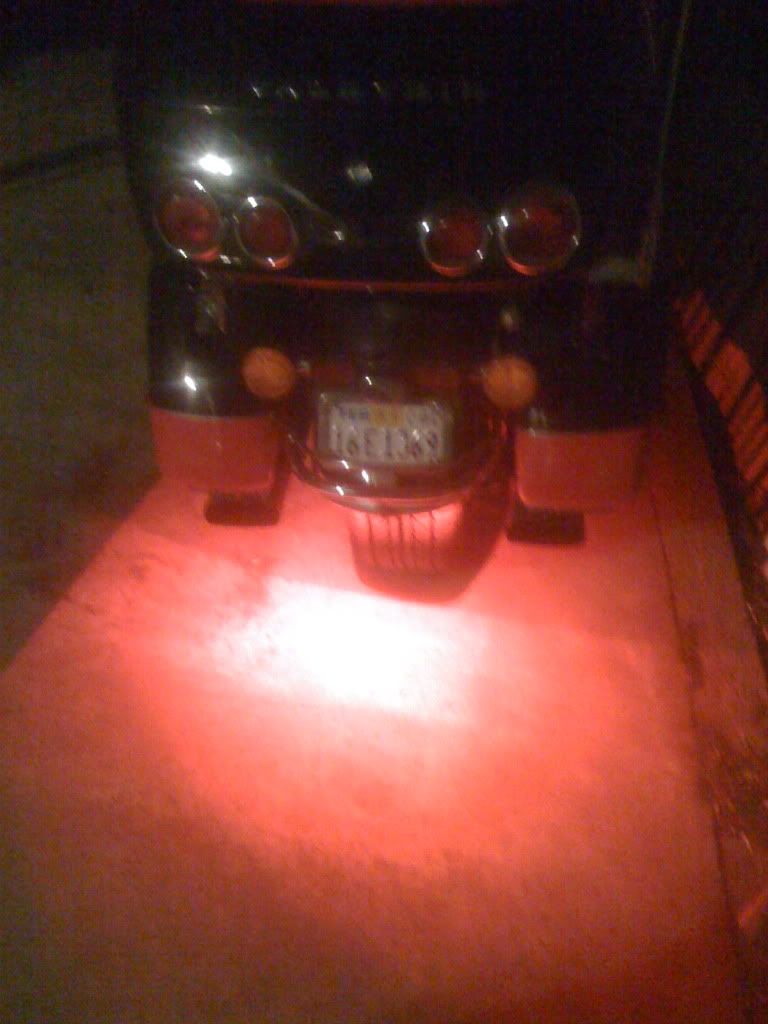 I will be putting a small strip of reflective tape on the lower side of the LED's to help be sure any extra heat from the exhuast tip does not ruin them. Welll I got to a stop point when I realized that I did not have a new set of blade connectors so I could just unplug the existing ones that had attached to the taps and wire the new set of LED's at the same location instead of making another splice. So I started on the Progressive 416's. I ONLY got them put on the mounts since I had the rims still at the shop having new rubber installed I figured I would run the air lines after I get my wiring cleaned up since I will be using the entire length of air line coiled up under the seat as to allow for a larger volume of air that can expand when needed. My father inlaw and I have talked about this for many hours. He is sure that the volume that is in a short line and the shock it self is NOT enough volume and not enough total expansion area. So this is my temporary solution to prove or disprove his theory. Side one. 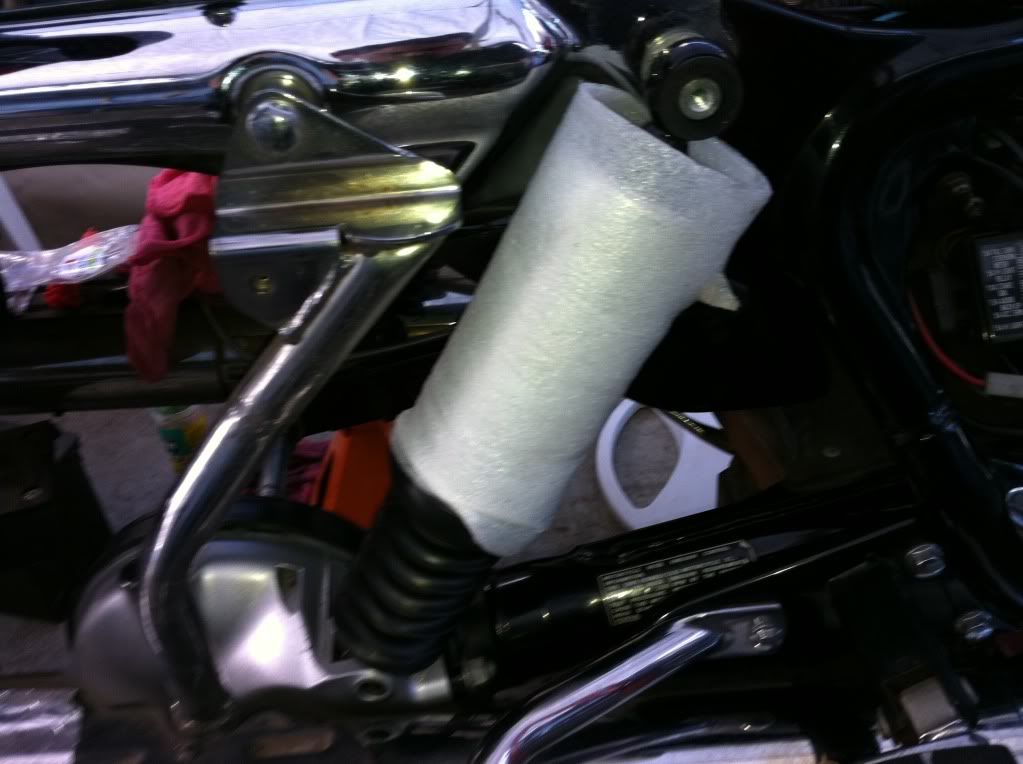 Side two. 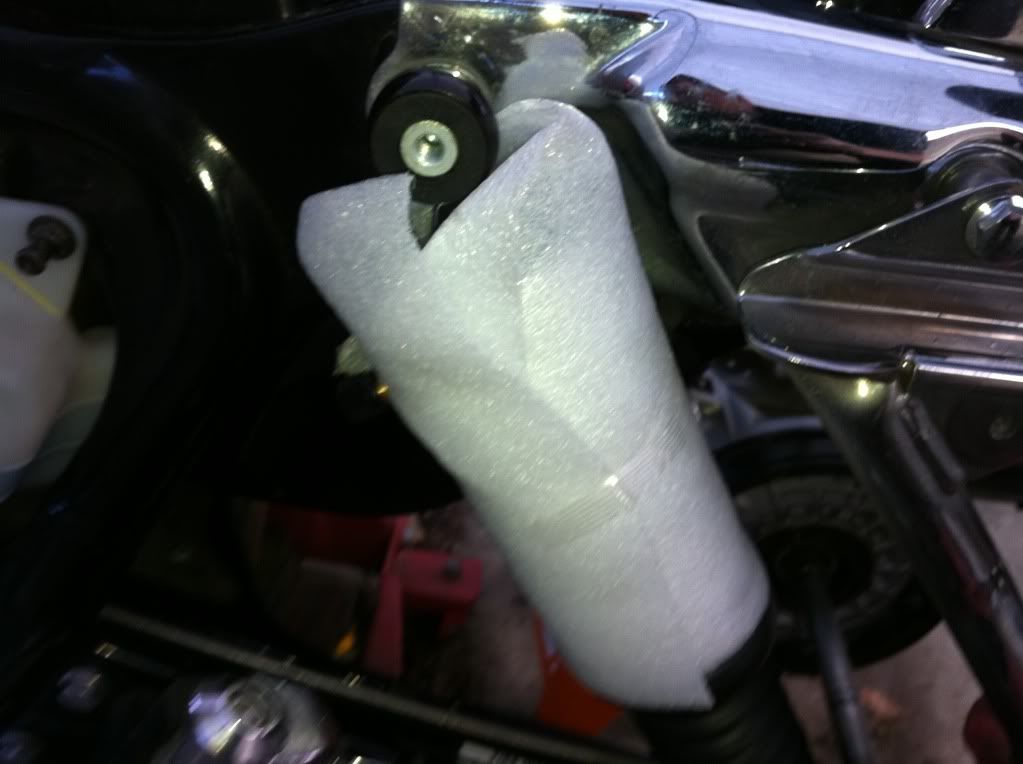 |
|
|
|
« Last Edit: December 08, 2010, 03:09:28 AM by fordmano »
|
Logged
|
83GS550 93XR650L TARD! 97WR250 99ValkyrieI/S Tri-tone 01YZ125(x2) 05DRZ-125
|
|
|
fordmano
Member
Posts: 1457
San Jose, CA. 1999 I/S 232 miles when bought 11/05
San Jose, CA.
|
|
« Reply #67 on: December 08, 2010, 09:09:13 PM » |
|
Well I got my wheels back after having new rubber installed, this will be the FIRST time I have ever had 2 brand new tires on this bike at the same time and also the first time I have ever had a brand new rear M/C tire on her at all. When I bought my Fat Lady she still had the factory origional tires that were almost 7 years old and only had 232 miles on them.. Tire Number one. 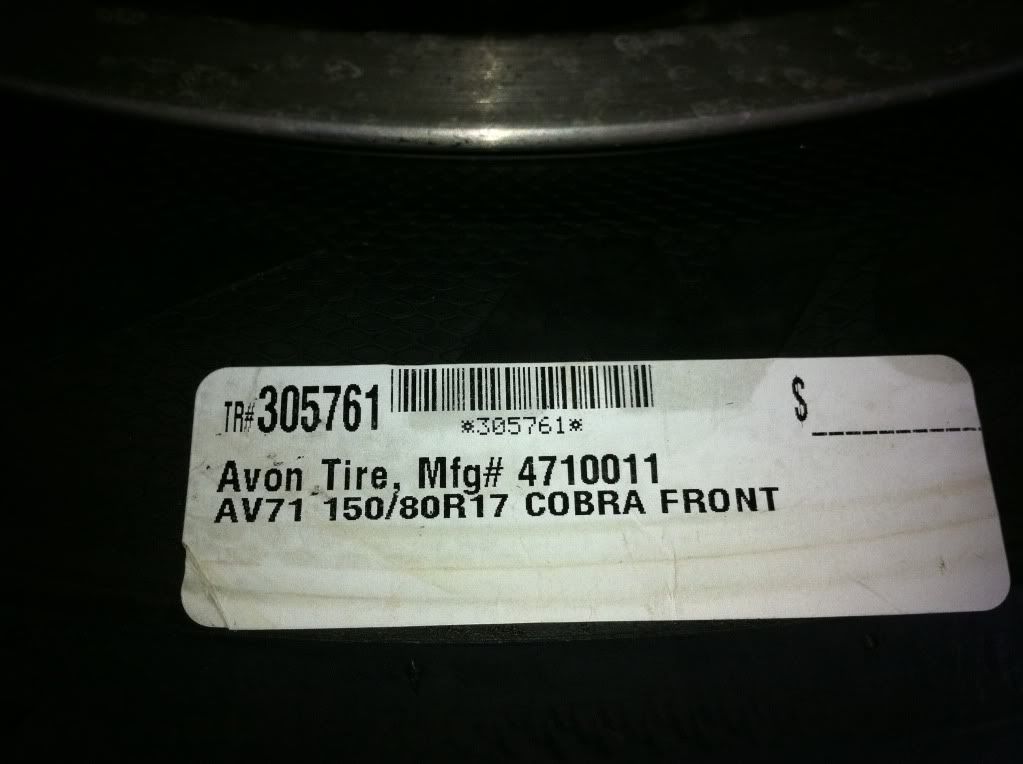 Tire Number two. 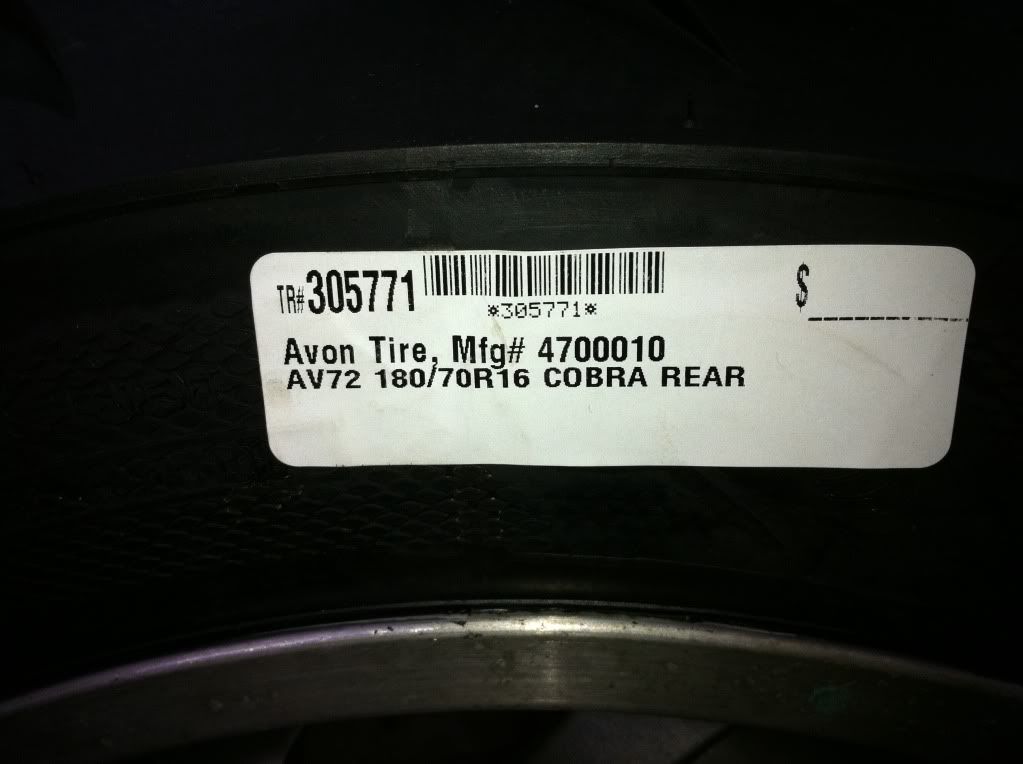 Now the pretty new set. Thank you very much "Santa Clara Cycles", great price and great service.  I really need to spend a couple hours real soon and clean up these wheels, I guess that will maybe happen next Monday. |
|
|
|
|
Logged
|
83GS550 93XR650L TARD! 97WR250 99ValkyrieI/S Tri-tone 01YZ125(x2) 05DRZ-125
|
|
|
fordmano
Member
Posts: 1457
San Jose, CA. 1999 I/S 232 miles when bought 11/05
San Jose, CA.
|
|
« Reply #68 on: December 16, 2010, 09:55:00 PM » |
|
Well I managed to find a few minutes this afternoon So Ii modified my battery box to allow a bit more room underseat for wiring. DUH!!! so I now wonder why I never thought of this before, its a NO brainer especially on an I/S since our tool pouches are stored in the left side saddle bag and why or better yet who still carries the owners manual with them? The only thing I have ever looked up in that book was the controls for the clock and the radio, it is stored safely in a Ziplock freezer bag in my humidity controlled Gun/Fire safe. A few before modification, well actually these were taken while I was cutting the center wall out. 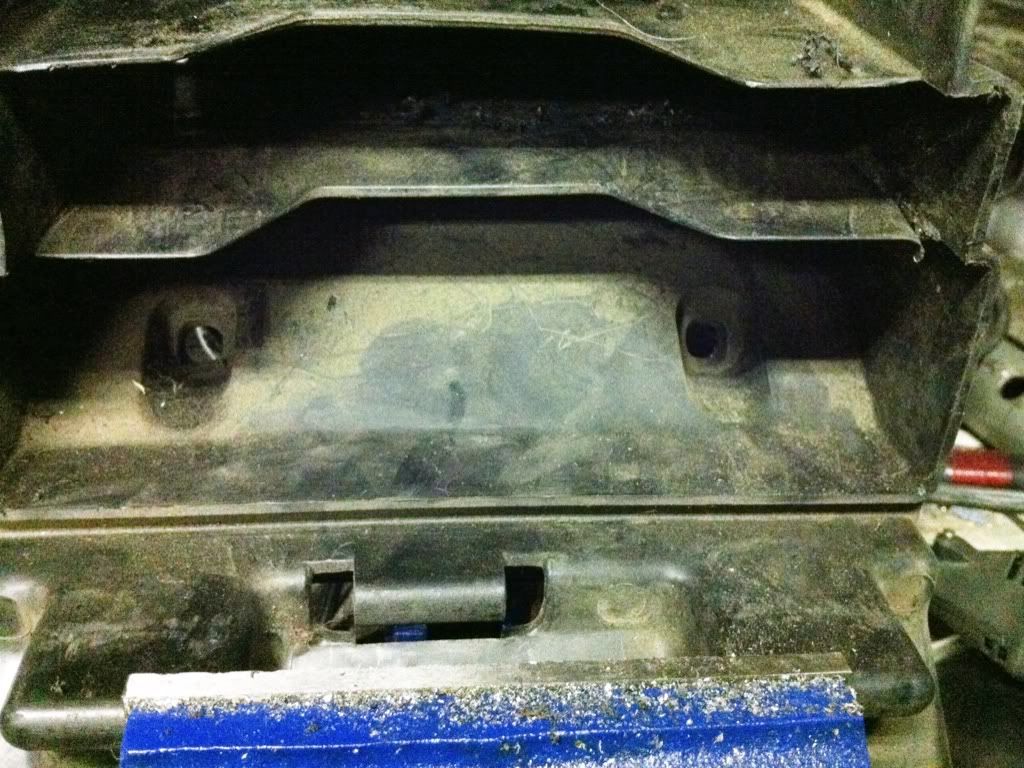 ____________________________________________________________________________ 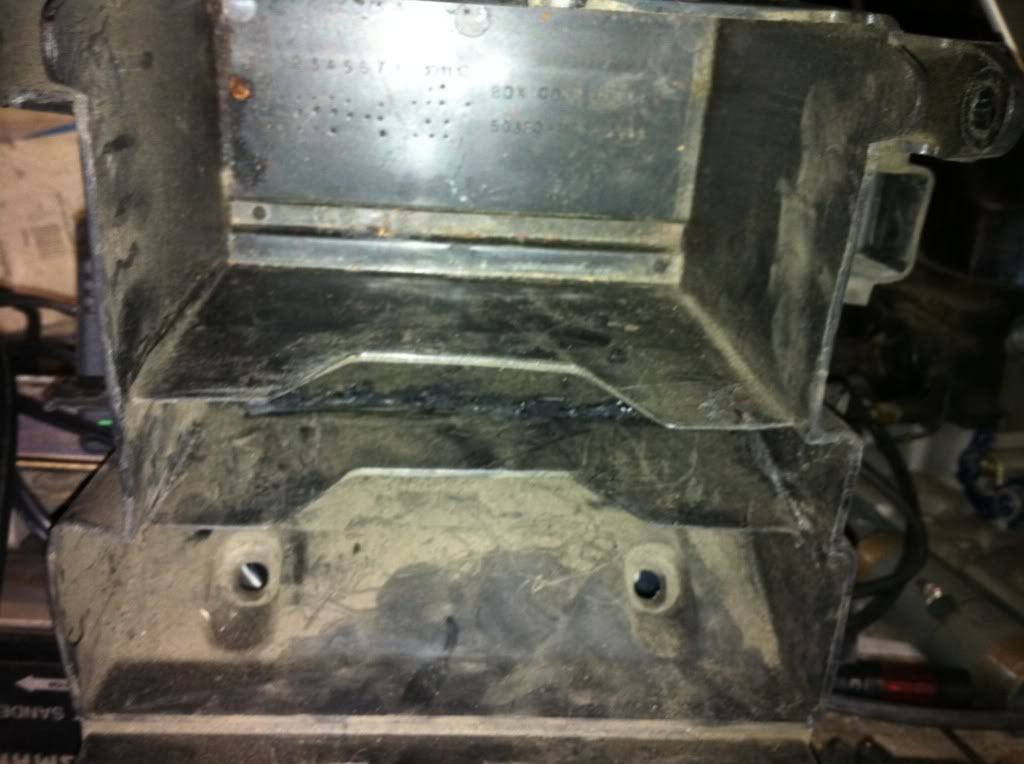 _____________________________________________________________________________ 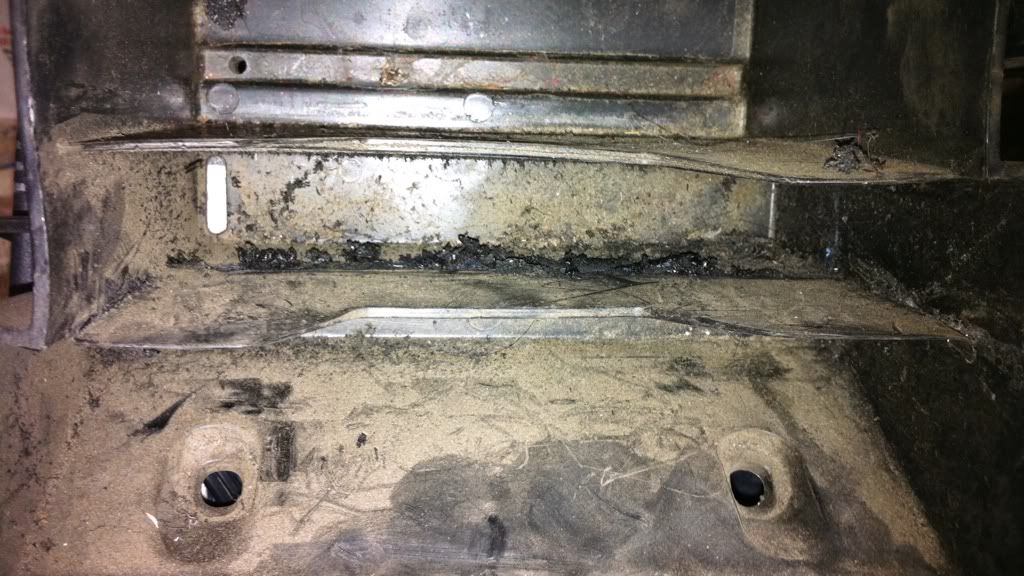 And now for a couple after getting it all cut out. 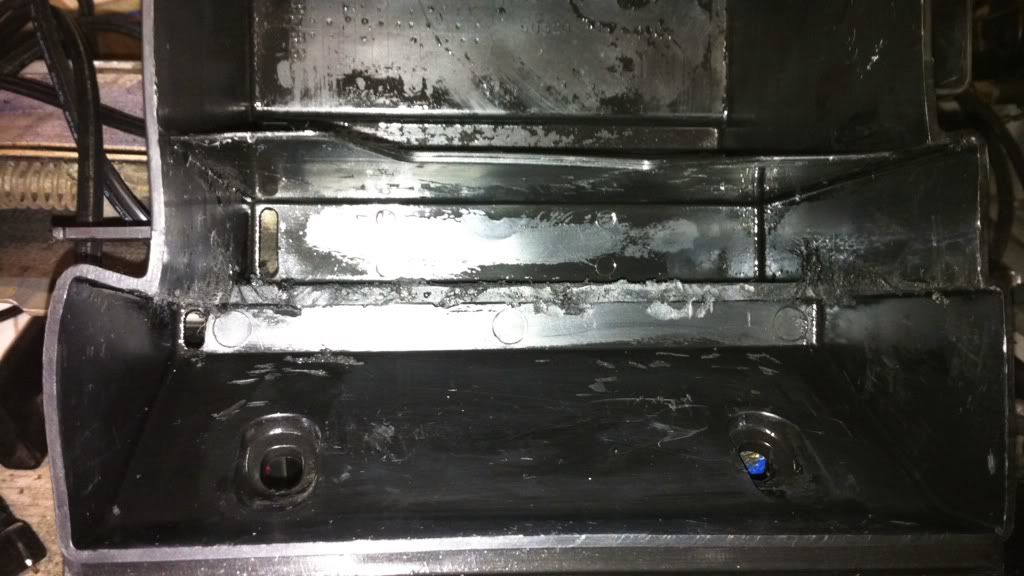 ________________________________________________________________________________ 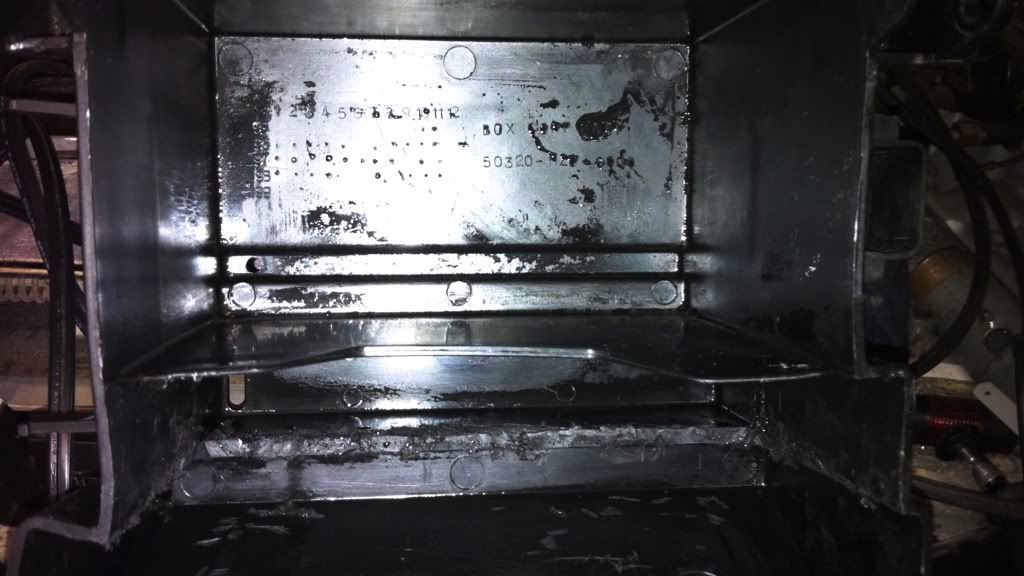 _______________________________________________________________________________ Now for one back in the bike.  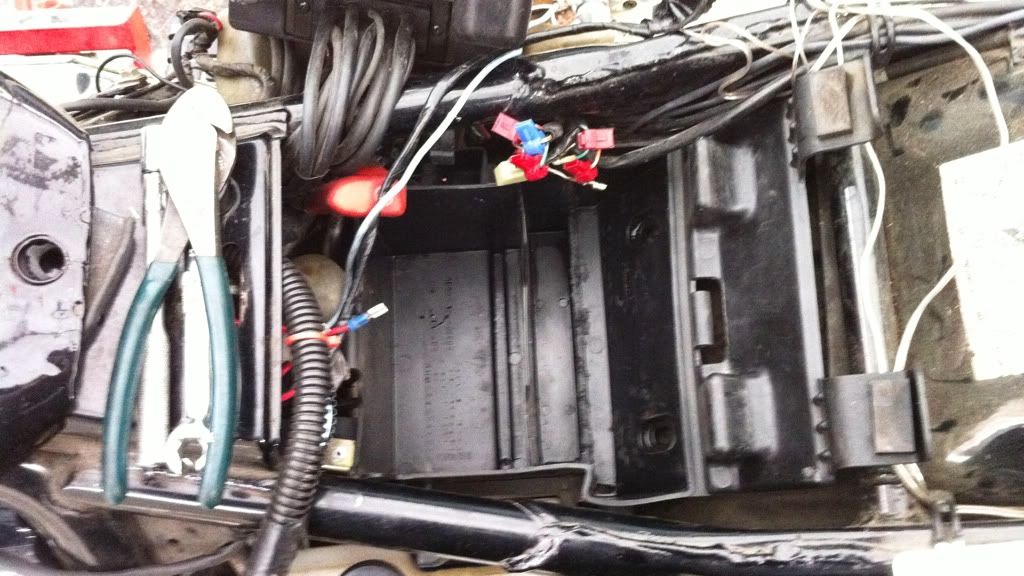 Well getting it back in was actually a LOT easier than getting it out  . I figured since it was out it was a good time to clean it up but being in a rush I forgot to clean up inside the frame of the bike at all. |
|
|
|
« Last Edit: December 16, 2010, 10:13:29 PM by fordmano »
|
Logged
|
83GS550 93XR650L TARD! 97WR250 99ValkyrieI/S Tri-tone 01YZ125(x2) 05DRZ-125
|
|
|
fordmano
Member
Posts: 1457
San Jose, CA. 1999 I/S 232 miles when bought 11/05
San Jose, CA.
|
|
« Reply #69 on: December 16, 2010, 10:08:04 PM » |
|
On another thread Bone asked about the LED's and what he would need to hook them up, well I only have the last picture above here that shows were I picked up the circuit for brake and turn lights when I added my LED's. Here below you can see what the side tap connectors look like, then you use a simple blade type wire connector and it just plugs into these when thay are snapped into place on a wire. 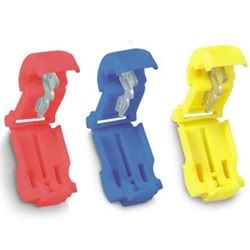 Hope fully I will get back on task with this since I will be off work for 10 days straight for Christmas, and all but one gift has been taken care of already. So I hope to post some real progress over this next week. |
|
|
|
« Last Edit: December 16, 2010, 10:16:29 PM by fordmano »
|
Logged
|
83GS550 93XR650L TARD! 97WR250 99ValkyrieI/S Tri-tone 01YZ125(x2) 05DRZ-125
|
|
|
gordonv
Member
Posts: 5766
VRCC # 31419
Richmond BC
|
|
« Reply #70 on: December 16, 2010, 10:17:06 PM » |
|
Well I managed to find a few minutes this afternoon So Ii modified my battery box to allow a bit more room underseat for wiring. DUH!!! so I now wonder why I never thought of this before, its a NO brainer especially on an I/S since our tool pouches are stored in the left side saddle bag and why or better yet who still carries the owners manual with them? The only thing I have ever looked up in that book was the controls for the clock and the radio, it is stored safely in a Ziplock freezer bag in my humidity controlled Gun/Fire safe.
Well now I get an answer to what I was thinking. Someone else mention they had their tools there in the battery box, and I have an IS also with the tools in my saddle bags. My owners manual is in a tupperware box with some other items and my insurance papers, I keep at the bottom of my bags also. |
|
|
|
|
Logged
|
1999 Black with custom paint IS |
|
|
|
Ricky-D
|
|
« Reply #71 on: December 17, 2010, 08:15:49 AM » |
|
That's very nice!
Regarding the Valkyrie took kit, I wonder if the kit has actually helped out someone that got stuck out in the boonies. It is a poor tool kit!
Much better to carry a tire plug kit with an inflating system.
More important to me to keep room for my beer coolers in the bags. Without them it would really be an emergency!
Jus sayin'
***
|
|
|
|
|
Logged
|
2000_Valkyrie_Interstate
|
|
|
fordmano
Member
Posts: 1457
San Jose, CA. 1999 I/S 232 miles when bought 11/05
San Jose, CA.
|
|
« Reply #72 on: December 25, 2010, 03:01:33 PM » |
|
Well I have gotten a few more things completed or at least worked on over tha last few day. I am only going to share the pictures for now,,, I will be back much later this evening or more than likely tomorrow and I will update these pictures with captions at that time so you will have to use your imagination for now. ******************************************************************** Updated 12/28/2010 Yep that is one YUCKY looking rim! 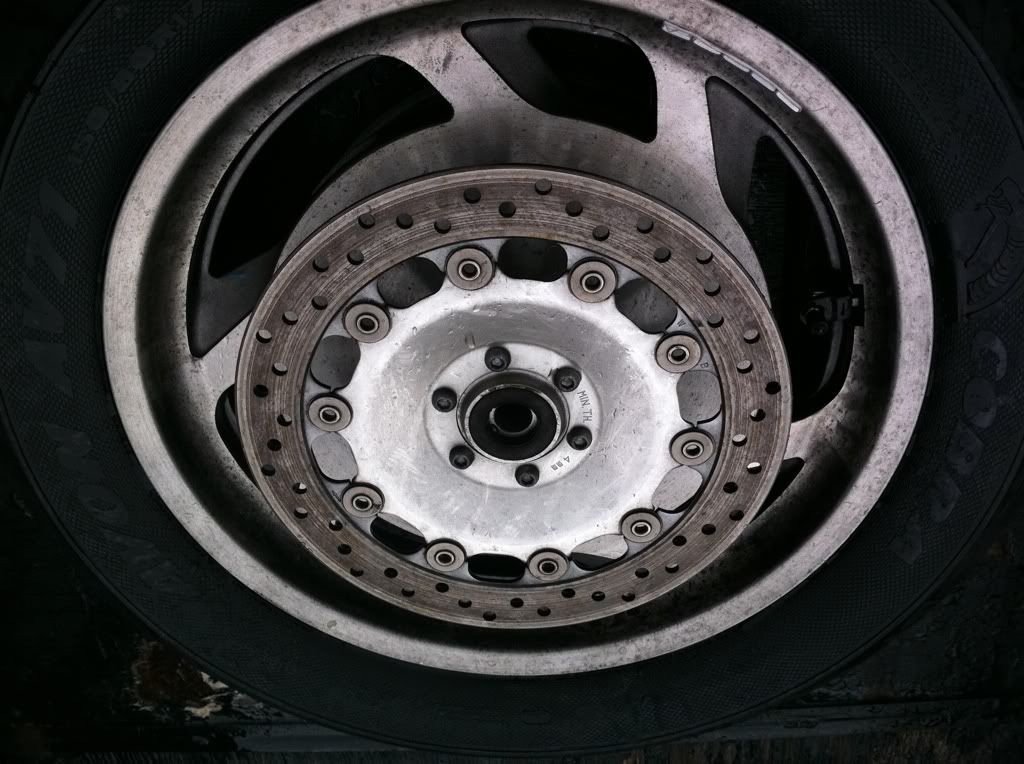 Doesn't this seem like alot of weight especially since there is also this much on the other side of the rim? 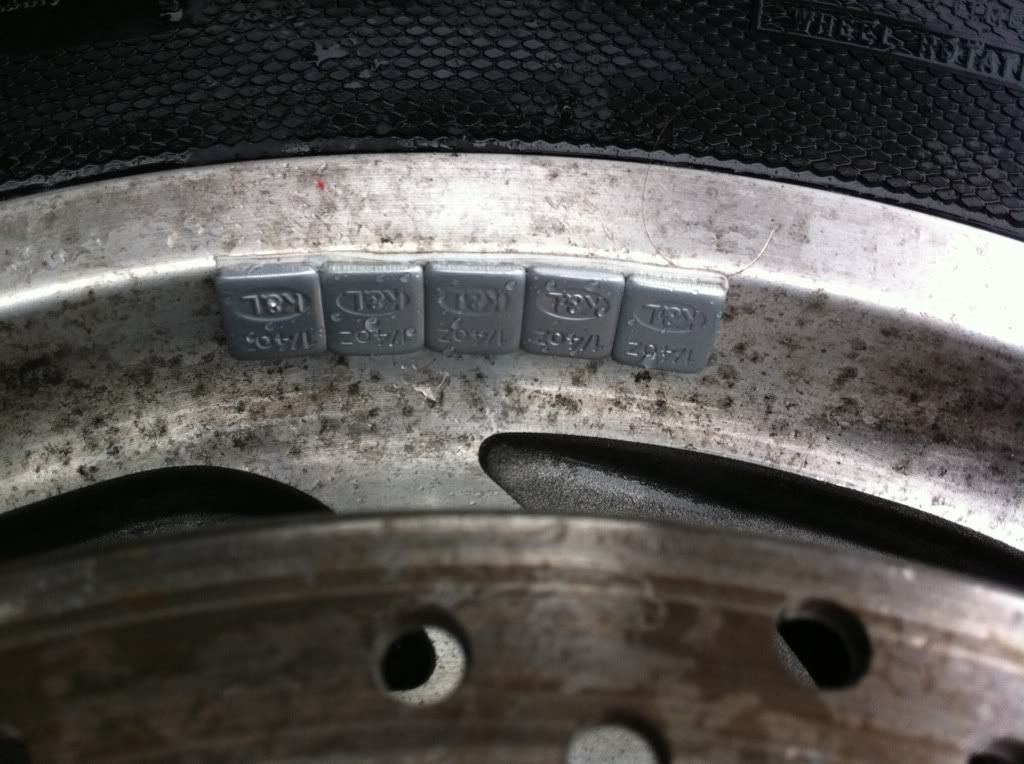 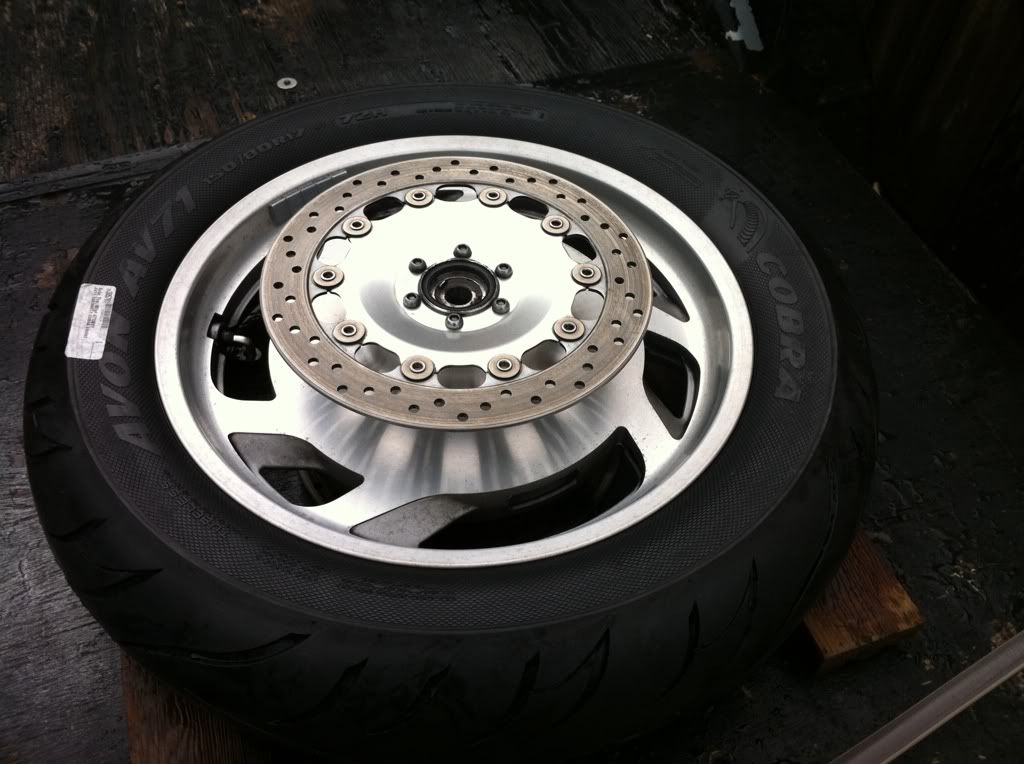 Now that is a LOT better I know it's not perfect or even close but My arm/shoulder can only handle so much scrubbing. This was accomplished with a simple off brand S.O.S. soap pad and about 15 minutes of scrubbing.. A lot nicer now. 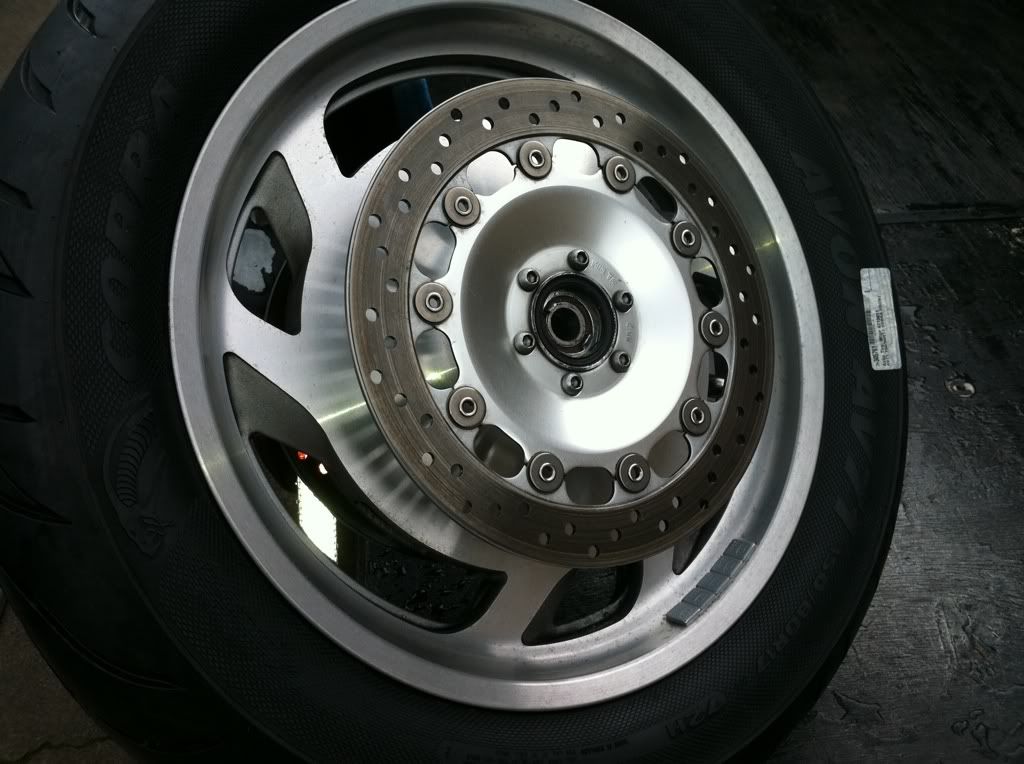 |
|
|
|
« Last Edit: December 29, 2010, 09:26:51 PM by fordmano »
|
Logged
|
83GS550 93XR650L TARD! 97WR250 99ValkyrieI/S Tri-tone 01YZ125(x2) 05DRZ-125
|
|
|
fordmano
Member
Posts: 1457
San Jose, CA. 1999 I/S 232 miles when bought 11/05
San Jose, CA.
|
|
« Reply #73 on: December 25, 2010, 03:02:26 PM » |
|
Ok I am now headed onto the Airline install for the Progressive 416's. First I need somewhere to mount the shrader valve ( sorry if thats spelled wrong). I decided for now I will mount it out back under the trunk so I am making a MULTI use bracket. I was planning on mounting an additional strip of LED's under the trunk for another brake light so why not just add a little hole to mount the air inlet. What do I have laying around that will look ok under there? how about this scrap of Aluminum angle about 2"x2" 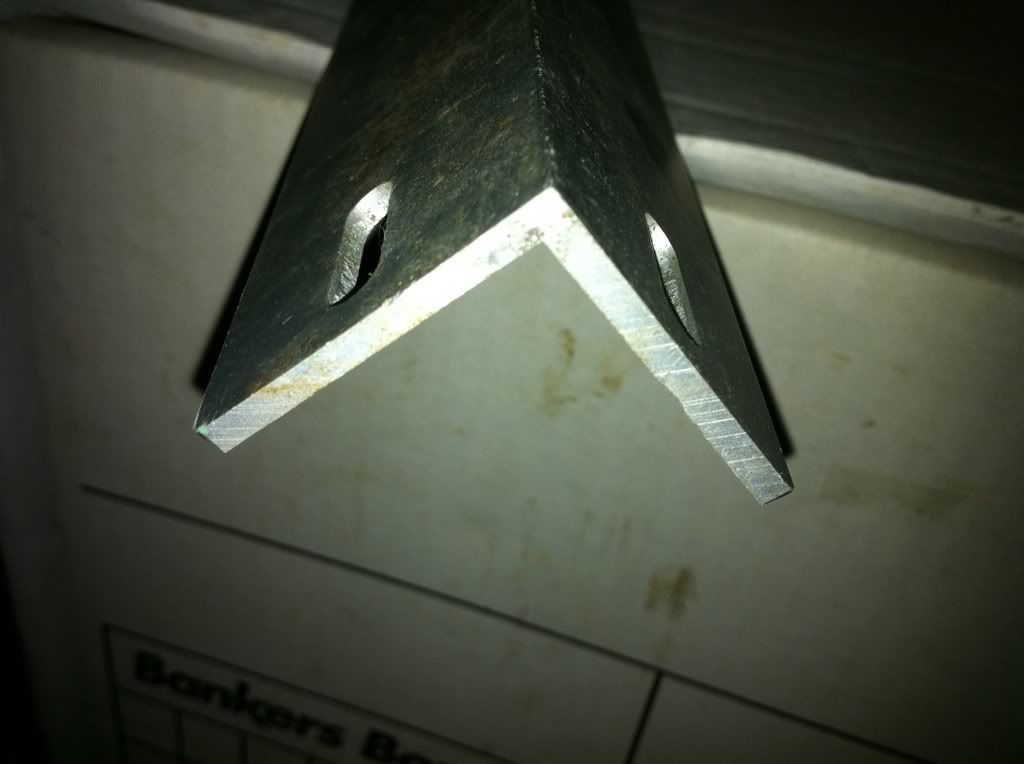 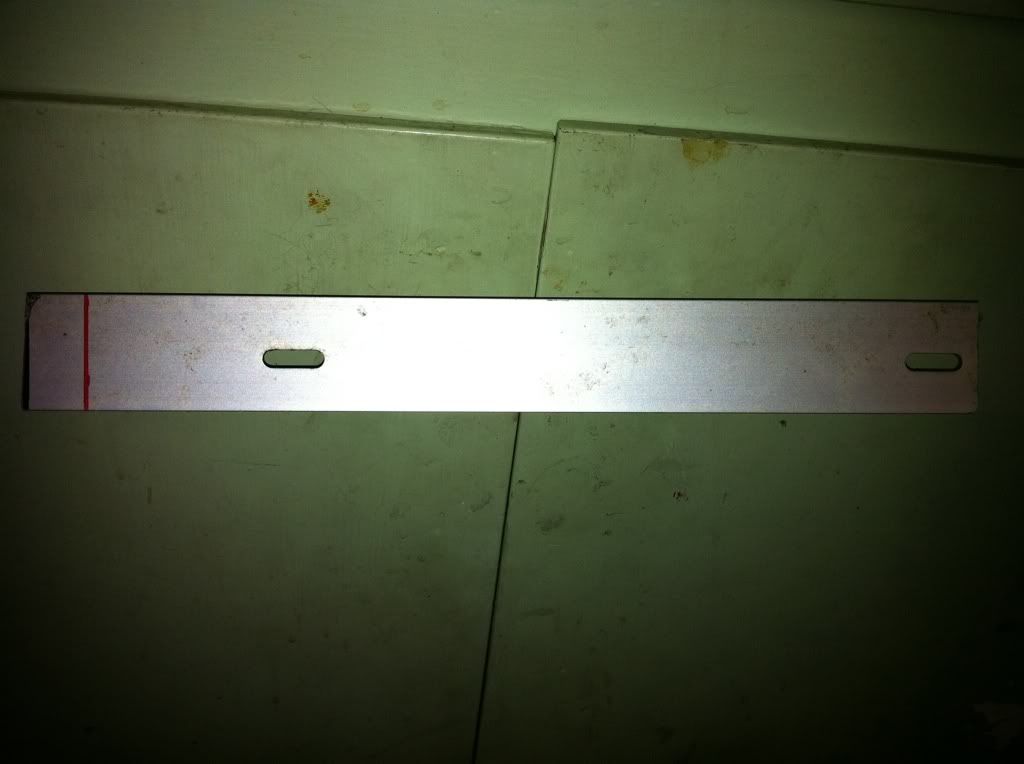 OK that will do just fine for a starting point. Not sure if I will try and polish it or paint it black to try and make it disappear? lets get it finished first then think about color. 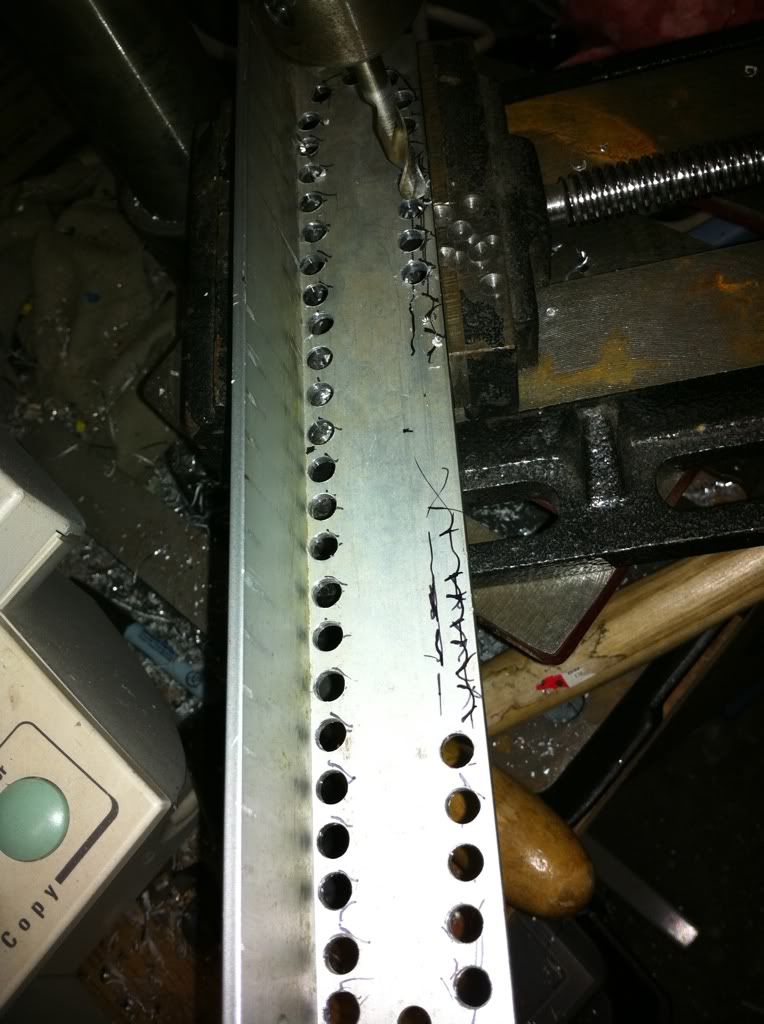 Now that was a PAIN to get all the holes drilled and this was done free hand it's is not perfect but it will be mostly out of sight until the brakes come on. 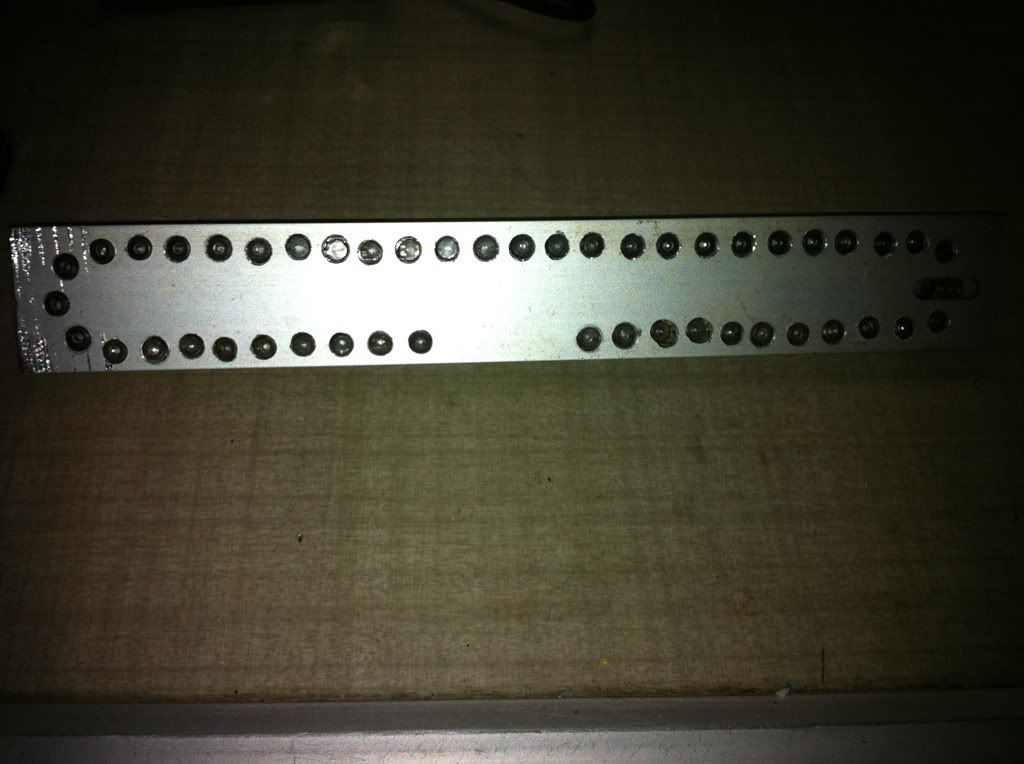 I will be drilling the hole for the Air inlet right there in the space that has no lights in line. 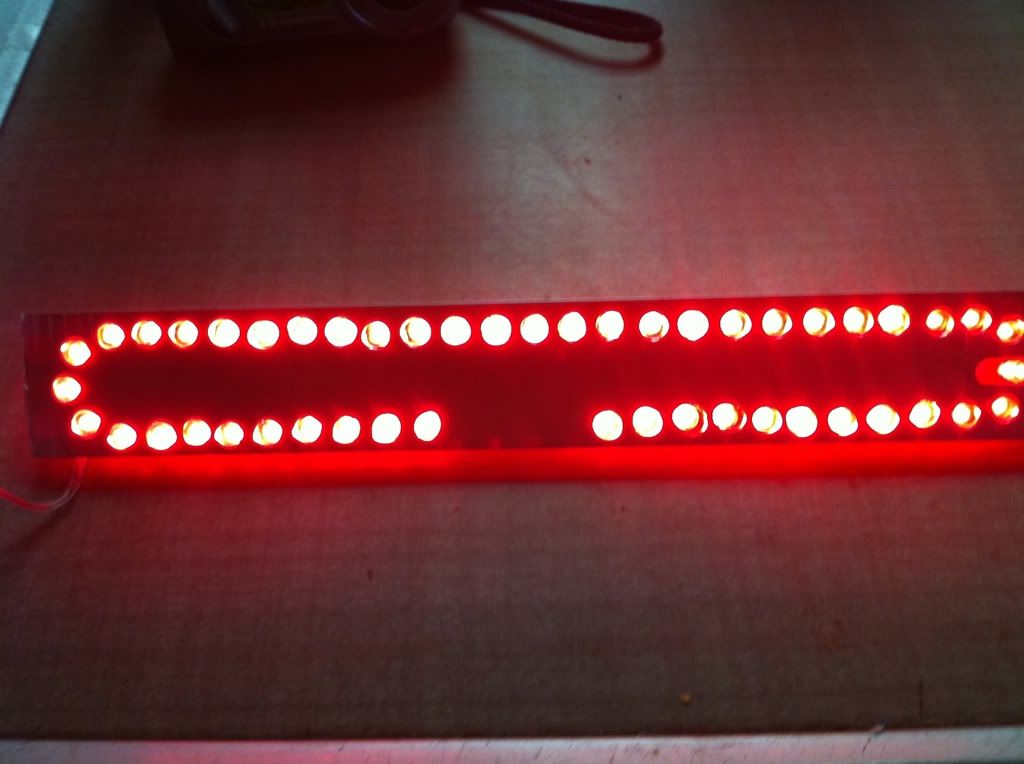 It is definitely bright, I hope it's not too over the top with volume of rear light when I am done. |
|
|
|
« Last Edit: December 29, 2010, 09:30:29 PM by fordmano »
|
Logged
|
83GS550 93XR650L TARD! 97WR250 99ValkyrieI/S Tri-tone 01YZ125(x2) 05DRZ-125
|
|
|
fordmano
Member
Posts: 1457
San Jose, CA. 1999 I/S 232 miles when bought 11/05
San Jose, CA.
|
|
« Reply #74 on: December 25, 2010, 03:03:47 PM » |
|
Not even close to completed, just wanted to share the rear of the bracket. I will be using some more of that lovely (black) brick adhesives that I used to mount my boxes for the HID lights up front. 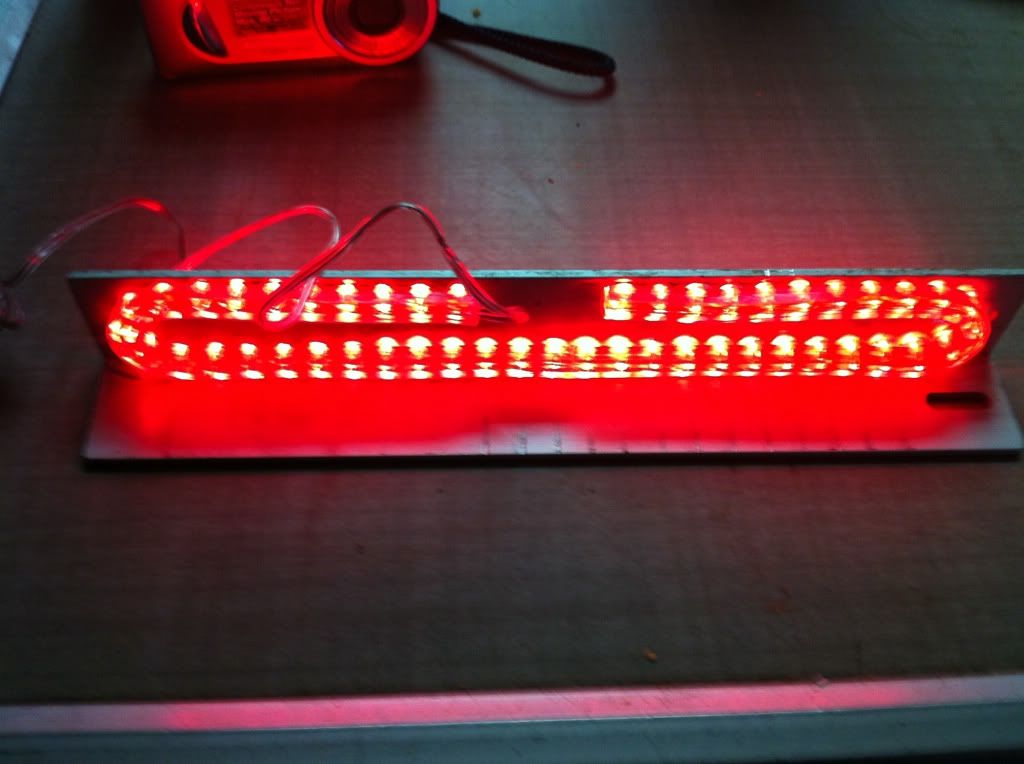 I know its not much but here is a very short video of the LED lights that reside under the bags.
Not sure what I am doing wrong with the video stuff but it is what it is,.... |
|
|
|
« Last Edit: December 29, 2010, 09:32:22 PM by fordmano »
|
Logged
|
83GS550 93XR650L TARD! 97WR250 99ValkyrieI/S Tri-tone 01YZ125(x2) 05DRZ-125
|
|
|
fordmano
Member
Posts: 1457
San Jose, CA. 1999 I/S 232 miles when bought 11/05
San Jose, CA.
|
|
« Reply #75 on: December 25, 2010, 03:04:47 PM » |
|
Well it's about time to start addressing those blank or unwanted black areas of the fat Girl. I have seen some very nice looking spark plug wire swaps but I am lazy and mine are still working perfectly I believe so lets just dress them up a little bit. 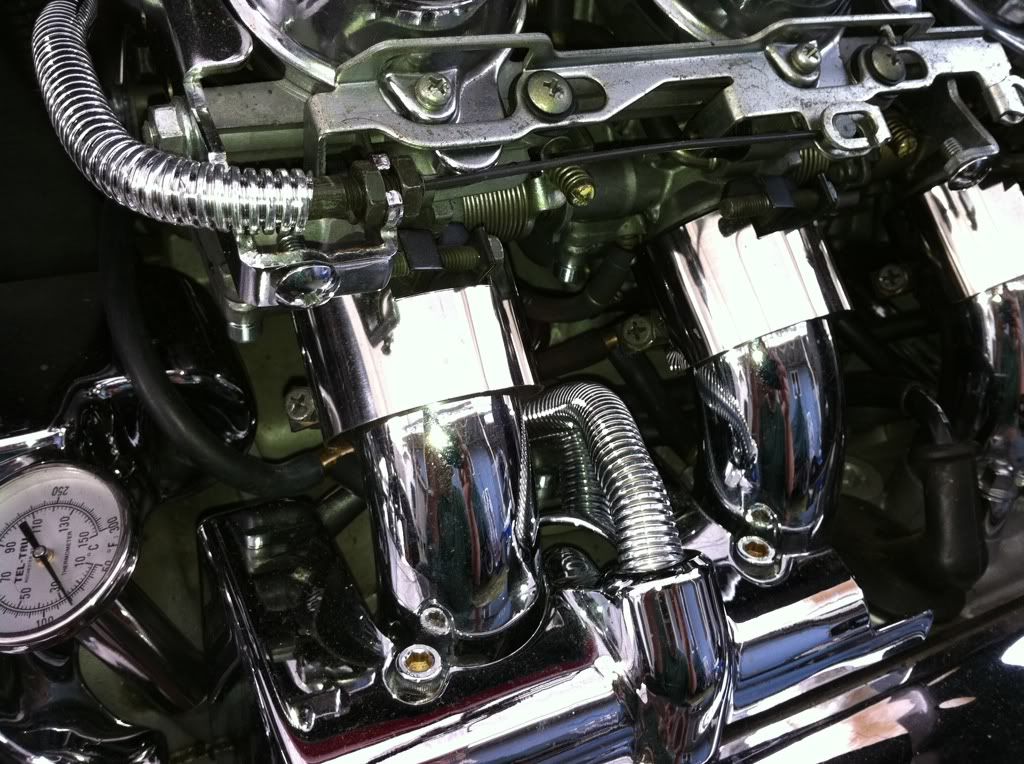  And we might as well work on that choke cable crossover at the rear of the carb banks. 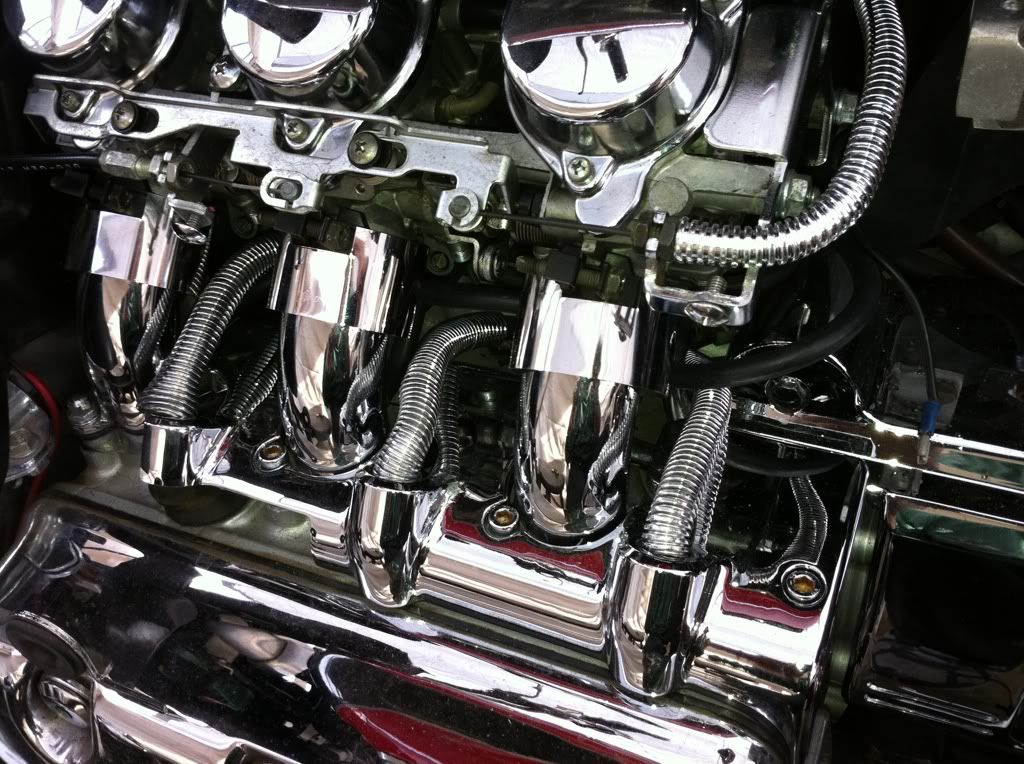 So can you tell what I am using??? OK Ok Ok I will spill the beans here. I happened to be at one of our local auto stores (used to be Kragens) cant seem to remember what the name is now but anyways they have a engine dress up area that has lots of little chrome knick knacks and lights and manifolds ok you get the idea. I found some split loom for covering wires and it is CHROME, WOW!!! So I bought it in 3 sizes it runs a bout $12 a small roll in a package. So I got a roll in 1/4" one in 3/8" and another roll in 1/2". I found that the 3/8" stuff worked very well covering the spark plug wires and remember it's is actually plastic so it shouldn't create a short I hope. I sure hope it will stand up to normal engine temps I will report back on how that works later. Then I used a length of the 1/4" stuff to cover up that choke tube crossover that the choke cable runs inside of. 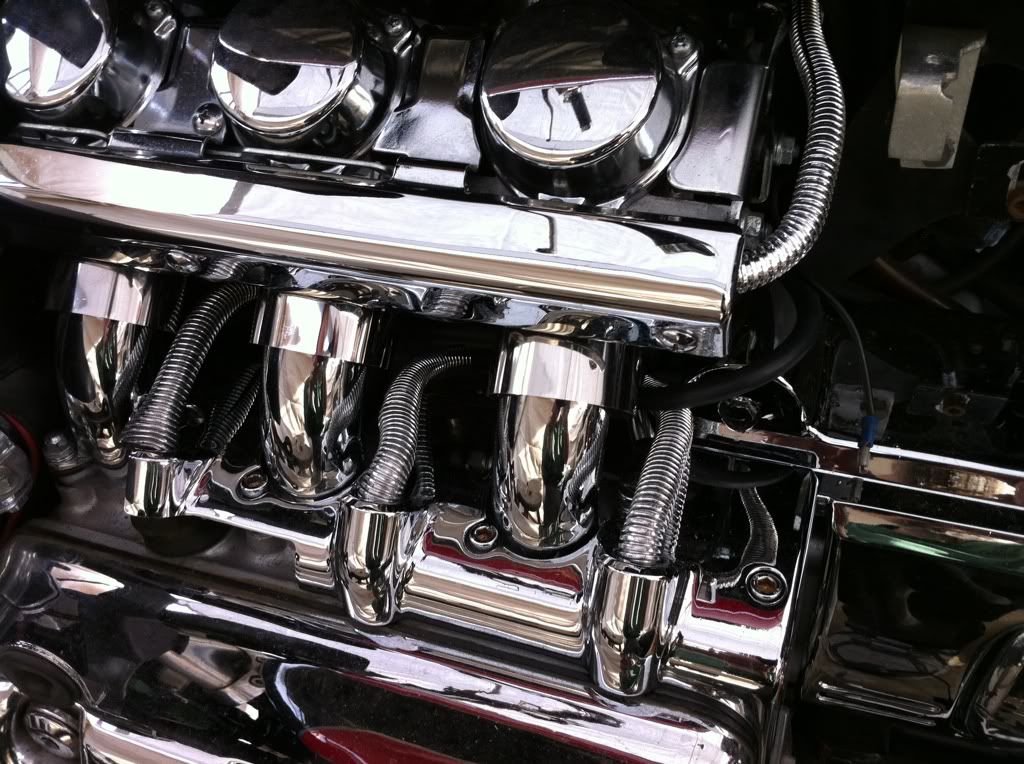 I think it looks very nice for the time being I really hope it holds up for a while. |
|
|
|
« Last Edit: December 29, 2010, 09:40:45 PM by fordmano »
|
Logged
|
83GS550 93XR650L TARD! 97WR250 99ValkyrieI/S Tri-tone 01YZ125(x2) 05DRZ-125
|
|
|
fordmano
Member
Posts: 1457
San Jose, CA. 1999 I/S 232 miles when bought 11/05
San Jose, CA.
|
|
« Reply #76 on: December 25, 2010, 03:05:24 PM » |
|
I kinda got out of order again on the pictures sorry about that. This is some of the process of adding the extra strip of LED's for the under bag Turn signals.  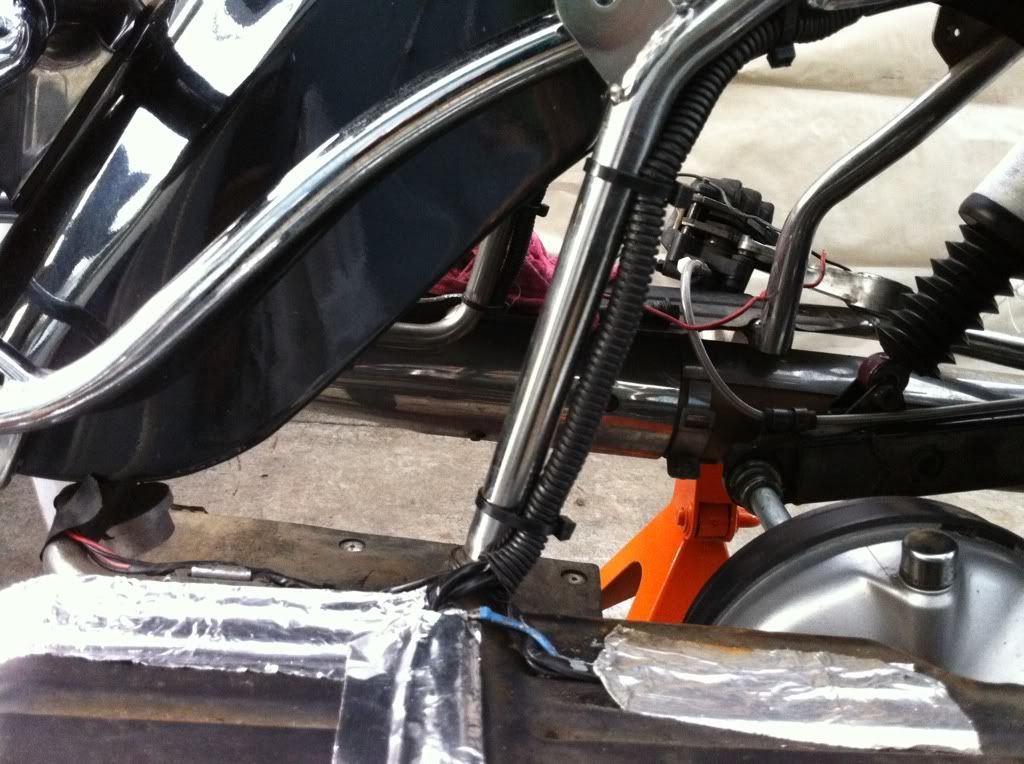 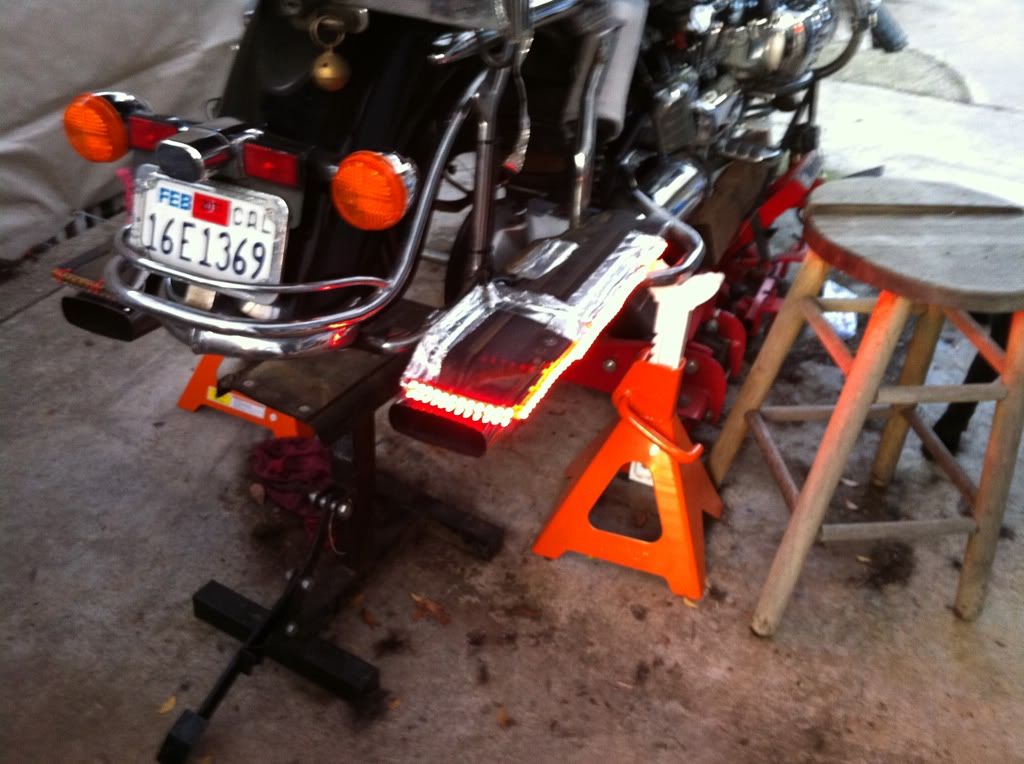 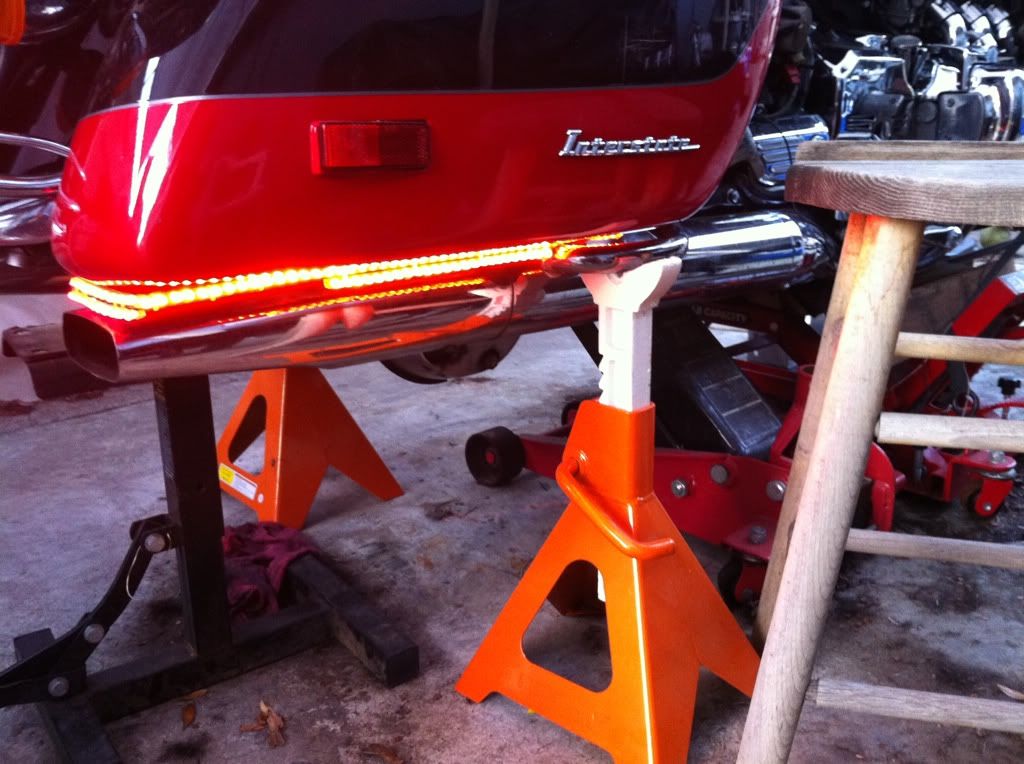 I hope anyone that sees any of these changes that might be inspired to try something similar asks specific questions if you happen to have a question. I have had a couple questions so far that showed up in email and that is fine by me, if at all possible I am trying to add some of the passed back and fourth info that I have come across. |
|
|
|
« Last Edit: December 29, 2010, 09:42:15 PM by fordmano »
|
Logged
|
83GS550 93XR650L TARD! 97WR250 99ValkyrieI/S Tri-tone 01YZ125(x2) 05DRZ-125
|
|
|
fordmano
Member
Posts: 1457
San Jose, CA. 1999 I/S 232 miles when bought 11/05
San Jose, CA.
|
|
« Reply #77 on: December 25, 2010, 03:19:07 PM » |
|
Thats all for now I have a couple more to slip in here be back later, I appologize for jumping around so much on each of these tasks but I just am not very organized and I have a lot more pictures that what I have posted so far. Merry Christmas be back soon....
|
|
|
|
|
Logged
|
83GS550 93XR650L TARD! 97WR250 99ValkyrieI/S Tri-tone 01YZ125(x2) 05DRZ-125
|
|
|
Tundra
Member
Posts: 3882
2014 Valkyrie 1800
Seminole, Florida
|
|
« Reply #78 on: December 26, 2010, 05:28:03 AM » |
|
Is this bike new to you and you just wanted to go thru it? or did you decide "it's time" to do everything you've always wanted to do to your old friend? Curious ??? Anywho...Real nice job, your thorough and meticulous. You missed your calling, you should be working on Valkyries full time |
|
|
|
|
Logged
|
If you can't be a good example: be a WARNING!!
|
|
|
fordmano
Member
Posts: 1457
San Jose, CA. 1999 I/S 232 miles when bought 11/05
San Jose, CA.
|
|
« Reply #79 on: December 27, 2010, 12:11:32 AM » |
|
Nope, this is not a new too me bike. I have had it 5 years now just needed to get a couple things taken care of like I was having some odd handling issues and I wanted cruise control since I bought it early last year then there is the fact I needed a new front tire. So I just figured I should just take the time to get as many tasks done as possible and hopefully only have my bike down for a month or two then money issues and then I had that wreck on my dirt bike and the rain and other less than perfect weather (I will ride in the cold but I am kinda spooked by the wet).
My goal is to get all that I want taken care of at one time that way hopefully I can just do oil changes and tire changes for a couple years.
As far as being full time anything especially a Valkyrie mechanic, sorry to say but as slow as I am my family would starve to death and I would have a backyard full of half fixed bikes and a front porch of PISSED off Valkyrie owners. Thanks for the complements I appreciate them.
Ok really I will get back online and update the comments and text associated with the recent pictures in just another day or so I am writing this from my iPhone while I am waiting for the wife to come to bed.
|
|
|
|
|
Logged
|
83GS550 93XR650L TARD! 97WR250 99ValkyrieI/S Tri-tone 01YZ125(x2) 05DRZ-125
|
|
|
|


